
The purpose of this article is to help you understand:
- How time logs are created
- Where to view job statuses
- How to adjust time logs
- How to approve time logs
- How to export time logs
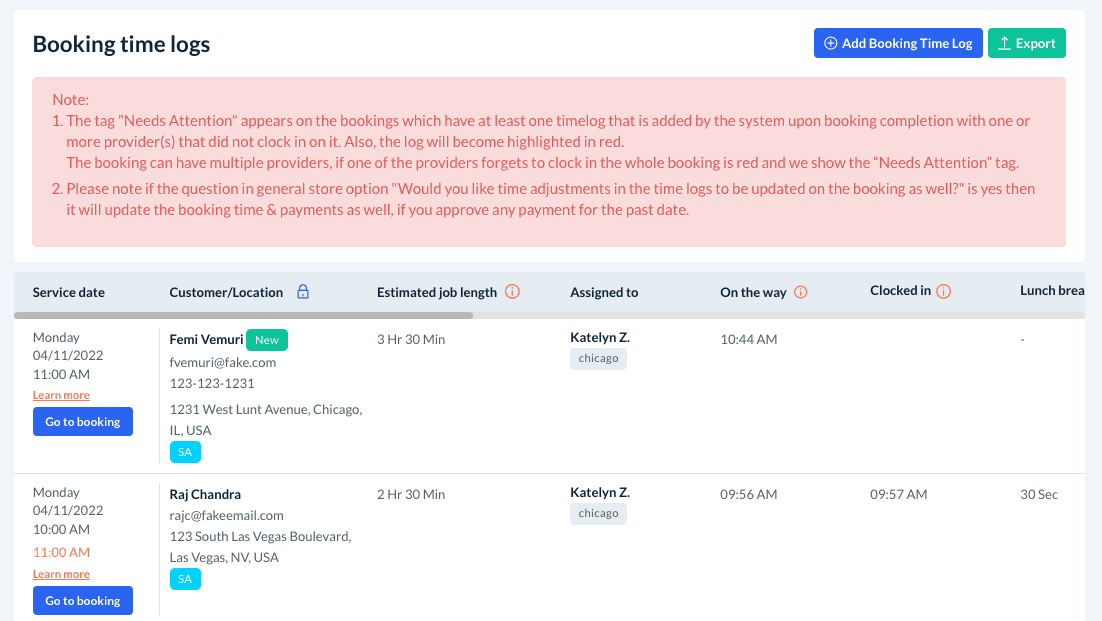
Booking Time Logs
If you have enabled the clock in/out feature, your providers will be able to clock in and clock out from the BookingKoala for Providers app. This allows you to track the total length of each service if you charge your customers based on time. Click here to enable clocking in and out for providers and set up your GPS rules.
When a provider clicks "On the Way" from the booking details page of the app, the system will generate a time log for the booking and start tracking their travel time (and distance if GPS tracking is enabled). Once they click "Clock In", the system will start tracking the job length.
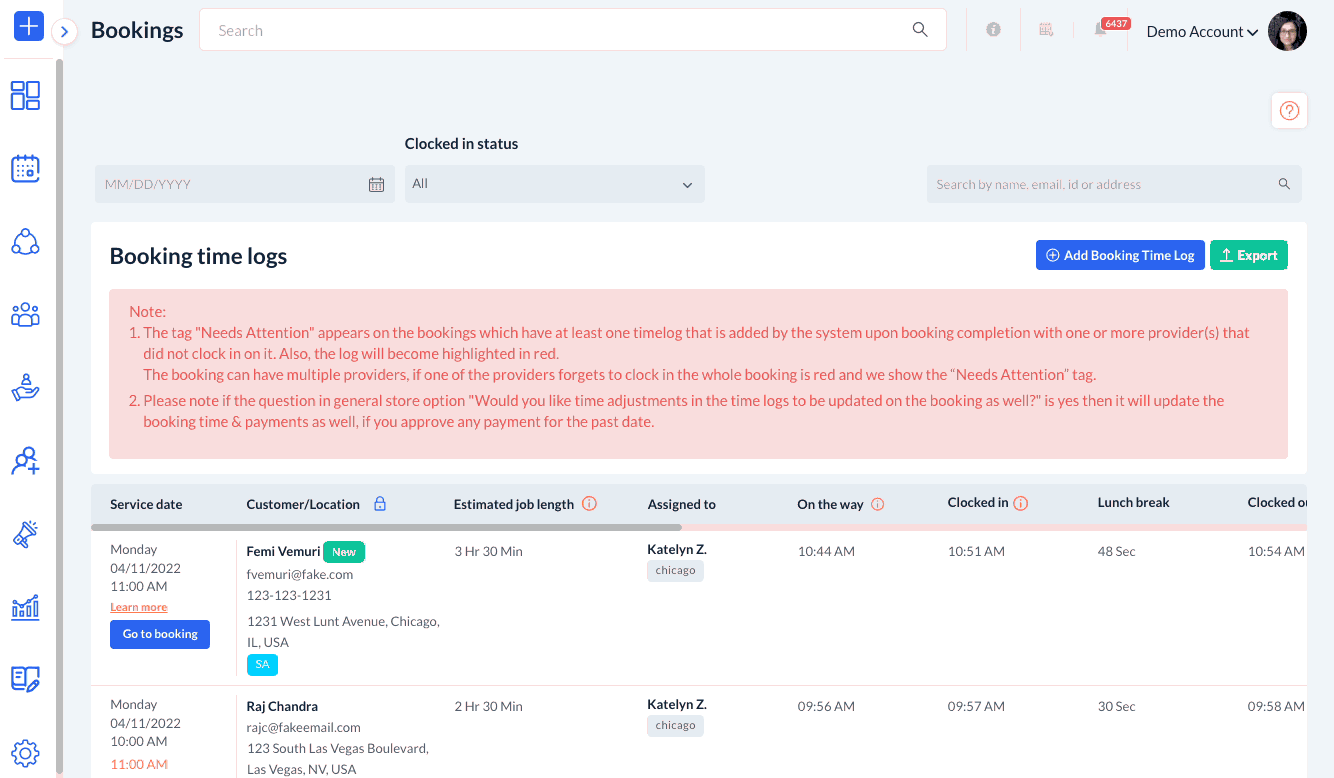
Once tracking has begun, you can view the corresponding booking time log by going to:
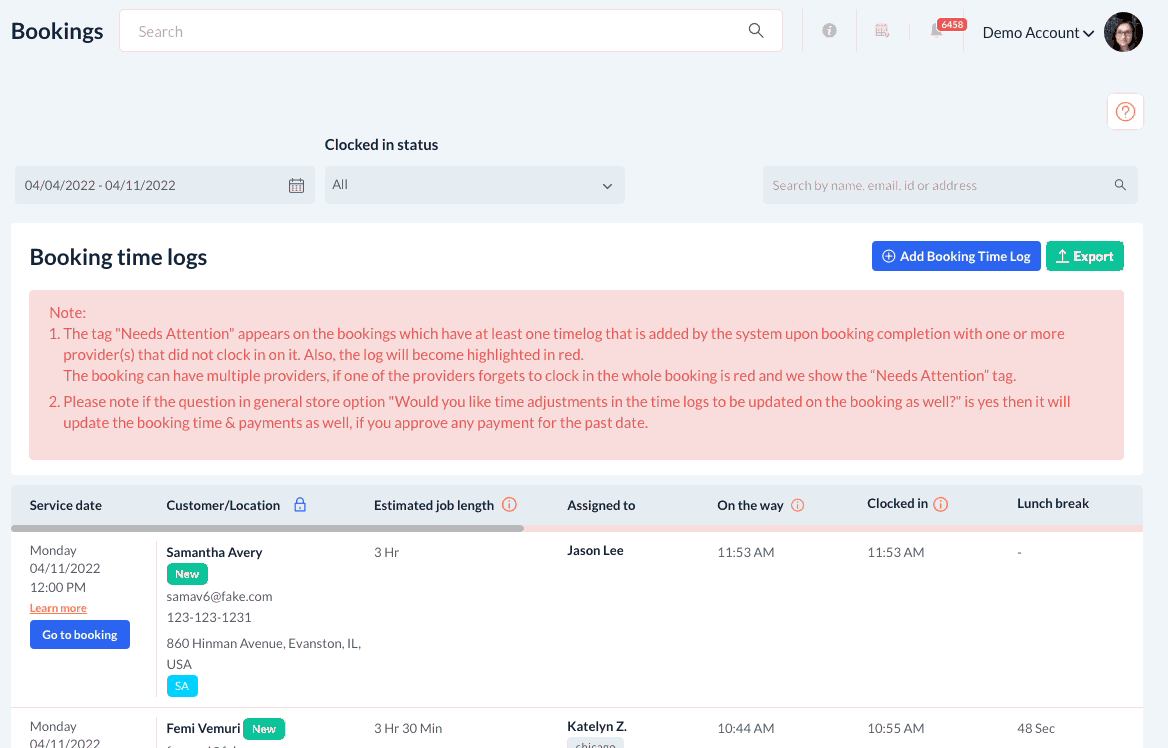
Bookings > Booking Time Logs
At the top of this section, you can use the date box, status menu, or search bar to look up a specific time log for a customer or provider.
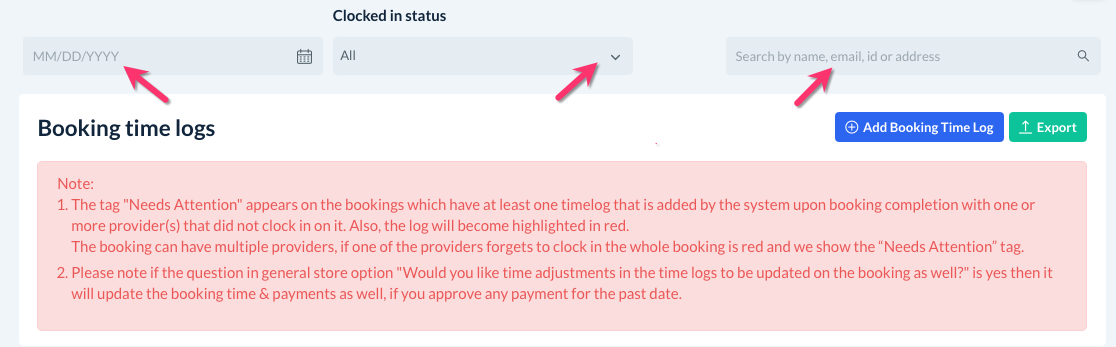
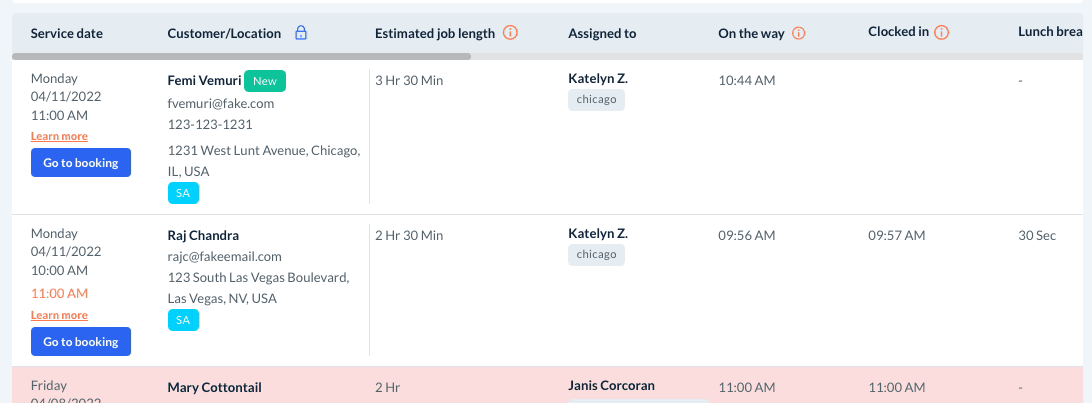
Below, you will see all of the logs that have been generated so far, with the most recent located at the top of the list.
If you would like to lock the Customer/Location column in place, click the blue lock icon to the left of "Customer/Location". This will allow you to scroll through the booking time log while referencing the customer's information.
Viewing Job Statuses
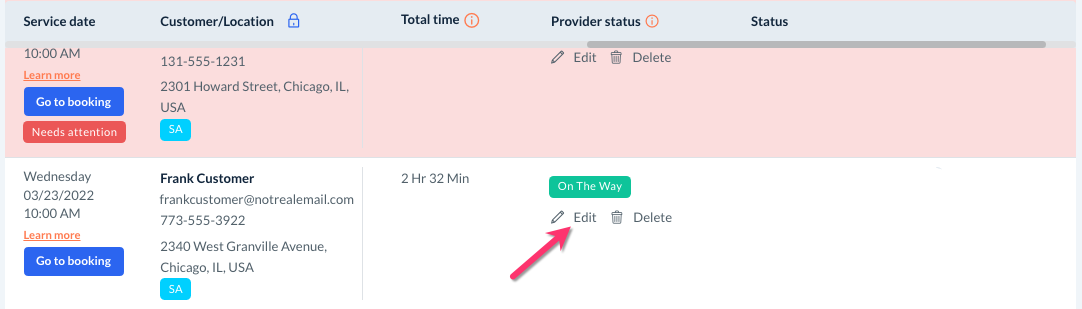
If a log is highlighted in red and has a red "Needs Attention" tag, this means that the log was added automatically by the system upon job completion because one or more providers did not clock in.
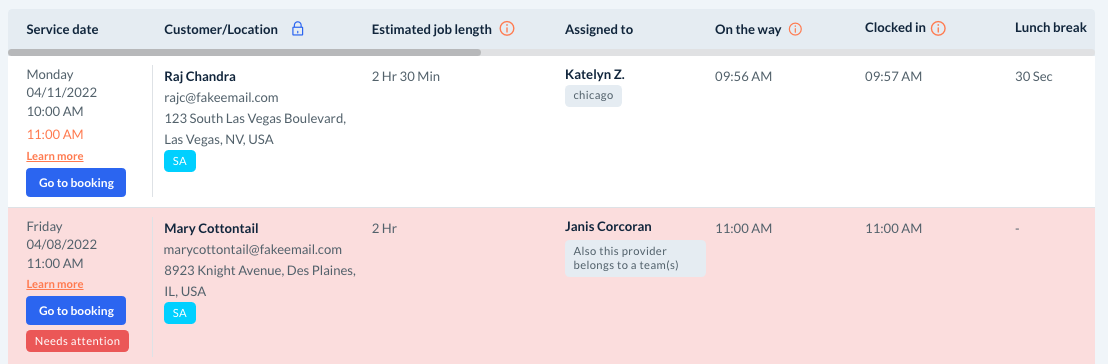
Use the scroll bar to scroll to the right to view the Provider Status.
The possible job statuses are:
- On the Way - The provider has clicked the "On the Way" button but has not yet arrived at the job site.
- At Location - The provider is at the job site but has not clicked "Clock In" just yet.
- Clocked In - The provider has clicked the "Clock In" button or has been automatically clocked in and is actively working on the job.
- Lunch Break - The provider has clicked "Lunch Break" and is currently on a break.
- Completed - The provider has clicked the "Clock Out" button or has been automatically clocked out and has finished working on the job.
To view where a provider is located if they have not clocked out yet, scroll to the right until you see the "Provider Status" column and then click "Edit".
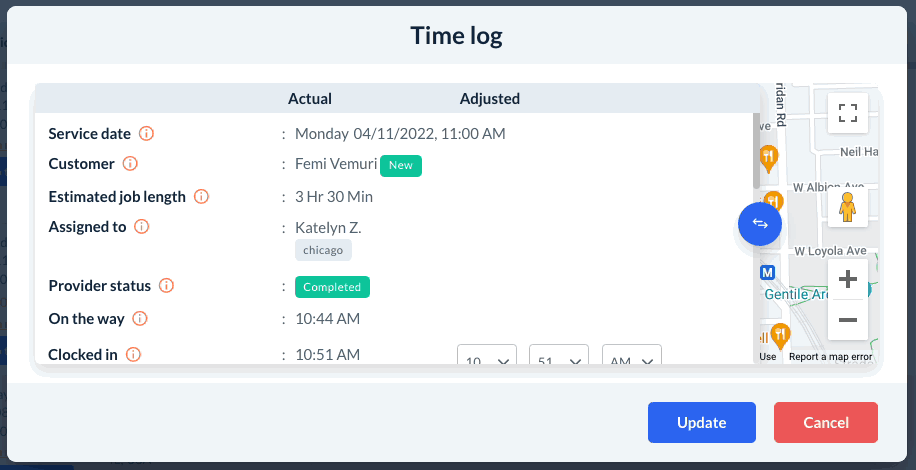
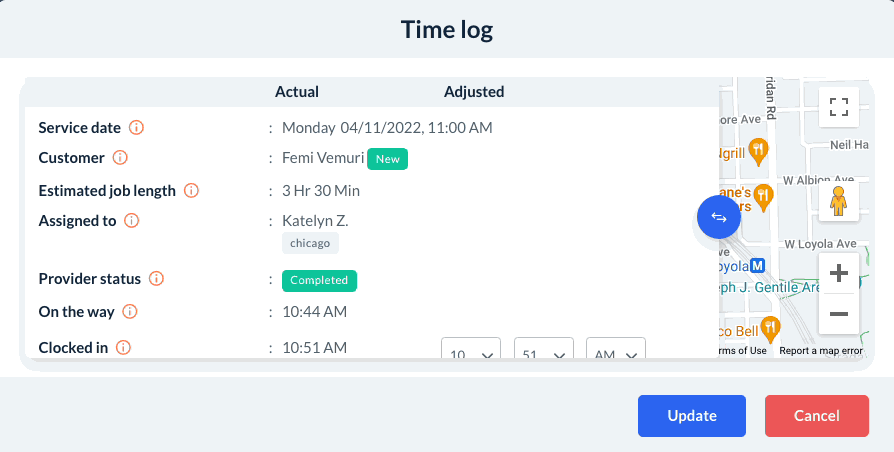
A "Time Log" pop-up will appear with all of the log details that have been generated so far. If GPS tracking has been enabled, you will also be able to click and hold the blue arrows icon to view the map and see the GPS points that have been generated by the provider.
You can also view time log information inside the booking form for that job. Click on the edit/pencil icon to open the booking. Then, scroll down and click on the grey "Booking Time Log" button at the bottom of the right-side menu.
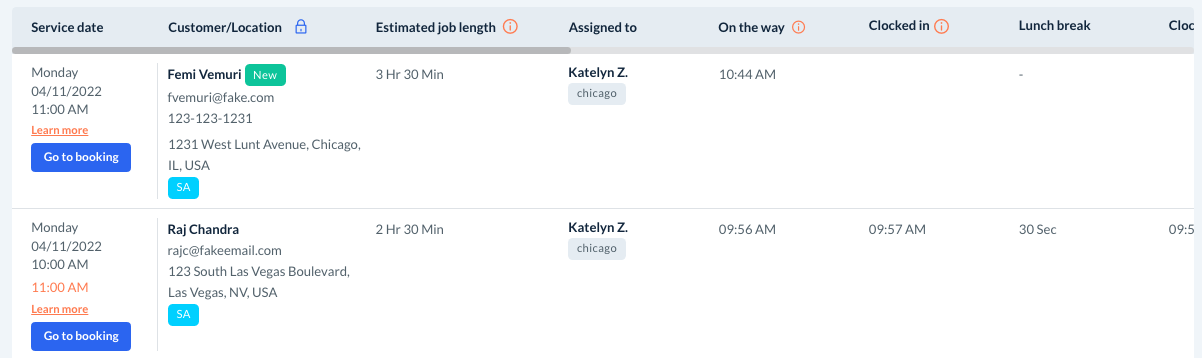
Once your provider has clocked out, you will be able to see the completed log under the “Booking Time Logs” section or by opening the booking page and clicking on "Booking Time Logs". The completed log includes the following data:
- Service Date - Day, date, and time the service was scheduled to begin.
- Customer - Displays the customer's name.
- Estimated Job Length - The job length as estimated by you or the booking form when the job was first scheduled.
- Assigned To - The provider(s)/team assigned to this job.
- Provider Status - Such as “Clocked In”, “At location”, or “Completed”.
- On The Way - The time the provider clicked "On the Way".
- Clocked In - The time the provider clicked "Clock In".
- Clocked Out - The time the provider clicked "Clock Out".
- Travel Distance - The total distance traveled between the provider clicking "On the Way" and "Clock In" (only available if GPS tracking has been enabled).
- Travel Time - The total time between the provider clicking "On the Way" and "Clock In".
- Time Reported - The total length of time between "Clock In" and "Clock Out".
- Total Time - The total length of travel time plus the job length.
If you have allowed your provider to override/update their time logs, you will also see data for:
- Provider overridden travel distance - The total travel distance as submitted by the provider.
- Provider overridden travel time - The total travel time as submitted by the provider.
- Provider overridden time reported - The total length of the job between "Clock In" and "Clock Out" as submitted by the provider.
Any provider adjustments to job time or distance travel will not override the GPS measurements that the system recorded. As the admin, you have total control over these aspects and can override them at any time.
Adjust Booking Time Logs
Admin can make adjustments to the booking time logs at any time if needed. To do so, please go to:
Bookings > Booking Time Logs
Next, scroll to the right end of the log until you see the "Edit" button just below the "Provider Status" column.
The admin can edit the following points:
- Clock in time
- Clock out time
- Travel distance
- Travel time
- Provider override travel distance
- Provider override travel time
- Provider override time reported
Once finished making any changes, be sure to click the blue "Update" button to update the time log.
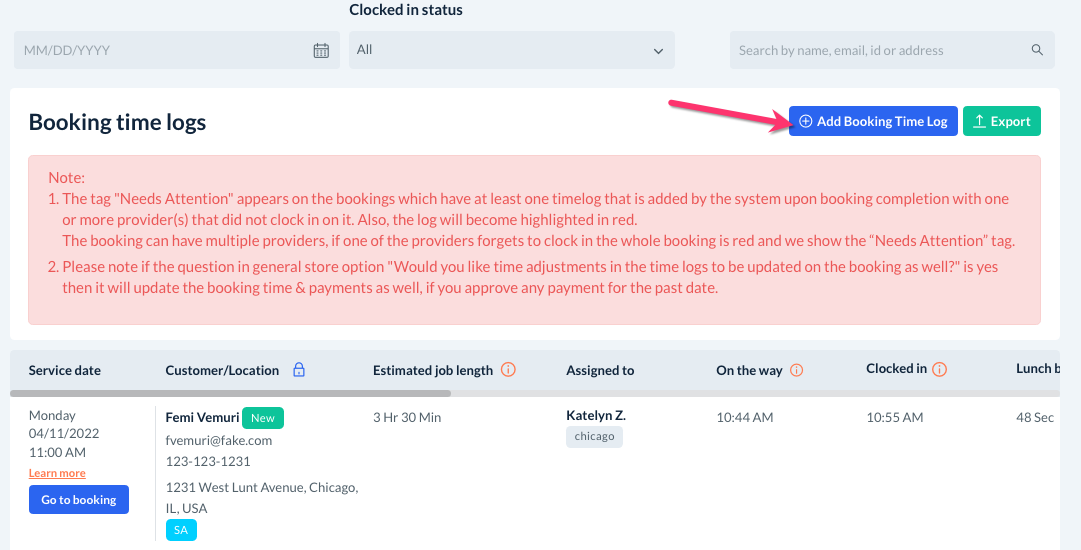
If your provider has forgotten to clock in, you can easily generate a new time log for their booking by clicking the blue "Add Booking Time Log" button at the top right corner of the page.
A pop-up will appear, allowing you to search based on the customer or provider name. Type their name into the box and then click on their profile. Then, click on the drop-down menu on the right side of the page to select the booking ID that you want to create a log for.
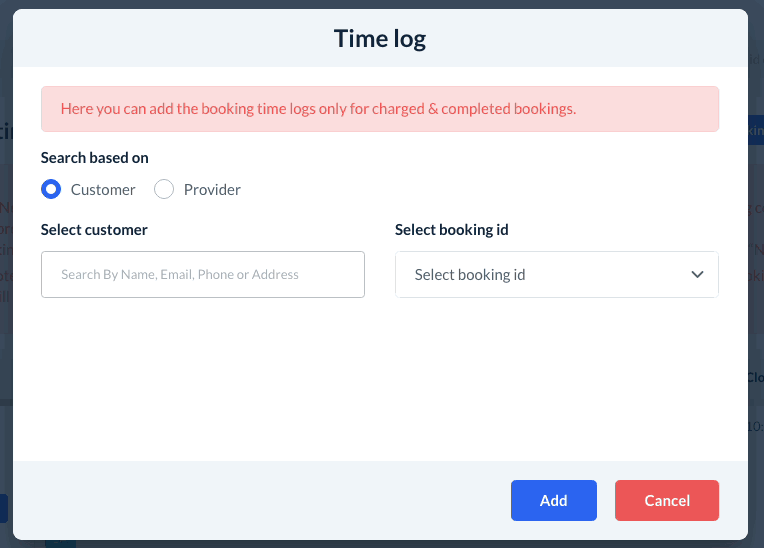
The information for the selected booking ID will be displayed in the pop-up below. Enter the times for "On the Way", "Clock In", and "Clock Out", then click the blue "Add" button at the bottom of the page. A new log will be generated for the booking.
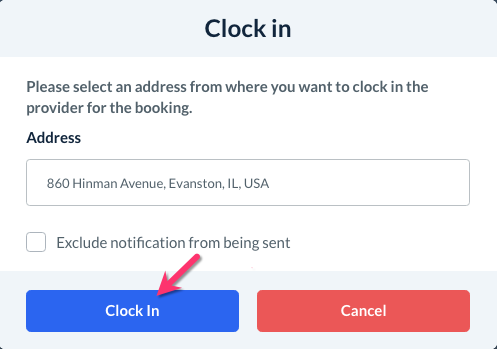
Admin can also clock in for a booking on behalf of the provider from the "Today's Bookings" section. To do so, go to:
Bookings > Today's Bookings
Once you locate the booking you'd like to clock in, click the clock icon under the "Actions" column.

Once you click this, a "Clock In" popup will appear. The address for where you want to clock the provider in will be listed in the box below. If you want to exclude a notification from being sent regarding the clock in, check the box next to "Exclude notification from being sent". Then click the blue "Clock In' button to proceed.
You can now visit the Booking Time Logs section to view or edit the log as needed.
Approve Booking Time Logs
If your business's bookings are priced according to time, you will need to approve your booking time logs before charging your customers. This ensures that you are charged exactly what has been reported by the provider.
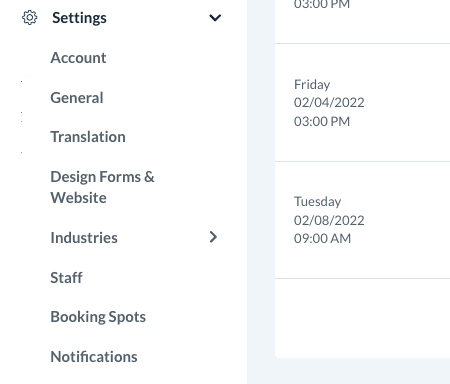
If you would like to update the booking length based on adjustments in the booking time logs, please go to:
Settings > General > Store Options > Provider
Click the plus sign icon to expand the "GPS & Time Logs" section.

Scroll down to the question, "Would you like time adjustments in the time logs to be updated on the booking as well?" and select "Yes".
Then click the blue "Save" button at the bottom right corner of the page to update your settings.

Once you've made this update, the booking time logs will update the booking length once you approve them.
To approve the booking time logs, go to:
Bookings > Booking Time Logs
Scroll to the right of the row until you see a grey "Pending" button below the "Status" column. You will see this drop-down menu with options for approving the time log once the job has been completed.
There are five options to pick from for the time log status:
- Rejected - The booking time log will be rejected and the system will not update the booking's total length.
- Pending - The booking time log has not been approved or rejected yet.
- Approved - Time reported with lunch break - The booking time log will be approved including the lunch break, updating the booking's total length.
- Approved - Time reported without lunch break - The booking time log will be approved not including the lunch break towards the booking's total length.
- Approved - Time reported & travel time - The booking time log will be approved including the travel time as part of the booking's total length.
Once you have approved or rejected your provider time logs, you can head to the pending charged section to begin processing the customers' charges.
Click here to learn more about how to charge customers and collect payment in BookingKoala.
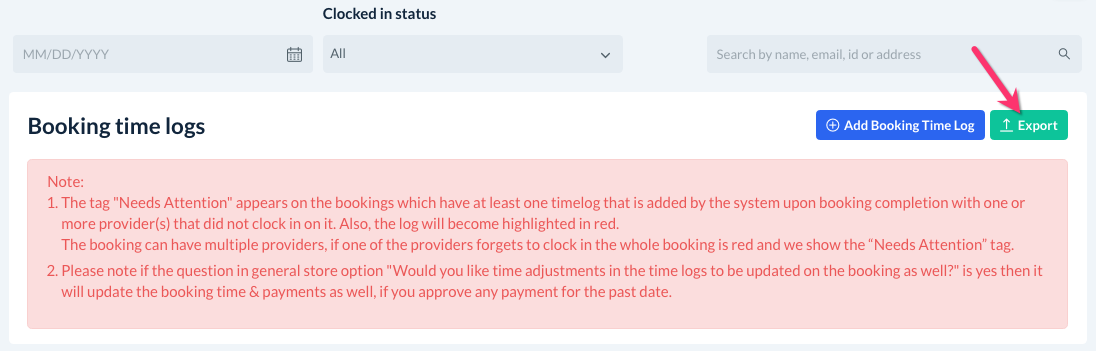
Export the Booking Time Logs
You can download a .CSV file of your booking time logs at any time by going to:
Bookings > Booking Time Logs
Click on the green "Export" button at the top right corner of the page.
You will be redirected to the "Export Booking Time Logs" page. You can use the filters at the top of the page to export times logs by:
- Date range
- Industry
- Provider status
- All
- All excluding deleted
- Active
- Inactive
- Deleted
- Status
- All
- Approved
- Rejected
- Pending
- Clocked-in status
- All
- Clocked in
- Not clocked in

Under "Export For", you can select "All Providers" or "Specific Provider(s)".
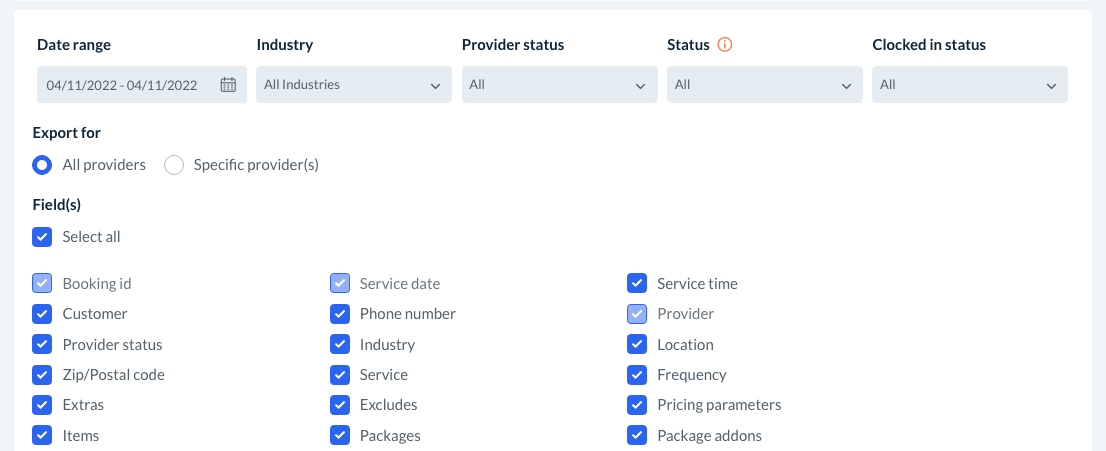
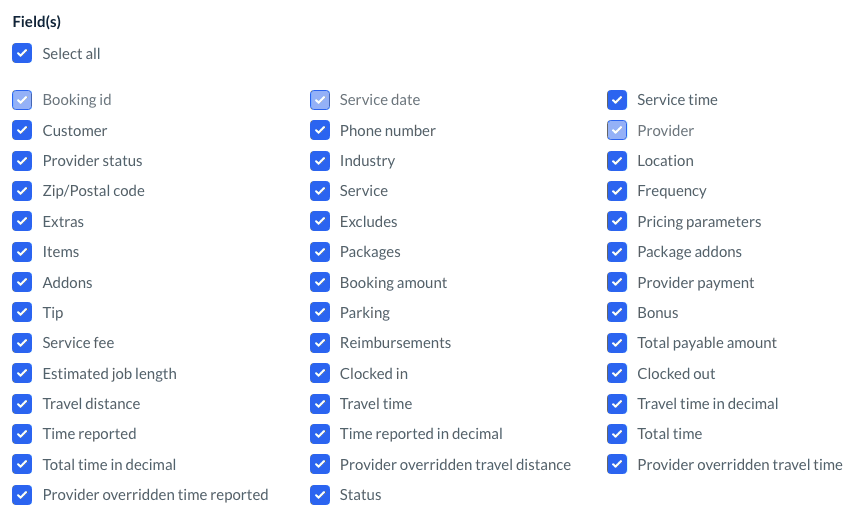
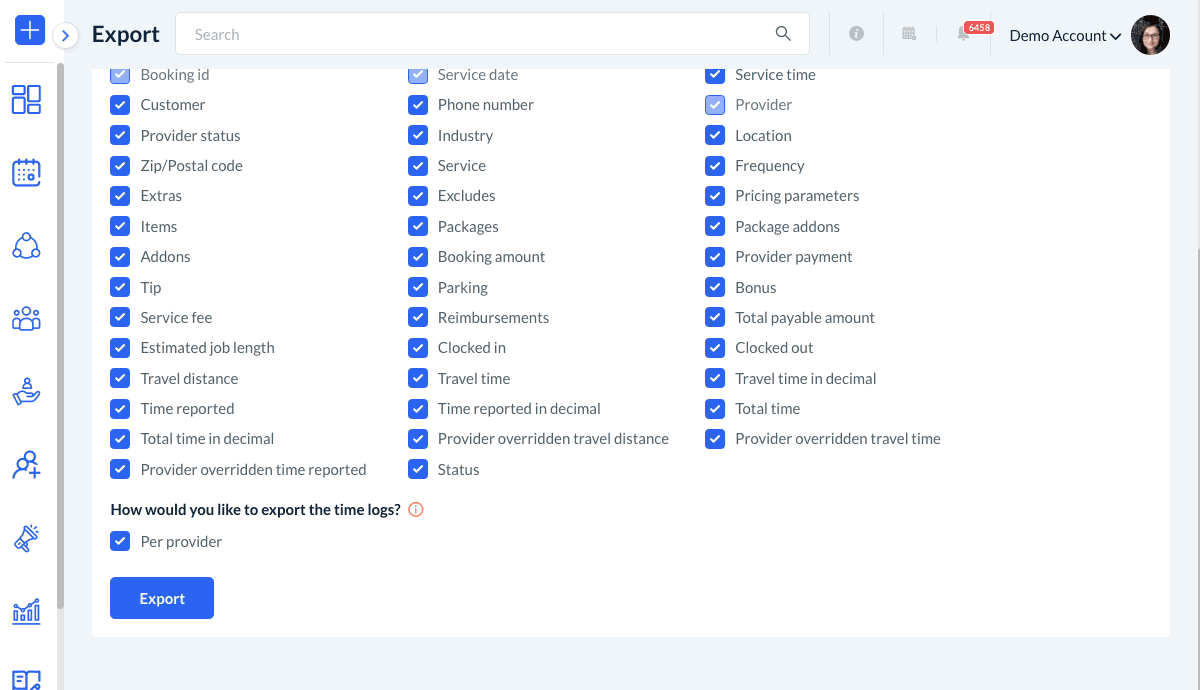
Next, select which field(s) you would like to export. Check the topmost box next to "Select All" to select all of the options below, or check the boxes next to the fields you would like to have included.
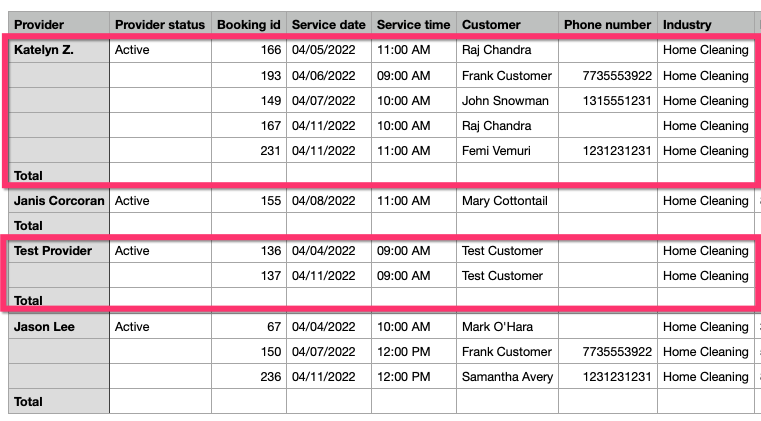
If you would the export to sort the logs per provider, check the box next to "Per Provider".

When this box is checked, your export file will sort the providers into sections so you can view all of their time logs grouped together.
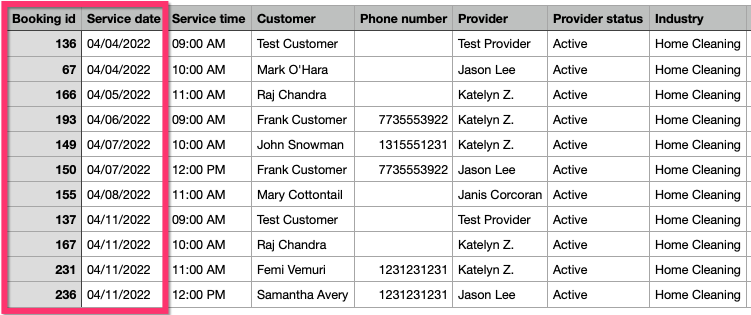
If the box is left unchecked, the file will be sorted by booking ID and date.
Once you are ready to export your file, click the blue "Export" button at the bottom of the page.
A green system notification will appear in the top right corner letting you know the data has begun downloading successfully.