The purpose of this article is to help you understand:
What are Smart Documents
How to prepare a smart document
What are Smart Documents?
Smart Documents are documents that you can upload, edit, send, and sign all through the Lead's module. Smart Documents allow you to capture signatures from up to 10 parties, all with an audit trail to help you see when and who signed what. You can use Smart Documents to:
Send service agreements to potential customers
Deliver the results of an onsight estimate
Gather feedback regarding the lead's experience with your business
In addition to signature gathering, Smart Documents allow you to insert fields into the document for a fully customizable document for each party.
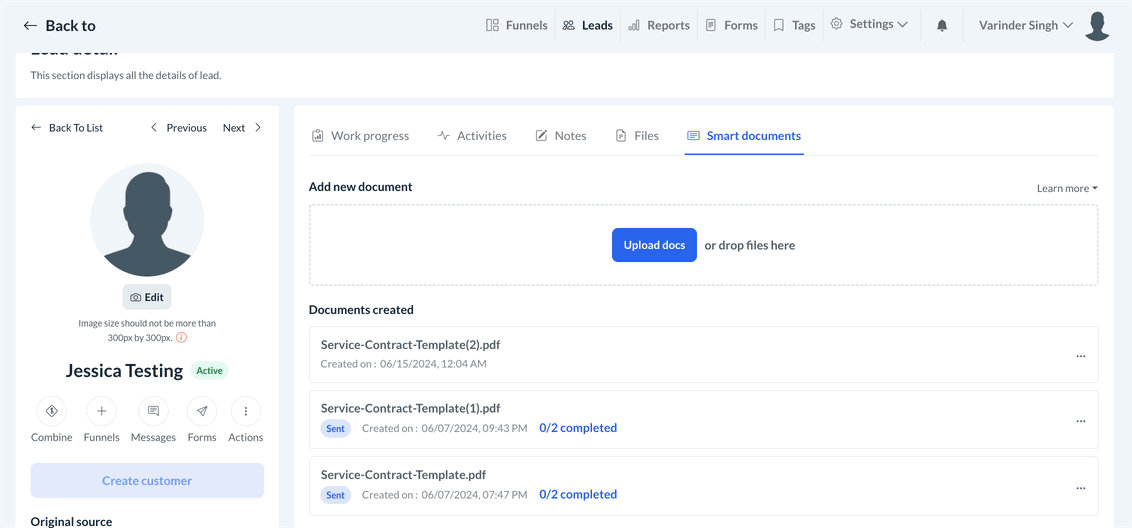
How to Use Smart Documents
To use Smart Documents, go to any lead's profile/"Details" page to whom you'd like to send a document and click on the Smart Documents tab.
To begin working with a document, click the blue Upload Docs button, or drag and drop a file into the surrounding section. Once the file is finished uploading, you'll see a preview of the document.
From here there are several actions you can take. If you click the blue Share button, you have three options:
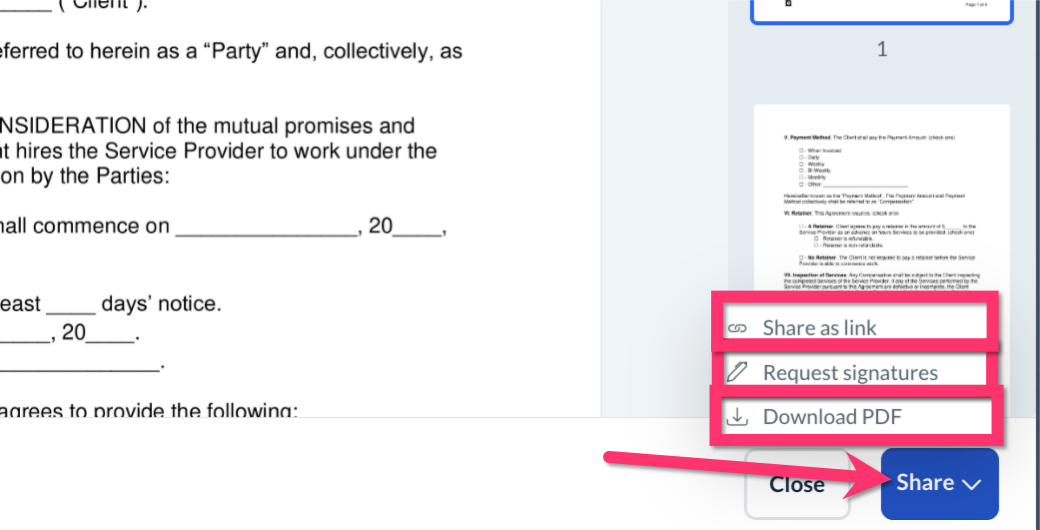
Share as Link - Share a link to the document via email. You can further customize the email prior to sending out.

Request Signatures - Add signature fields to any document and send the document out via email to request signatures.
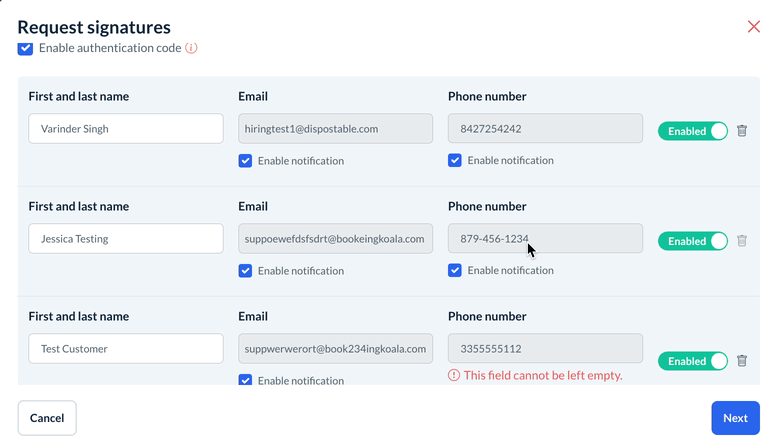
After you click Request sigantures, a Request Signatures pop-up will appear. You can decide if you'd like to add an extra level of authenticity to your document by enabling the authentication code option, which sends an email with a security code to the signer that they must enter in order to sign the document. Authentification can be enabled or disabled per each individual signer on the document by using the green toggle buttons.
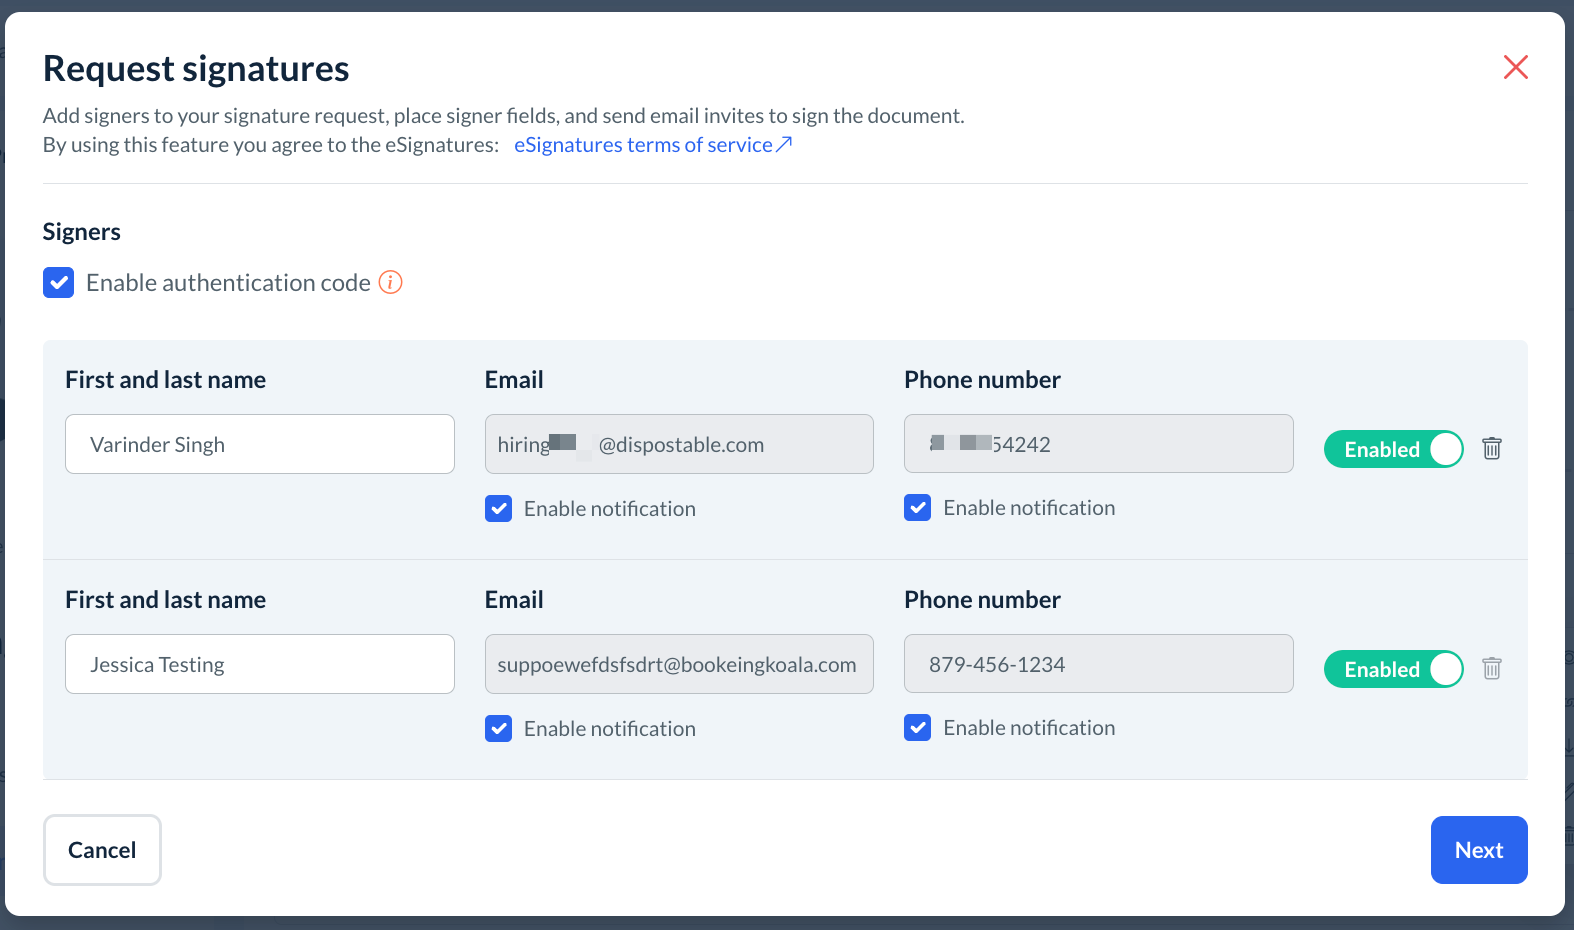
If you'd like to add additional signers, scroll down past the existing signers and click on the Add Signer button. From here, select "As a Staff" or "As a Lead" to decide which type of user you are adding. Then, search for the signer and select their name to add them to the list.
Once you have finished adding your signers, click the blue Next button.
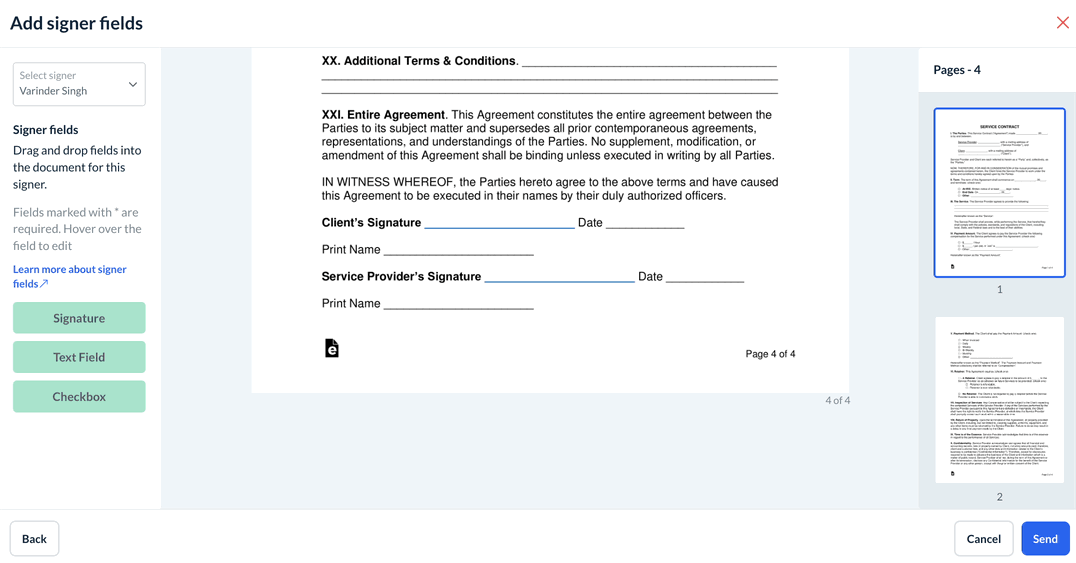
Next, you'll be placing your fields for each signer. Select the signer's name from the Select signer menu at the top of the left side of the page and then drag and drop one of the three possible signer fields into the document.
Signature - Collects a binding signature from the client.
Text Field - A blank text field that can be used to fill out names, dates, and other personal details that the signer is required to share.
Checkbox - Adds a checkable box to any sections requiring such.
Once finished adding fields for each signer, you are ready to click the blue Send button. A green system alert will appear in the top right corner confirming the document has been sent successfully.
Download PDF - Download a PDF of the document.
Once you close the document preview window, you'll be able to see all documents you've uploaded, including those that have been sent out for signatures.
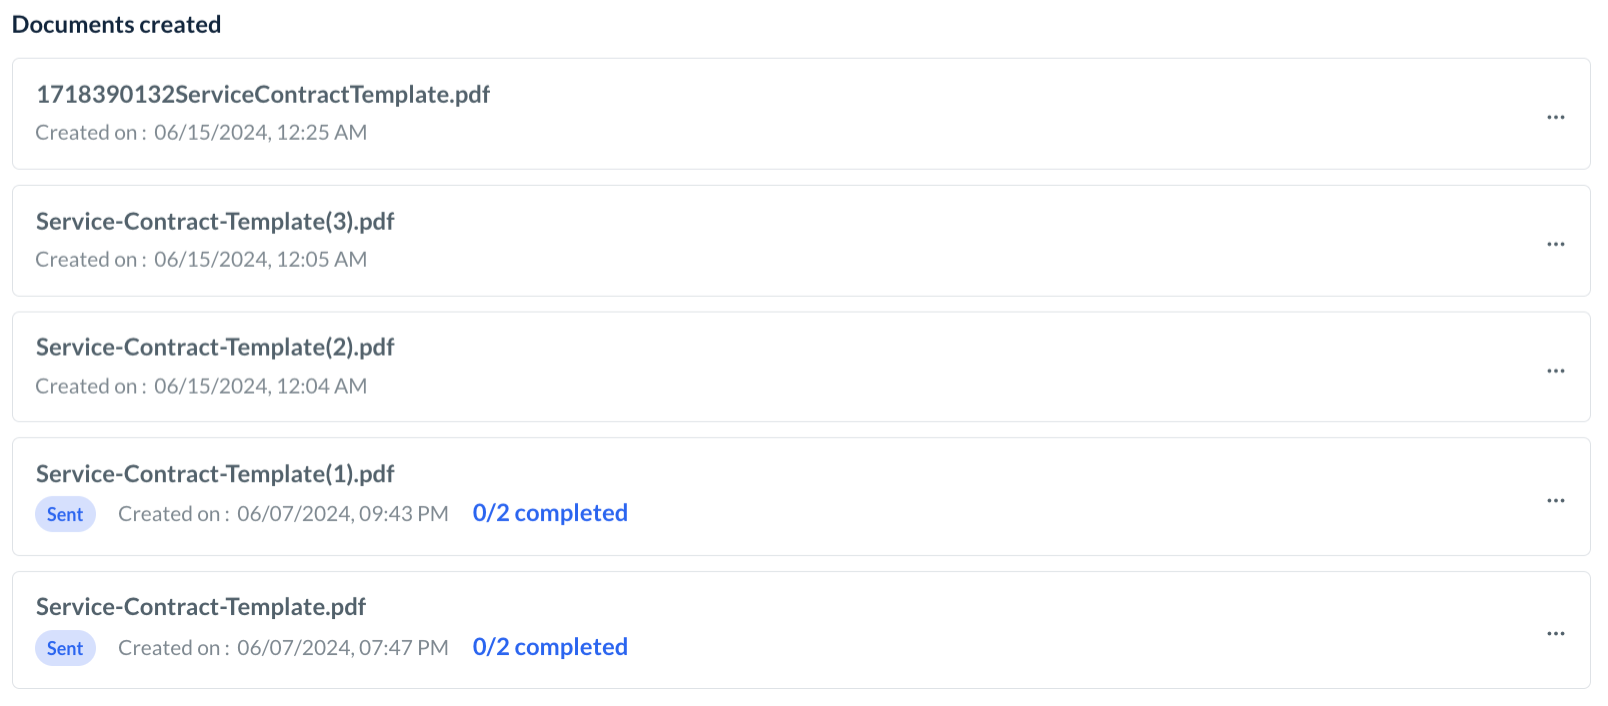
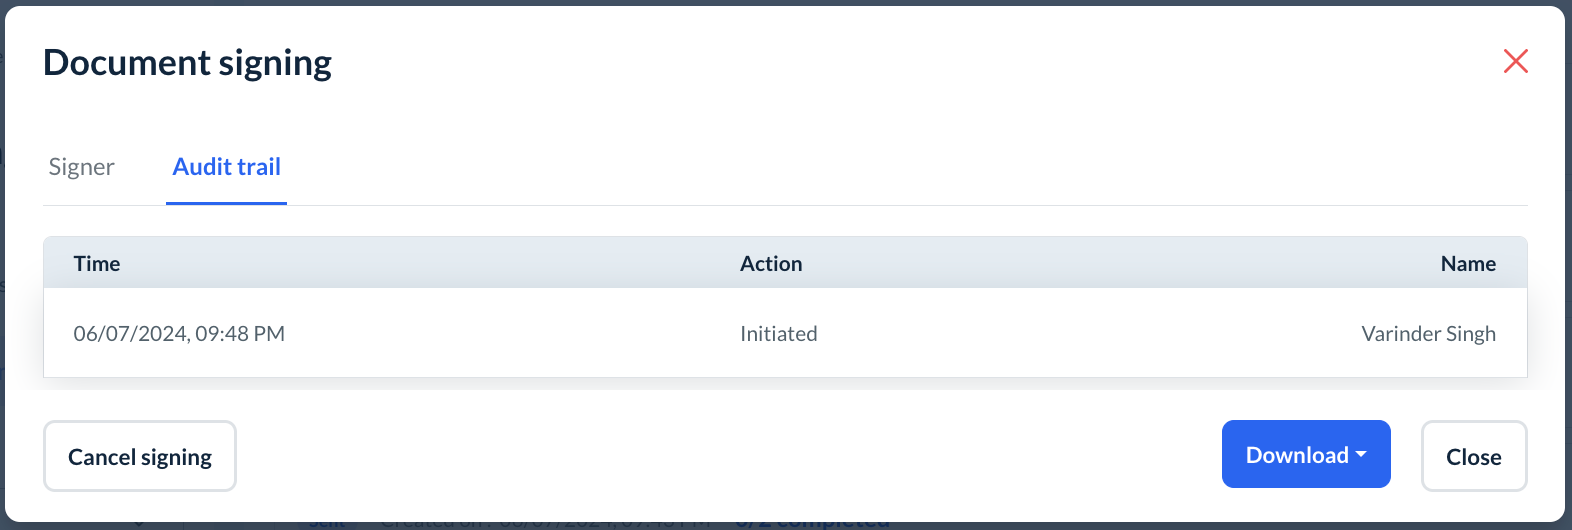
If you click on the "[#]/[#] completed" link, you can access the Document Signing pop-up.
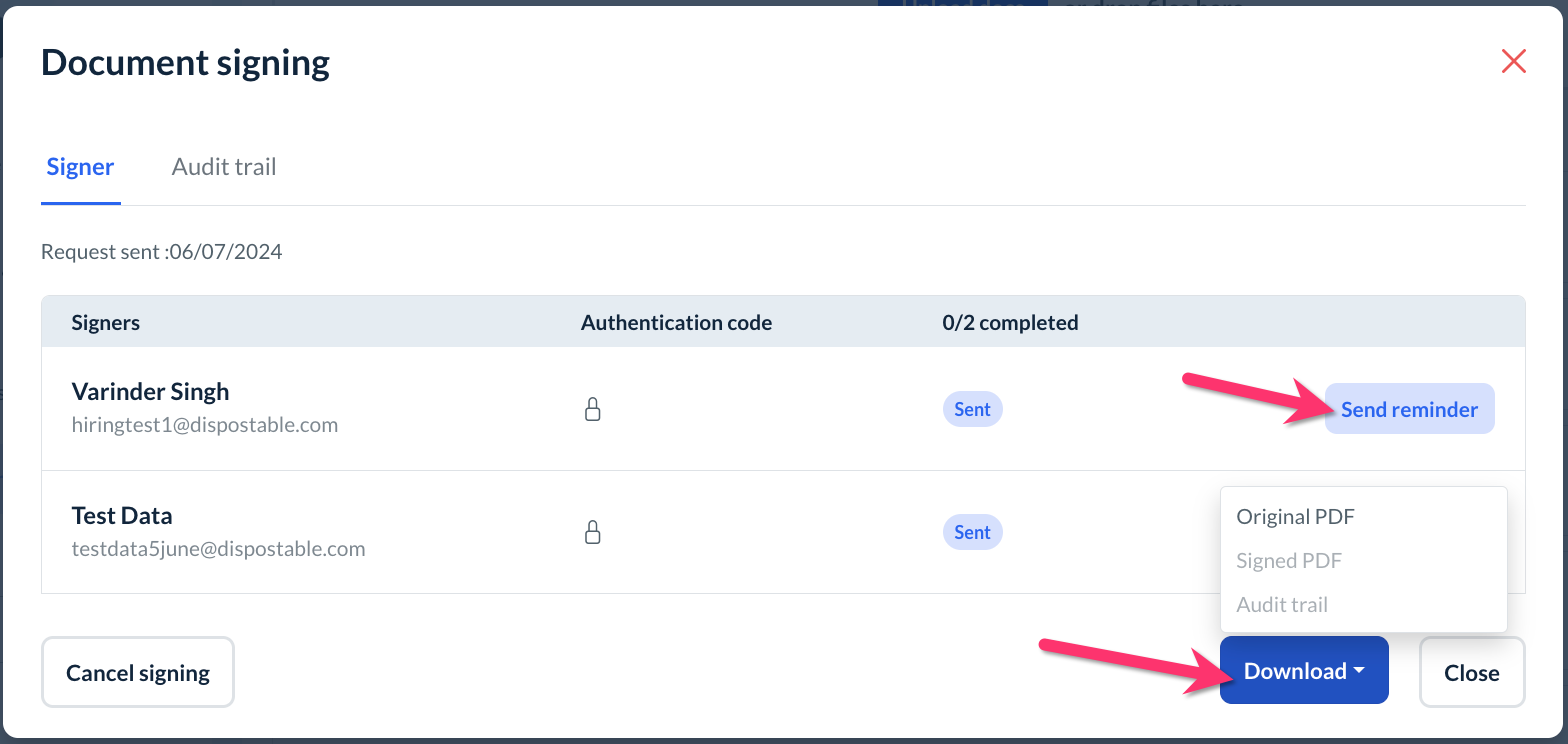
This has great features including the ability to send reminders using the Send Reminder button, see an audit trail for signing, and download PDFs of the original PDF, the signed PDF (once available), and the audit trail.