
The purpose of this article is to help you understand:
- How to send out receipts
Getting Started
Customers can receive a receipt email for their booking in several different ways:
- Emailed automatically when the service is booked
- Emailed manually by the admin
- Downloaded manually by the customer
Before you can send out a receipt to a customer, you must make sure you have set up and verified your email notification settings. Click here to view a guide on how to set them up.
Enable Automatic Receipt Notifications
If you would like your customers to receive a copy of their receipt when they first schedule a booking, please go to:
Settings > Notifications > Emails
Click on the "Customer" tab at the top of the page.

Click on the "New & Modified Booking" section to expand it.

There are two versions of the Receipt email, one for one-time, or "ot", customers, and the other for recurring, or "rec", customers. This allows you to customize your messages depending on whether the customer has a recurring frequency or not.
To enable each notification, click the red "Disabled" button to switch it to green "Enabled". A green system notification will appear in the top right concern of the page, letting you know the notification has been enabled successfully.
Now the customer will automatically receive an email with their receipt once the booking is saved into the system.
Manually Send a Receipt
Enable the Service Receipt Notification
You can also manually resend customers' receipts later if you made any changes to the booking after the booking was completed. To enable this option, please go to:
Settings > Notifications > Emails
Click on the "Customer" tab at the top of the page.
Click on the "Booking Fee Charged & Refund" section to expand it.
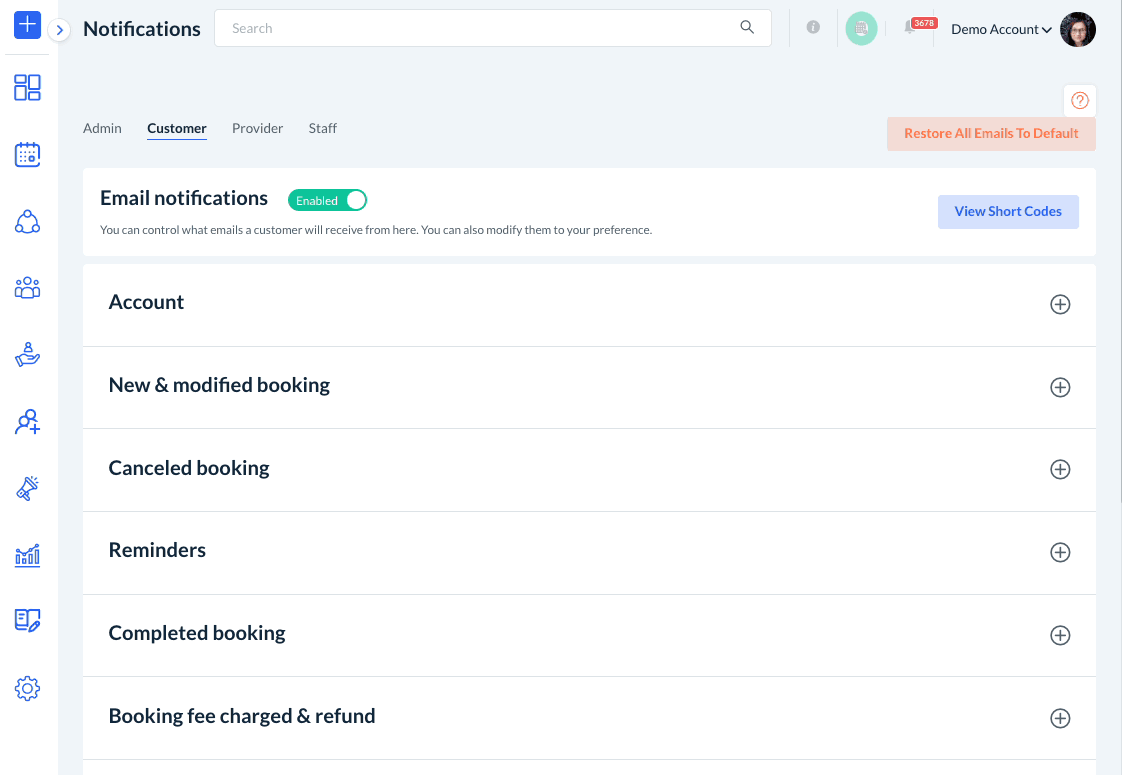
Scroll down until you see the "Service Receipt" template. Click the red "Disabled" button to switch it to green "Enabled". A green system notification will appear in the top right concern of the page, letting you know the notification has been enabled successfully.
Customize the "Service Receipt" Template
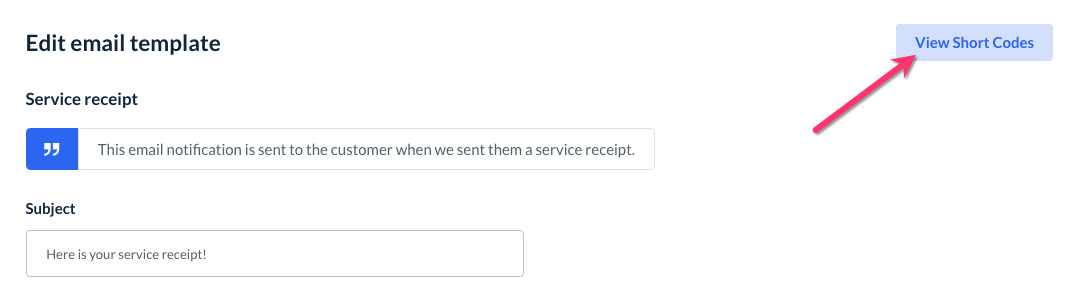
If you would like to customize which information is included on your receipt, click the "Edit" button to the right of the "Service Receipt" template.

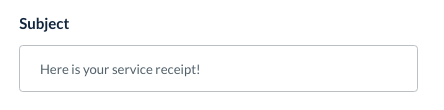
You can change the subject line for this email by clicking on the "Subject" box at the top of the page.
If you have created any master templates, you can select one from the "Master Template" drop-down menu and check the box next to "Preview with Master Template" to see what the email will look like to customers.
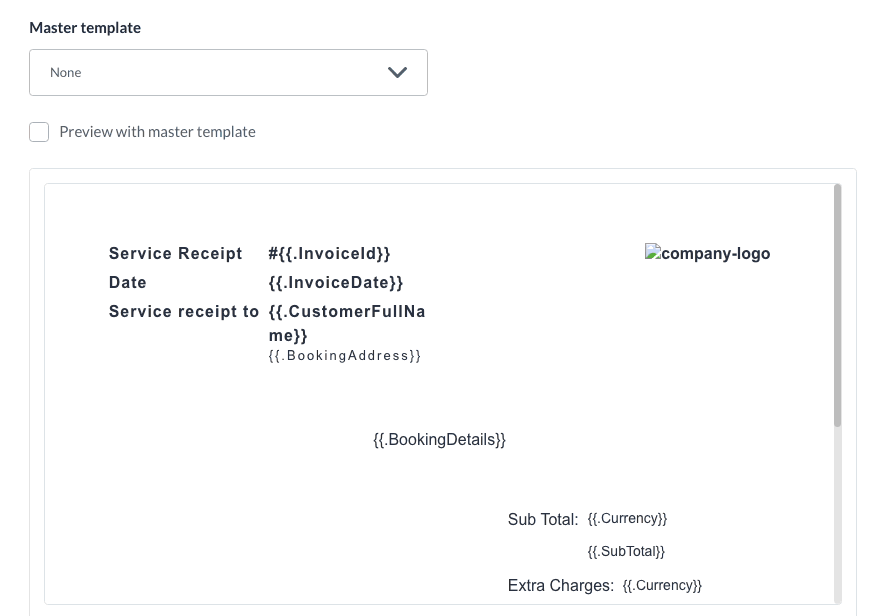
To make changes to the appearance of the receipt, scroll to the bottom section and use the content editing tools in the bottom box to modify the template.
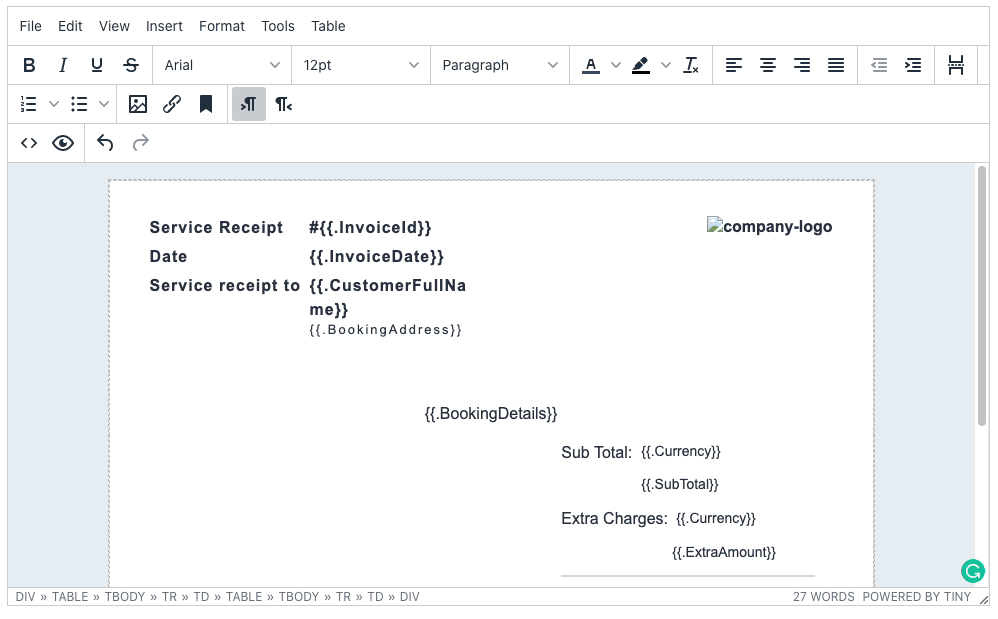
The default template contains several short codes which are used to display the receipt for a specific booking. To see a list of all possible shortcodes available for the template, click the blue "View Short Codes" button at the top of the screen.
If you would like your receipt to contain specific fields instead of using the {{.BookingDetails}} shortcode, you can replace this with the codes you want to display.

Click here to learn more about how to use shortcodes to customer your email and SMS templates.
Resend a Receipt
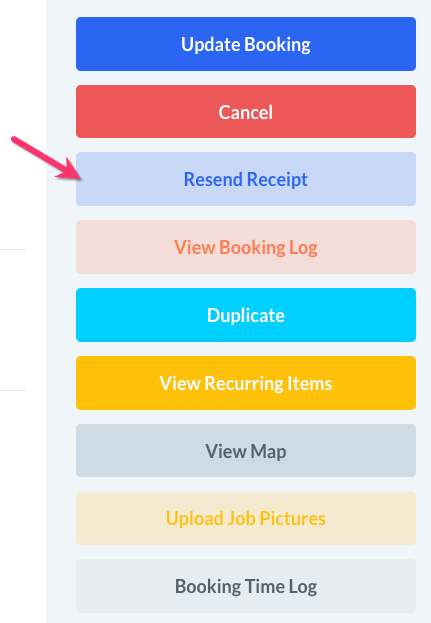
To resend the customer's receipt, open the booking you would like to send a receipt for by clicking the pencil icon to edit it.

Scroll down and locate the pale blue "Resend Receipt" button on the left-side menu (or the bottom of the page, if you are on a mobile device or in a small browser window).
Once you click the "Resent Receipt" button, a pop-up window will appear. If you'd like, you can add a note to the receipt to cover any special reasons why the receipt is being updated or resent. Then, click the blue "Send" button".
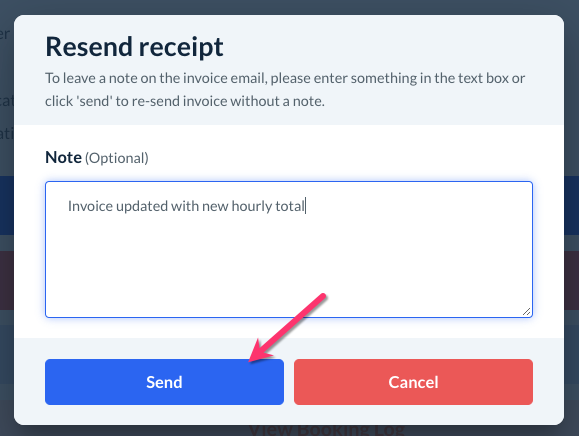
A green-system notification will appear in the top right corner of the page, letting you know the notification has been sent successfully. A copy of the customer's up-to-date receipt has been sent out.