The purpose of this article is to help you learn:
How booking invoices can be created with specific and all industries.
How you can create booking invoices with preferred booking statuses.
Overview
You can effortlessly create booking recurring invoices tailored to specific industries or applicable to all industries. Additionally, you have the flexibility to generate booking invoices with statuses of your choice, including completed, declined, upcoming, or any combination of these options. To further improve clarity and transparency, we have also introduced customizable options for displaying invoice details. You can choose specific parameters that will allow for a detailed breakdown of the booking invoice summary, providing both you and your clients with much greater insight.
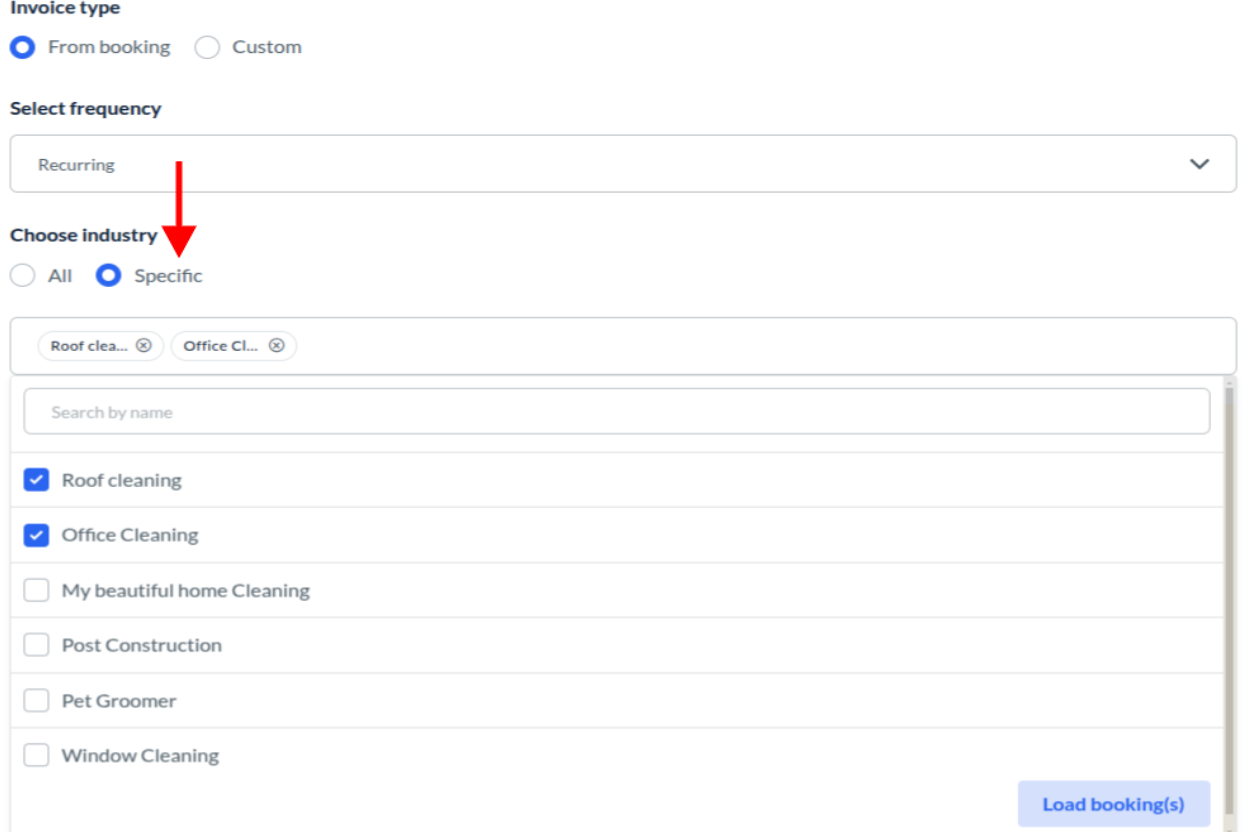
Select Industry

Select whether you want to create an invoice with all or specific industries.
Specific Industry
To create invoices with specific industries:
Select the specific option. Select the preferred industries from the options below to select industry, you can also select multiple industries to create combinations of different industries. Once selected click on the Load booking(s) button.
This will display all your recurring schedules of selected industry(s). You can view the bookings of each schedule by clicking on View all option. To create an invoice, check the boxes for the schedules you want to include. You will be able to select a maximum of 5 schedules at a time.
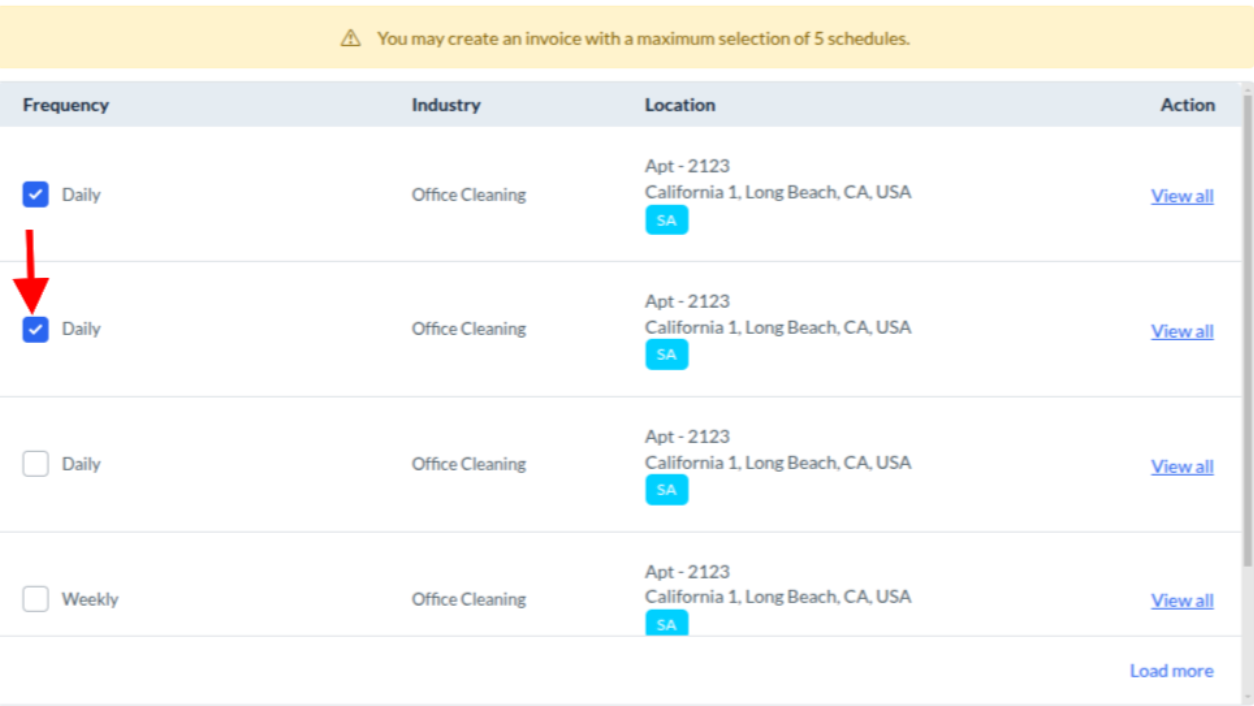
You can click on the Load More button to load more schedules(if any).
Select Booking Status
Now you can select booking statuses for specific industries & for all industries recurring invoices.
Choose the booking status by checking the box for the bookings you want to include in the invoice. For example, if you select the "Completed" status, only completed bookings will be added to the recurring invoice.

Form params
If you are creating a booking invoice, you can select which form parameters and price parameters the customer will view on the invoice by clicking on the plus sign icon next to the Form Parameters section. To add form and price parameters in the booking table click on “What do you want to show in the booking table?” and check the box next to each parameter to display in the booking table.

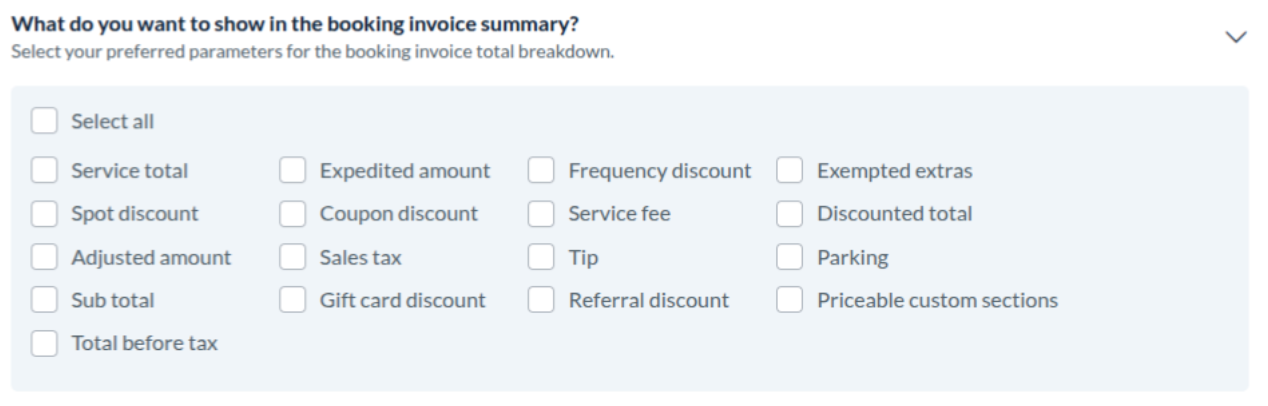
Adding parameters in booking invoice summary
To select what parameters you want to show during the booking invoice summary breakdown, click on “What do you want to show in the booking invoice summary?” and check the box next to each parameter to display the parameter in the booking invoice summary.
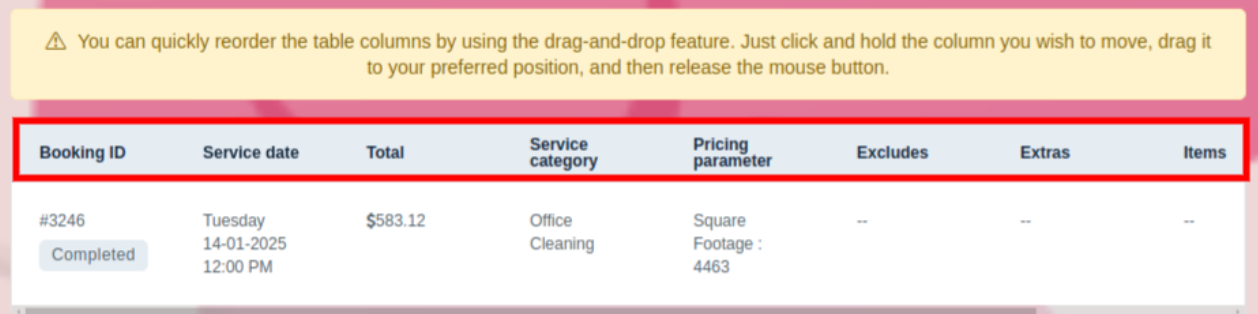
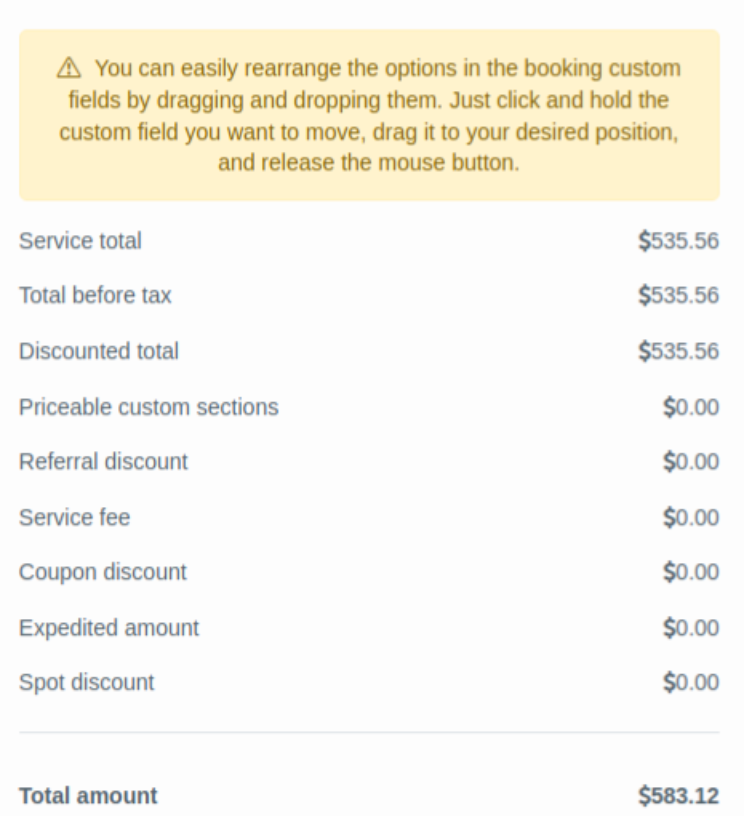
Drag and drop booking table and booking summary
To rearrange the parameters added in the booking table, just click and hold the column you wish to move, drag it to your preferred position, and then release the mouse button.
To reorder the booking invoice summary, just click and hold the custom field you want to move, drag it to your desired position, and release the mouse button.
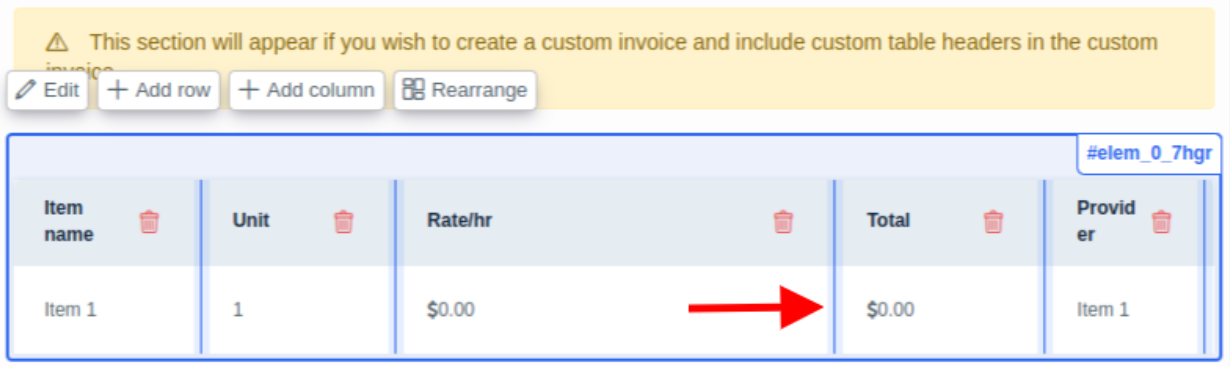
Resize your custom table from the theme builder
To adjust the column sizes on your custom invoice table, simply click and hold the blue border of the column you want to resize. Then, drag it to your preferred width and release the border when you're done.
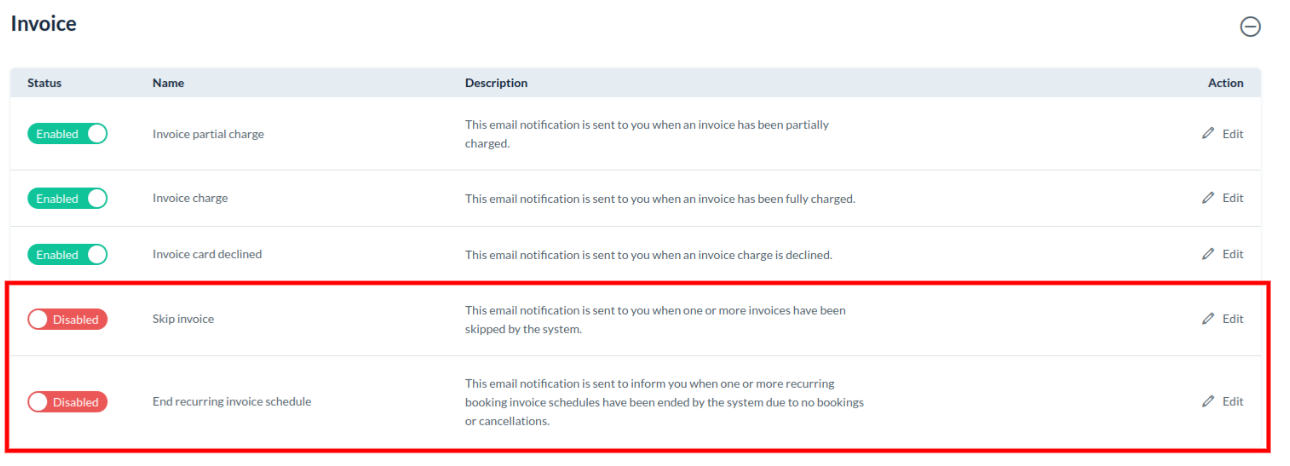
Introduced Notifications for Skipped Invoices & Ended Recurring Invoice Schedules
We’ve added new notifications to keep you informed about important updates in your invoicing process.
Skipped Invoice Notification: Now, in a recurring booking invoice if the system does not find any bookings and skips an invoice, it will send a notification to the admin so that they are aware of the situation.
Ended Recurring Invoice Schedule Notification: The system will notify the admin in case a recurring booking invoice schedule is ended, either because no bookings were found or due to the cancellation of the recurring booking schedule.
You have to enable the notification template from Settings > Notification > Emails > Admin > Invoice.