The purpose of this article is to help you:
Enable or disable calendar view
Set your default booking view
Set the default time frame in the calendar view
Set the default for where provider names display in the calendar view
Select how customer names display in the month view
Set how bookings for the same day and time will display
Choose how to display unavailable times for providers
Calendar Settings
To manage your general Calendar Settings, please go to:
Settings > General > Store Options > General
Click the plus sign icon to expand the "Calendar Settings" section.

These settings pertain to using the calendar view when looking at bookings in the system.
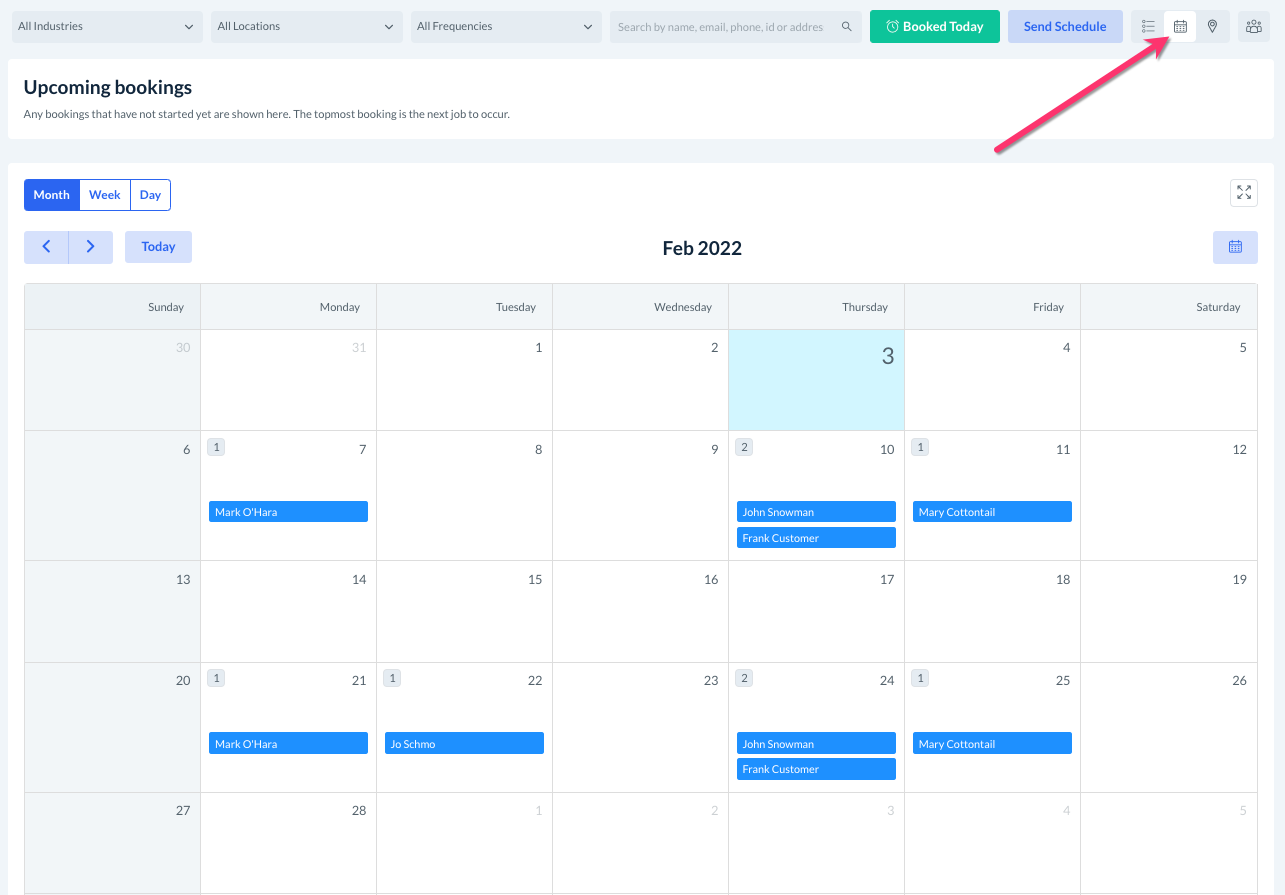
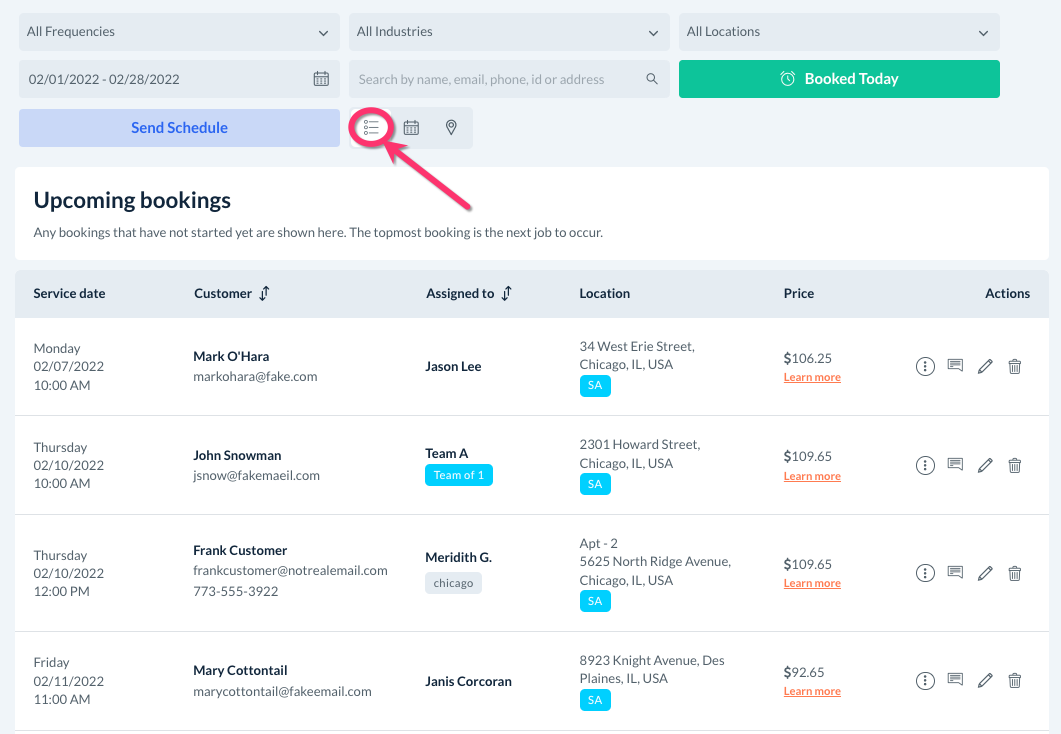
As mentioned above, the calendar view button can be found in any section where bookings are listed, including:
Today's Bookings
Upcoming Bookings
Job History
Unassigned Bookings
Providers' dashboards
Customers' dashboards
Would you like to disable the calendar view?
If you do not want to use the calendar view at all, you can remove the option from the system by selecting "Yes" to this question.
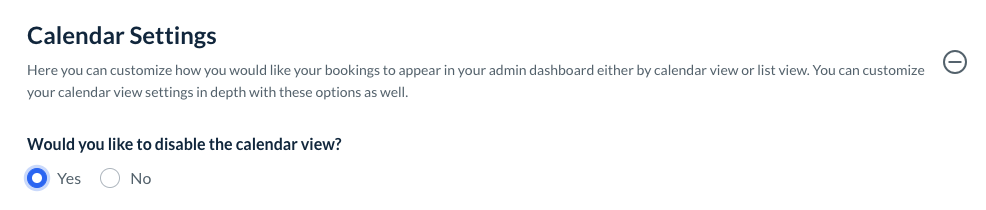
If you answer "No", proceed by making selections for the following questions:
Would you like your bookings to appear in the calendar view or listing view by default?
Select "Calendar view" to set your default view for all sections to this.
Select "Listing view" instead if you prefer to see bookings in a list.
You will still be able to switch between viewing modes at any time.
How would you like to set up the calendar view by default?
Decide which time frame you would like the calendar view to display by default.
"Month" view will show every day of the current month.
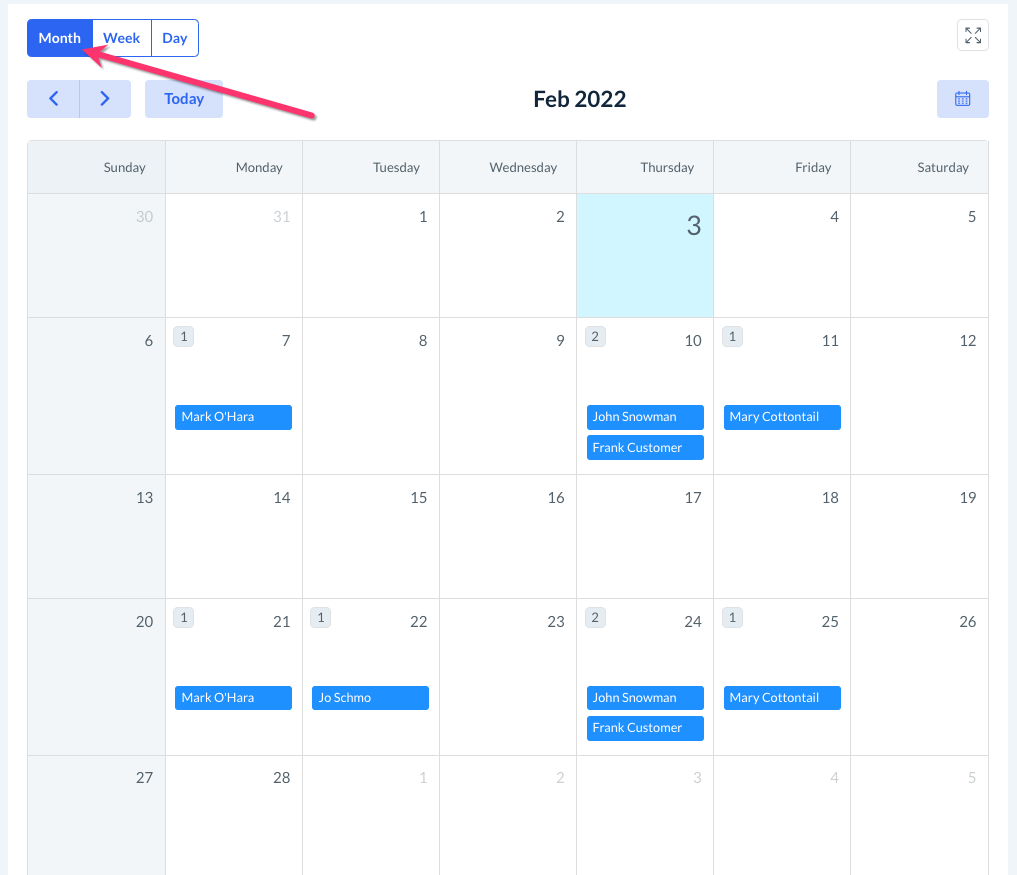
"Week" view will show every day of the current week.
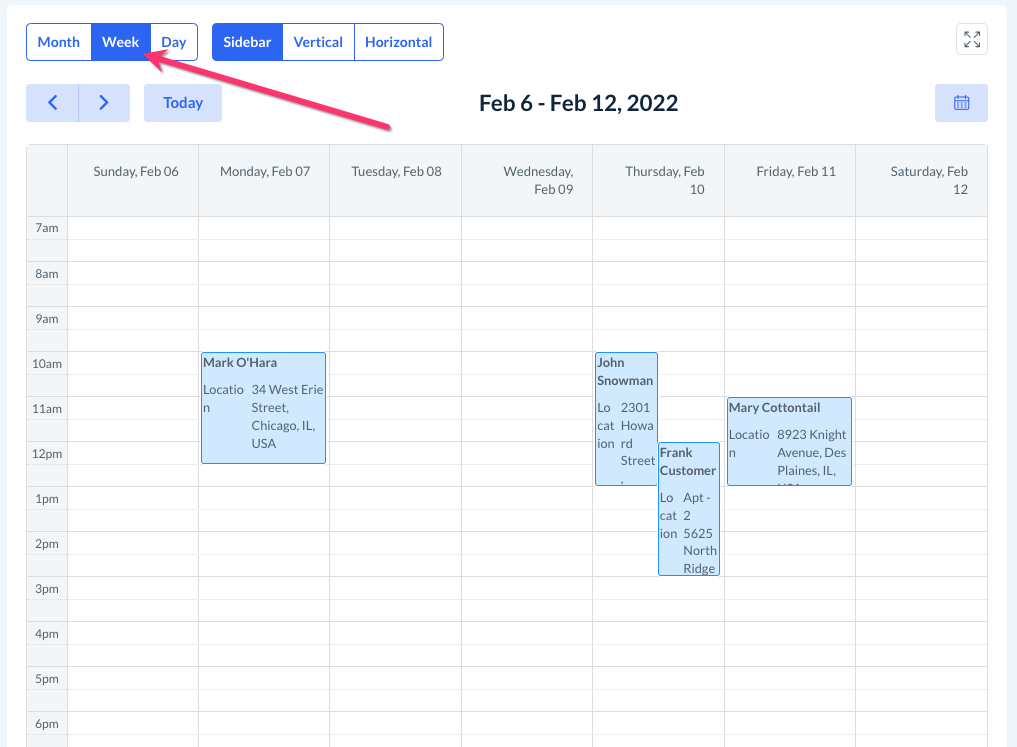
"Day" view will show the current date.

You will still be able to switch between month-, week-, and day-view in the booking sections.
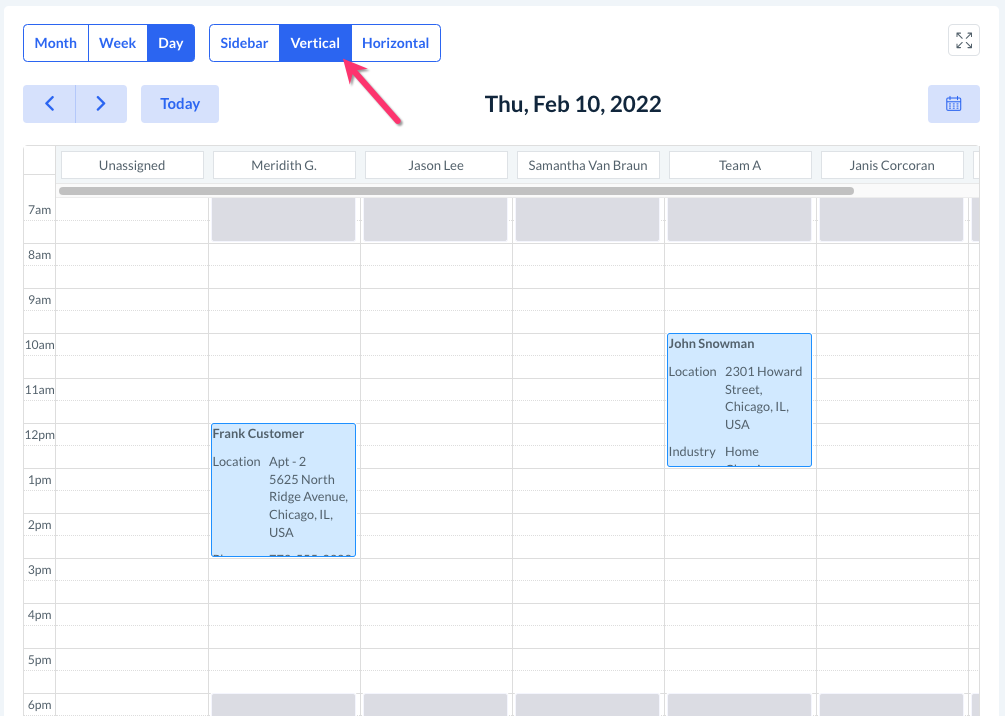
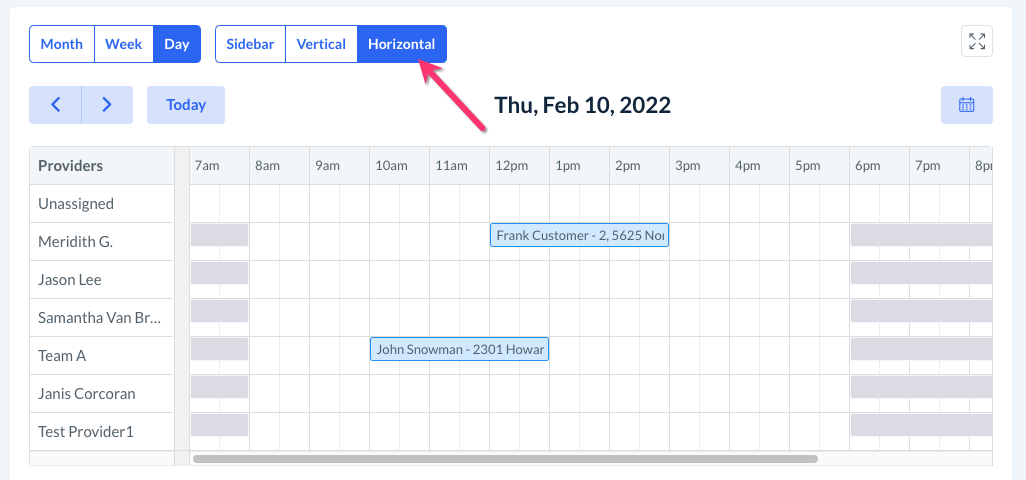
Where should the providers show on your calendar by default?
Decide how you would like your providers to be displayed in calendar view.
Select "Top" to place the provider's names at the top of the calendar view. This corresponds with the "Vertical" view of the job calendar.
Select "Timelines/Horizontal" to place the provider names on the left side of the calendar. This corresponds with the "Horizontal" view of the calendar.
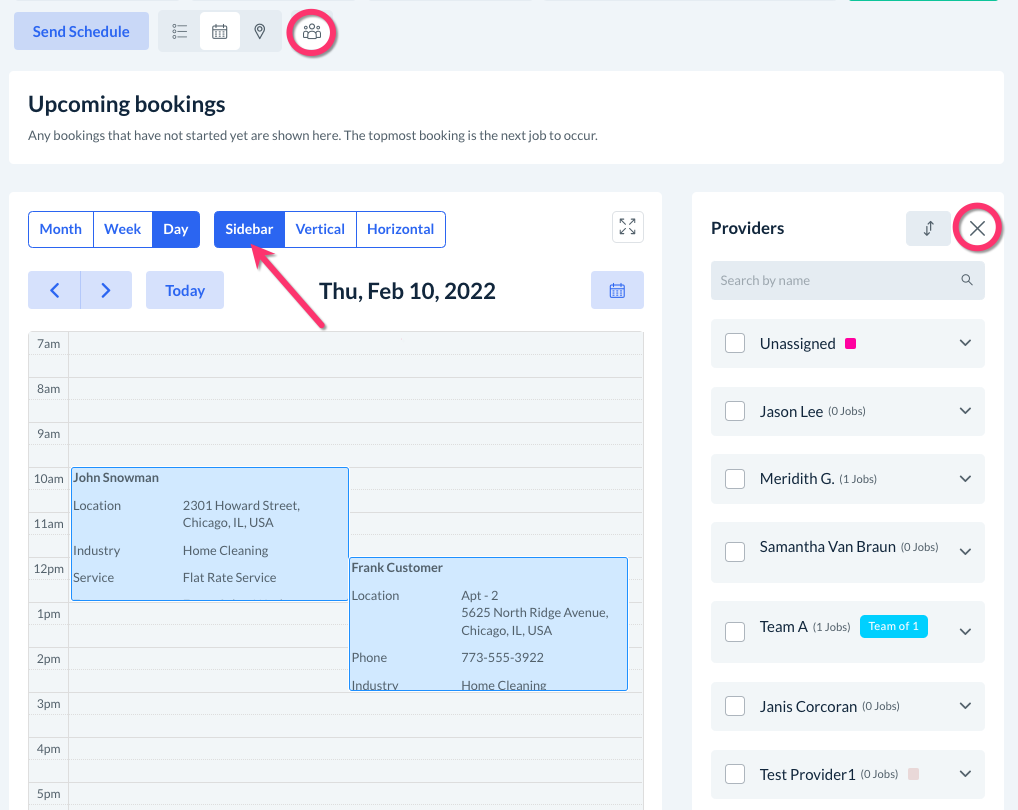
Select "Side" to display the provider names in a bar on the right side of the calendar. This corresponds with the "Sidebar" view of the calendar.
You can hide the provider sidebar at any time by clicking the "people" icon at the top of the page, or the "x" in the top right corner of the sidebar.
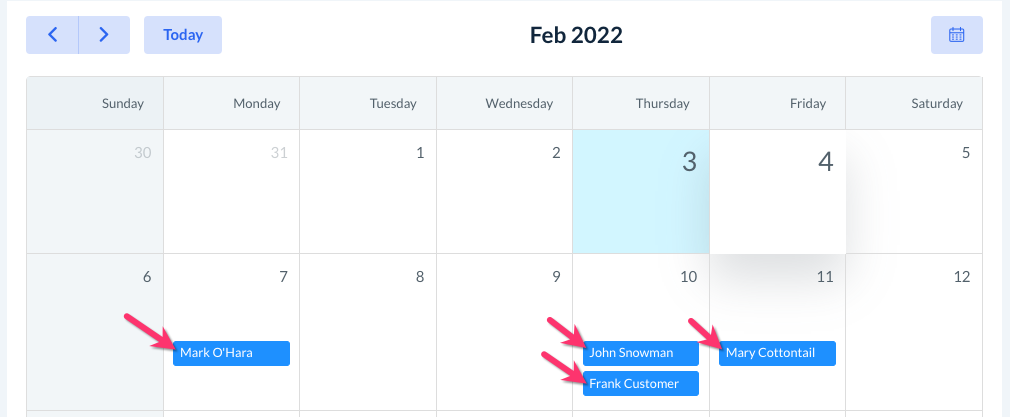
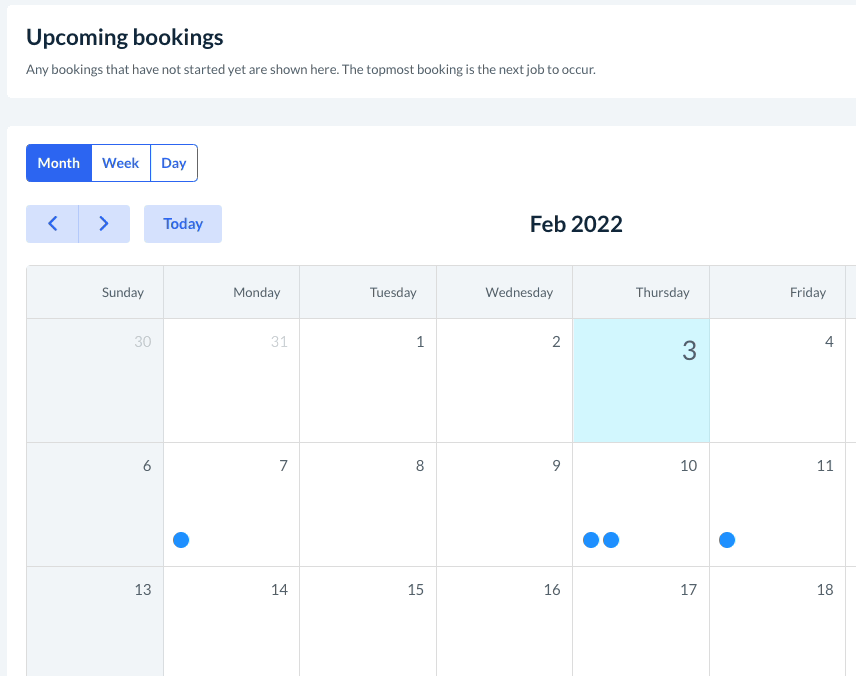
Would you like to show customer names in the month view or the dots for bookings?
Choose "Names" to see the customer's full name in a small box on the monthly calendar view.
Choose "Dots" to see dots that represent each booking on the monthly calendar view.
You can view the booking's details by hovering over a dot or clicking it with your curser.
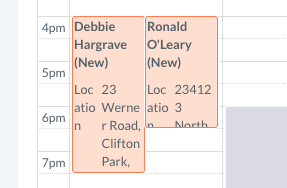
How do you want to show multiple bookings on a single date?
"Side by side" prioritizes the customer details by displaying two bookings next to each other when they start at the same time.
"Overlapped" prioritizes how much space is being taken up in a column by overlapping shorter appointments on top of longer appointments starting at the same time.

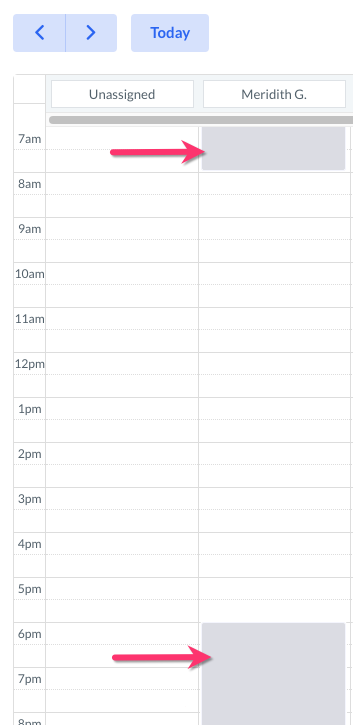
Would you like to hide the provider's non-working hours (grey area)?
Select "Yes" to hide the provider's non-work hours completely from the calendar view.
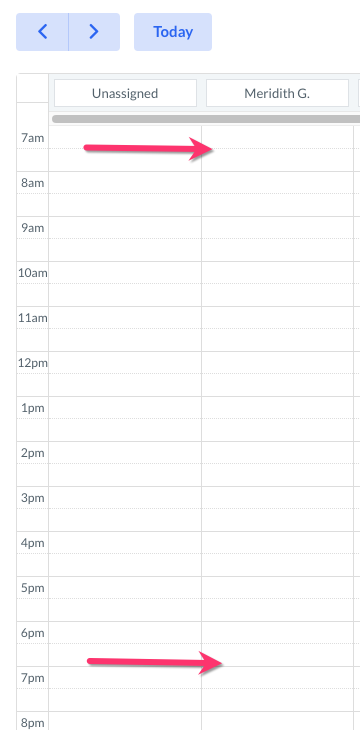
Select "No" to show the provider's non-working hours as "greyed out".
Remember to Save!
If you have made any changes, remember to click the blue "Save" button at the bottom left corner of the page to update your settings.