The purpose of this article is to help you learn:
How to translate a checklist into one or more languages
Before You Begin
Before you can start translating a checklist, you must configure your Google Translation integration.
Click here for instructions on setting up multiple languages and translations via Google Translate.
You should also have started work on at least one checklist in the
"Checklist Builder" under Settings > General > Checklist.
Click here for instructions on creating checklists using the Checklist Builder.
Translate a Checklist
Checklists can be translated into a different language or multiple languages using the "Manage Translation" option at the top of the "Checklist Builder".
As an admin or staff member with permission, you can access the admin checklist dashboard from the left-side menu in the admin/staff dashboard under:
Settings > General > Checklist
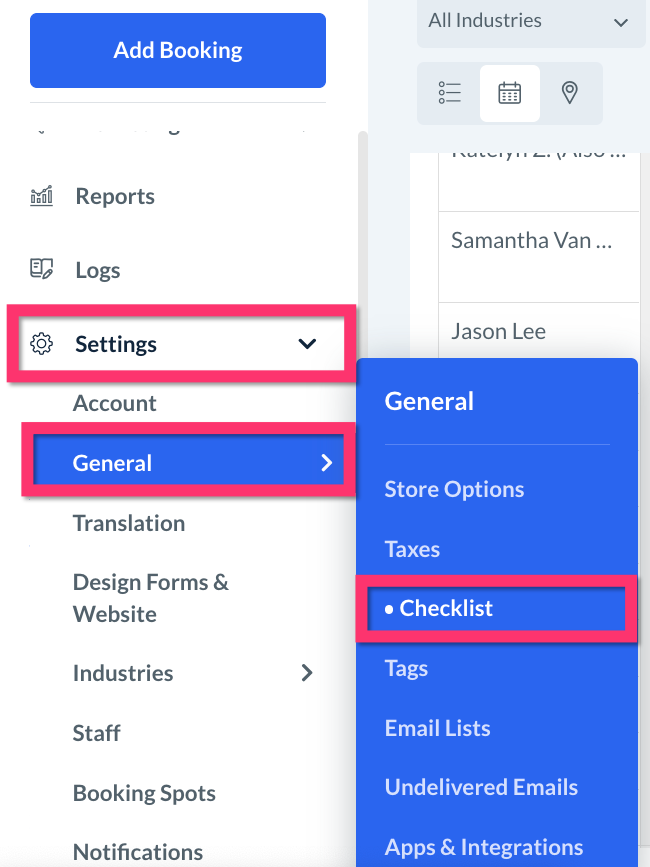
Once the dashboard has opened, select "Options" then "Edit" under the "Actions" column to open a specific checklist.
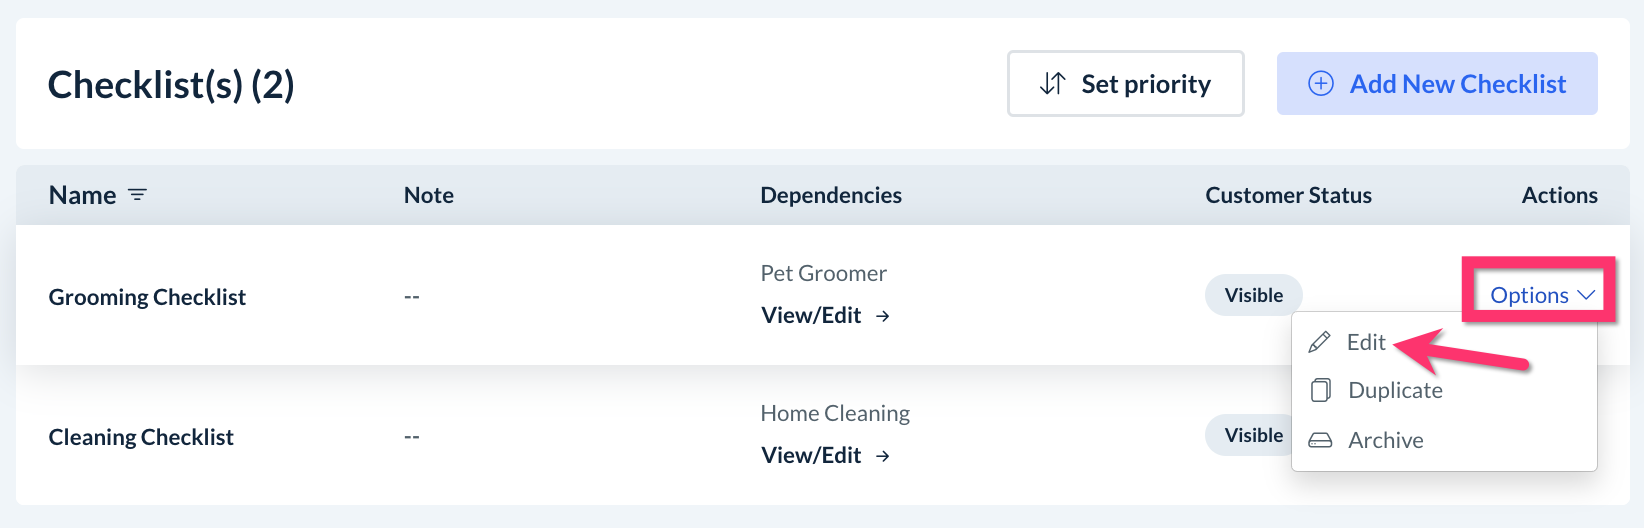
Next, click the grey "Manage Translation" button at the top-right corner of the checklist preview area.
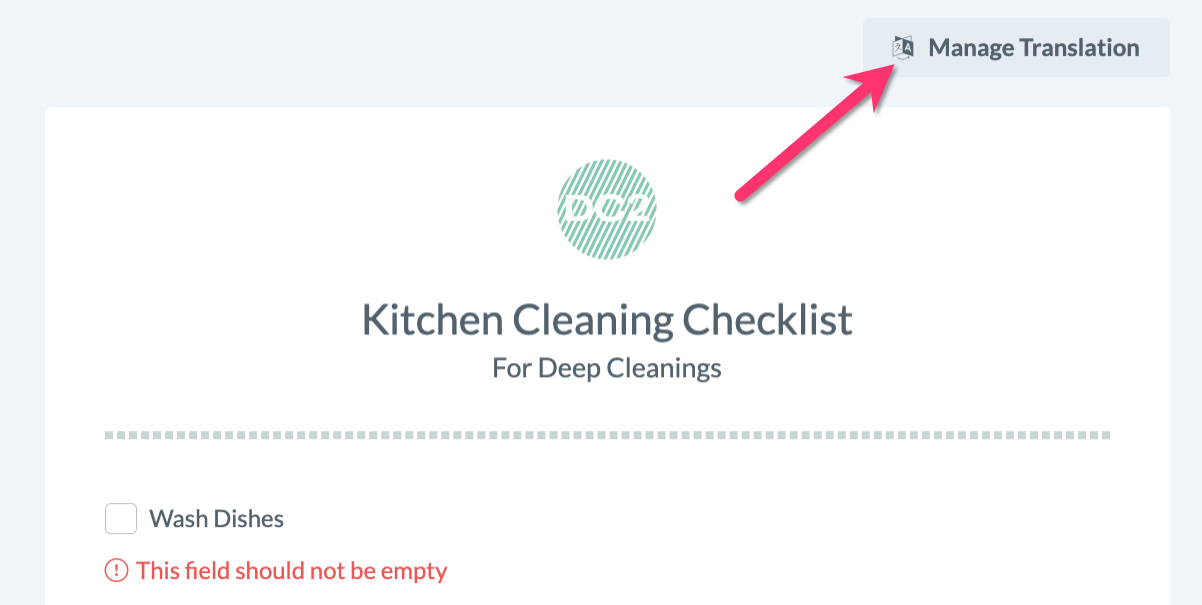
A "Translation" pop-up window will appear.
To translate the text and phrases, or "strings" used in the checklist, select the language you would like to translate the checklist into from the "Select Language" dropdown menu.
Next, check the box below "Select All", or, use the search bar or browse through the list to select the checkboxes next to each string you want to translate. Click the blue "Translate" button to run the translation key.
After translating the strings, you will see a green system alert confirming the translation was successful. To save the translations to the checklist, click the blue "Save" button at the bottom right corner of the window.
A green system alert will confirm the translation has been saved successfully.