The purpose of this article is to help you learn:
- What is Zapier
- How to set up a Zapier account
- How to connect your Zapier account to BookingKoala
What is Zapier?
Zapier is a product that helps automate repetitive tasks between two or more apps. Zapier uses automated workflows to identify when a specific event has occurred and trigger one or more actions. These automated workflows are called "Zaps".
Zaps are very helpful for tasks you need to do frequently, like sending out reminders to your team to complete a task, or regular transfer of information from one app to another, like updating a spreadsheet or calendar.
Once you integrate Zapier with your BookingKoala account, the system executes Zaps on specific operations, like add booking, cancellation, reschedule, etc, and performs the action on the connected app.
We have integrated the following triggers with Zapier for BookingKoala:
- New Booking
- Booking Updated
- Booking Cancelled
- Booking Completed
- Booking Charged
- New Customer
- Customer Updated
- New Quote
-
New Rating
For example, you can set up a Zap to add customer details to your Mailchimp account whenever a new booking has been added to the system. Then, when the booking has been charged, another Zap can sync the data to your Quickbooks account. There are innumerable ways to use Zapier to automate tasks for your business.
How to set up a Zapier account
Before you begin, you will first need to have an account with Zapier. If you do not have one yet, you can sign up for a free account or start a trial to check out premium features.
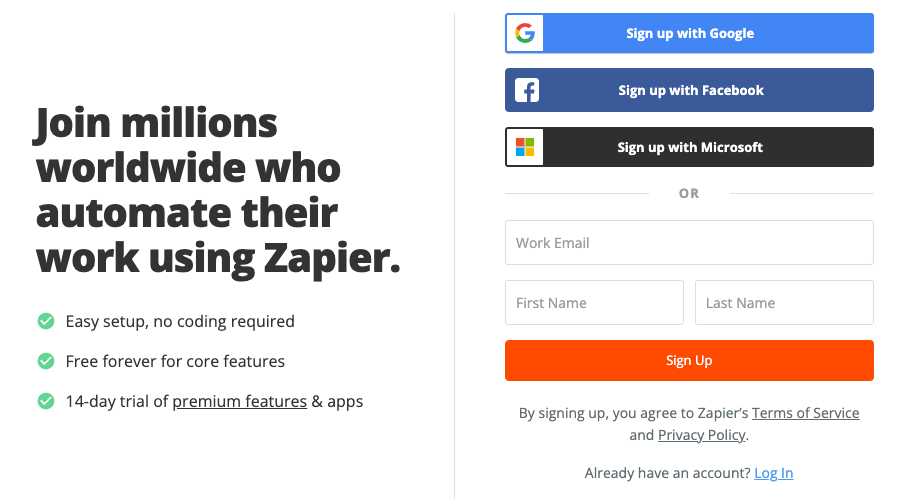
Go to Zapier's sign-up page and start by clicking a "Sign up with Google/Facebook/Microsoft" button, or entering your name and email and clicking the orange "Sign Up" button.
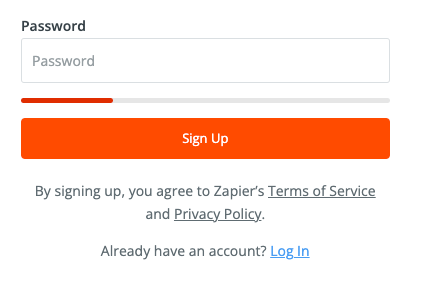
Next, create a password for your account and click the "Sign Up" button.
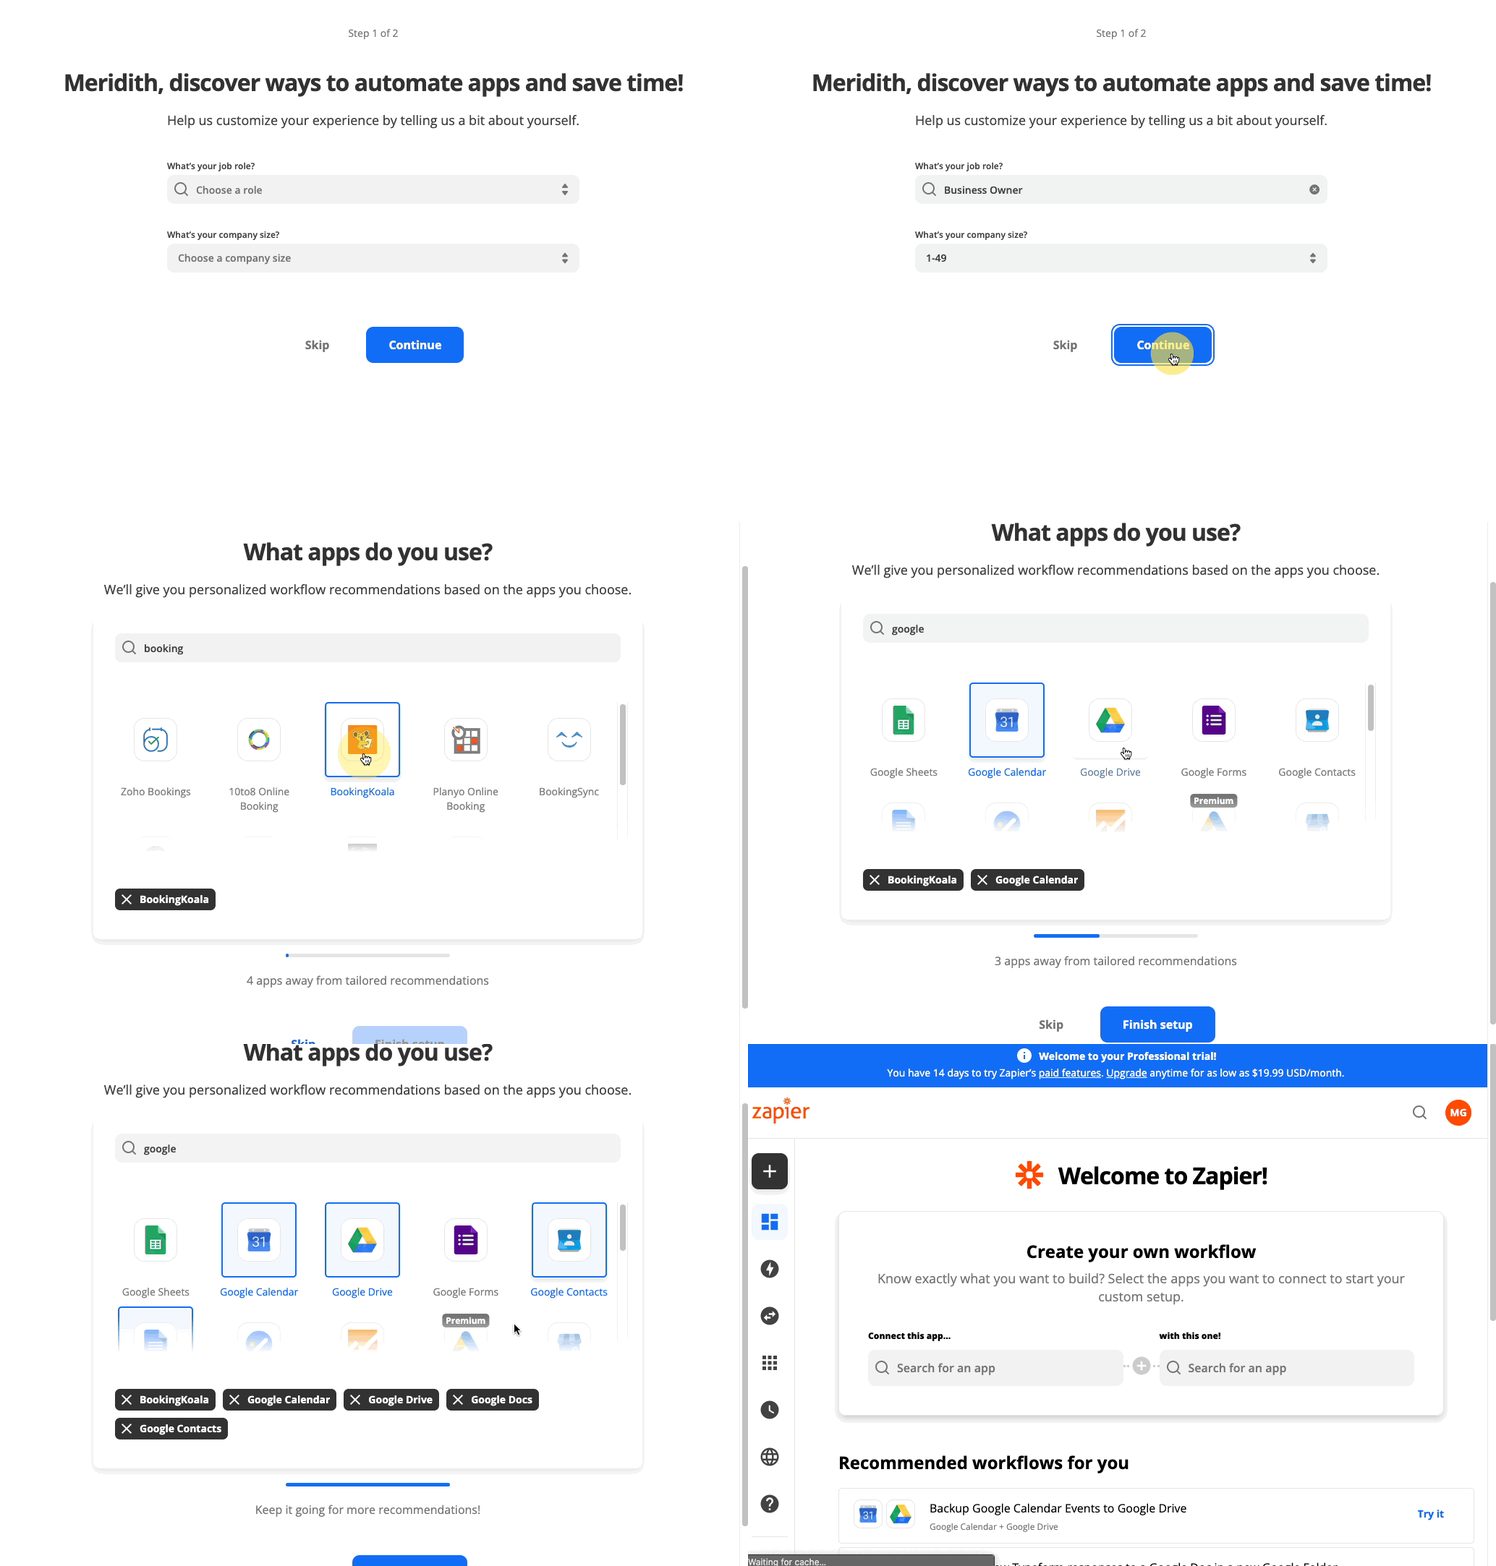
There is an optional setup screen that will appear next.
You can enter more specific information about your role and business size, and then select which apps you regularly use for personalized suggestions (including BookingKoala). Click the blue "Finish Setup" button to complete the account setup.
You can also skip this step by clicking the grey "Skip" button at the bottom of the screen. You will be brought to the main dashboard.
Connecting Your Zapier Account
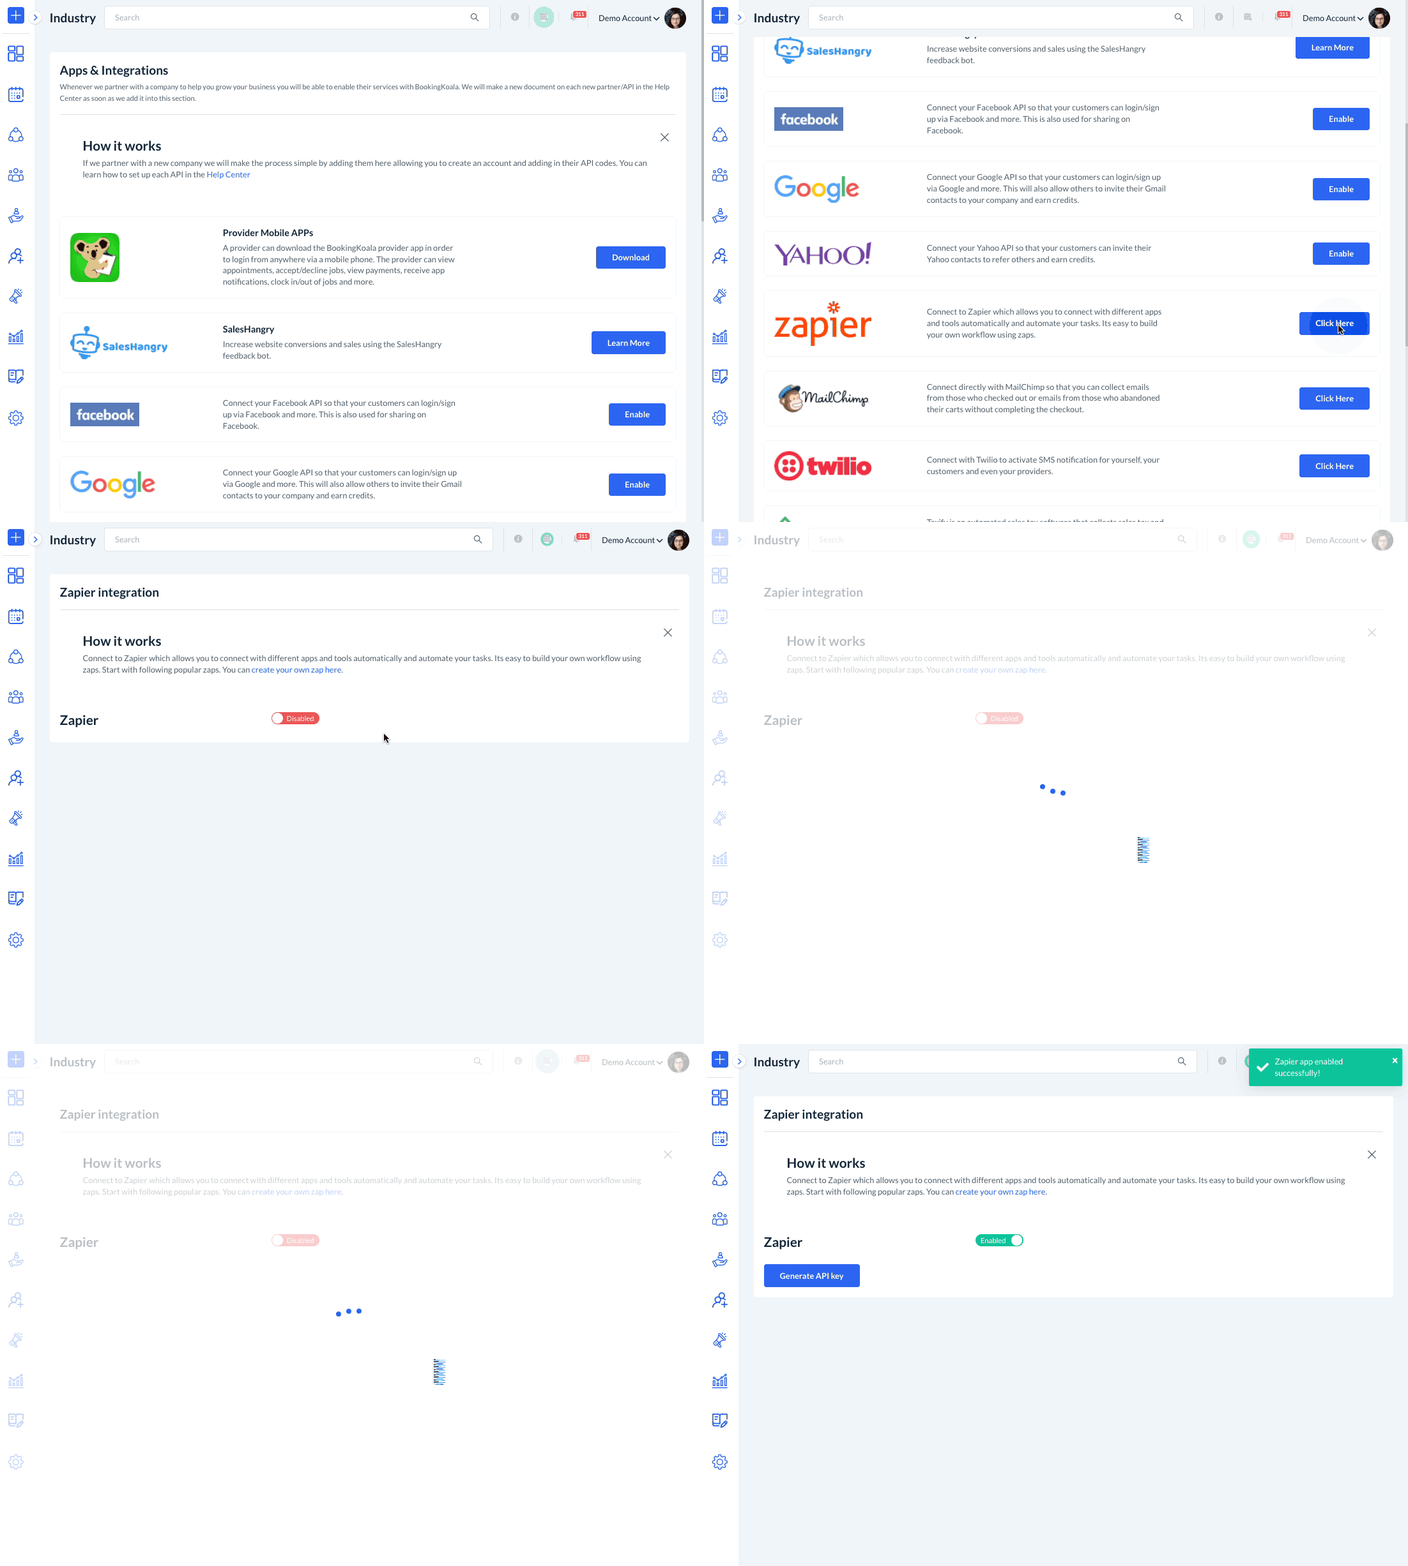
To connect your Zapier account to Bookingkoala, go to:
Settings > General > Apps & Integrations
Scroll down to the Zapier box and click the blue "Click Here" button.
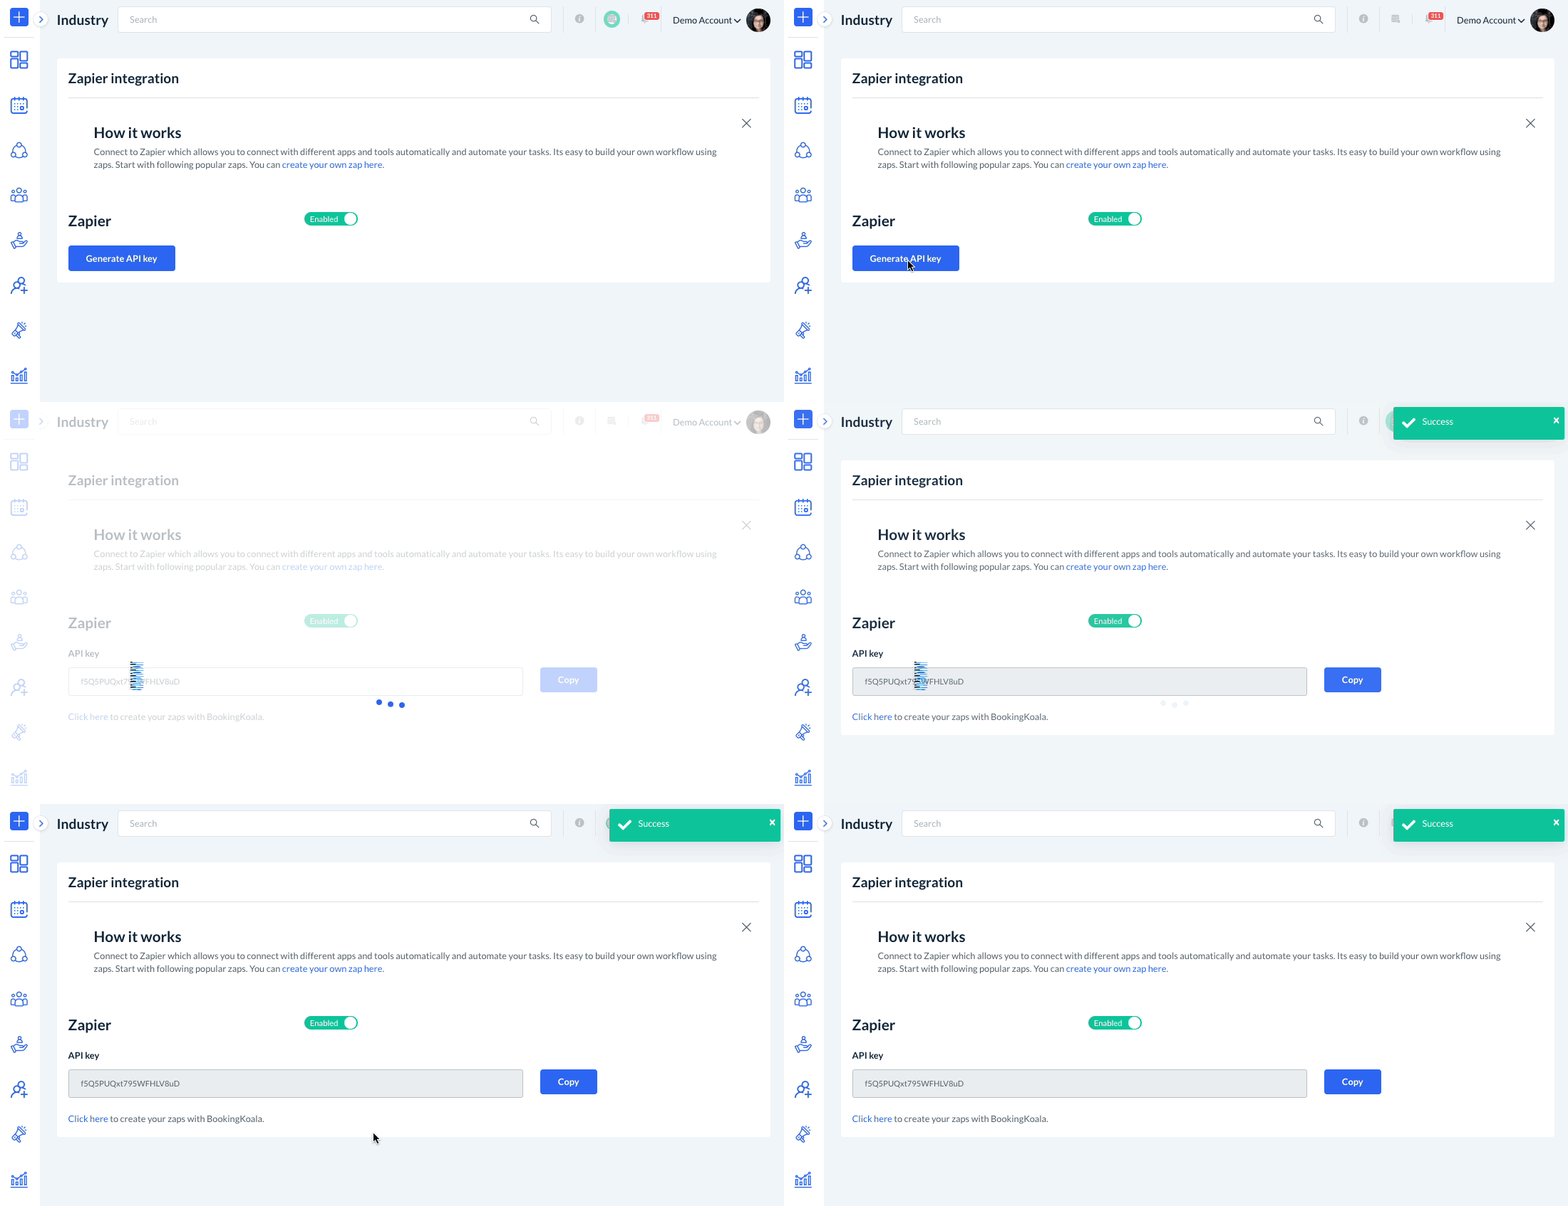
Next, click on the red "Disabled" button to switch it to "Enabled". You will see a green system notification in the top right corner letting you know that the Zapier app has been enabled successfully.
Next, click the blue "Generate API Key" button. This will create a unique key for you to connect your BookingKoala account with Zapier.
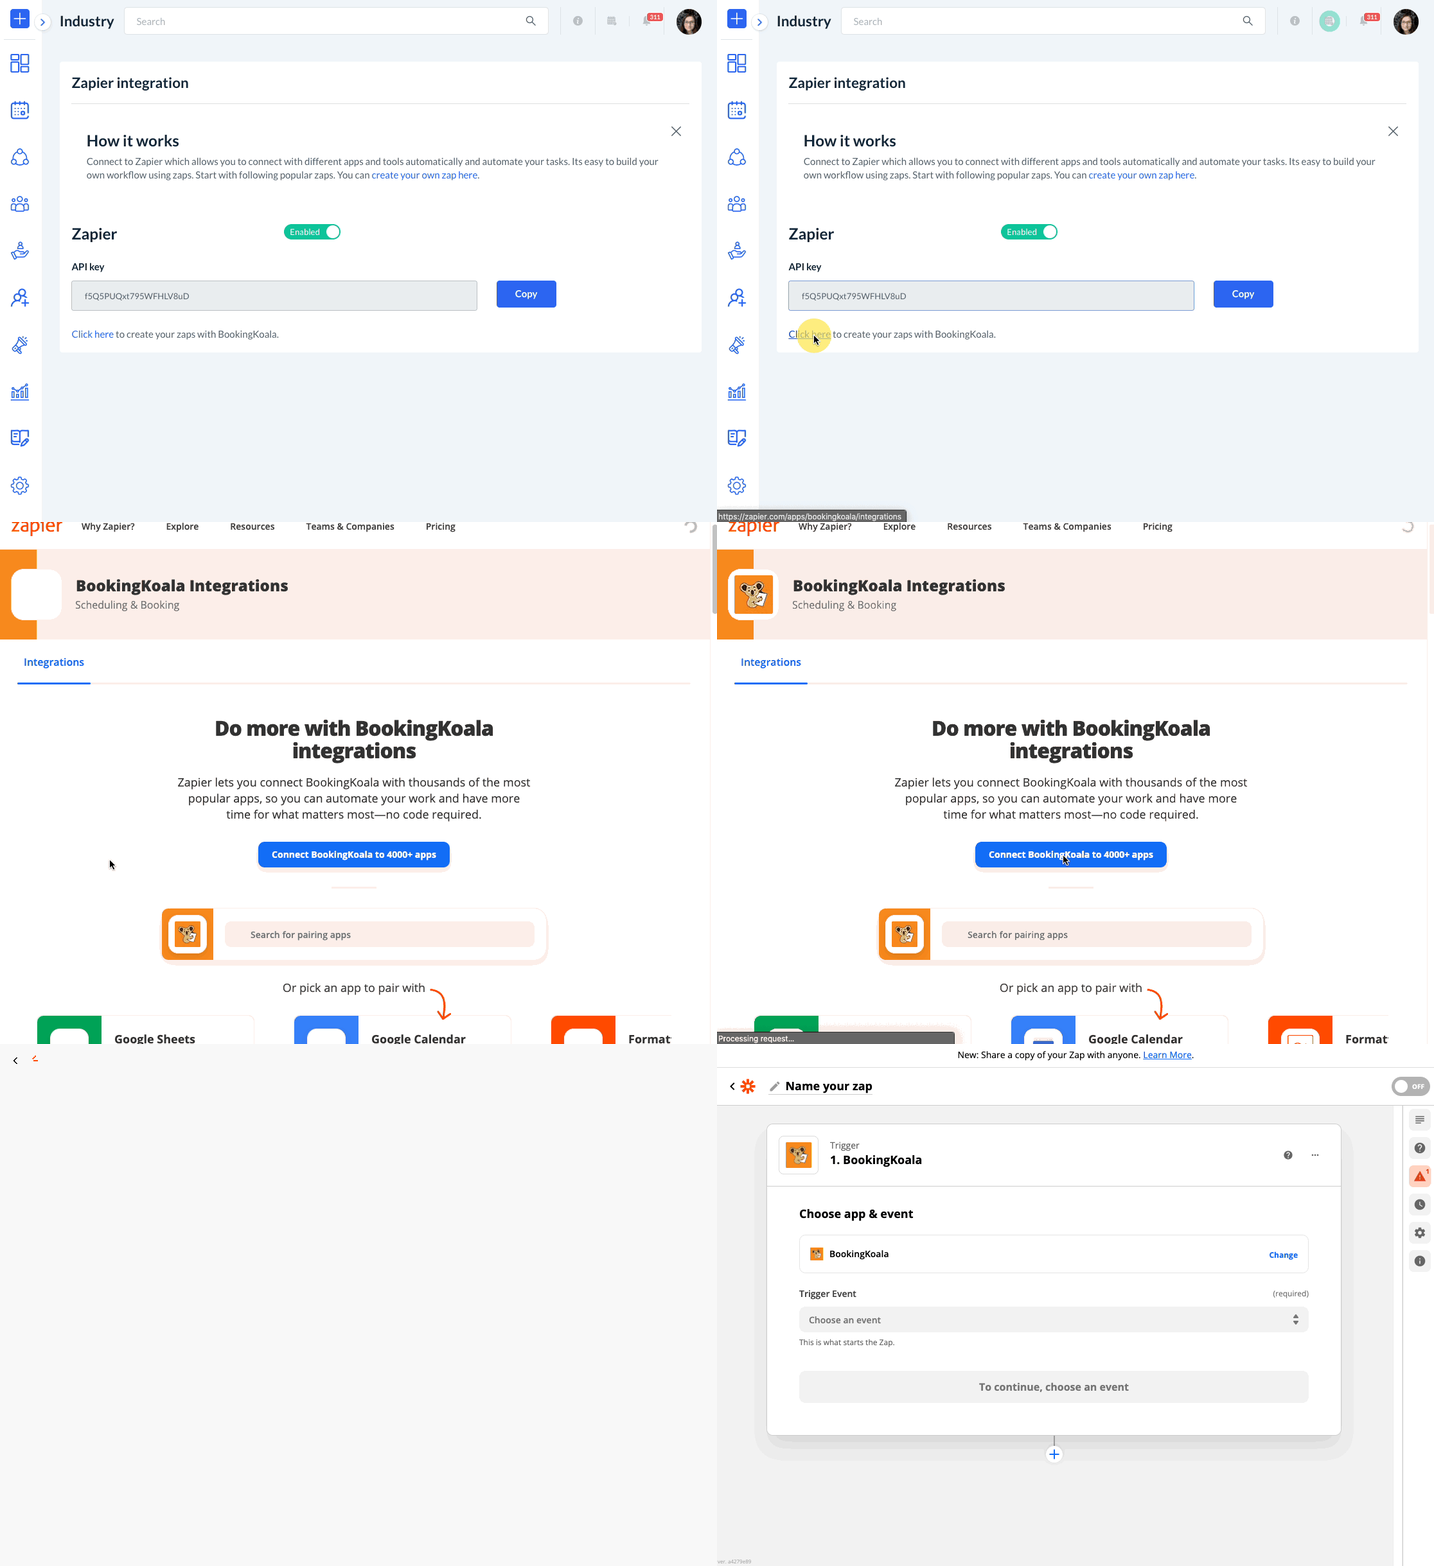
Once the API key has been generated, use the blue Copy button to copy the code, and then click the blue "Click Here" link just below the API key box. This will open a new tab and bring you to the set-up page.
Click the blue "Connect BookingKoala to 4000+ apps" button at the center of the page. You will be brought to a Zap creation page. To connect your Zapier account to BookingKoala, you will need to begin setting up a new zap so you can link the accounts.
First, select a Trigger Event from the drop-down menu. The options you have are:
- New Booking
- Booking Updated
- Booking Cancelled
- Booking Completed
- Booking Charged
- New Customer
- Customer Updated
- New Quote
-
New Rating
Click the blue "Continue" button after you have selected a trigger.
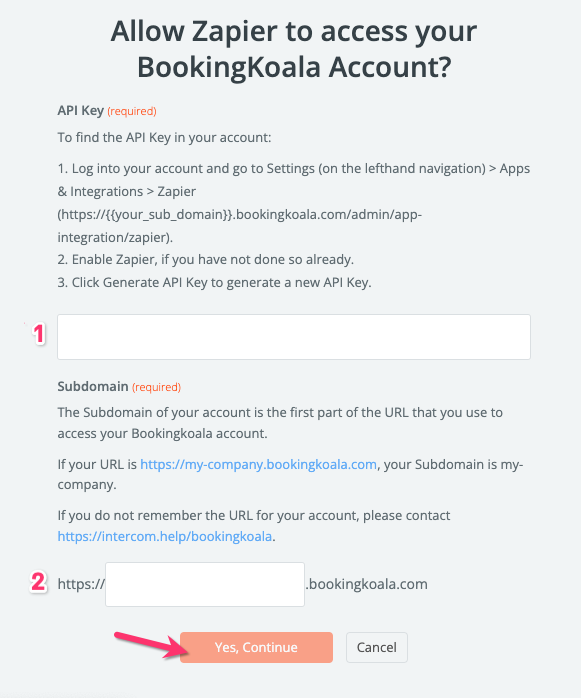
Then, under "Choose account", click the blue "Sign in to BookingKoala" button. This will open a pop-up window where you will link your accounts.
- Enter the API key you copied from BookingKoala into the first box.
- Enter your account's subdomain into the second box.
Click the red "Yes, Continue" button to proceed. Your BookingKoala account will now be selected in the "Choose Account" section.
Finally, you will want to test the integration in the Test Trigger section to ensure that everything is connected properly. Click the blue "test trigger" button and Zapier will pull a recent event of that type to show as an example.
Once the system returns the details, check to make sure it matches the information in your BookingKoala account. Click the blue "Continue" button to save this trigger.
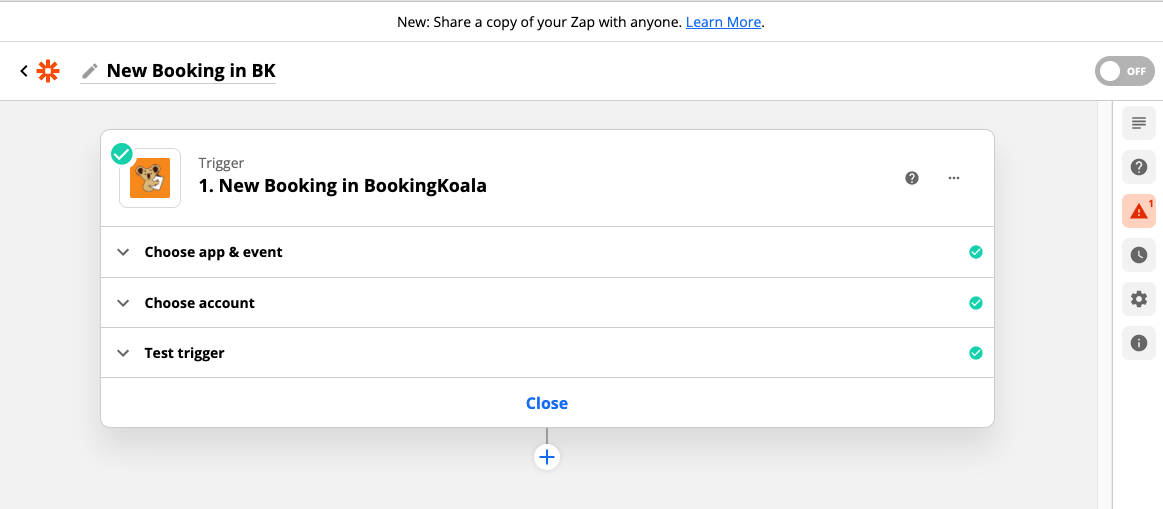
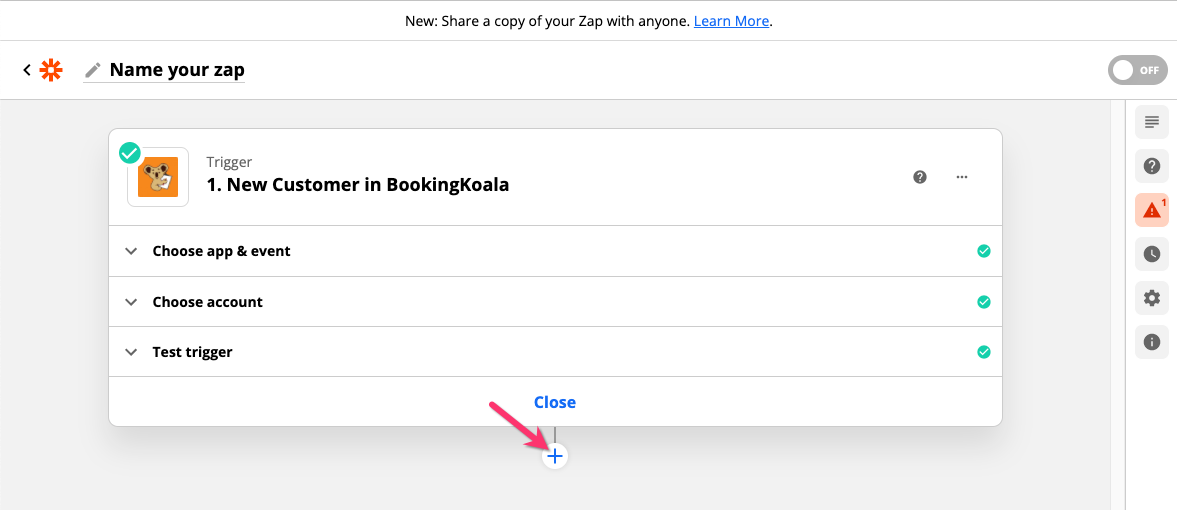
A green checkmark will be added to the corner of your icon. This shows that BookingKoala has been successfully connected with Zapier.
At this point, you can continue on to create your first Zap by clicking the blue plus sign icon just below the trigger box.
For a detailed guide to completing and enabling our first zap, click here.
Details Synced to Zapier
The following tables contain each detail that is synced to Zapier. The column on the right shows the detail's name and the column on the left shows an example.
Customer
Bookings

