The purpose of this article is to help you learn more about:
How to access the "Checklist Progress" dashboard
How to filter checklists in the dashboard
Using the checklist action buttons
How to update and complete subtasks and checklists
How to send a checklist note for the merchant, customer, or provider(s)
How to send email and SMS messages to the provider(s) or customer
How to monitor checklist activity
The Checklist Progress Dashboard
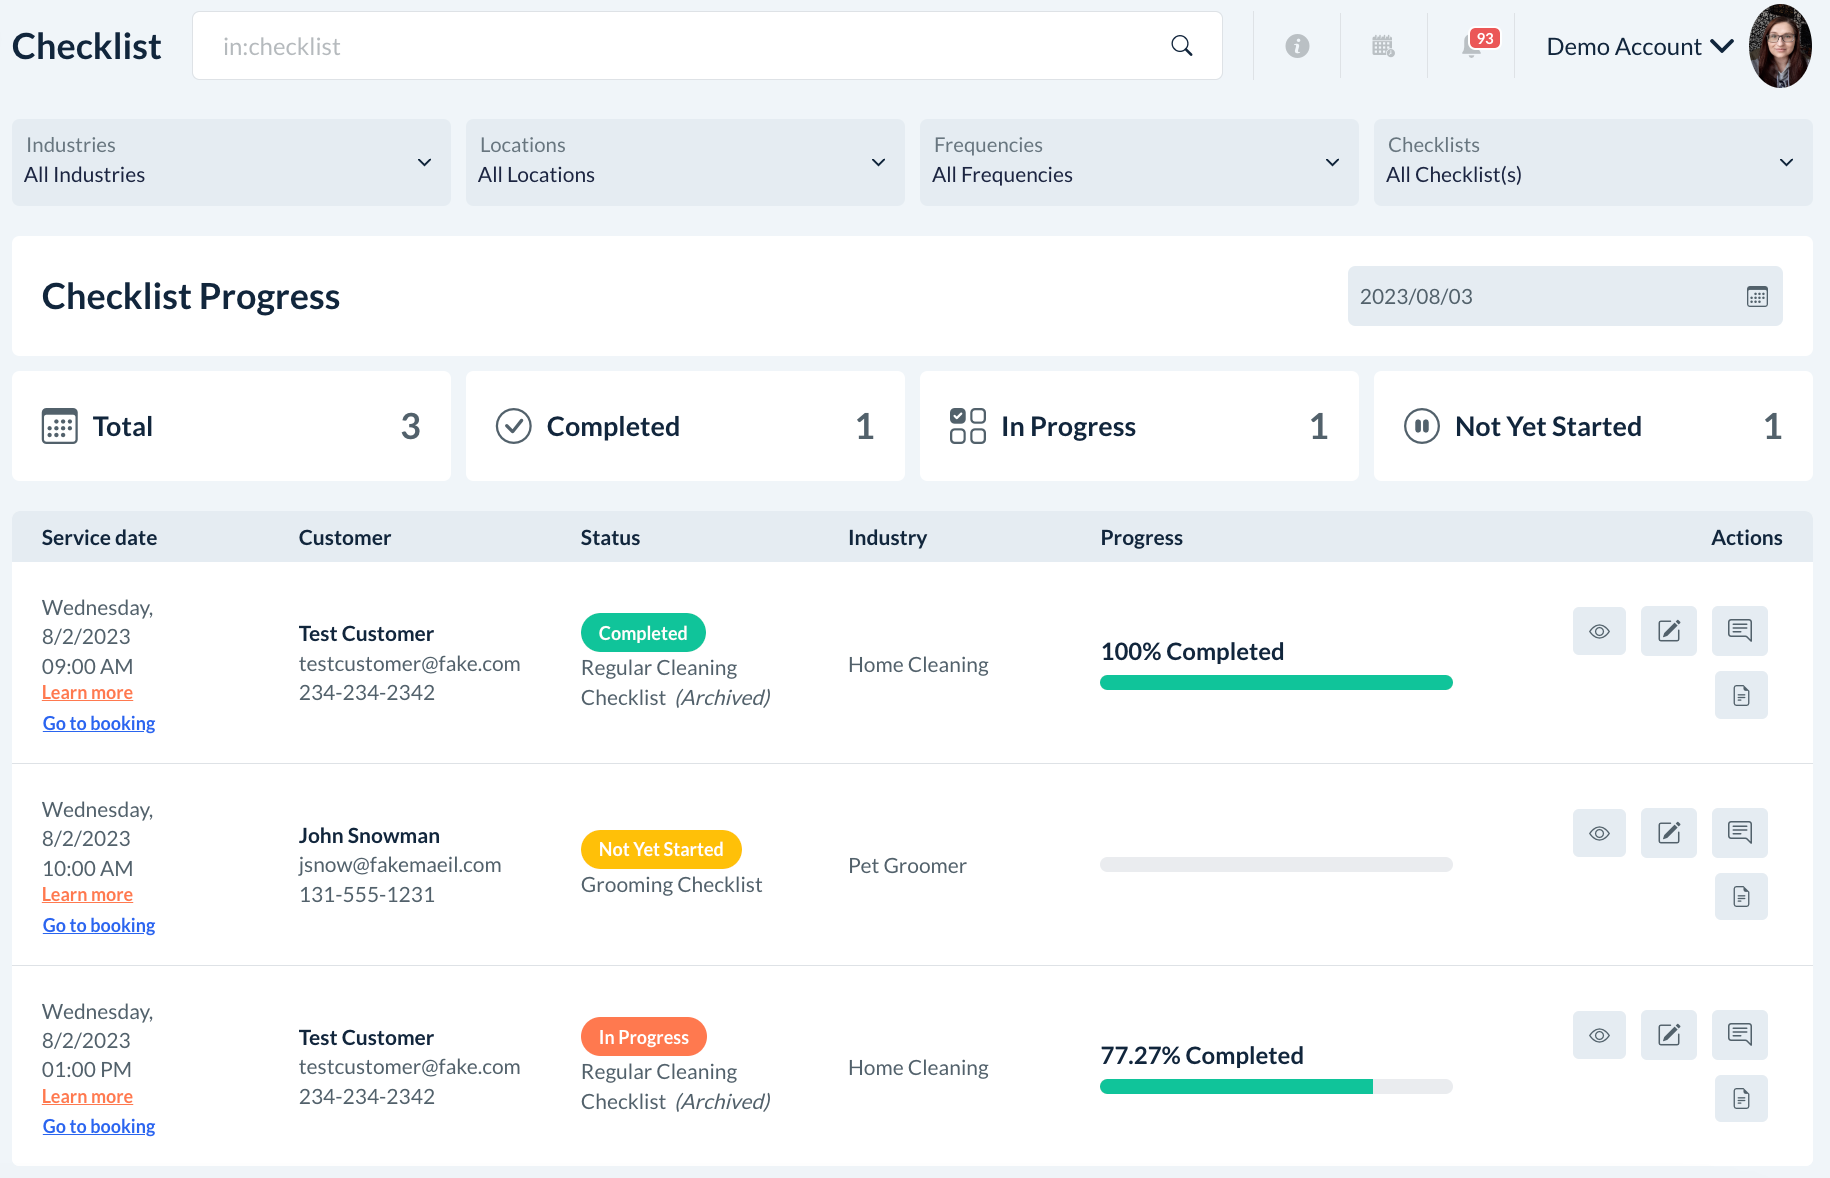
If your account has a Premium Subscription, you also have access to an exclusive checklist feature called the "Checklist Progress" dashboard. This page allows the admin and staff to see any checklists belonging to various bookings and providers for the selected date.
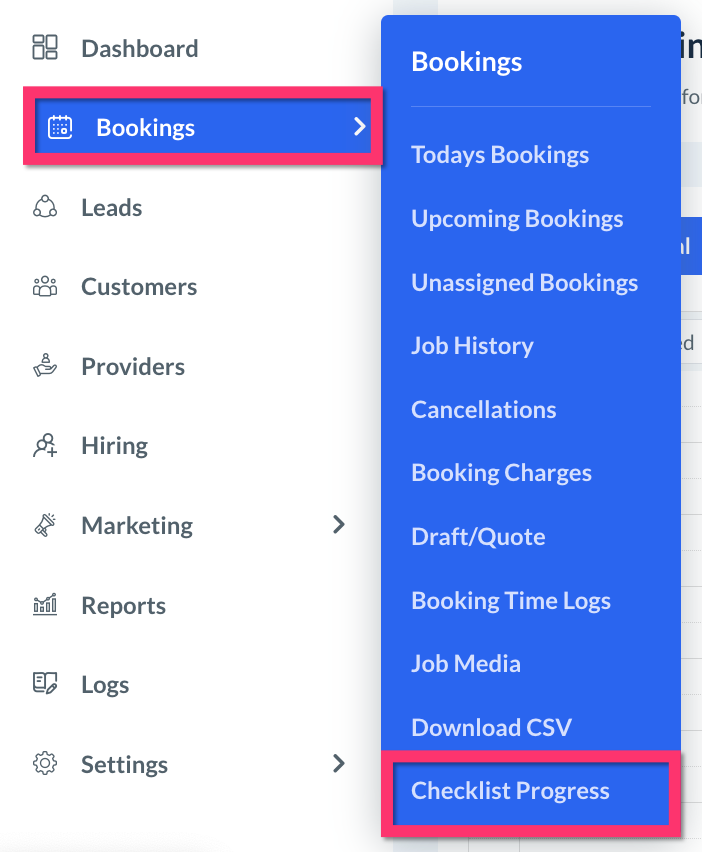
To access the "Checklist Progress" dashboard, open the left-side menu in the admin/staff dashboard and go to:
Bookings > Checklist Progress
Dashboard Filters & Tags
Five filters along the top of the page can be used to sort bookings based on industry, location, frequency, checklist, and service date.
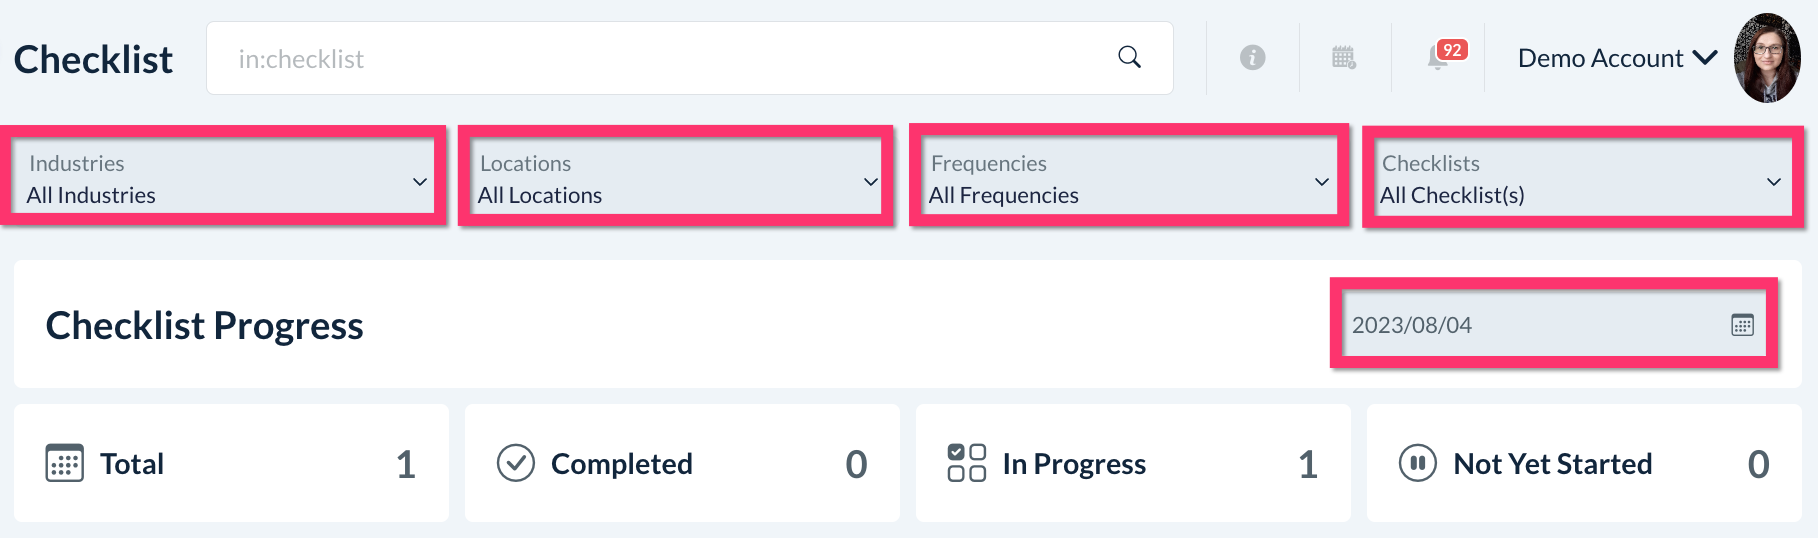
The "Industry" filter shows bookings with checklists based on their industry (if your account uses more than one industry).
The "Locations" filter shows bookings with checklists based on their location (if your account uses more than one location).
The "Frequency" filter shows bookings based on their frequency (if your account uses more than one frequency).
The "Checklists" filter shows bookings based on the checklist(s) enabled for that service.
The "Service Date" filter shows bookings based on when they are scheduled to take place.
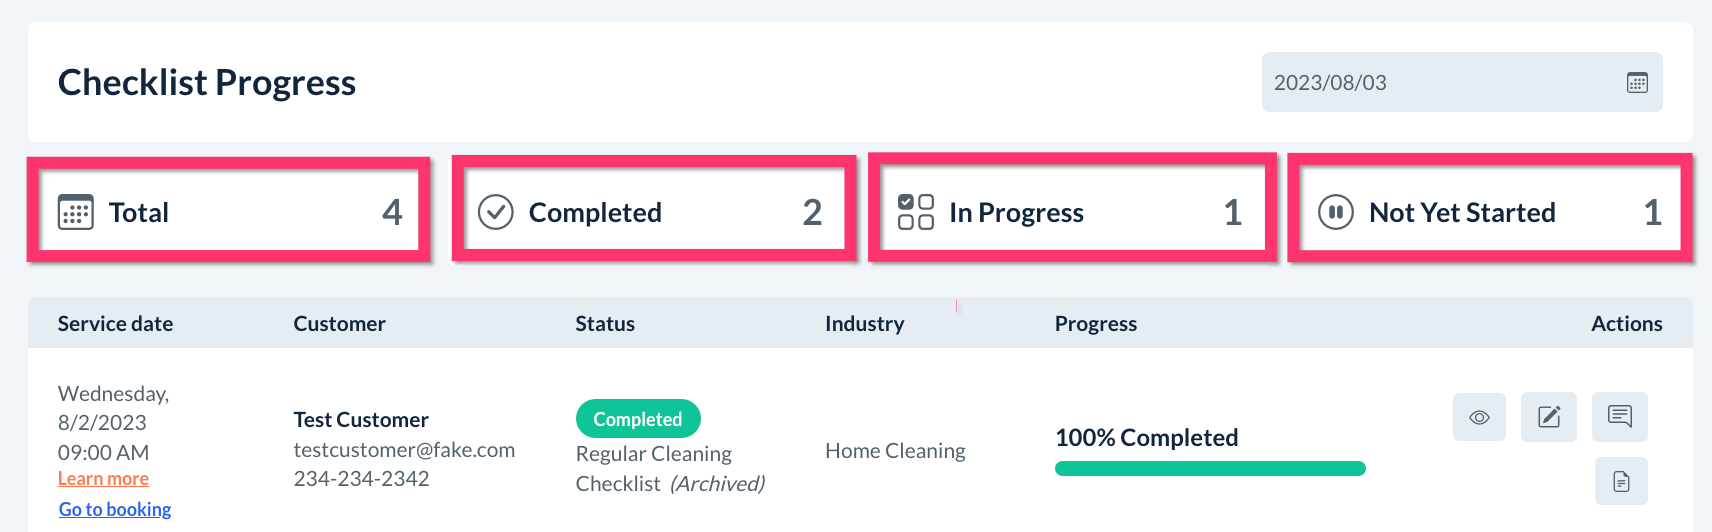
The Checklist Progress dashboard also contains four boxes just above the bookings list. These display the "Total" number of checklists being monitored for the selected date/filters, the number of "Completed" checklists, how many checklists are "In Progress" and how many have "Not Yet Started".
Bookings with more than one checklist will be displayed with the "Multiple Checklist" tag and include a plus sign icon/"More" button to view the rest of the checklists.
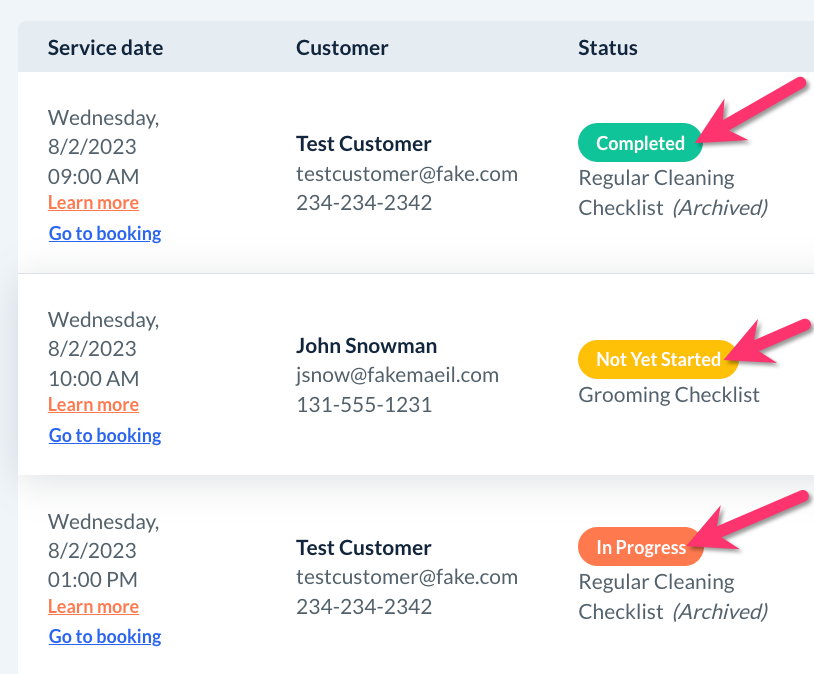
Under the "Status" column, each checklist will display one of the following tags:
"Not Started Yet" - The provider(s)/team, staff, or admin have not yet begun marking off the checklist tasks.
"In Progress" - Some checklist tasks or subtasks have been completed.
"Completed" - All tasks and subtasks are completed or have been marked "Does not apply".
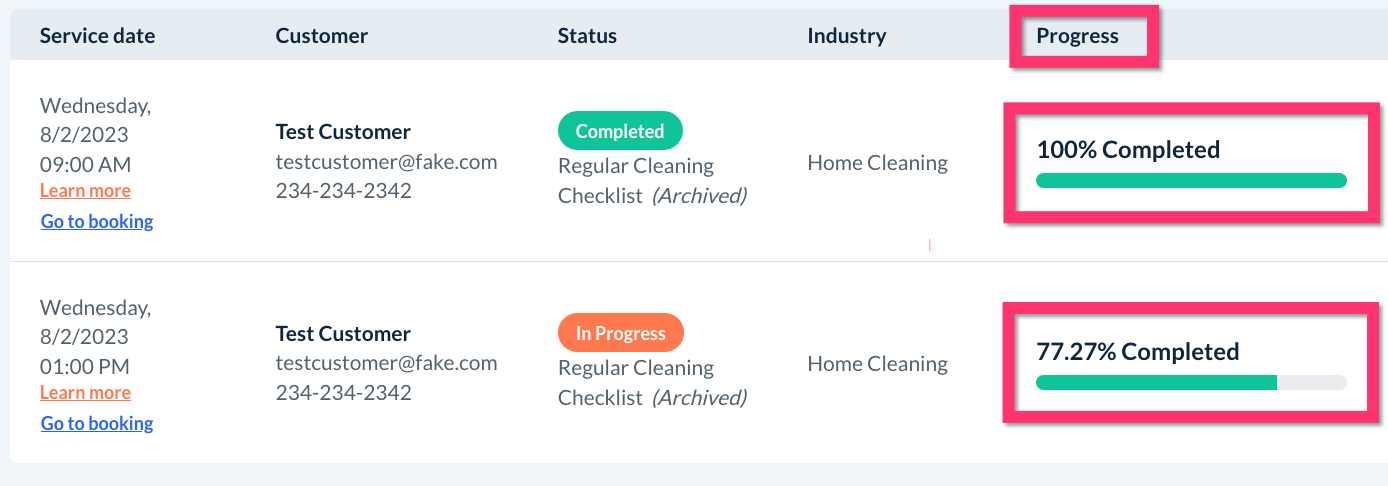
A "Checklist Progress Bar" displays the percentage of completion for each checklist as the tasks are completed.
Action Buttons
Each checklist on the Checklist Progress dashboard has four action buttons: "Checklist Details", "Notes", "Send message", and "Activity".
The "Checklist Details" button allows admin and staff to view the checklist, complete tasks, upload checklist media, and reset or complete the checklist for the provider.
The "Notes" button allows the admin and staff to add/send checklist notes to the merchant (admin), provider, and customer.
The "Send Message" button allows admin and staff to send on-demand messages via SMS or email to the customer or provider(s) associated with a booking.
The "Activity" button shows admin and staff a detailed log of all checklist actions and updates.
Checklist Details
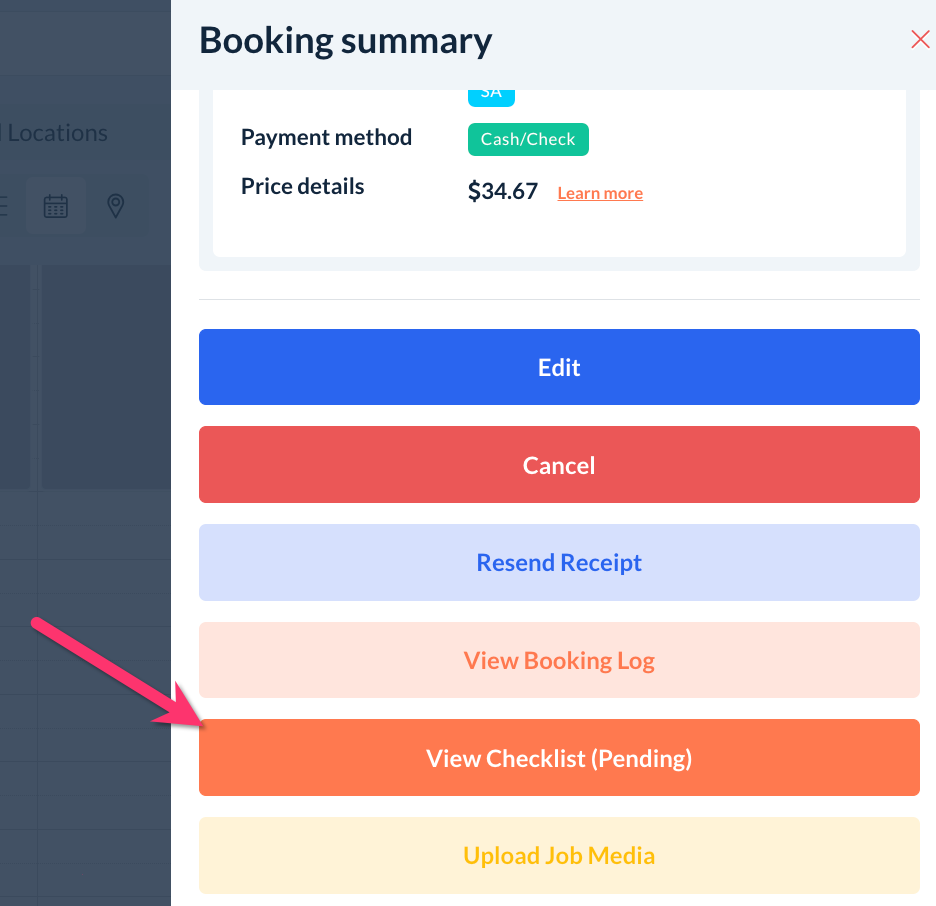
When the eye icon/"Checklist Details" button is clicked, the full checklist will appear in a menu on the right side of the page.
This provides admin and staff access to view, update, send notes, and complete the checklist just like the "View Checklist" button on the booking form/"Reschedule Booking" page.
Notes
The second action button for each job on the "Checklist Progress" dashboard is the "Notes" icon. "Checklist Notes" are chat-like messages that allow users to log details related to the checklist.
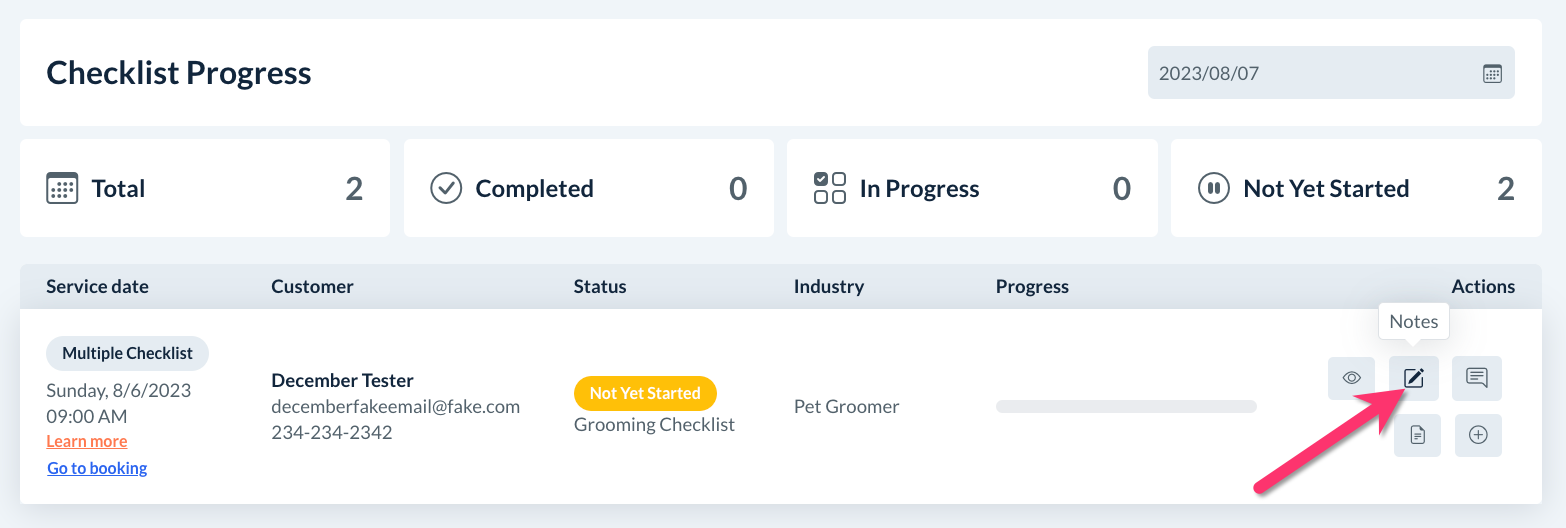
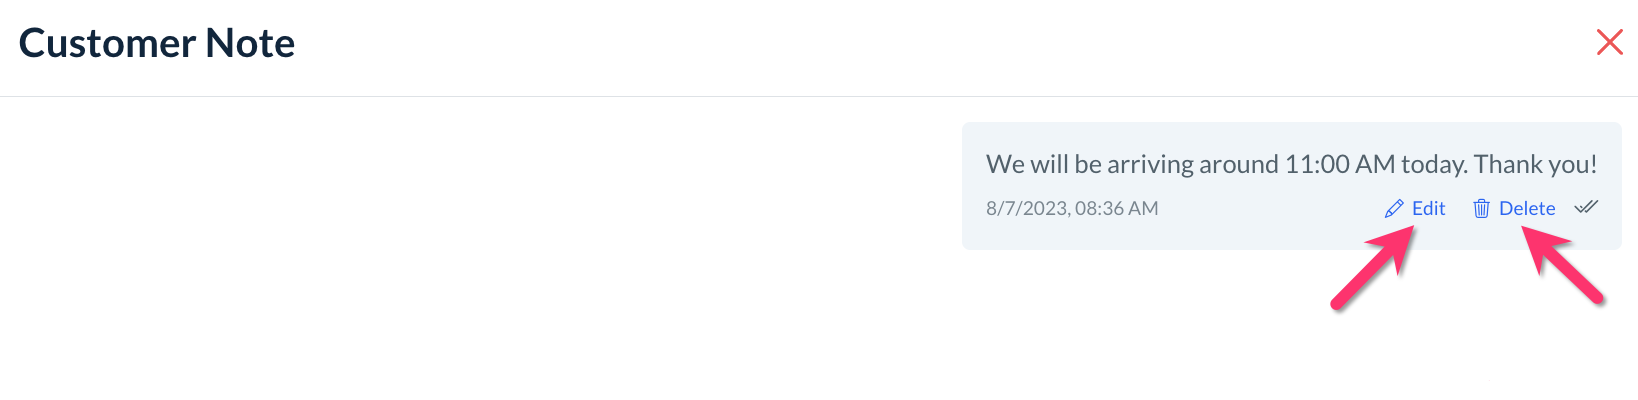
The "Notes" button in this section allows admin and staff to quickly add merchant notes, provider notes, and customer notes to the checklist. When you select one of the three options (merchant note, provider note, or customer note), the system launches a "Note" window where text can be sent using the text box and "Add" button at the bottom of the page.
Notes can be edited or deleted using the "Edit" and "Delete" icons below each message once it has been sent.
Any notes added from this section will be visible in the note sections at the top of the "Checklist Details" page.
Send Message
The third action button for each booking on the "Checklist Progress" dashboard is the "Send Message" icon.
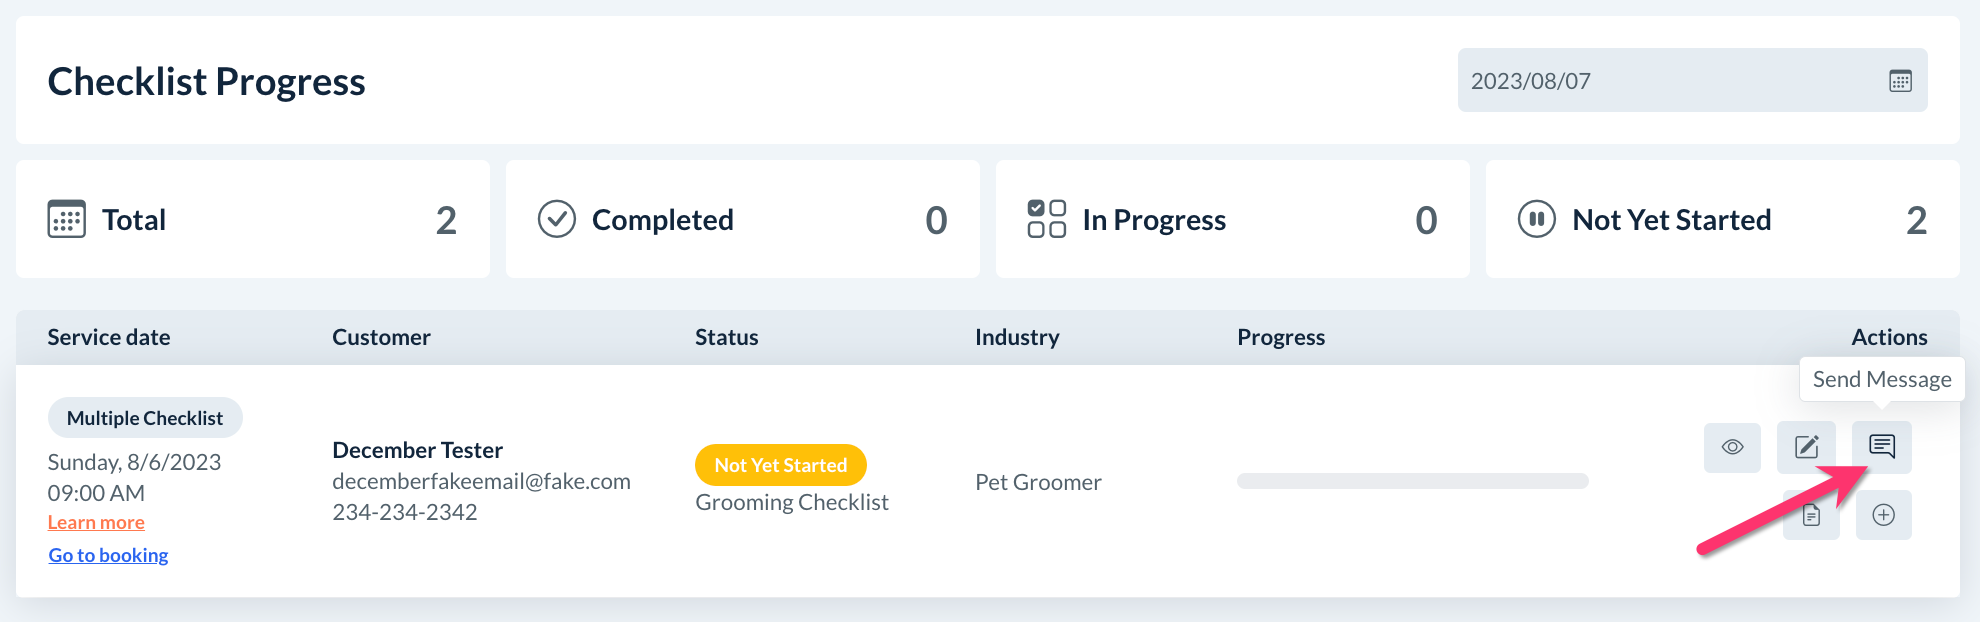
The "Send Message" icon allows admin and staff to send emails or SMS messages to the provider or customer.
Please Note: You must verify and set up your email and/or SMS notification settings before you can email or text message customers and providers using this feature.
Click here for our guide on how to set up and verify your business email address.
Click here to learn how to set up and connect a Twilio integration to send SMS messages.
Send an Email
If you select "Customer" or "Provider" from the "Send Email" options, the system will open a "Send Email" pop-up window.
The customer or provider's email address will be prefilled in the "Send to" field at the top of the page. You can also delete and replace or add additional emails to this section.
Add a subject line for the email by editing the "Write subject here" text in the second field from the top of the page.
In the email editor box, you can replace the "Write your message" text with your custom message or modify the email in any way you see fit.
The "Custom Message Email" customer and provider email template is used for emails sent from this feature.
If the template is not enabled yet, you can go to Settings > Notifications > Email > Customer or Provider tab > Checklist section. The toggle button next to the "Custom Message Email" template to set it to "Enabled".
You can also change the template's style, format, and default content by using the "Edit" button.
Once the message has been drafted, you can send a test email to your email address by using the "Send Test E-Mail" button to check the look and feel of the email before it is sent.
When the email is ready to be sent, click the blue "Send" button at the bottom of the window.
A green system alert will appear in the top-right corner confirming the email has been sent successfully.

Send an SMS
If you select "Customer" or "Provider" from the "Send SMS" options, the system will open a "Send SMS" pop-up window.
The customer or provider's phone number will be prefilled in the "Send to" field at the top of the page. You can also delete and replace or add additional phone numbers to this section.

In the SMS editor box, you can replace the "Write your message" text with your custom message. To add links to the message, click the grey "Insert Link" button and paste the link into the field below, then click the blue "Add URL" button.
The "Custom Message SMS" customer and provider SMS templates are used for messages sent from this feature.
If the template is not enabled yet, you can go to Settings > Notifications > SMS > Customer or Provider tab > Checklist section. The toggle button next to the "Custom Message SMS" template to set it to "Enabled".
You can also change the template's default content using the "Edit" button in the notifications section.
Once the message has been drafted, you can send a test SMS to your phone number by using the "Send Test SMS" button.
When the SMS is ready to be sent, click the blue "Send" button at the bottom of the window.
A green system alert will appear in the top-right corner confirming the SMS has been sent successfully.

Activity
The fourth action button for each booking on the "Checklist Progress" dashboard is the "Activity" icon.
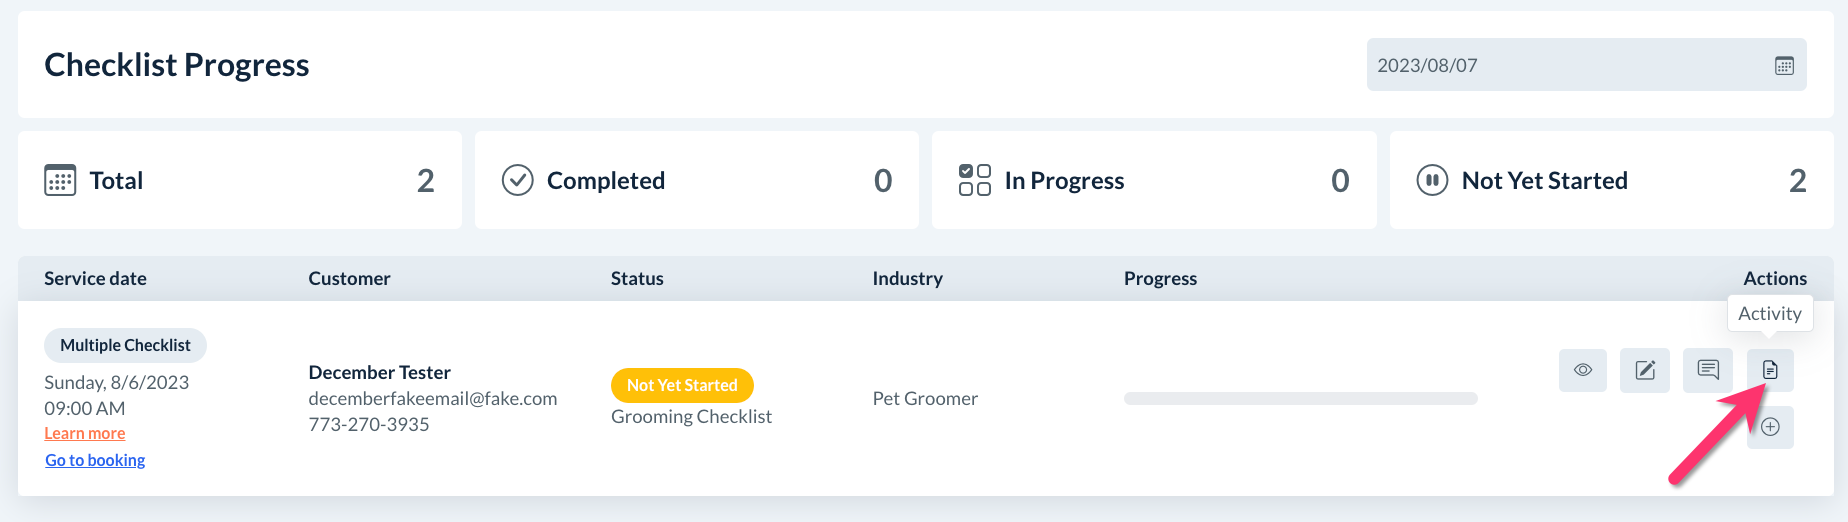
Upon clicking the "Activity" icon, the system will open an "Activities" menu on the right side of the screen. This section displays event logs for the checklist, including who updated and/or completed each subtask.

The dropdown menu at the top of the section allows you to view "All" activity, or to just view "Provider" activity or "Merchant" (admin or staff) activity.
The Growing and Premium subscriptions also display the checklist activity under:
Logs > System Logs
To filter the logs for checklist activity, click on the second dropdown menu from the left at the top of the page and select "Checklist".
Other filters can be applied to view checklist activity by user type ("Admin", "Customer", "Provider", or "Staff" ) or for a specific date or date range.
Next Steps
After familiarizing yourself with the Checklist Progress dashboard, you can explore how to view and use other admin/staff checklist tools in the guides below.
Click here to learn how to use the various booking form checklist tools for admin and staff.
Click here to learn about the "admin checklist dashboard", including how to view, filter, add, edit, archive, publish, and delete checklists.