The purpose of this article is to help you learn more about:
How to hide checklist(s) for a booking
How to view, update, and complete checklist subtasks
How to reset or complete a checklist for the provider
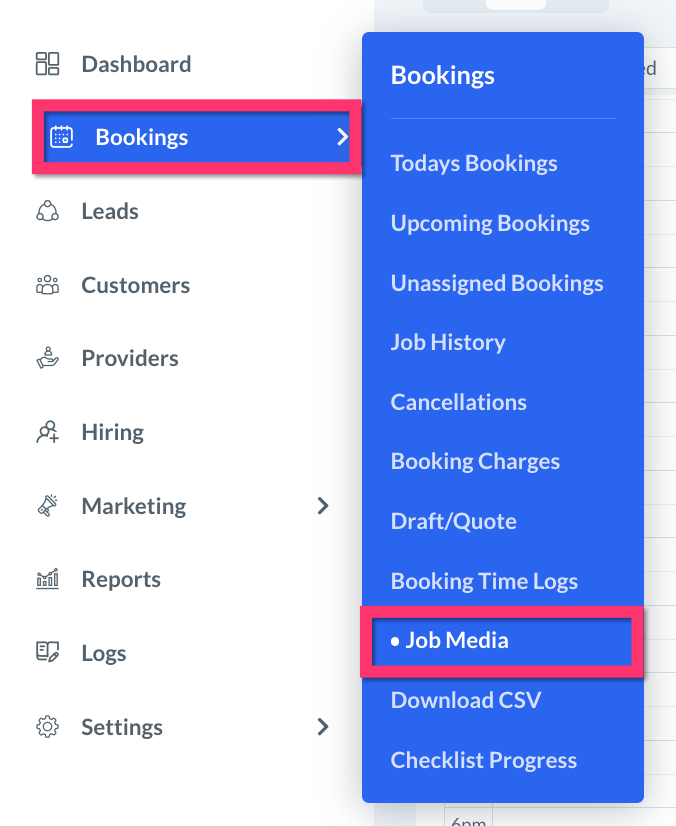
How to add, tag, and view job media to a checklist or booking
Booking Form Checklist Tools
In addition to the admin checklist dashboard, admin and staff (with permission) can use different Checklist Module tools for bookings from that job's "Booking Details" / "Reschedule Booking" page.
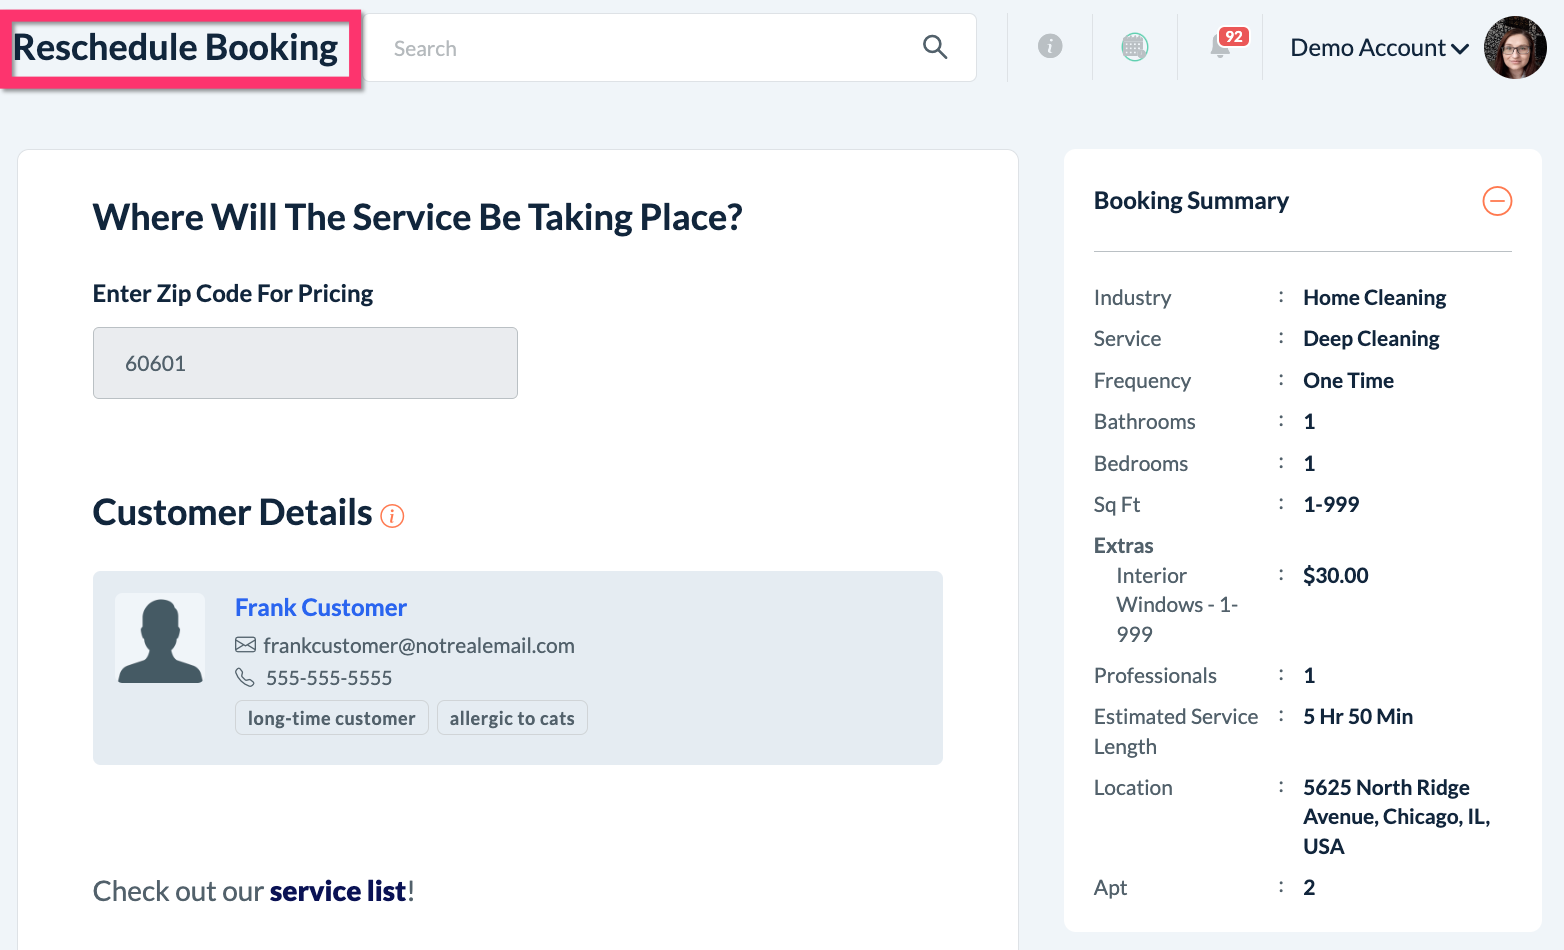
To get to the "Reschedule Booking" page, you must first locate the booking in the system. Use the search bar at the top of the admin dashboard to search for the booking by the customer's name, phone number, address, or email, or go to any of the following sections:
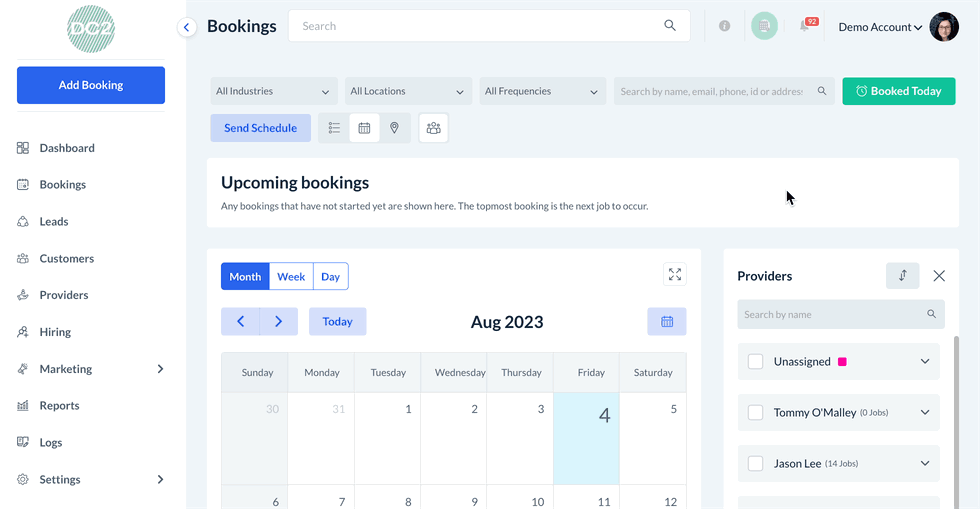
Dashboard > Calendar View
Dashboard > Listing View
Dashboard > Map View
Bookings > Today's Bookings
Bookings > Upcoming Bookings
Bookings > Unassigned Bookings
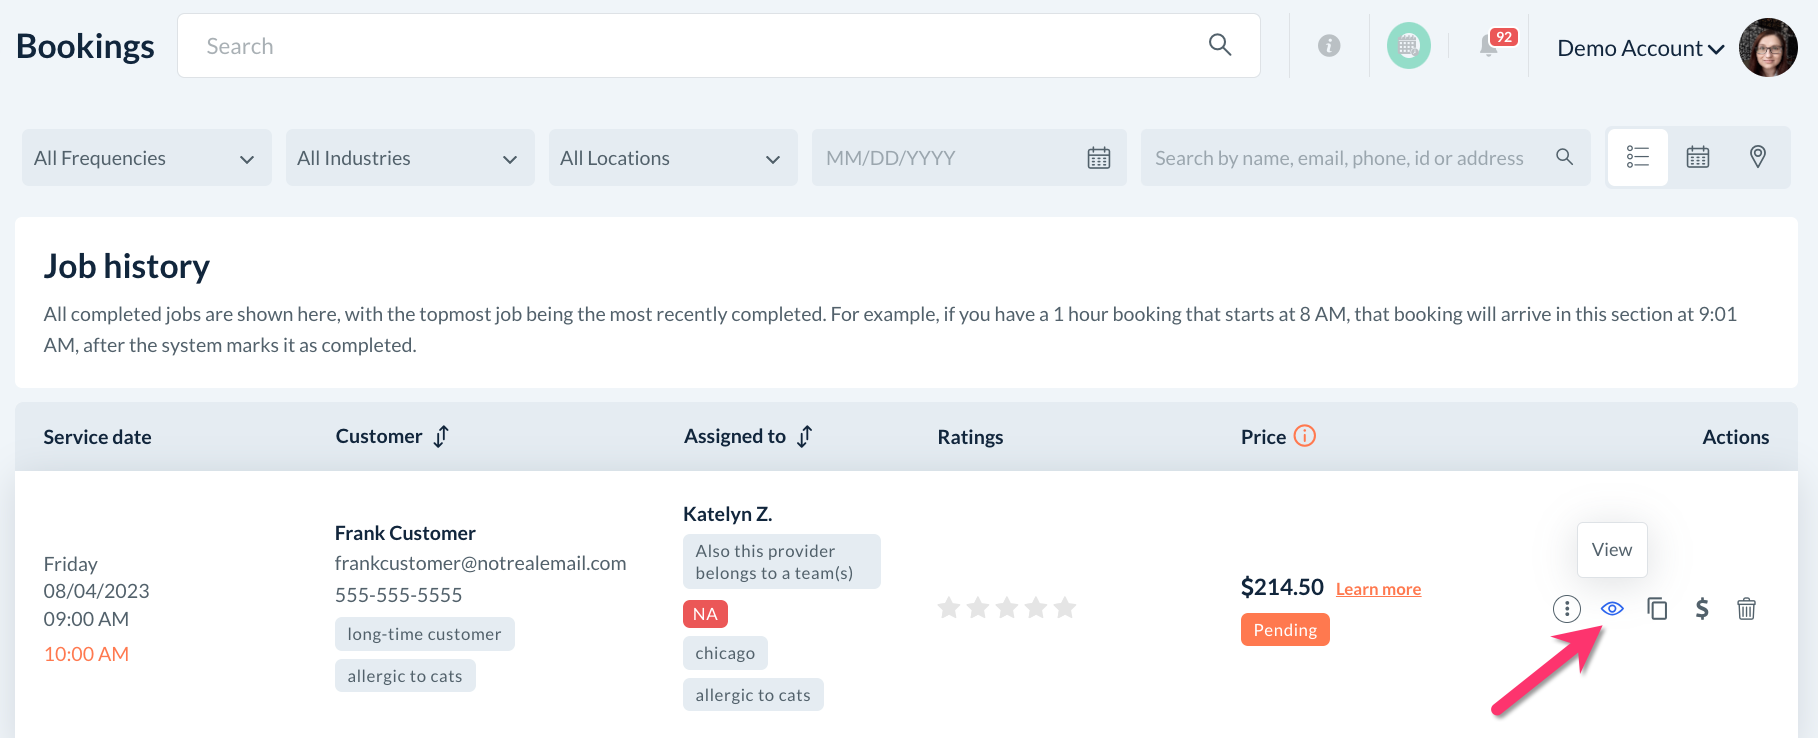
Bookings > Job History
Click the pencil icon/"Edit" button if viewing upcoming bookings in list view.

Click the eye icon/"View" button for past bookings in list view.
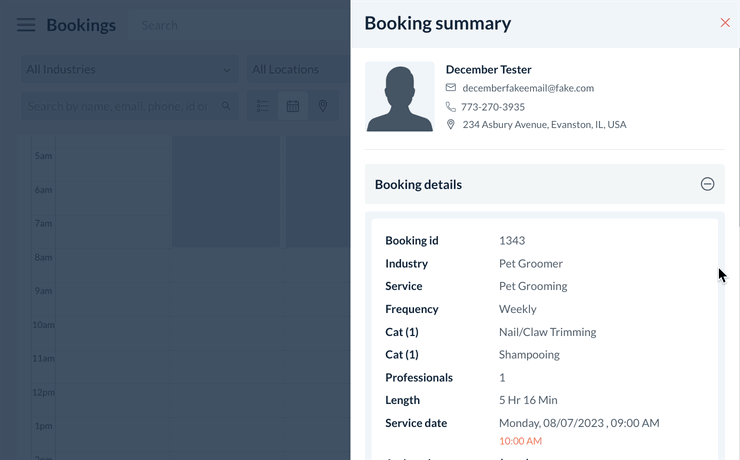
In calendar view, click on the booking in the calendar and select the "Edit" button from the "Booking Summary" menu.
Hide a Checklist
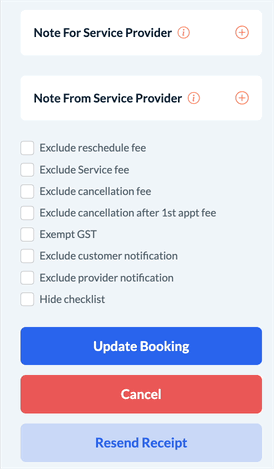
When the admin or staff is booking or editing an appointment, the booking form includes a "Hide checklist" option alongside the other options "Exclude customer notification", "Exclude provider notification", etc.
The "Hide Checklist" checkbox can be used by the admin or staff to hide one or multiple checklists from the provider(s) and customers.
View, Update, and Complete a Checklist
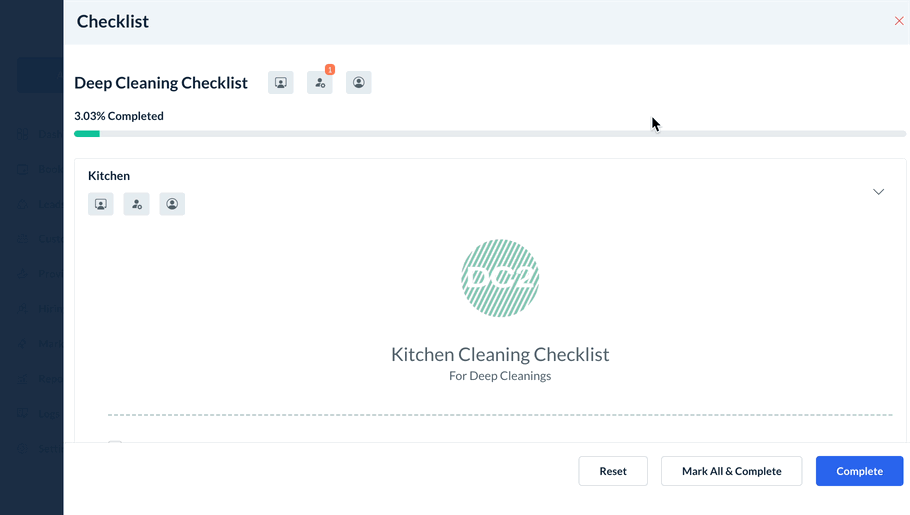
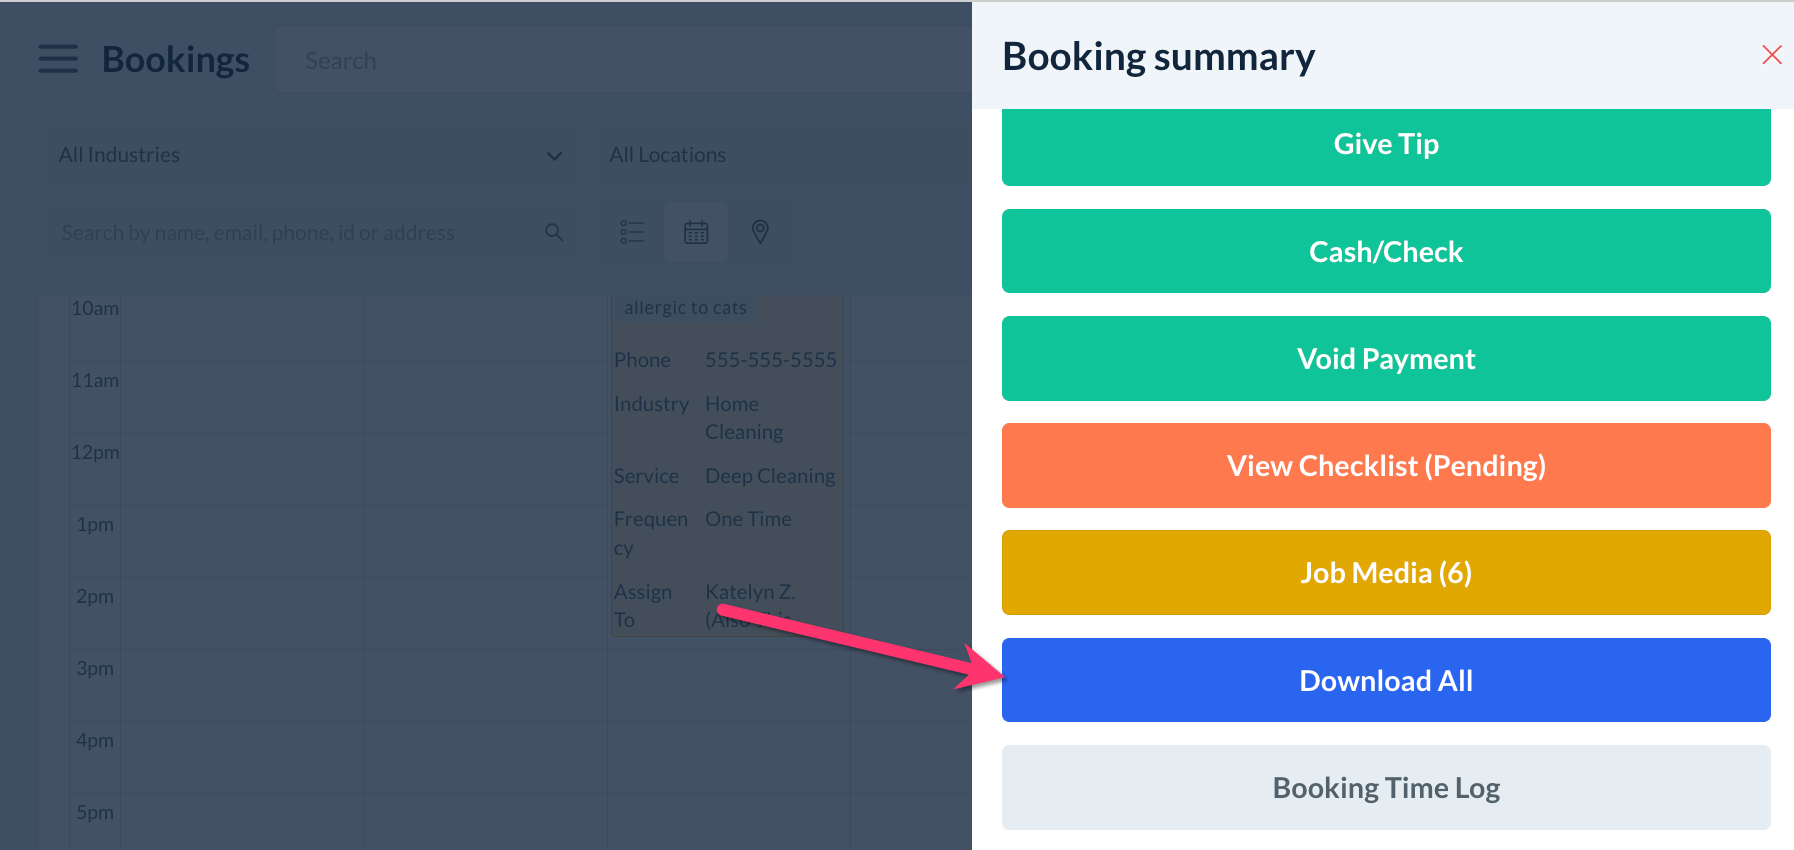
Admin can view, update, and complete subtasks for any checklist(s) associated with the booking by clicking on the "View checklist" button on the "Reschedule Booking" page.
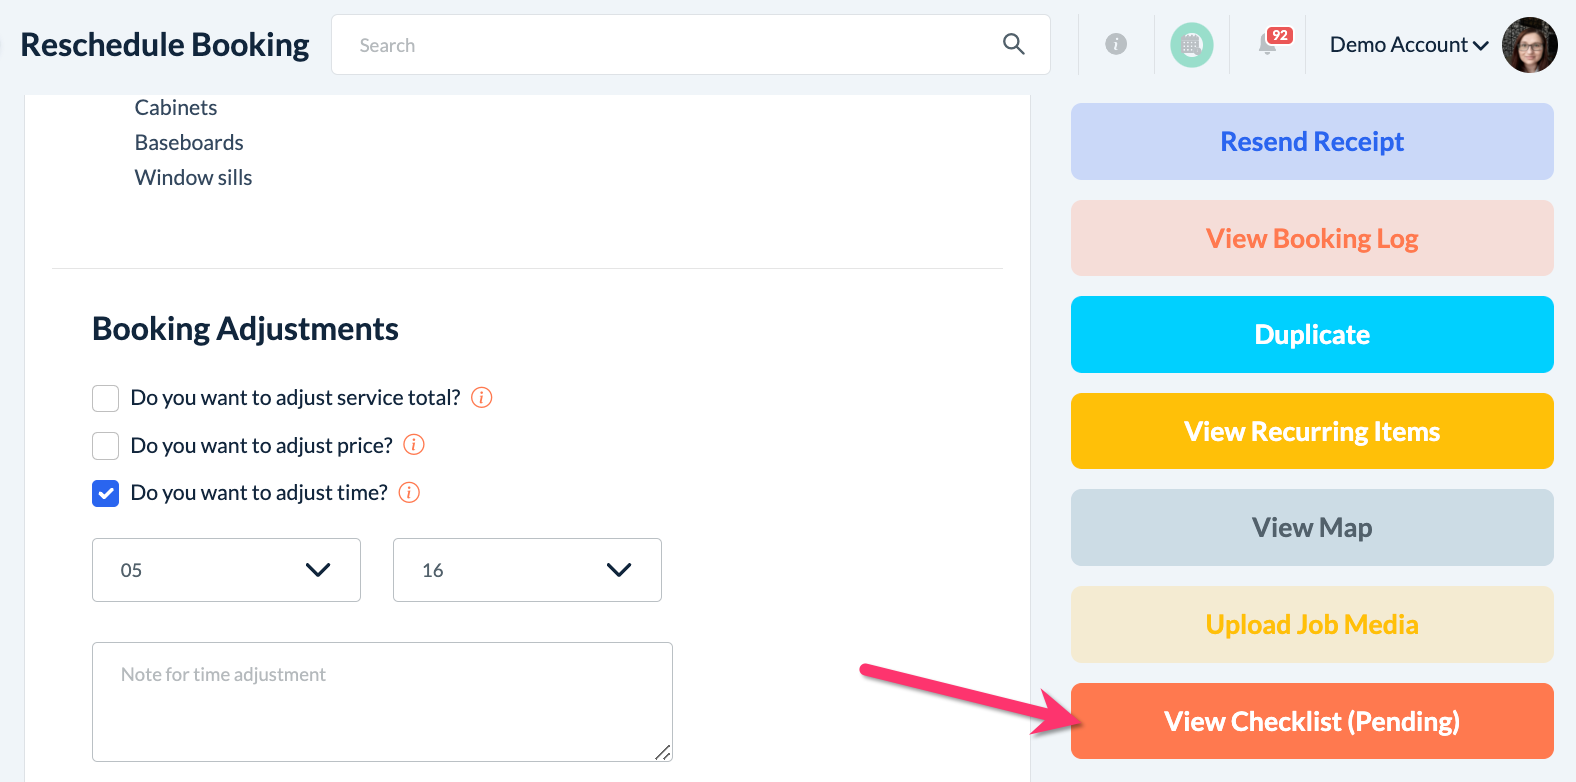
The "View Checklist" button displays the checklist status so you can see if it is pending or completed.
"Pending" means one or more required subtasks have not yet been completed, or, the provider, staff, or admin has not clicked the "Complete Checklist" button to mark the checklist as completed.
"Completed" means all required tasks are completed and the "Complete Checklist" button has been used.
The "Booking Summary" menu in the calendar view also has a "View Checklist" button.

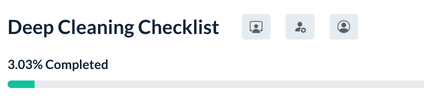
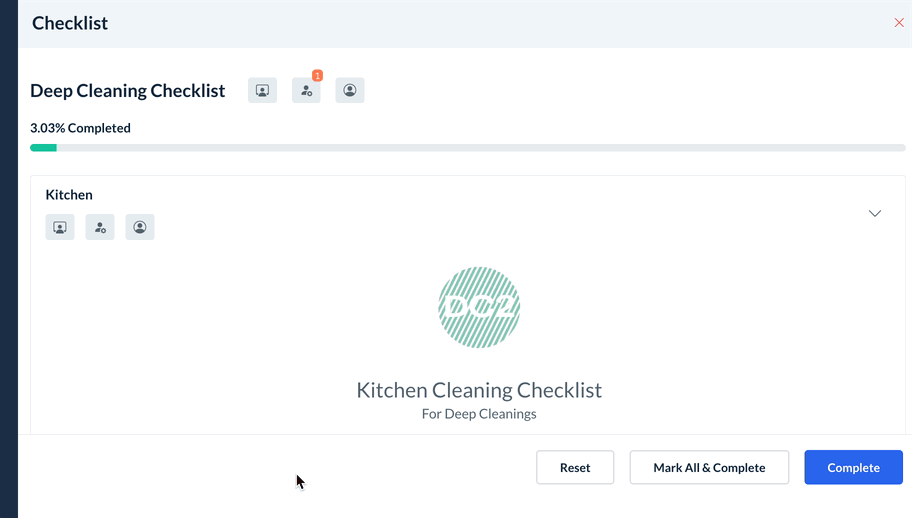
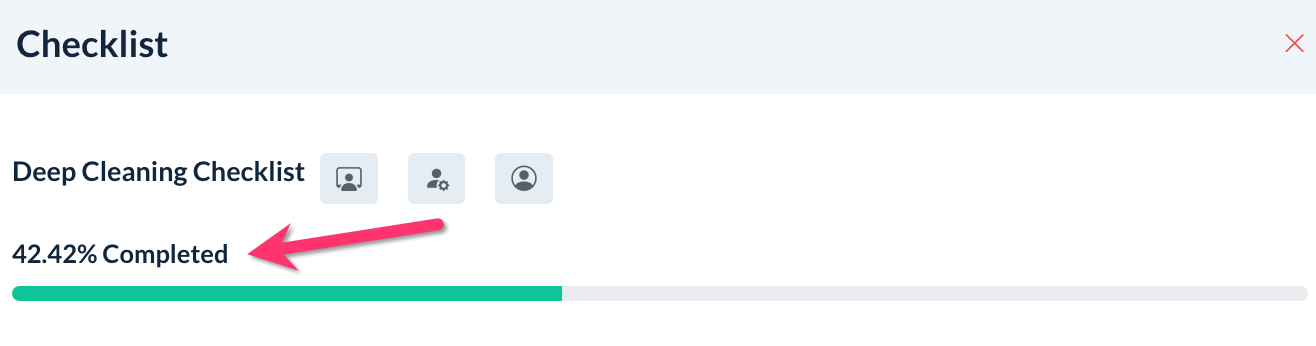
Once you click on the "View Checklist" button, a window will open from the right side of the page displaying the checklist and admin checklist options.
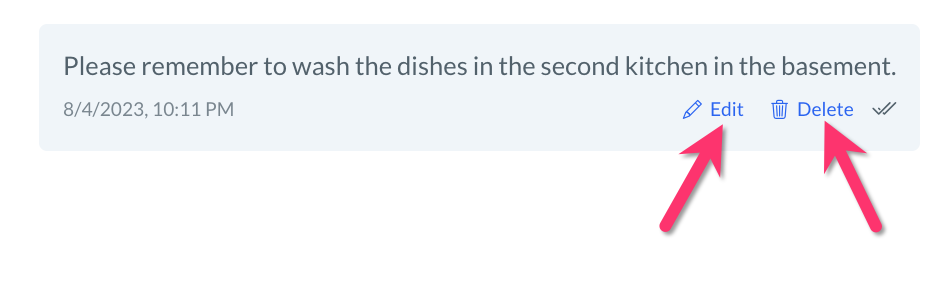
The top of the page has three "Checklist Note" icons next to the checklist name: "Merchant Note", "Provider Note", and "Customer Note". Admin and staff can use these options to send "checklist notes", a chat-like messaging interface to log and share details related to the checklist tasks.
The "Merchant Note" option sends a note that is only visible to the admin or staff.
The "Provider Note" option sends a note that is visible to the provider.
The "Customer Note" option sends a note that is visible to the customer.
To send a new note, click on one of the note icons to add notes for a specific user to see. Type a message into the text box at the bottom of the section and click the blue "Send" button.

New notes added by providers, customers, and other staff will display an orange icon showing the number of new notes on top of the merchant-, provider-, or customer-note icons.
In addition to adding notes, the system allows admin and staff to edit or delete notes they have added in these sections.
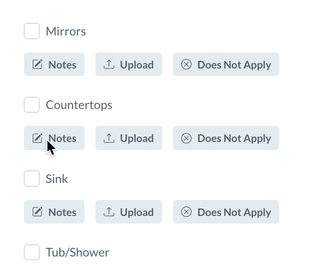
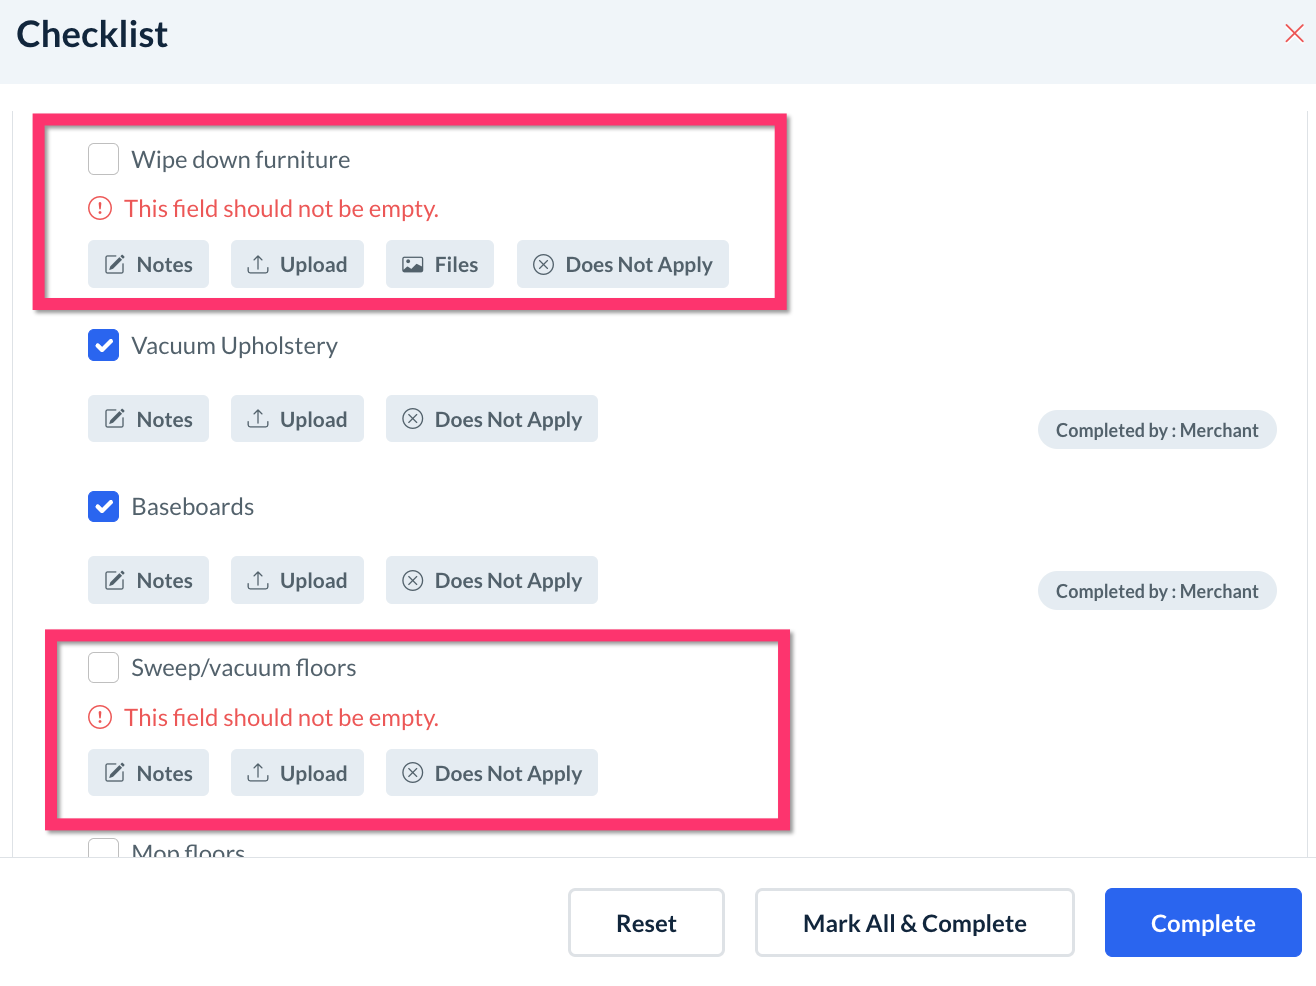
The "Checklist Details" button displays all tasks contained in the checklist. To display or hide all subtasks within a section, click the arrow icon to expand or collapse a task.
There are three buttons for each subtask on the Checklist Details page
The "Notes" button allows admin and staff to send/add notes for a specific subtask.
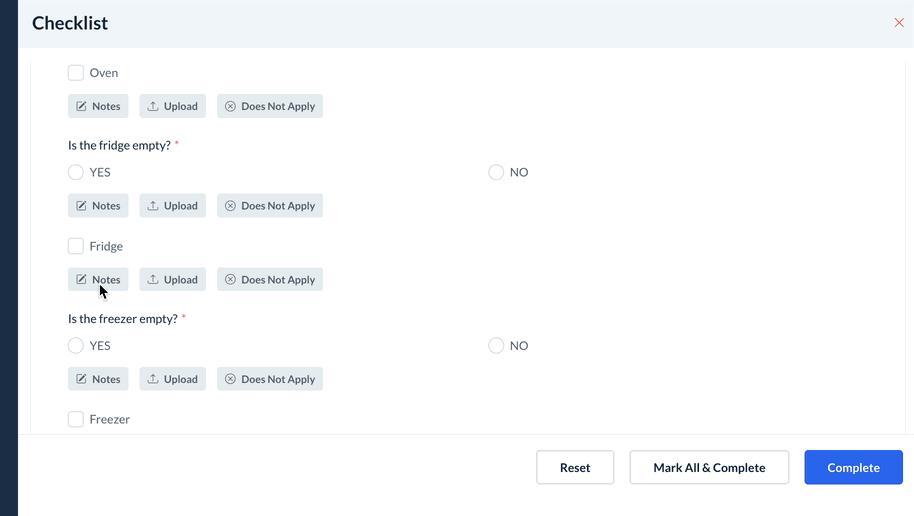
The "Upload" button allows admin and staff to upload job media for a specific subtask using an "Attach File" pop-up window.
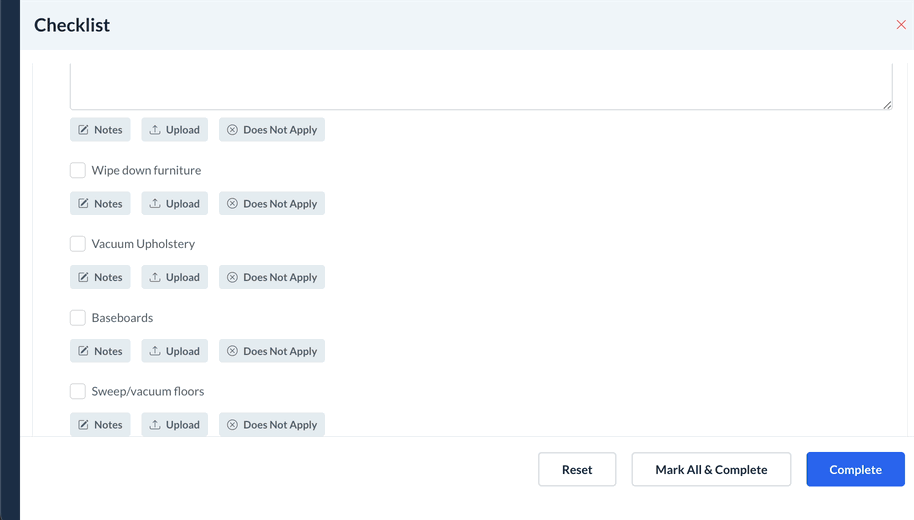
The "Does Not Apply" button allows admin and staff to cancel a specific subtask that is not included in the service.
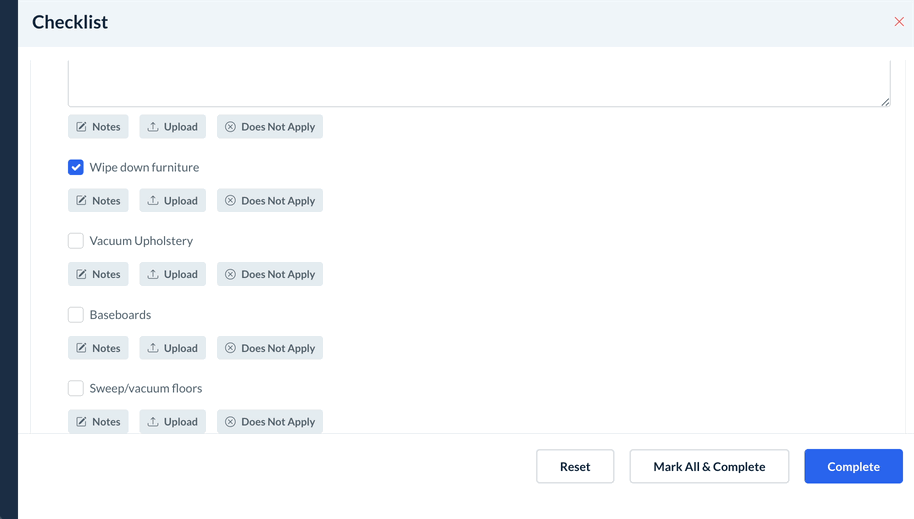
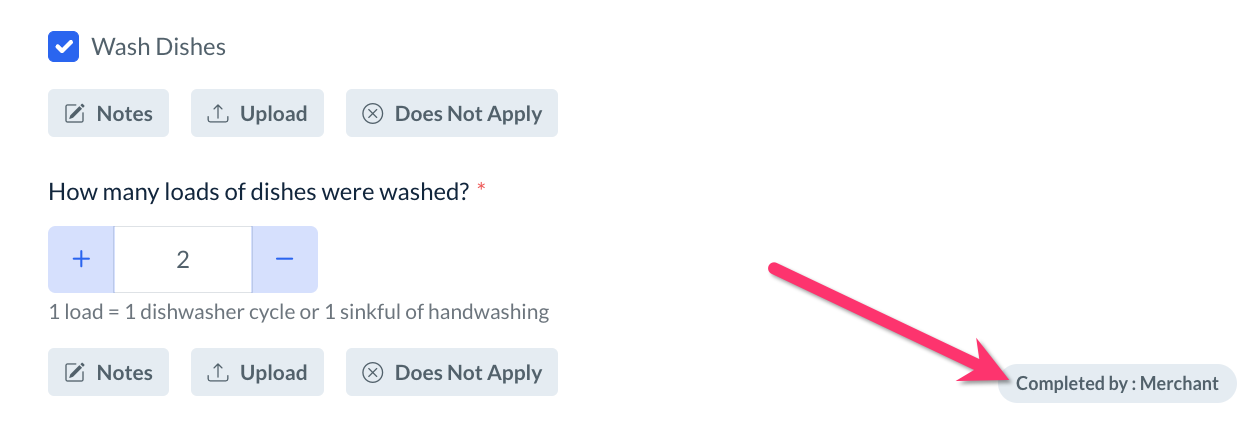
Subtasks can be marked as "completed" by clicking on the checkbox to the left of the subtask.
Tasks that are completed by admin or staff will be marked as "Completed by: Merchant".
The checklist progress bar at the top of the page will increase each time a subtask that impacts the progress bar is completed. Once all subtasks have been marked as "complete", the progress bar with display "100% Completed".
At the bottom of the checklist details page, there are three admin-only options available.

The "Reset" button clears all tasks, subtasks, notes, and job media added to the checklist.
A pop-up window will appear asking if you are sure you want to clear all checklist progress. If you are sure, click the blue "Reset" button to proceed.
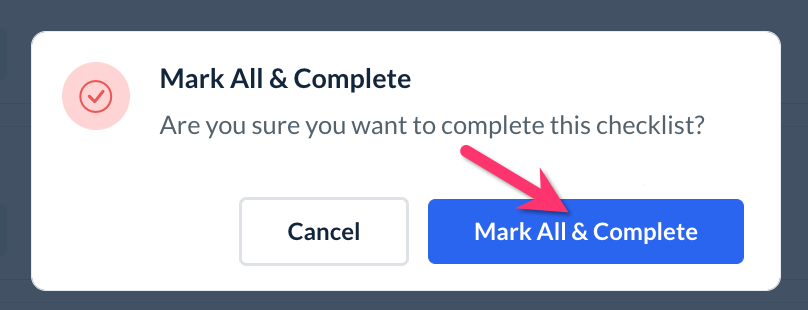
The "Mark All & Complete" button marks the checklist as complete without needing to mark each subtask as complete. This action finalizes the checklist so the provider(s) can no longer make changes.
A pop-up window will appear asking if you are sure you want to complete the checklist. If you are sure, click the blue "Mark All & Complete" button to proceed.
The "Complete" button marks the checklist as complete once all subtasks have been marked. If any required subtasks have been missed, the checklist will display the "Required" message for that element so it can be completed.
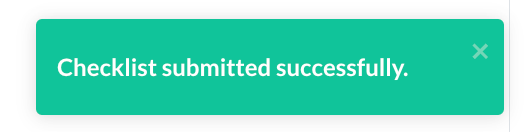
Once a checklist has been completed, a green system alert will appear in the top-right corner of the page confirming that the checklist has been submitted successfully.
The checklist will also show as "Completed" throughout the system, including on the Checklist Progress page and the "View Checklist" button in the booking itself.

Job Media
Admin and staff also have access to two "Job Media" sections via the Checklist Module. Job media (previously called "job pictures") refers to any files uploaded to the booking checklist(s) or "Job Media" section.
Media uploaded by admin, staff, and providers can be shared with customers via the checklist media tag settings. Click here to learn more about how to show customers checklist media using media tags.
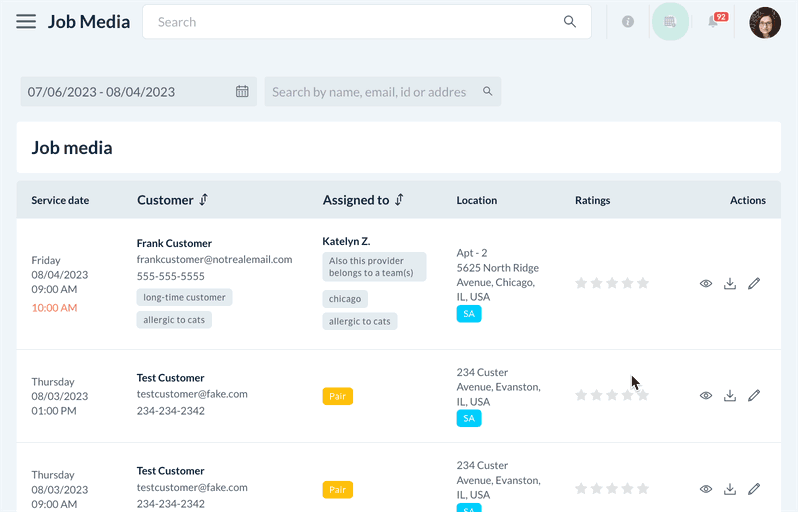
The Job Media Dashboard
The Job Media dashboard can be found under the left-side menu in the admin/staff dashboard under:
Bookings > Job Media
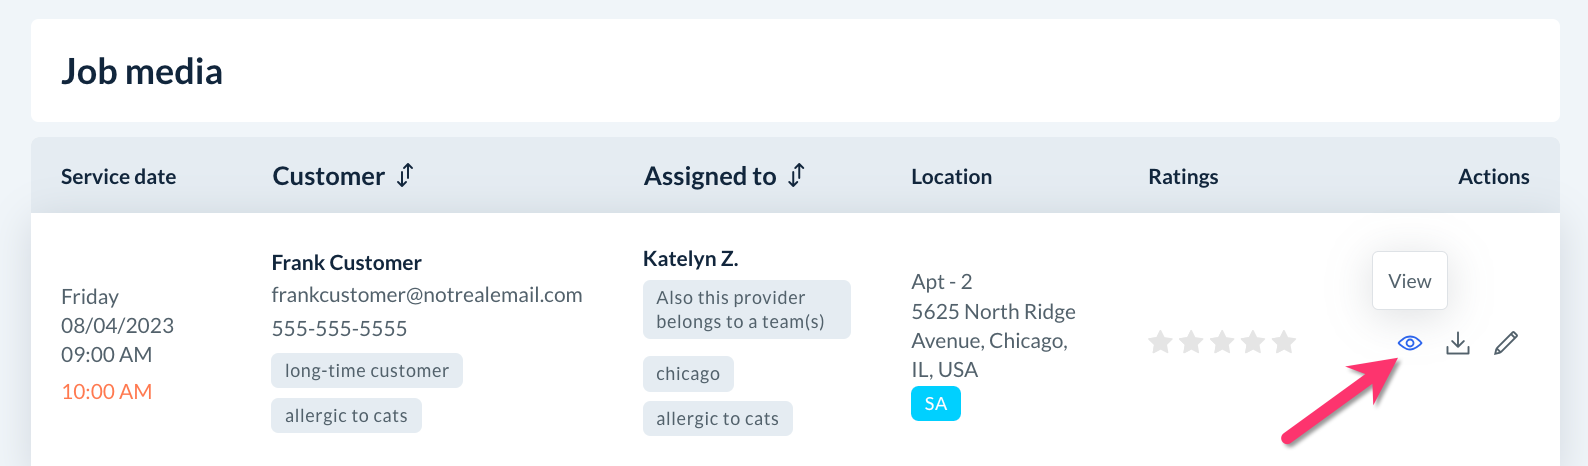
Search for a specific booking by selecting a date or date range from the filter at the top of the page. Admin can also search for bookings by customer name, email address, phone number, etc. using the search bar at the top of the page.
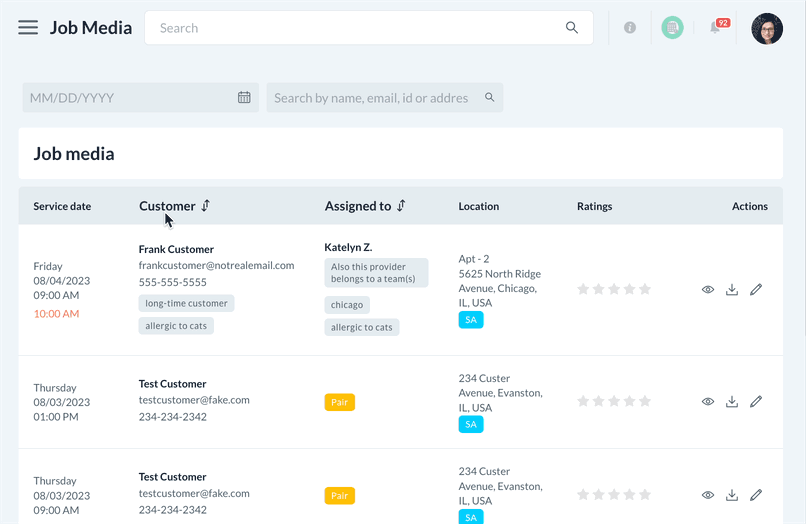
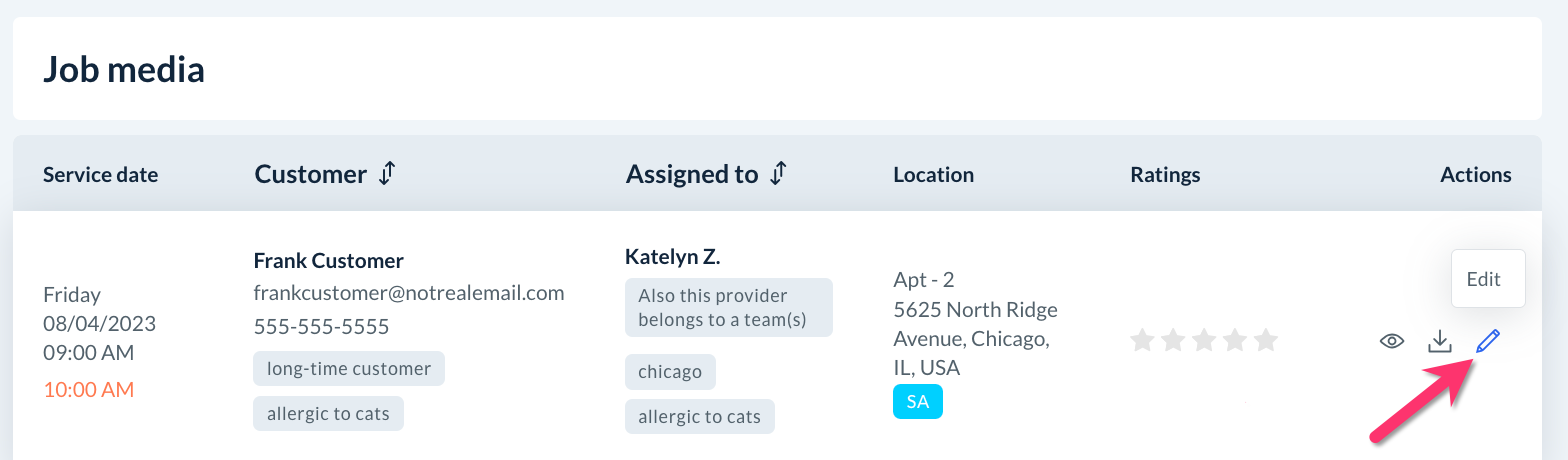
Admin and staff can perform the following actions under the "Actions" column for each booking: "View", "Download All", and "Edit".
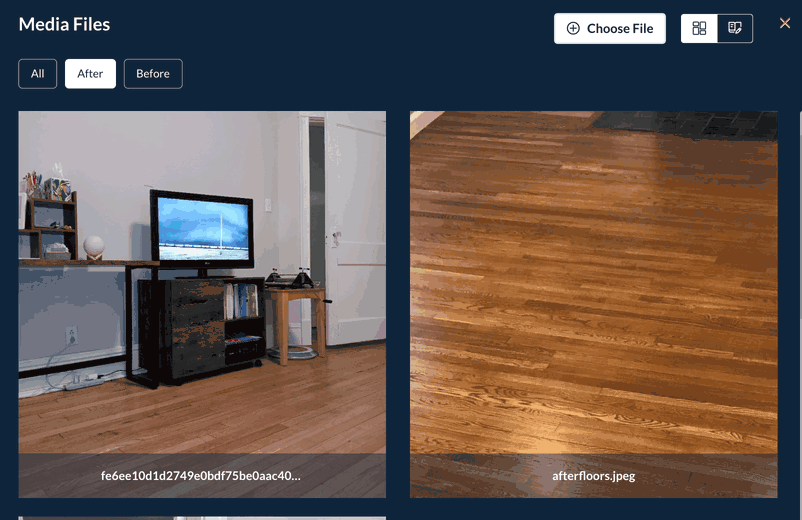
Click on the eye icon/"View" button on the booking's "Media Files" page. Here, you can view all files uploaded to that booking's checklist(s).
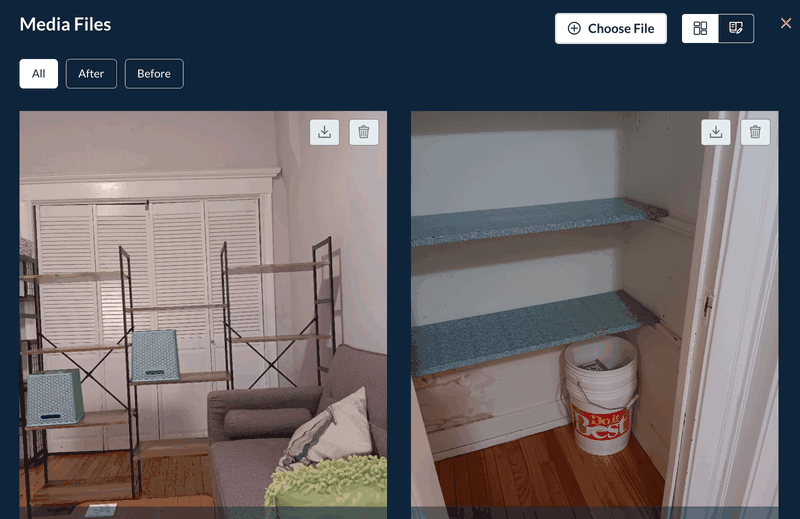
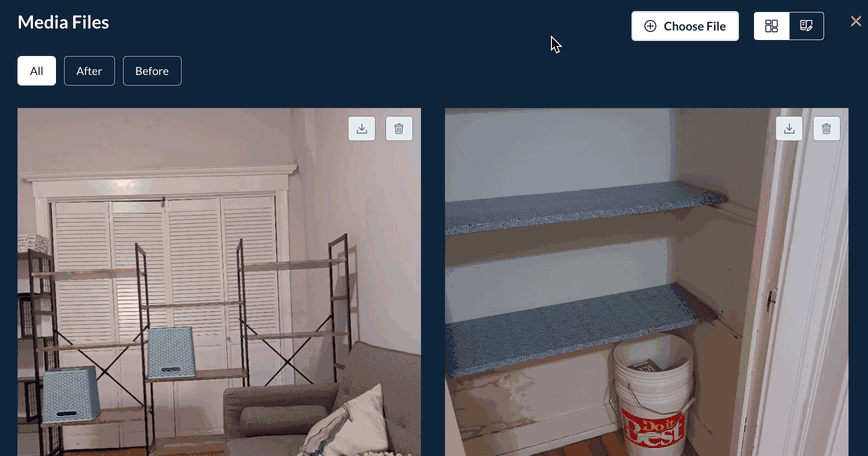
Click the "All" button near the top-left corner of the page to view all media added to the booking. If tags are enabled for this checklist's media, click on a tag name to see the media using that tag.
Click here to learn more about setting up checklists and job media tags.Click the white "Choose File" button near the top right corner of the page to upload a new file to the booking's Media Files section.
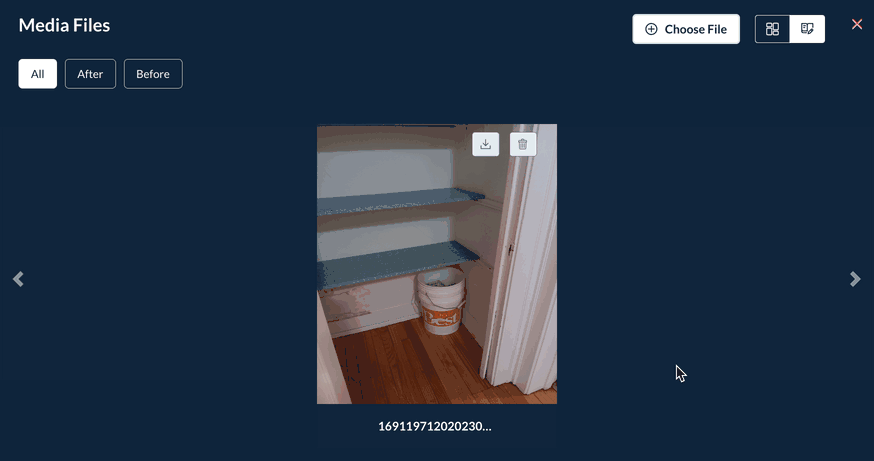
Use the "Collage View" or "Gallery View" buttons to switch how media is displayed on the Media Files page for this booking.
Click on the down arrow icon/"Download" icon on the top right corner of a specific file to download that file.
Click on the trashcan icon/"Delete" icon on the top right corner of a specific file to delete that file.
Click on the down arrow icon/"Download All" button for all media uploaded to this booking.
A pop-up window will appear asking if you are sure you want to download all job media for this booking. If you are sure, click the blue "Yes" button to proceed. A zip file containing the job media will automatically download to your local hard drive.
The "Download All" button for job media is also available on the "Booking Summary" side menu when viewing jobs in the calendar view.
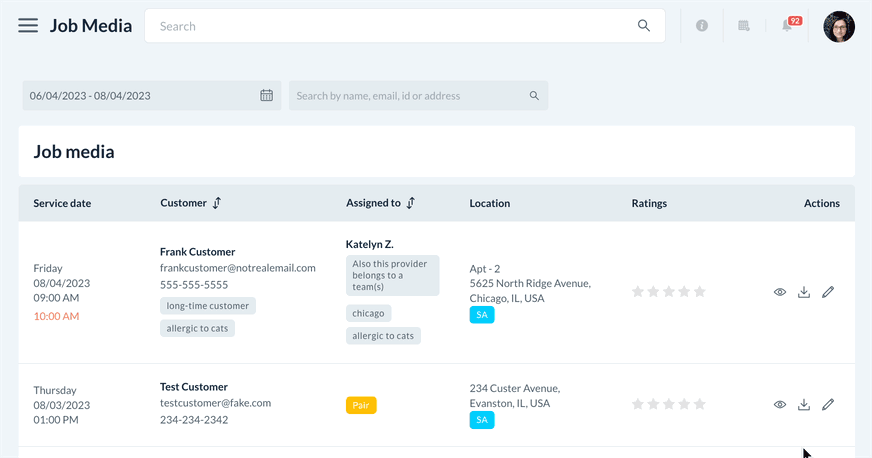

Click on the pencil icon/"Edit" button to visit the "Booking Details"/"Reschedule Booking" page for the booking.
The Job Media Button
The "Job Media" button in the Booking Summary menu/"Reschedule Booking" page also allows you to view and filter job media that has been uploaded by admin, staff, and providers to the checklist(s) or "Job Media" section for a specific booking.
Admin and staff can upload new booking media directly in this section in addition to media added to the checklist.
Next Steps
After familiarizing yourself with the booking form checklist tools, you can explore how to view and use other admin/staff checklist sections in the guides below.
Click here to learn about the "admin checklist dashboard", including how to view, filter, add, edit, archive, publish, and delete checklists.
Click here to learn about the "Checklist Progress" dashboard and how to use it to view checklist progress, send notes, send a message to the customer or provider(s), and more.