The purpose of this article is to help you learn:
How to edit header and footer menus
How to disable a header or footer
What are the header and footer menus?
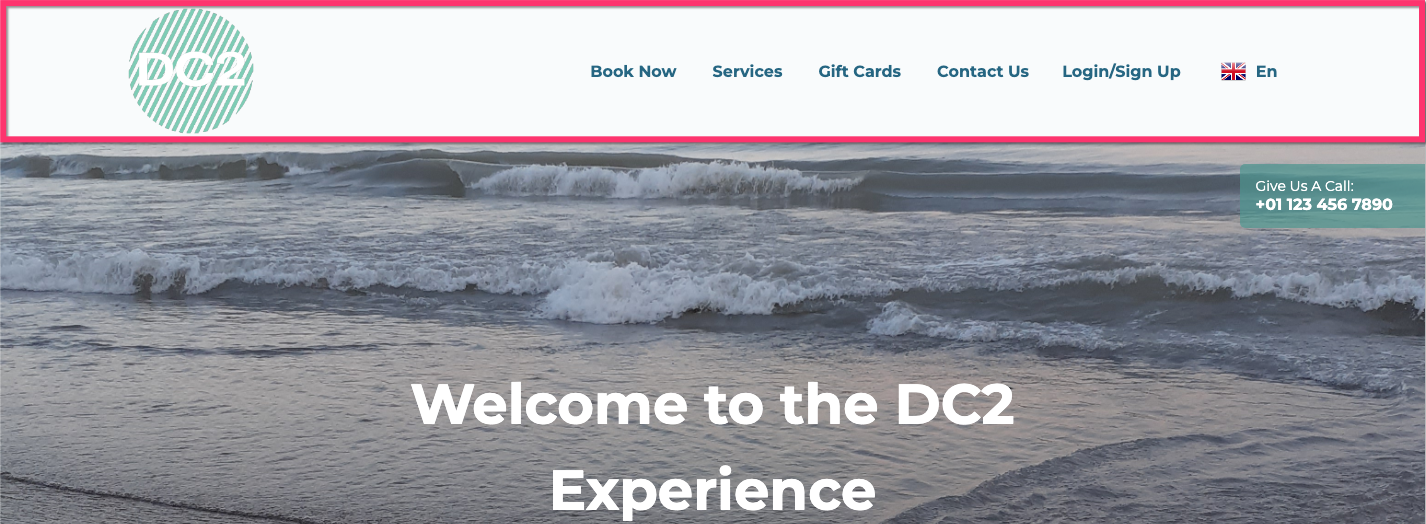
The header menu, when enabled, is the topmost section on any given page of your website. This menu displays your business's logo as well as links to important pages of your website. If you are utilizing the translation feature, you can also click the flag icon to switch between languages.
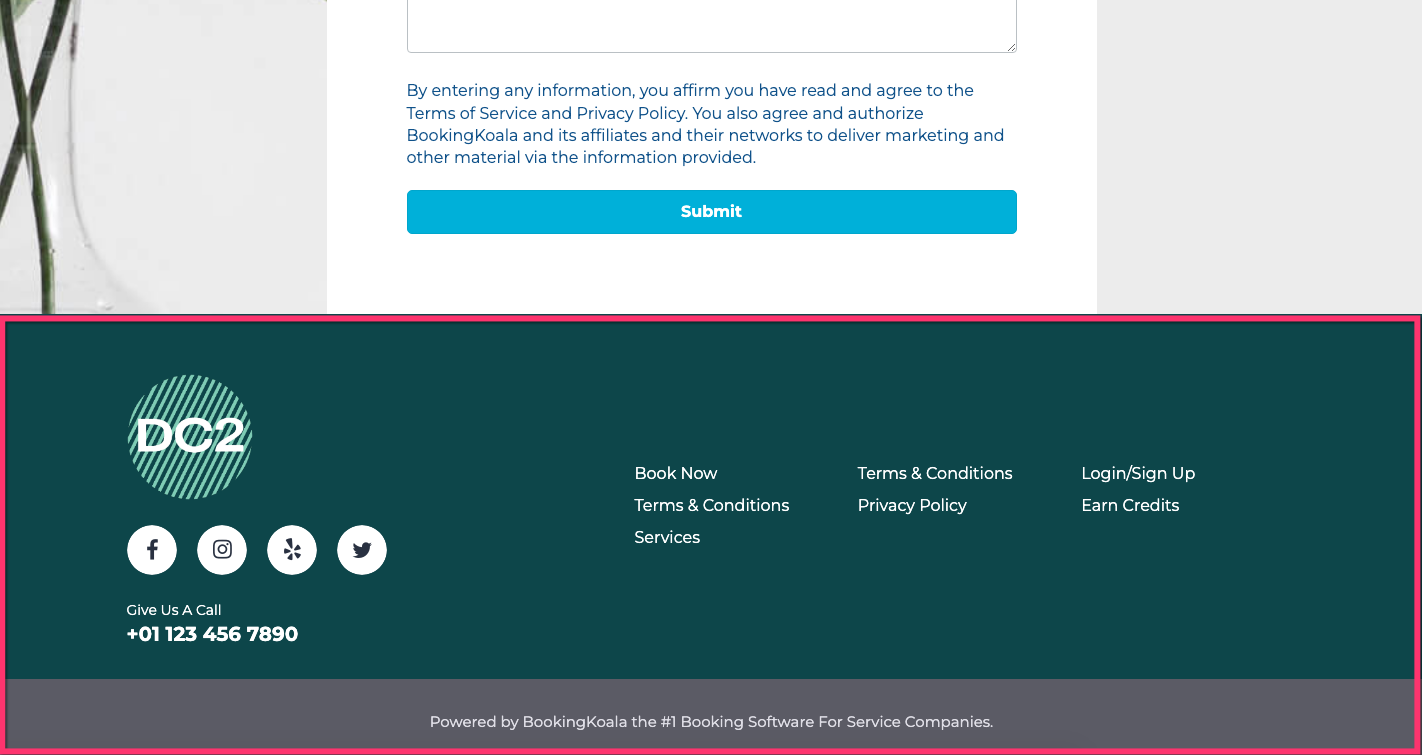
When enabled, the footer menu is displayed at the very bottom of your webpage. This menu also contains your business's logo, links to various pages, as well as additional options for linking social media buttons or adding contact information.
When you first sign up for BookingKoala, your account comes with a website that has the header and footer menus enabled for all pages. However, if you want to disable one or both, can you easily do so.
Disable the Header/Footer Menus for the Entire Site
To disable the header and/or footer in general, please go to:
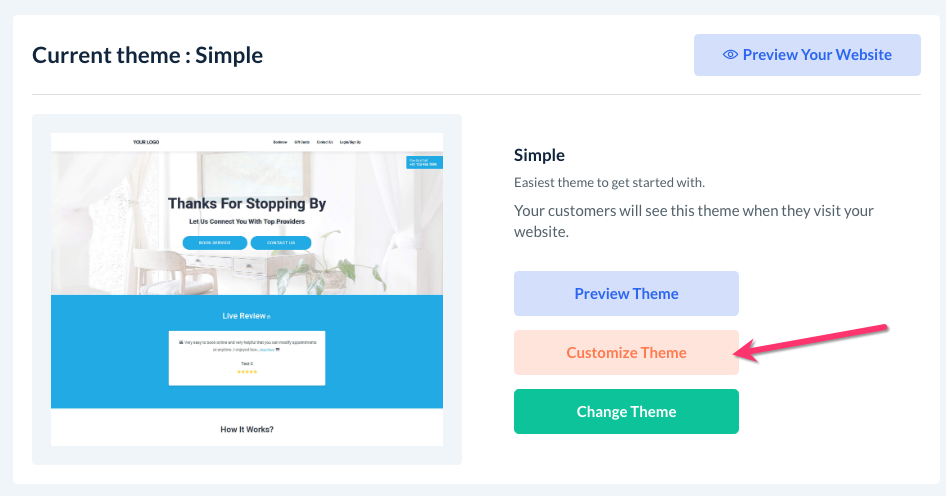
Settings > Design Forms & Website > Website Builder & Themes
Click on the orange "Customize Theme" button to open the website and theme editor.

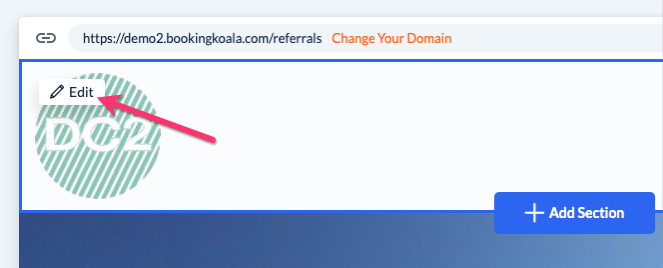
By default, you will land on your website's home page. Hover over the header section until a white "Edit" button appears in the top-left corner of the block.
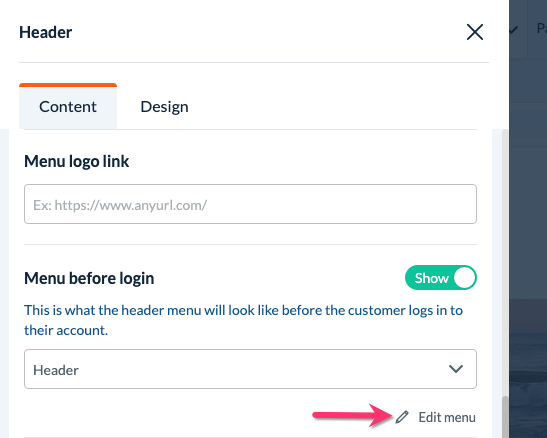
The header menu will appear on the left side of the screen. Scroll down until you see the section "Menu before login" and click the "Edit Menu" link.
You will be redirected to the general menu for both your header and footer. To disable the header or footer for your entire site, click the three dots on the right side of the menu and select "Hide".
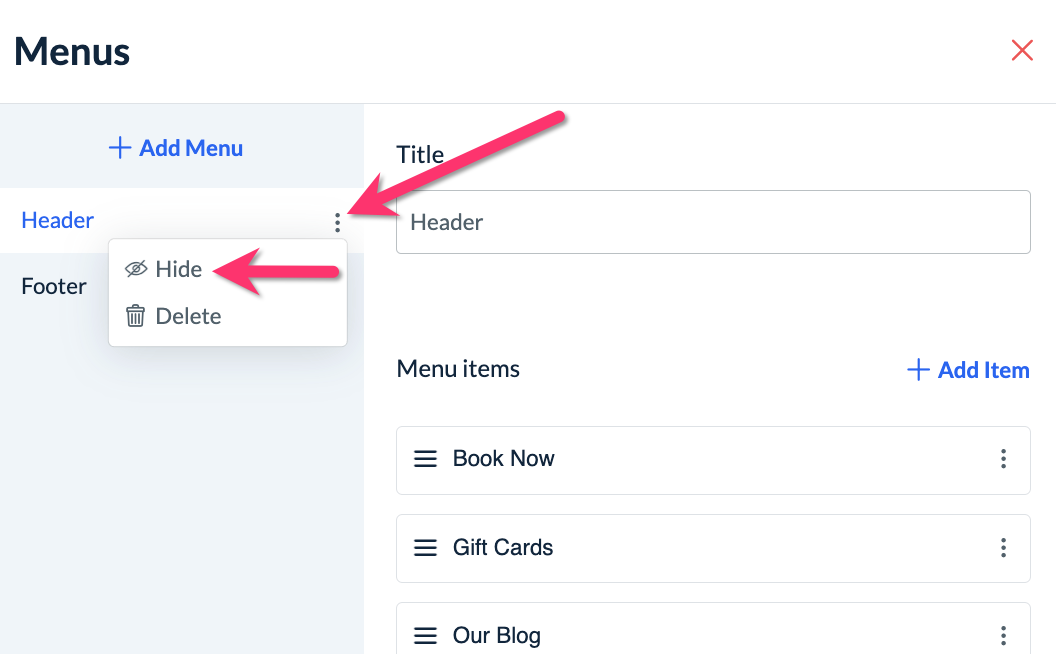
A pop-up will appear asking if you are sure you want to disable the header or footer menu. Click the blue "Yes" button to proceed.

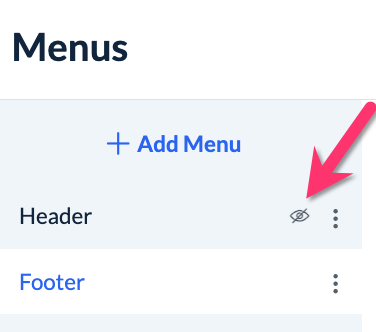
A green system notification will appear at the top of the page confirming that the header or footer menu has been disabled. An eye icon with a slash through it indicates that this menu is now disabled.
Once you are finished in this section, click the X icon to exit the header/footer menu, or the back arrow icon to go back to the main menu.

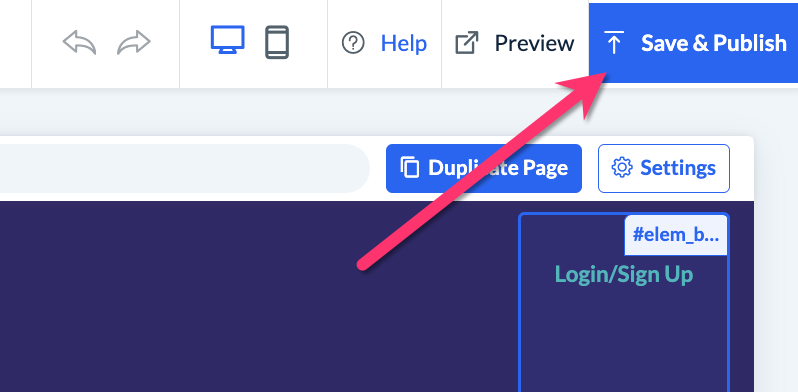
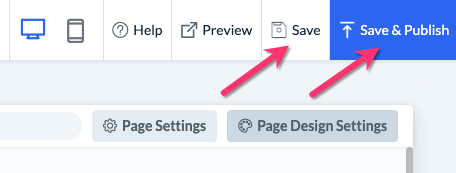
To push your updates live, please remember to click the blue "Save & Publish" button at the top-right corner of the page. You can also click the "Save" button if you only want to save these changes in the backend.
Disable the Header/Footer Menus by Page
To disable the header and/or footer on a page-by-page basis, please go to:
Settings > Design Forms & Website > Website Builder & Themes
Click on the orange "Customize Theme" button to open the website and theme editor.
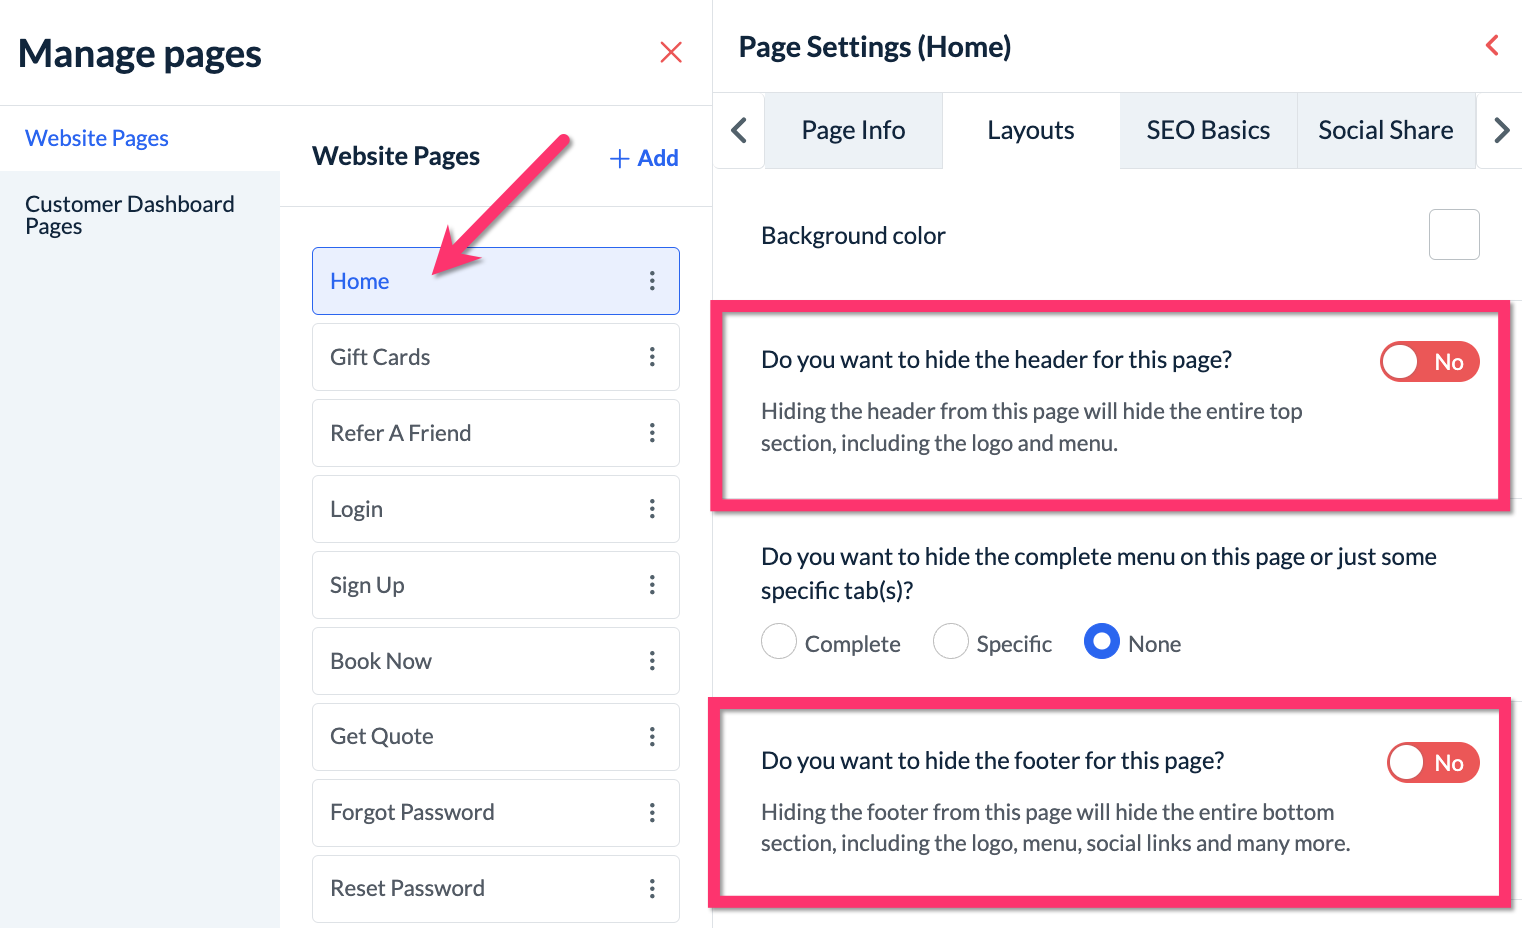
By default, you will land on your website's home page. To disable the header and/or footer for this page, click on the grey "Page Settings" button near the top right corner of the screen.

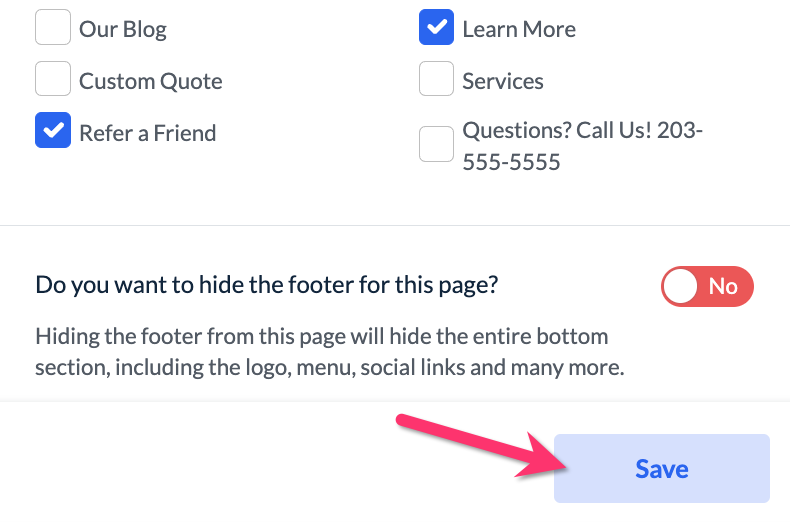
A page settings menu will appear. To disable the header or footer, select a page, click on the Layouts tab, and then select "Yes" for "Do you want to hide the header/footer for this page?"
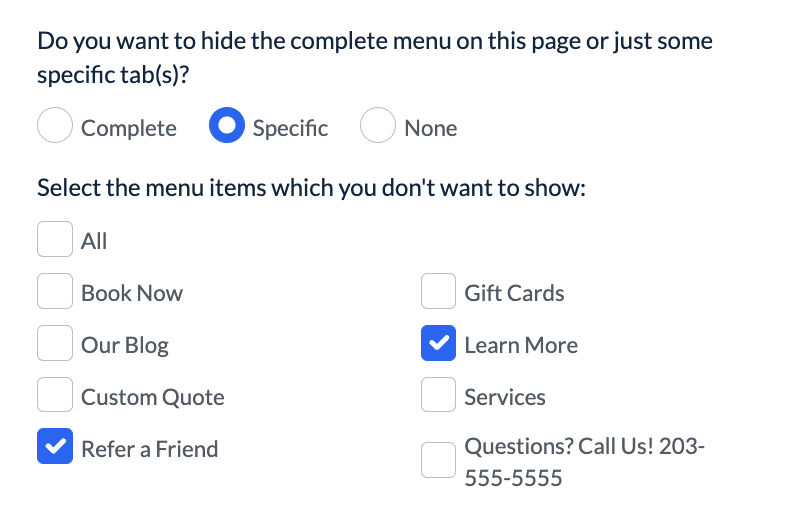
If you have selected "No" for the first question, you'll see a second question just below that says "Do you want to hide the complete menu on this page or just some specific tab(s)?"
If you select "Complete", only your business logo will be displayed in the header/footer.
If you select "Specific", you can decide which menu items you do not want to be displayed by checking the box next to the page name.
Once saved, the header/footer will only display the pages that have not been checked.

If you select "None", all of your linked pages will be displayed in the header/footer.

Once you have finished making your selections, click the blue "Save" button to update your header and/or footer preferences for the page.
To push your updates live, please remember to click the blue "Save & Publish" button at the top-right corner of the page.