The purpose of this article is to help you understand:
- How to add a page link to your header or footer
Add a Page Link to Your Header or Footer
Once you have created a page, you will want to add a link to it in your header or footer. This will allow customers to easily locate and navigate to your page.
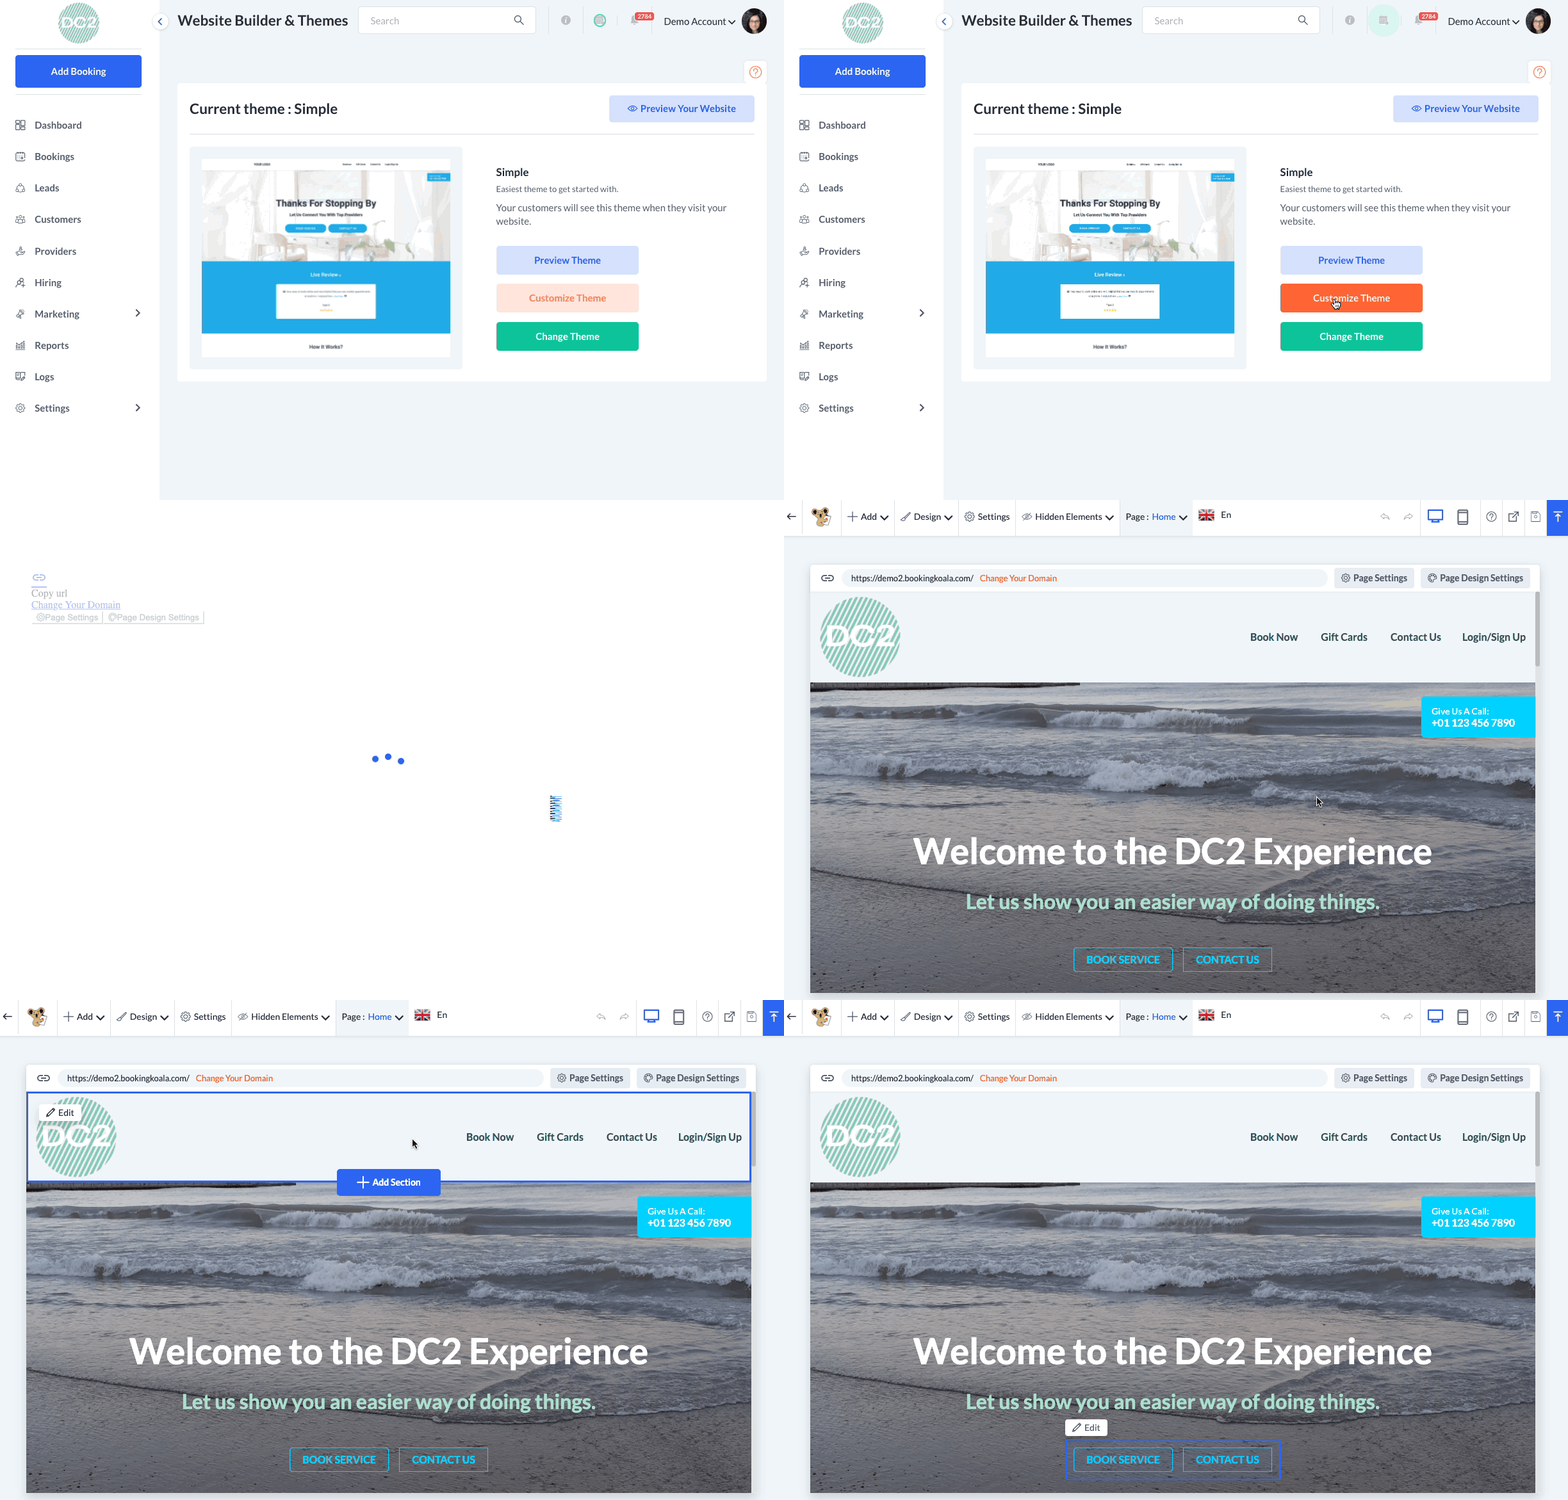
To do this, you will open the website and themes builder. Please go to:
Settings > Design Forms & Website > Website Builder & Themes
Click on the orange "Customize Theme" button to open the website and theme editor.
Once you are inside the builder, hover your cursor over the header or footer on the page and click the white "Edit" button that appears in the top left corner of the block.
A menu will open on the left side of the page. Scroll down until you see "Menu Before Login". Click the "Edit Menu" link just below here.
You will be redirected to the header and footer menu. Click the pencil icon to edit the header or footer.
The header or footer menu will display in the section below. Click the "+ Add Menu Item" link at the bottom of the section to add a new page to the menu.
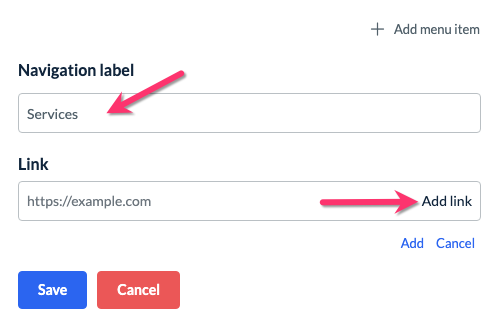
Enter a navigation label or the title of the link to the page. Then click "Add Link" to select the page you'd like to open when the link is clicked.
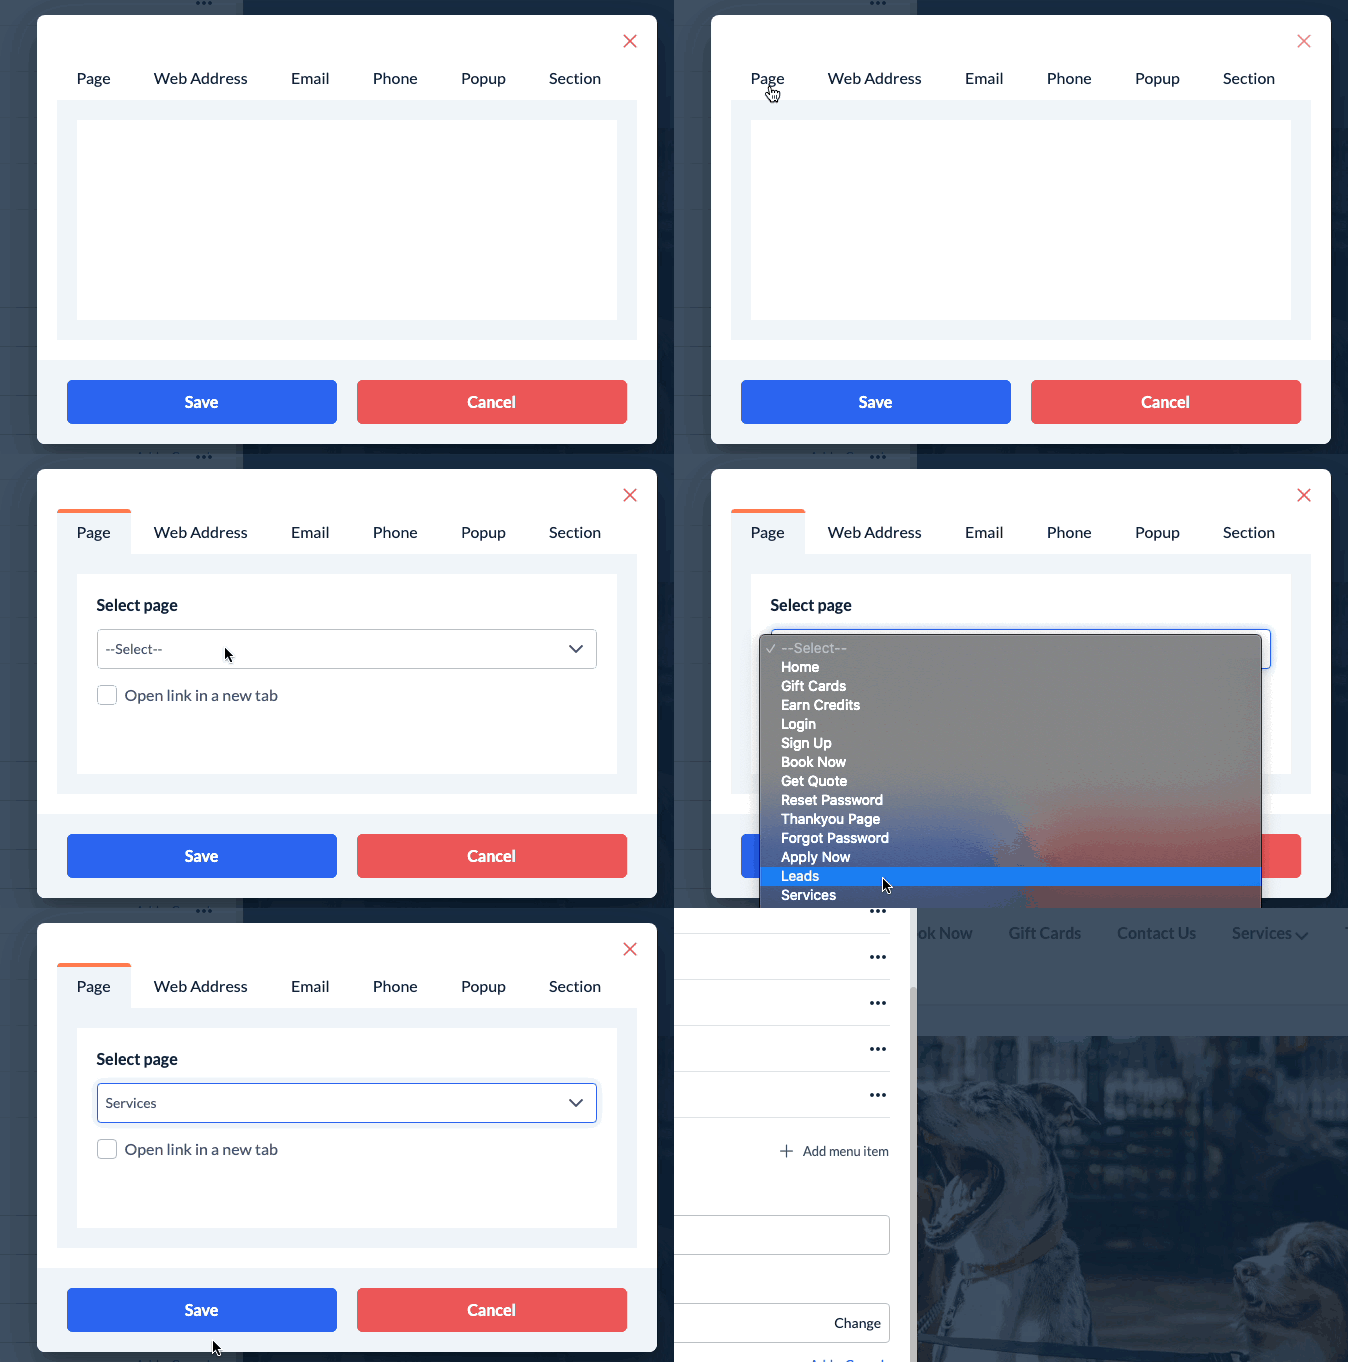
Once you click "Add Link", a pop-up will appear with several tabs. If you are adding a Bookingkoala page, click "Page" and then select which page you would like to link.
You also have options to enter a web address, email address, phone number, pop-up, or redirect to a section of a particular page.
Click the blue "Save" button to save your selection. You will now see your option selected in the "Link" box. To add the link to your header or footer, click the blue "Add" button just below the link box.
Once you've added the page, click the blue "Save" button at the bottom of the left side menu to save your updated header or footer item.
A green system notification will appear at the top center of the screen, letting you know your header or footer has been updated.
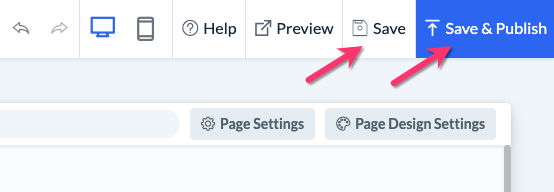
Remember to click "Save" or "Save & Publish" to save the changes to your backend or push them live to your site.


