The purpose of this article is to help you learn:
What is a discount bar
How a discount bar helps with conversions
How to generate links with a discount bar
How to add a discount bar in the website builder
What is a discount bar?
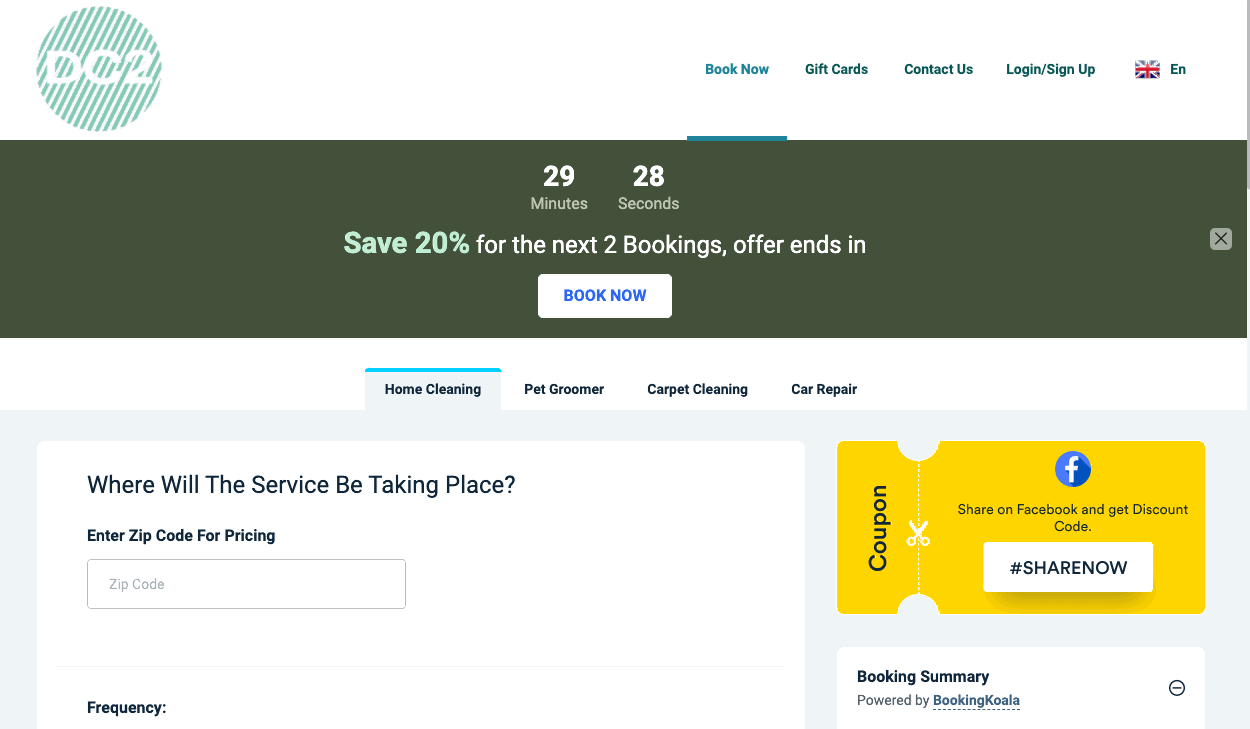
A discount bar is a section that can be inserted at the top of your webpage to promote a special promotion or coupon. This feature is only available for Premium Subscribers.
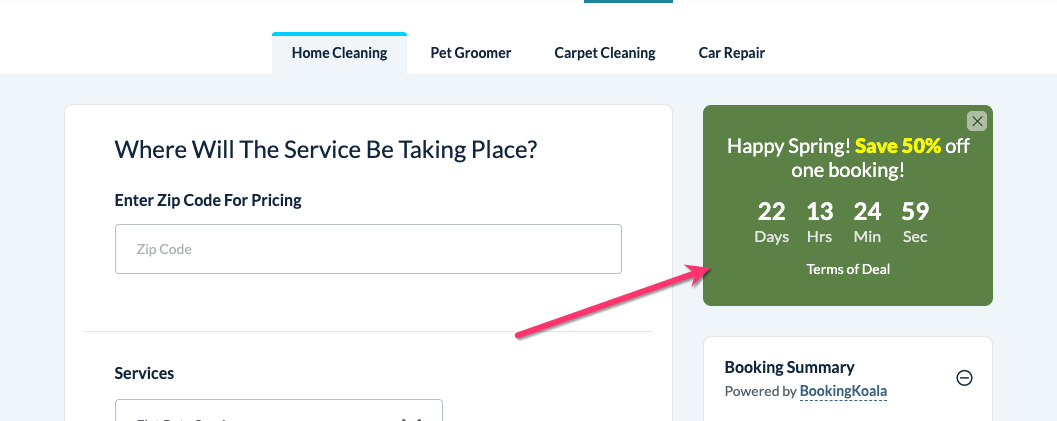
You can set up the discount bar to include a simple message or add a countdown clock to entice your customers further to take advantage of your promotion.
Why use a discount bar?
By creating a sense of urgency and scarcity, countdown bars can directly boost sales and revenue. The psychological impact of the ticking clock motivates customers to make purchases, leading to increased sales figures.
A discount bar, especially with a countdown timer, triggers a fear of missing out (FOMO) on a good deal or special promotion. This psychological trigger motivates people to make a purchase or take action before it's too late. Countdown timers create a sense of urgency and scarcity, making the offer or event seem more valuable and desirable. The ticking clock emphasizes that time is limited, pushing customers to act quickly. By leveraging FOMO and scarcity, countdown bars can significantly increase conversion rates. Customers are more likely to make a purchase when they feel a sense of urgency and pressure to act fast.
Countdown bars can draw attention to specific promotions or events, leading to increased engagement with your marketing efforts. The visual timer acts as a compelling call to action, encouraging customers to interact with your content. When used effectively, discount bars can enhance the user experience by providing clear information about time-sensitive deals or events. This transparency and clear communication can build trust and improve customer satisfaction.
Discount bars are versatile and can be used for a wide range of promotions, including flash sales, early bird discounts, product or service launches, limited-time offers, holiday deals, and more.
How to Add a Discount Bar
The discount bar can be set up in two different ways:
Generate a booking link with a discount bar for a new or existing coupon
Add a custom discount bar to a page on the website and theme builder
If you generate a link with a discount bar, you can then share that link in marketing emails, embed it as a button on your web page, or share it on social media with your customers.
If you use the website builder, you can add the discount bar to any page on your website.
Add a Discount Bar for a New or Existing Coupon
One way to set up the discount bar is by generating booking links. You can use these special links to share in campaign emails or messages to offer a special promotion directly through the booking form.
You can set up the discount bar under the "Advanced Settings" tab at the bottom of the "Add New Coupon" page under:
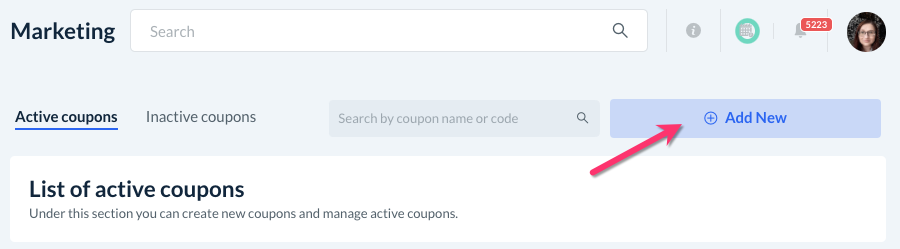
Marketing > Coupons
To generate a discount bar link for an existing coupon, select "Options", "Edit" next to the coupon you'd like to create a discount bar for.
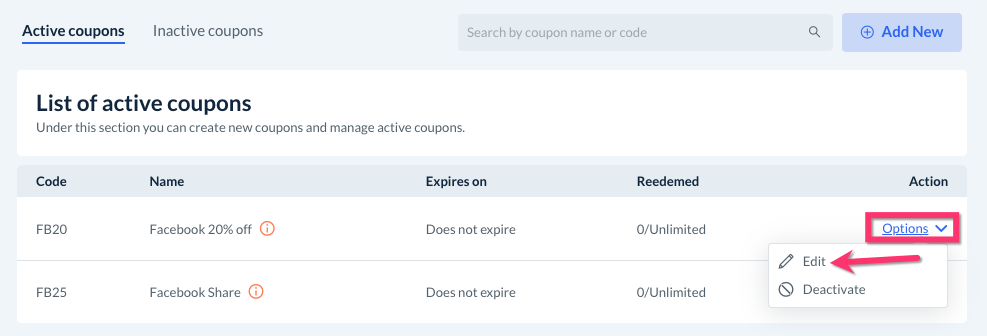
To create a new coupon with a discount bar, click the blue "Add New" button in the top right corner of the page.
Click here to learn how to create a coupon then proceed with the following steps.
Scroll down to the bottom of the page until you see the "Discount" and Limitations" tabs. The "Advanced Settings" tab will be located on the right.
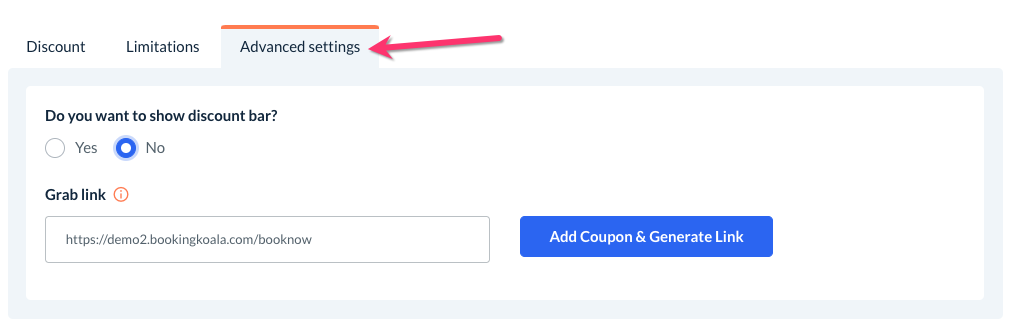
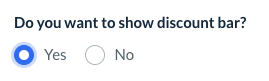
This option allows you to set up the discount bar on your booking page that contains this coupon code. Select "Yes" to enable the discount bar feature for your coupon.
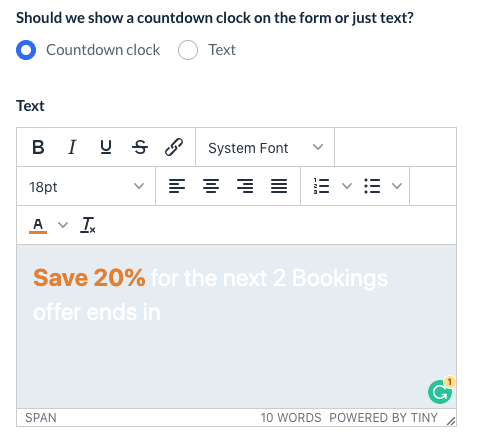
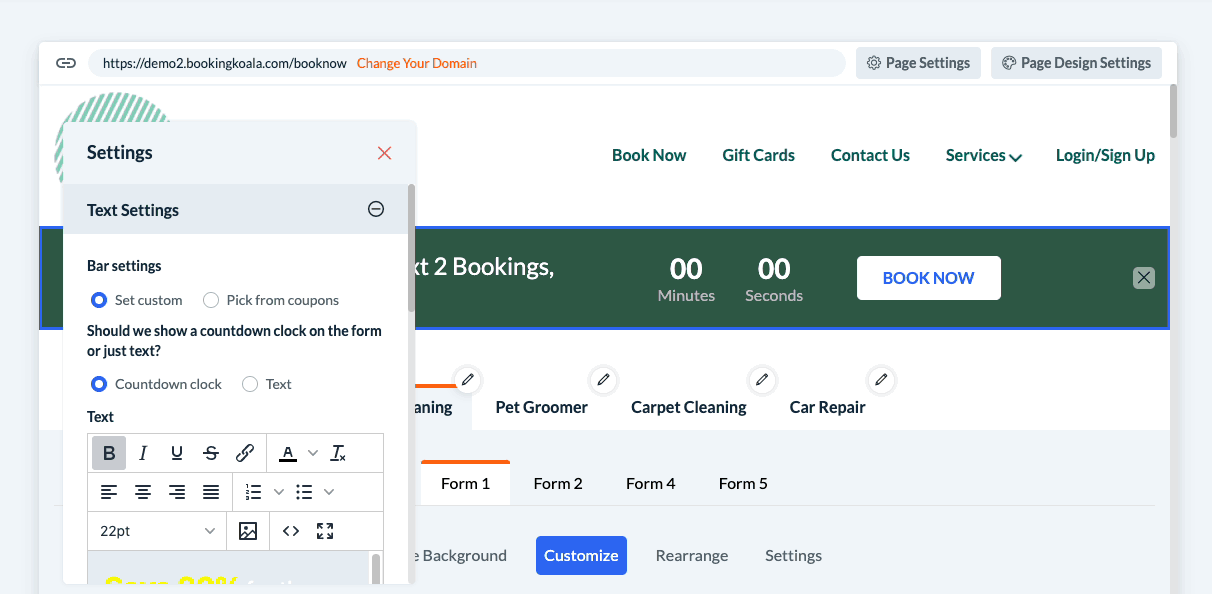
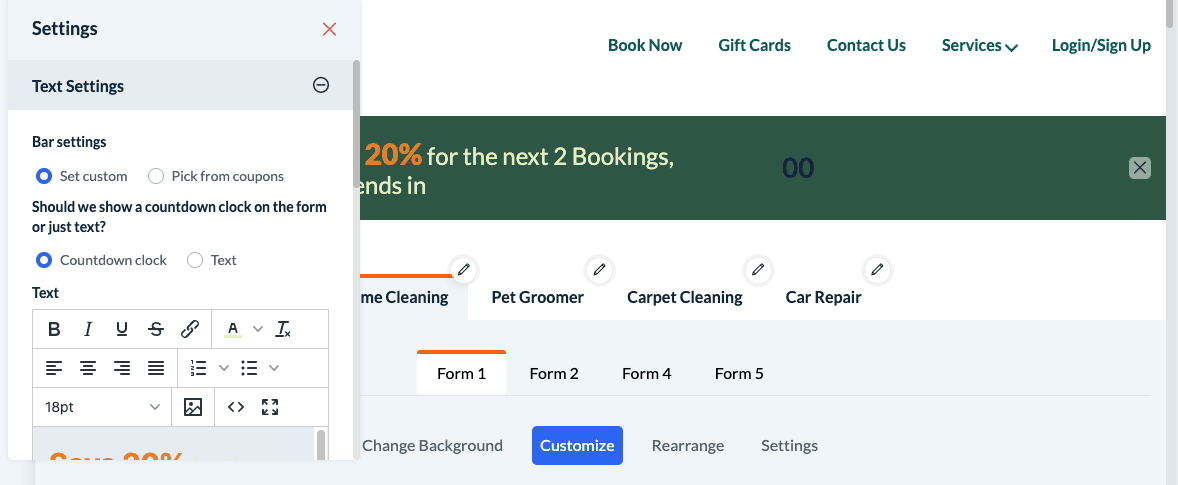
This bar can come in the form of a countdown clock or text. Use the text box below to enter the message your customers will see when the bar appears.
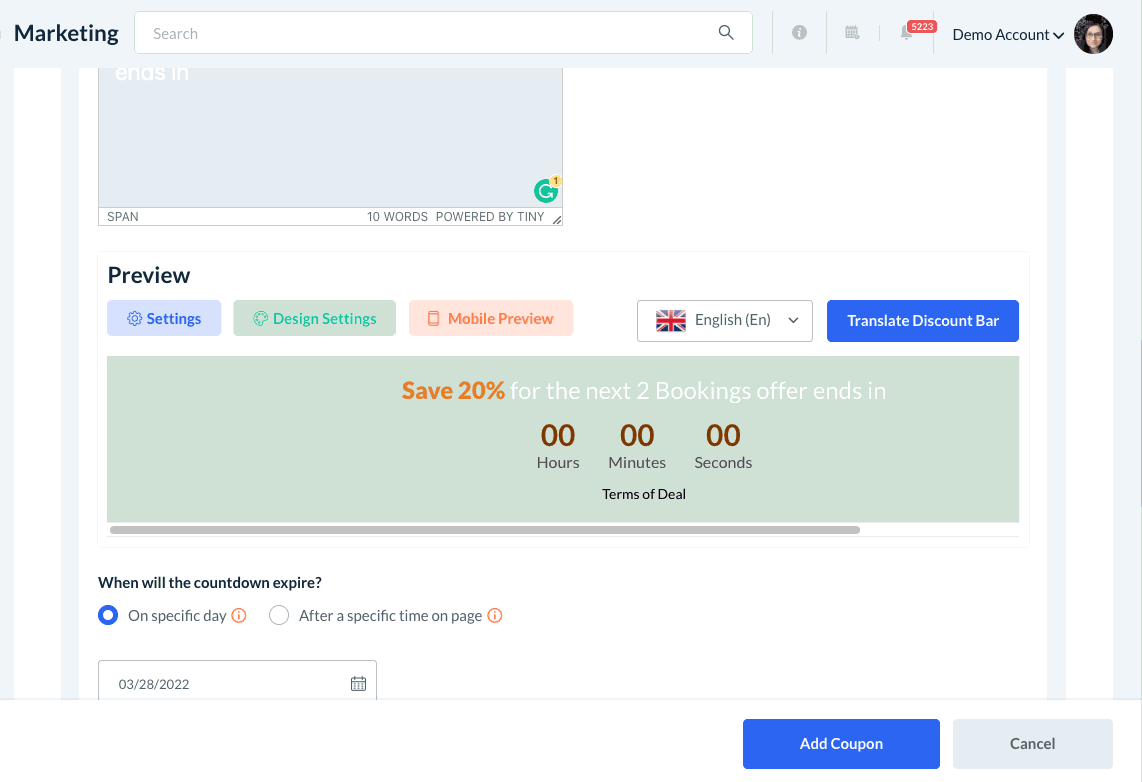
Preview what the discount bar will look like in the section below.
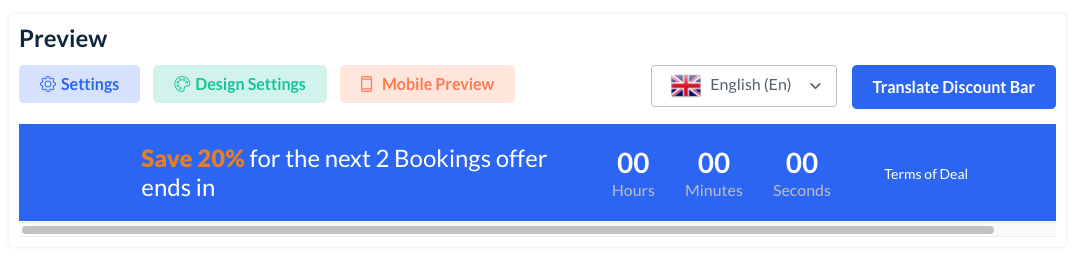
Click the blue "Settings" button to pick the layout of the discount bar.
Click on the green "Design Settings" button to change the font size, color, and appearance of the discount bar.
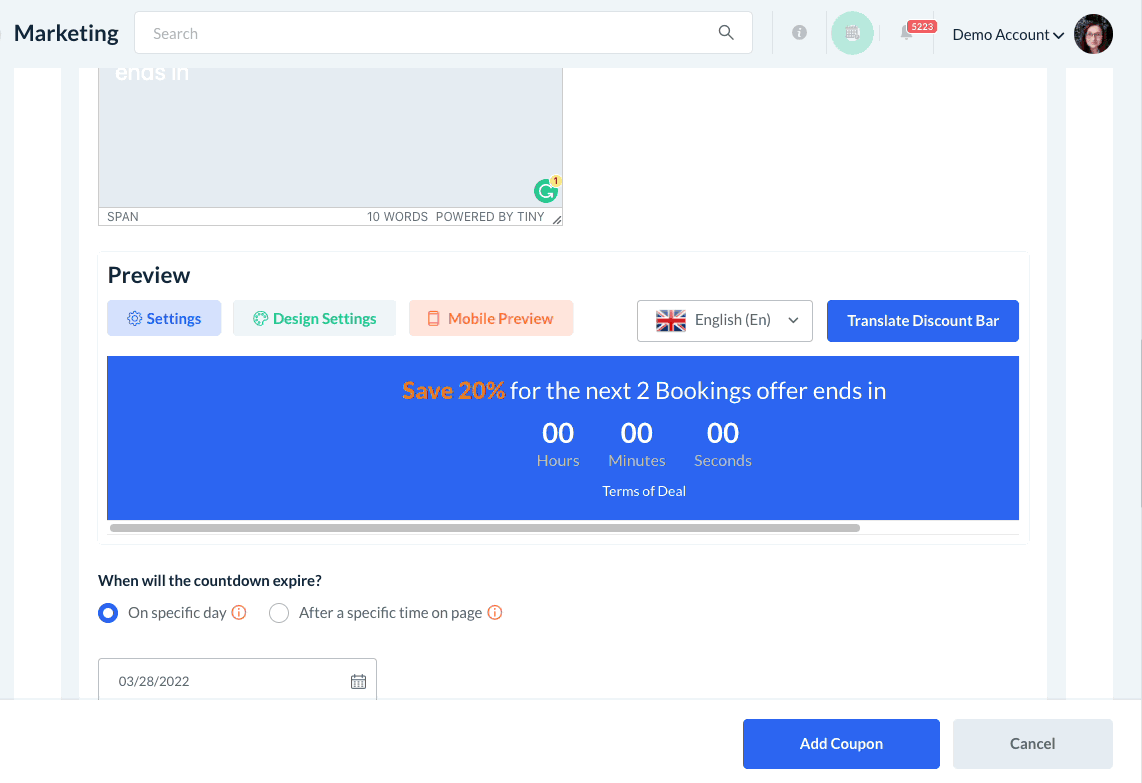
Click on the orange "Mobile Preview" button to view what the discount bar will look like on mobile devices.
Below the Preview box, there are additional questions on how the discount bar will function. These options will depend on whether you have selected to set up a countdown clock or text bar.
Countdown Clock Settings
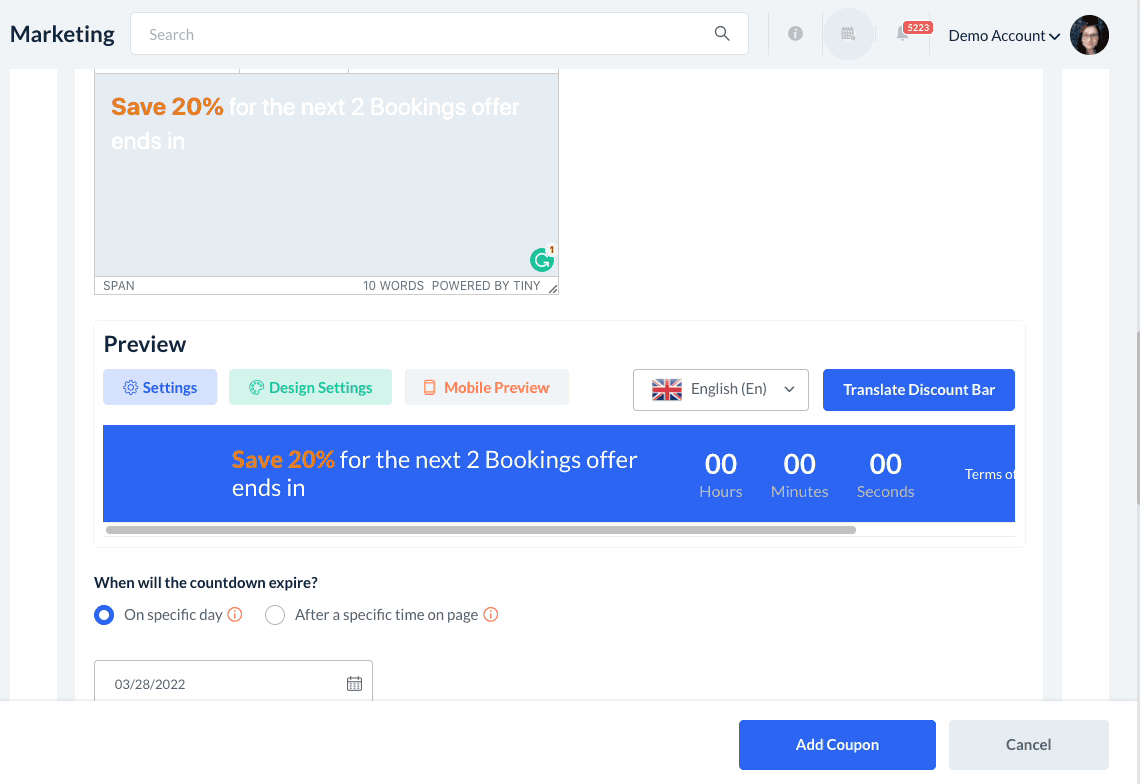
When will the countdown expire?
Select either "On a specific day" to set when the discount bar will expire, or "After a specific time on the page" for it to expire after the user has been on the page for a certain length of time.
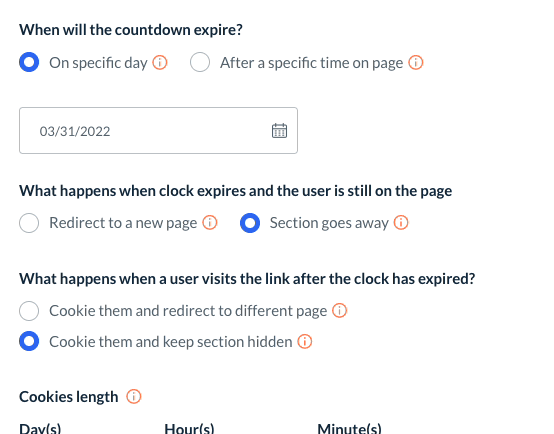
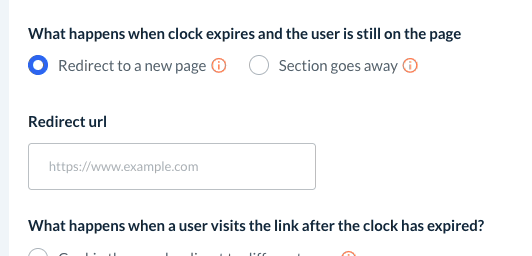
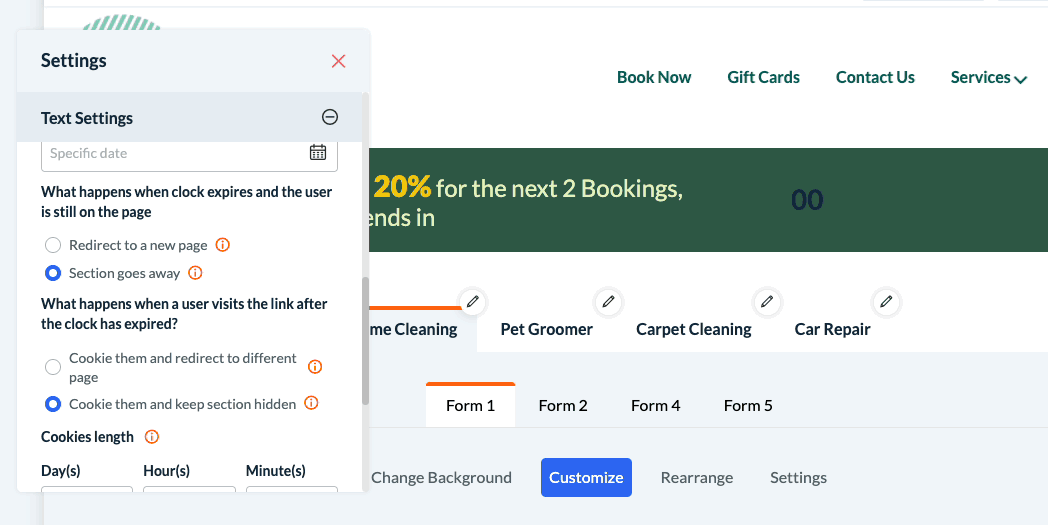
What happens when the clock expires and the user is still on the page?
You can either "Redirect to a new page" and provide a URL for the page you'd like to redirect to, or you can select "Section goes away" to hide the bar from the customer once the countdown expires.
What happens when a user visits the link after the clock has expired?
Decide what you'd like users to experience if they visit the link after the clock has expired. Select "Cookie them and redirect to a different page" to supply a different URL to redirect the user to. Select "Cookie them and keep section hidden" to let the user stay on the same page, but keep the discount bar hidden.
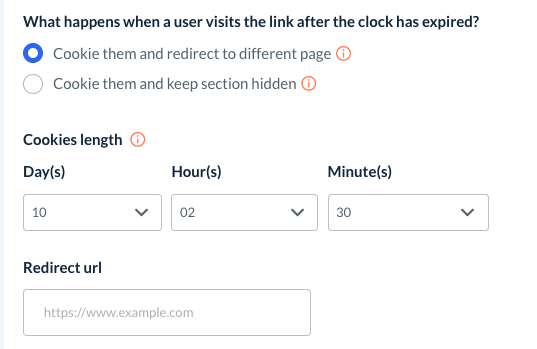
Select how long you would like the user to be "cookied" using the boxes.
General Discount Bar Settings
The following settings pertain to both countdown clock-style bars as well as plain-text discount bars.
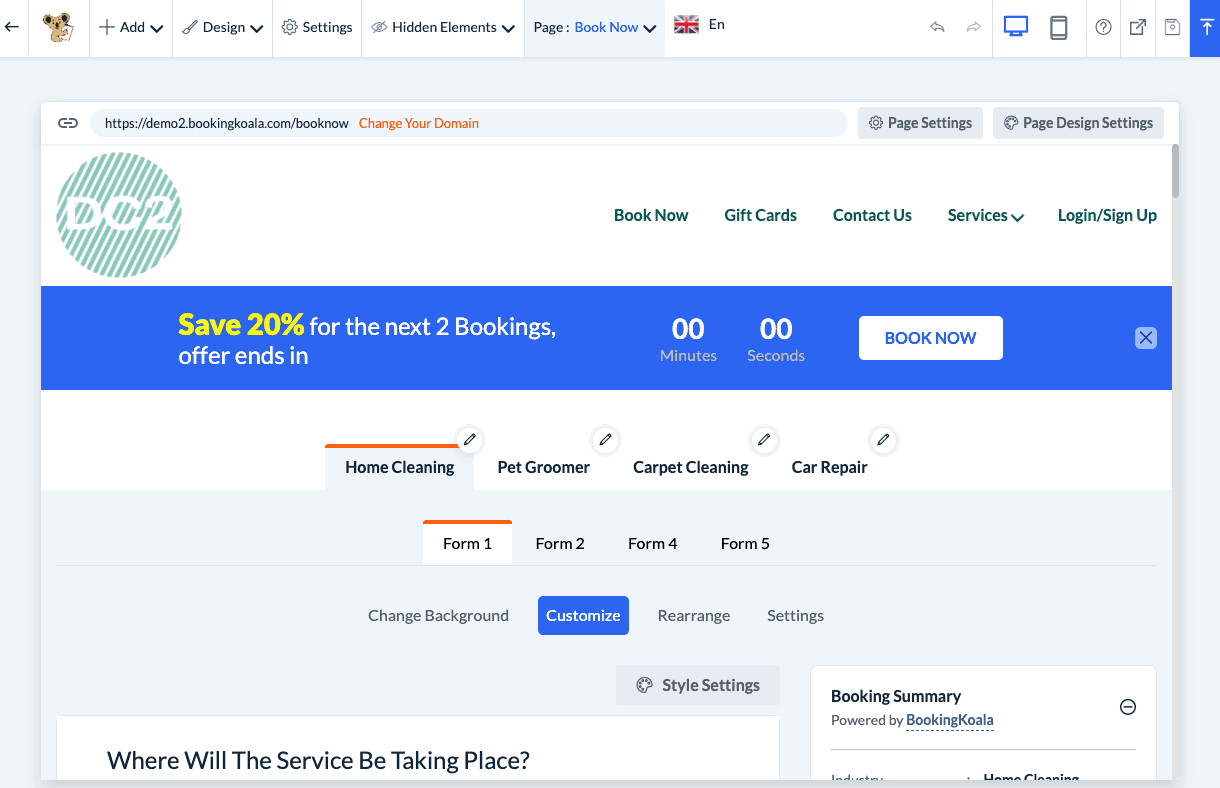
Where on the desktop should we display the text?
Select "Top Bar" to display the bar at the top of the page, or select "On Summary" to display the discount bar in a box above the Booking Summary section.
Design mobile countdown clock style
For mobile browsers, select either "Top Bar" or "On Summary" to decide whether the discount bar will display.
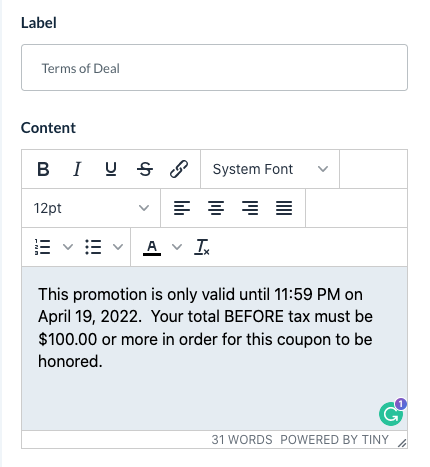
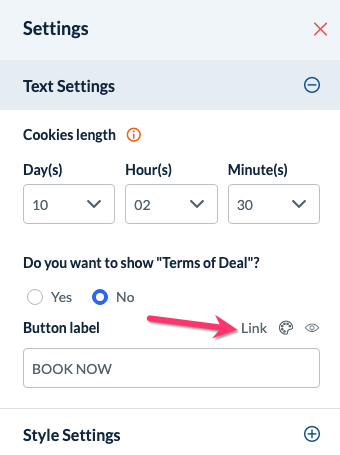
Do you want to show "Terms of Deal"?
Select "Yes" to include a "Terms of Deal" link in your discount bar. This can be clicked by the customer to see more information about your promotion. Selection "No" to hide the "Terms of Deal" link.
If you selected "Yes" to this question, you can set a Label and enter Content in the boxes below.
Grab Share Link(s)
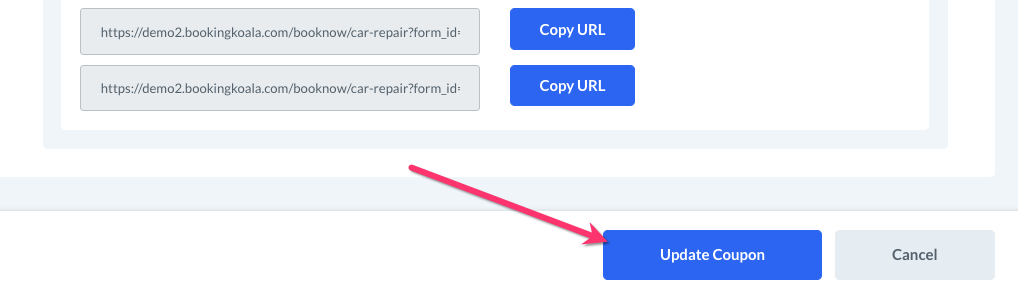
At the bottom of the page, click the blue "Generate Link" button to generate the link with the discount bar on your booking page. A separate link will be generated for each industry and booking form that you have enabled in the earlier settings.
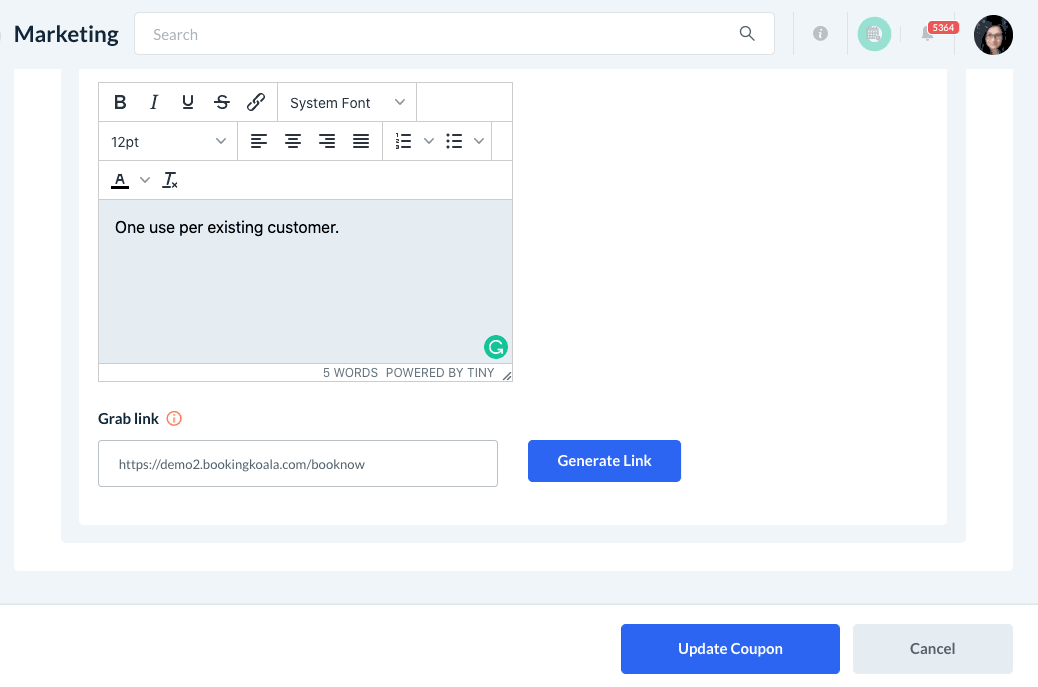
Double-click the URL in the box, or click the blue "Copy URL" button to copy the link.
From here, you can do things like:
Share the link with a customer via email or SMS
Add the link to a text or email campaign
Embed the link in a "Book Now" button on your website
To save the coupon's discount bar settings, be sure to click the blue "Update/Save Coupon" button at the bottom of the page after generating your links. This will ensure that the links will remain active (or however you set it up under the coupon's settings section).
A green system notification will appear in the top-right corner of the page, letting you know that the coupon has been saved/updated successfully.
Once the discount bar settings have been saved, you can also select this coupon when adding a discount bar to the BookingKoala website builder. The process for setting up a discount bar in the BookingKoala website builder is detailed in the next section.
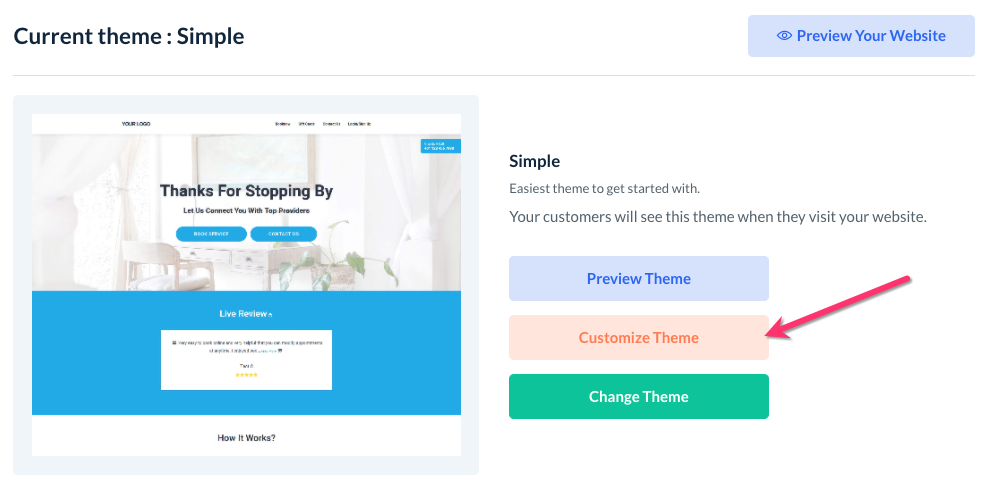
Add a Discount Bar Using the Website Builder
Another way to incorporate a discount bar into your site is by utilizing the website and theme builder. To begin, go to:
Settings > Design Forms & Website > Website Builder & Themes
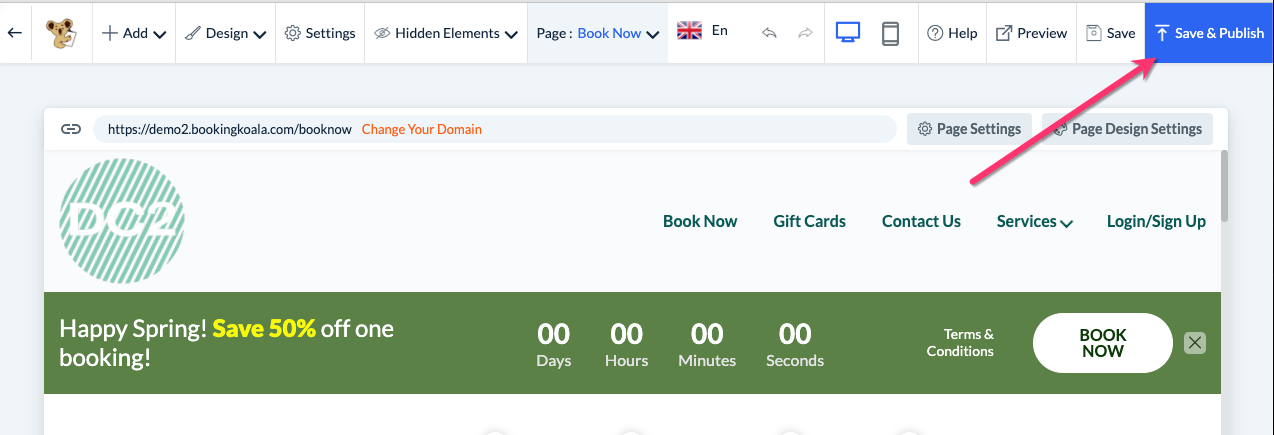
Click on the orange "Customize Theme" button to open the website builder.
At the top center of the page, click the "Page" menu and select which page you'd like to add a discount bar. Close the "Pages" menu that appears on the left of the screen.
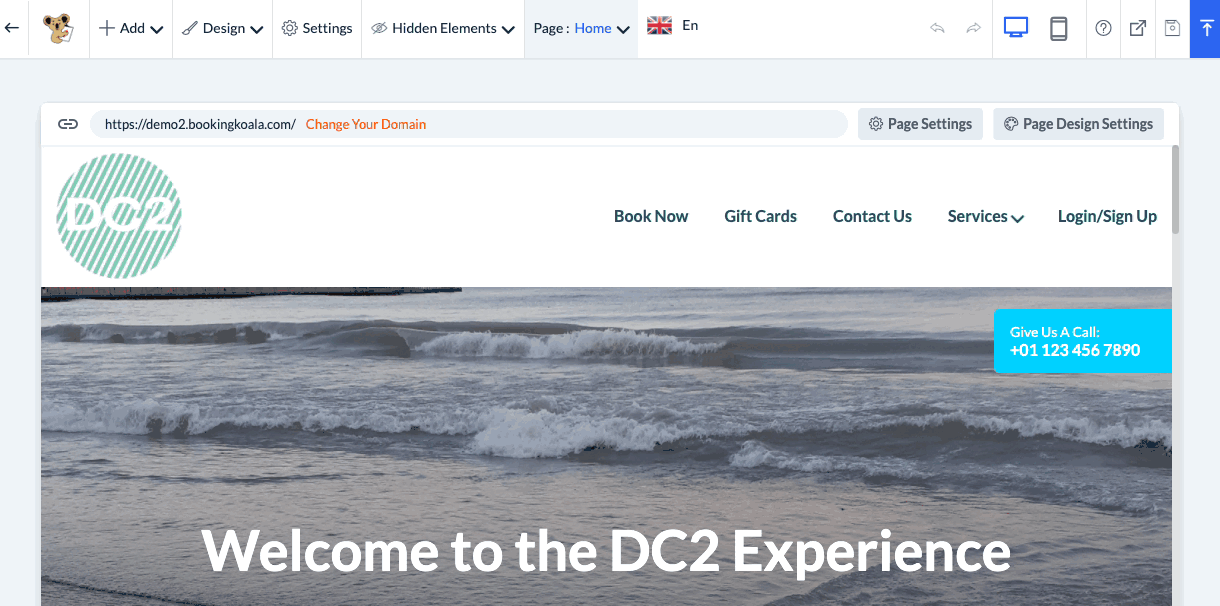
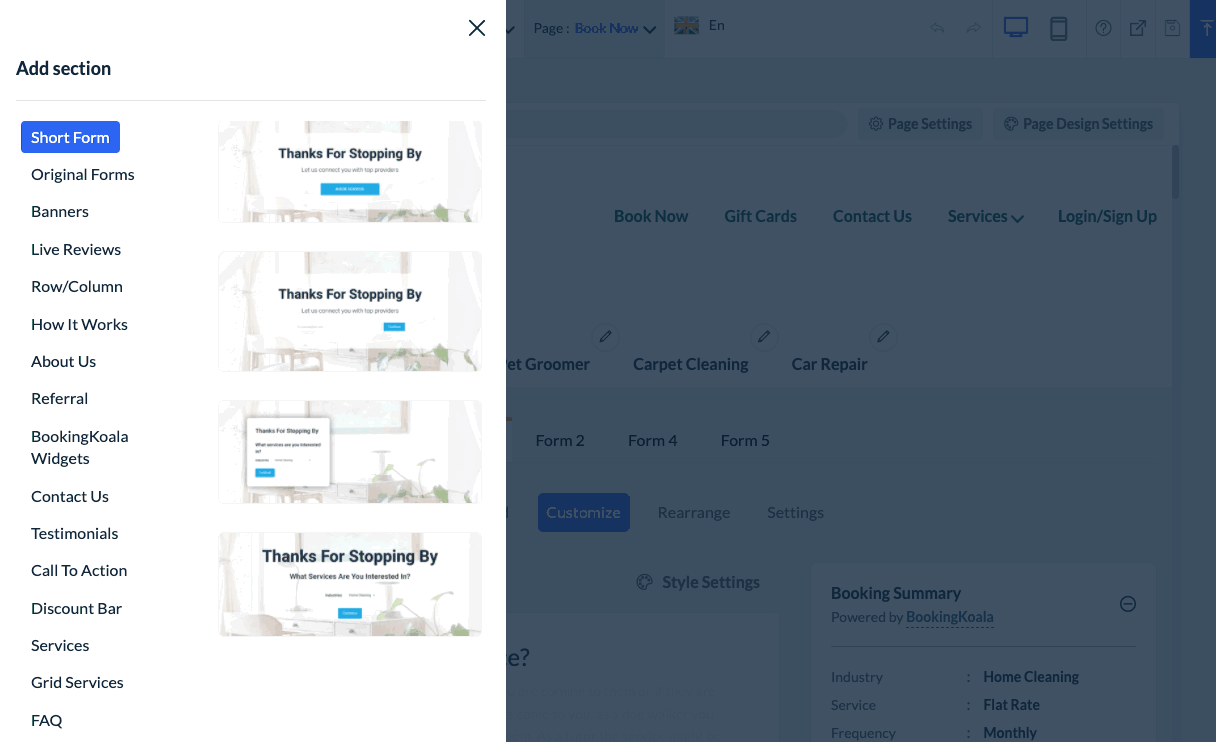
Hover your cursor above the header in this section until you see a blue "Add Section" button appear. Click the "Add Section" button and a menu will appear on the left side of the screen.
Scroll down until you see the "Discount Bar" section on the menu. Hover over the block until it says "Add This Section" and then click to add it to your page.
Once you've added the discount bar to your page, hover over it and click "Edit" in the top left corner of the block to set up the settings.
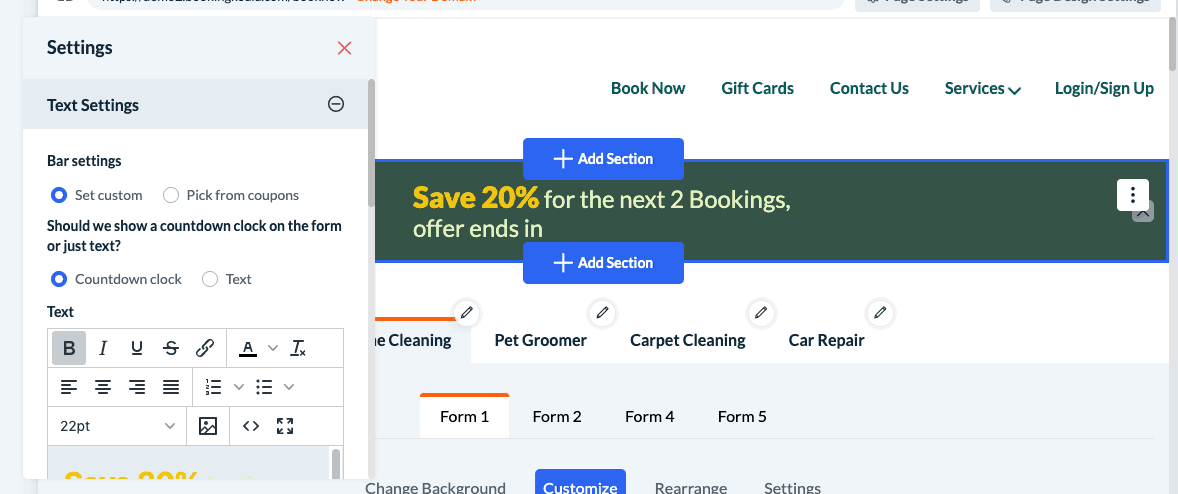
There are two different ways to proceed with setting up your discount bar. At the top of the Settings pop-up, select "Set custom" or "Pick from coupons".
If you proceed with "Set custom", you can set up a custom discount bar using the website builder and add any coupon link to the "Book Now" button.
If you proceed with "Pick from coupons", you can select a coupon that already has a discount bar set up and the system will automatically pull those settings from the coupon section.
Set a Custom Discount
Under "Bar Settings", select "Set Custom" to create a custom discount bar. Scroll down and answer the same settings questions as detailed above to set up your discount bar.
Click the blue "Bar Settings" and "Clock Settings" buttons to pick the layout for your discount bar.
Next, link the coupon you would like to offer to the discount bar. Click "Link" next to "Button Label" and paste the URL of the coupon into the box.
Scroll to the bottom of the pop-up and expand the "Style Settings" section to change the colors and fonts in the discount bar.
Once you are finished making your selections, click the blue "Save & Publish" button at the top right corner of the page to push your updates live.

Pick From Coupons
You can also click "Pick from Coupons" to use a coupon you have already set up in the "Coupons" section under Marketing.
Once you've selected a coupon you'd like to use, select which form they will land on when they click the "Book Now" button.
Once you are finished making your selections, click the blue "Save & Publish" button at the top right corner of the page to push your updates live.