The purpose of this article is to help you understand:
- How to set up Google as a method of logging in for customers
Log In/Sign Up Through Google
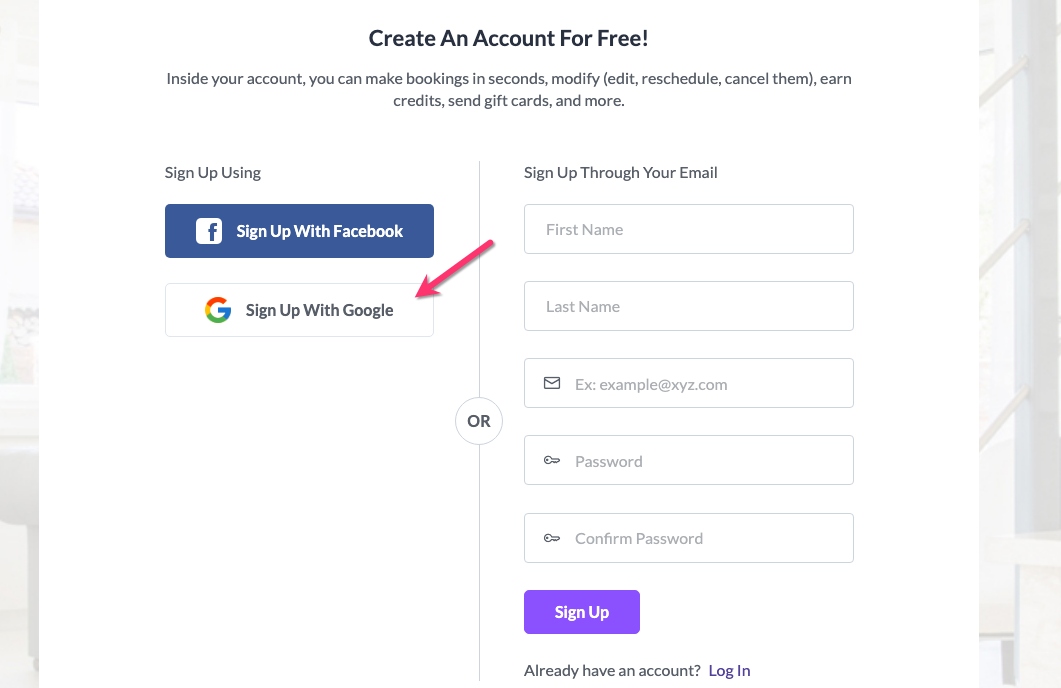
When a new customer creates an account with your business, you can offer the option for them to sign up with an existing Google account. This simplifies the account creation process for users who prefer to use a connected account instead of creating a new account.
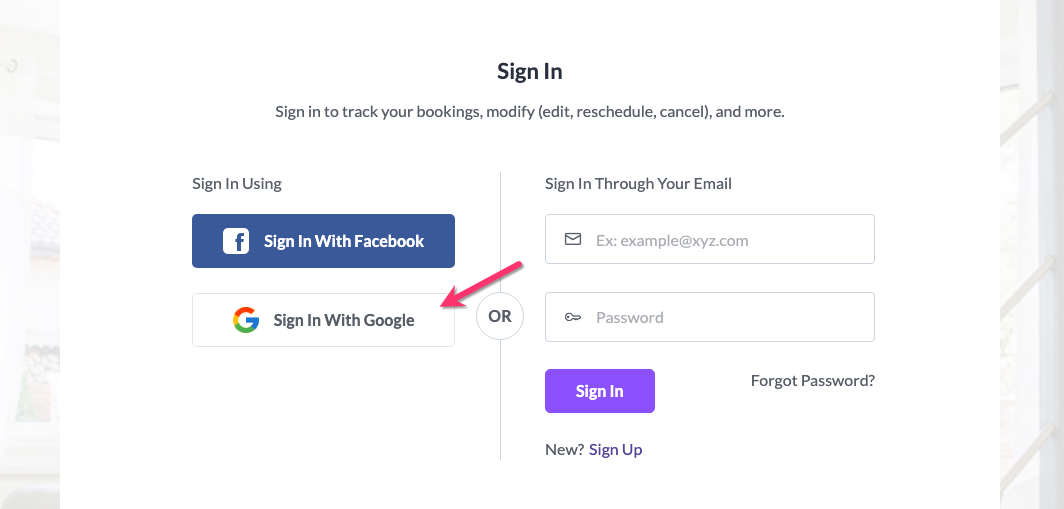
Once they have created an account using the Sign Up With Google button, they can log in using the same buttons on the "Sign In" page.
In order to activate this button, you will need to activate API keys for Google.
Activating Your Google API
Before You Begin
This setup process involves the Google Cloud Console. If you haven't used it before, check out this link to get more information and try it for free.
Create a New Project
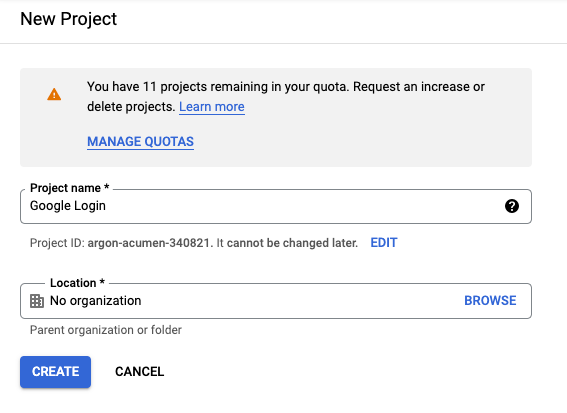
To enable sign-in with Google, you must also select or create a new project. If you are logged into your Google account already, click this link to create a new project.
Enter a name for the project, then click the blue "Create" button. You will be brought to the project dashboard.
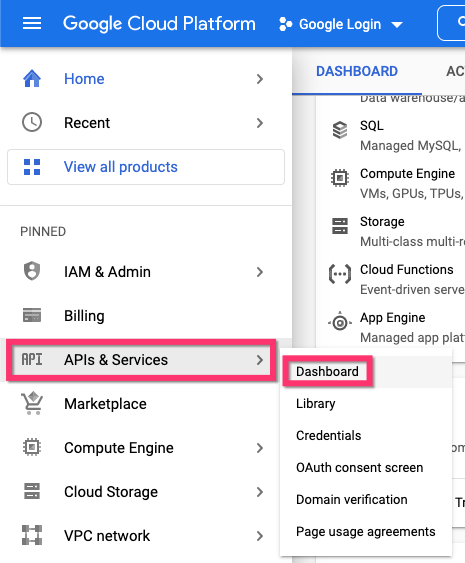
From the left side menu, select "APIs & Services" and click on "Dashboard".
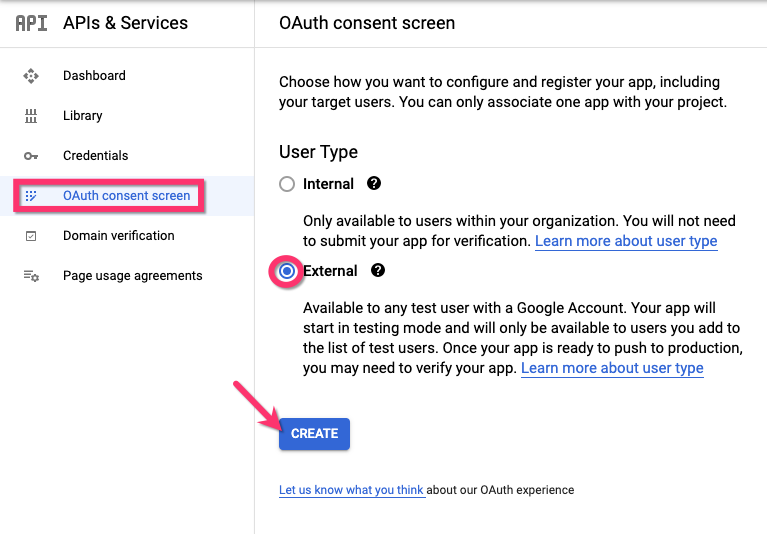
On the APIs & Services Dashboard, select "OAuth consent screen" from the left side menu. Select "External" for the User Type, and then click the blue "Create" button.
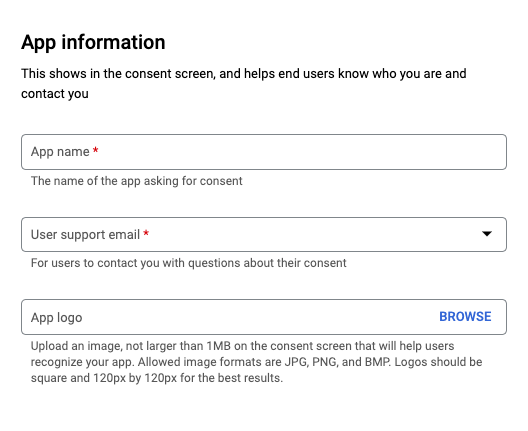
Fill out the required details that have a red asterisk next to them. Enter your business or website name for the App Name and select a User Support Email. You can also upload your logo to display when customers view the consent screen.
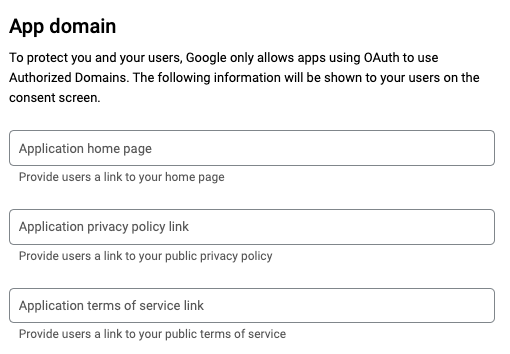
Fill out the app domain information and provide links to your home page, privacy policy page, and terms of service page (optional).
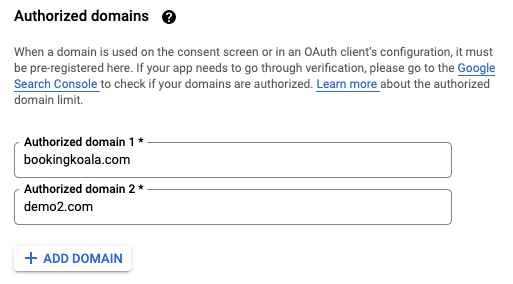
Next, click the "Add Domain" button to add your Authorized Domains. Your authorized domain will be bookingkoala.com, as this domain hosts your Bookingkoala website. If you use a custom domain, please add that domain here as well.
In the example below, the custom domain is "demo2.com".
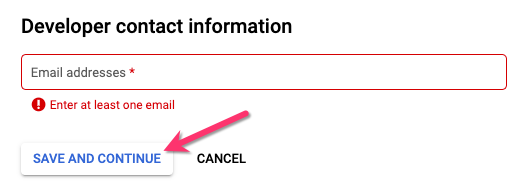
Next, add your Contact Email Address(es), then click "Save and Continue".
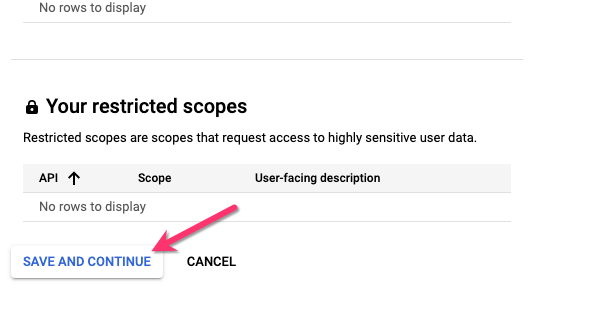
On the next page, click "Save and Continue" to proceed to the next page.
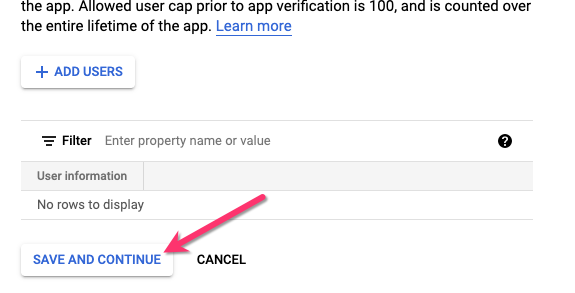
Again, click "Save and Continue" and proceed to the next page.
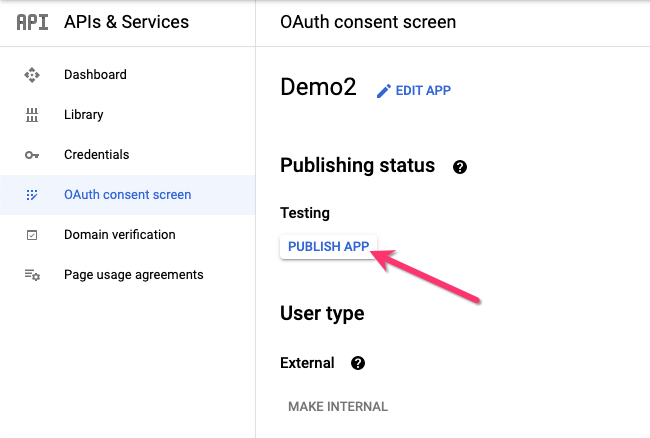
You will be brought to the Summary page. Click the Back to Dashboard button a the bottom of the page. Next, click the "Publish App" button below where it says Publishing Status.
A pop-up window will ask if you are ready to push to production. Click "Confirm" to proceed.
Connecting Your Google Account
Back in your BookingKoala dashboard, go to:
Settings > General > Apps & Integrations
Scroll down to the Google box and click the blue "Enable" button. A pop-up will ask if you are sure you want to enable it. Click "Yes" to proceed.
Next, click on the grey "Incomplete" button to the right of the "Disable" button.
A pop-up window will appear. Click the blue "Click here" link toward the bottom of the window.
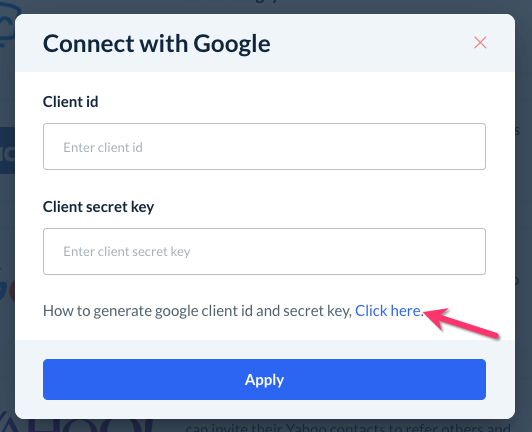
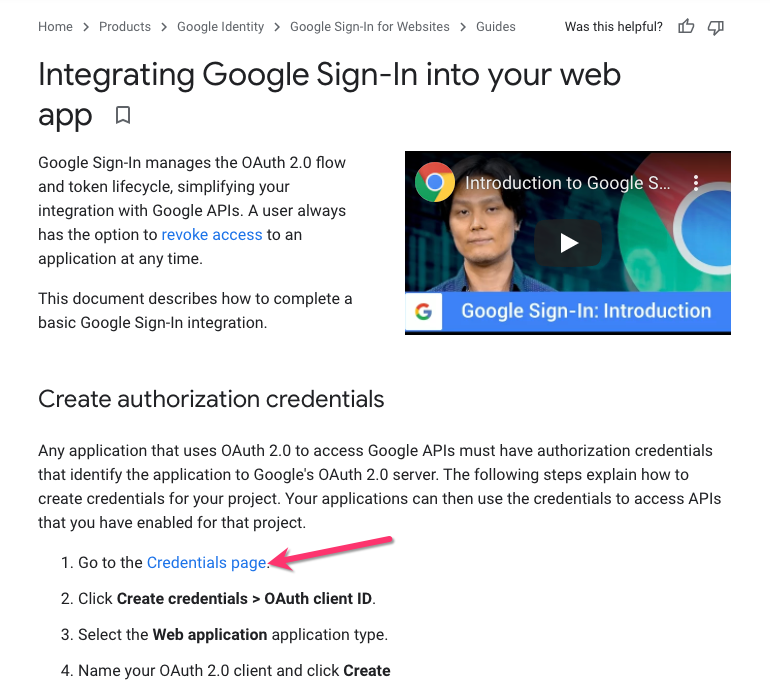
This link will take you to a set-up guide for Google Sign-In. Click the blue "Credentials Page" link to open the credential pages for your project.
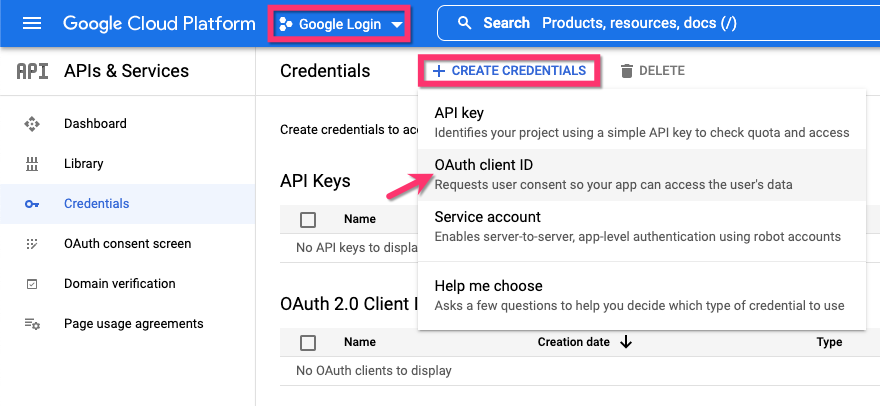
Make sure your project is selected in the drop-down menu and then click "+ Create Credentials" then "OAuth Client ID".
On this page, select "Web Application" under Application Type, and then enter a Name (this is only used for identification purposes on the backend).
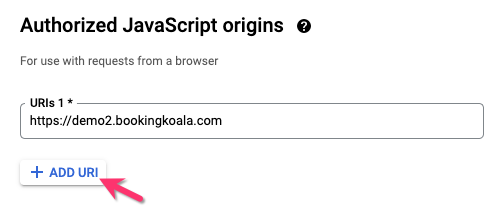
Under "Authorized JavaScript Origins", click the "+ Add URI" button to add your site's domain.
If you are using a custom domain, make sure to use this instead of your BookingKoala subdomain.
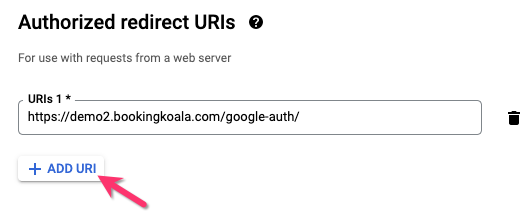
Under "Authorized redirect URIs", click the "+ Add URI" button to add your site's redirect domain. Your redirect URI will be your domain plus "/google-auth/".
If you are using a custom domain, make sure to use this instead of your BookingKoala subdomain for the redirect URI.
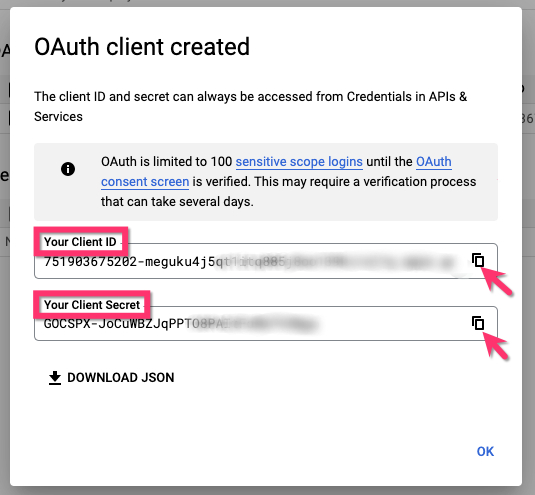
Finally, click the blue "Create" button at the bottom of the page. Your Client ID and Client Secret Key will be displayed in the resulting pop-up window.
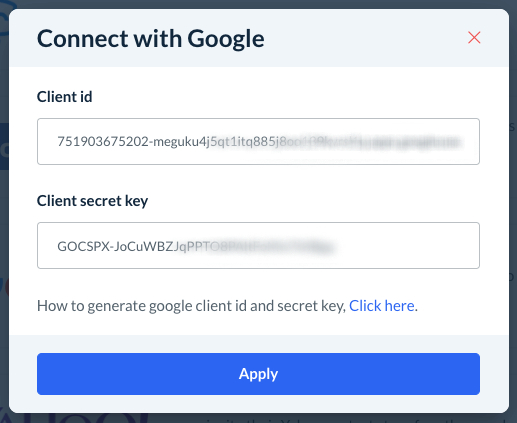
Copy the keys using the copy icon and paste them into their respective boxes in BookingKoala.
Click the blue "Apply" button. You will see a green system notification appear in the top right corner letting you know your Google app settings have been saved successfully.
Under the Apps & Integrations section, you will now see a green "Connected" button.
Users can now sign in or sign up using their Google account.

