The purpose of this article is to help you:
Learn what booking spots are
Find where your booking spots are located
How to set up spot limits
Learn why your booking spots may not be showing on your form
What are booking spots?
Booking Spots are the times you offer to clients to schedule their service. Booking spots can be set up as fixed start times or arrival ranges.
For example, a business with fixed start times might have booking spots for 8 AM, 9 AM, 10 AM, 11 AM, 12 PM, etc. In this case, the customer makes a selection expecting the service to begin at that exact time.
A business with arrival ranges would offer booking spots that look like 8-9 AM, 9-10 AM, 10-11 AM, etc. In this example, the customer's selection would indicate that the service will begin anytime within the range provided.
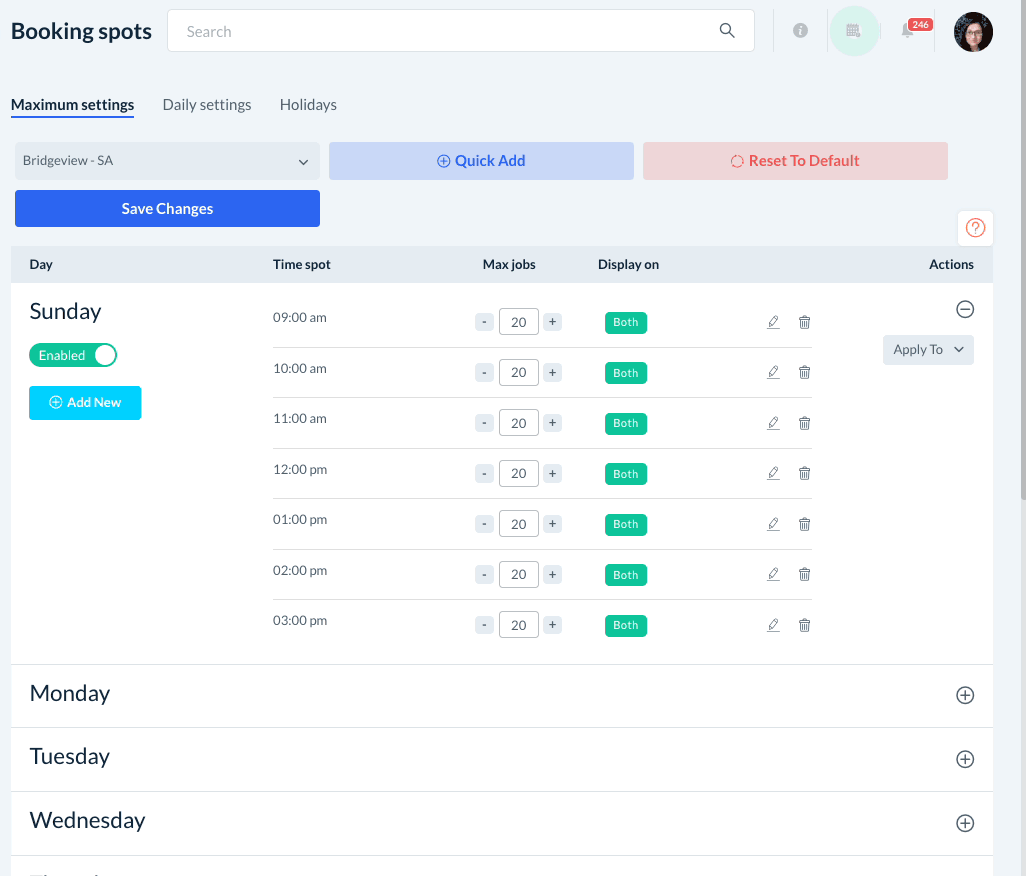
When you first sign up for your BookingKoala account, your store comes with built-in default booking spots so you can test out your availability settings.
The default bookings spots are set up as fixed start times:
Sunday, Monday, Tuesday, Wednesday, Thursday, Friday, Saturday
Every hour from 8 AM to 5 PM (ex: 8 AM, 9 AM, 10 AM, etc until 5 PM)
These can be modified or deleted depending on how your business operates.
Where are my booking spots located?
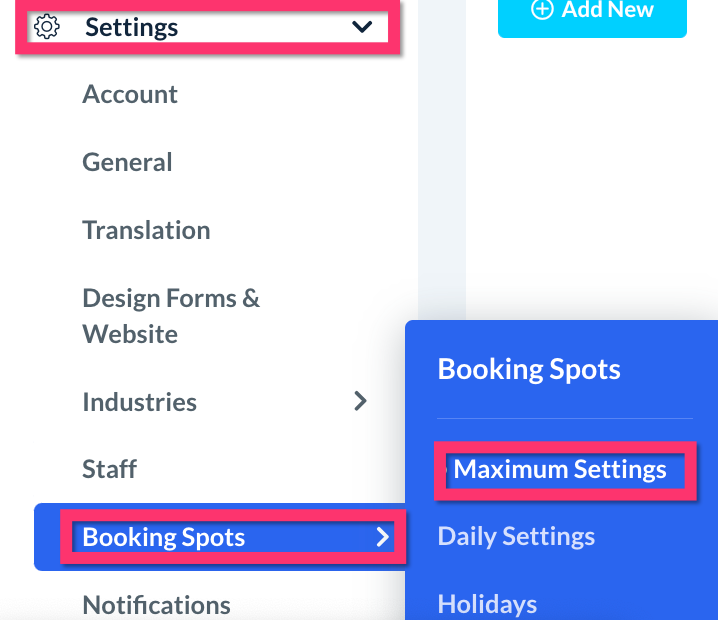
Your booking spots can be managed by going to:
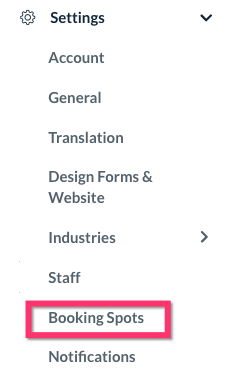
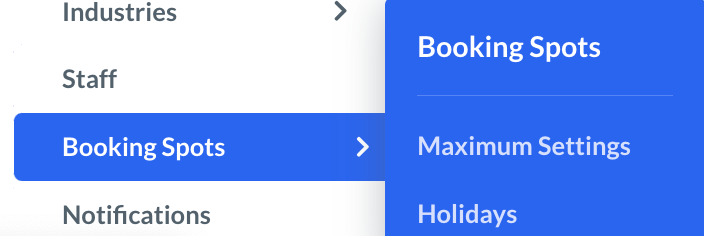
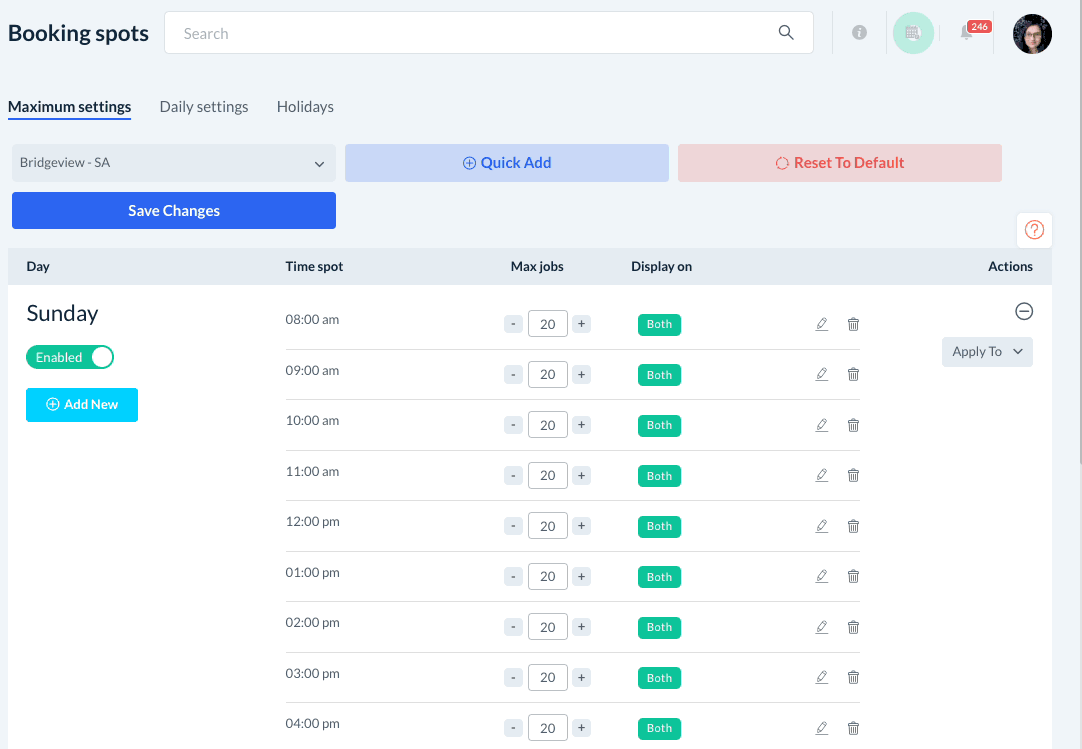
Settings > Booking Spots
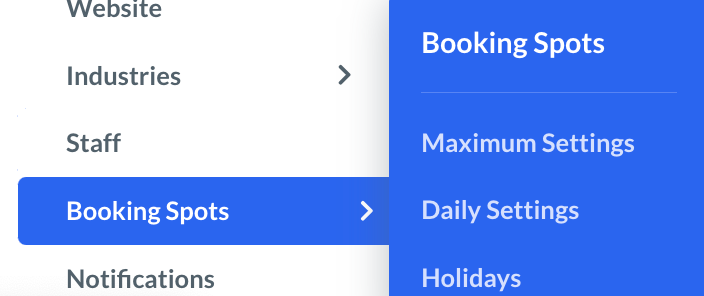
There are two or three sections under the Booking Spots tab (depending on your store options):
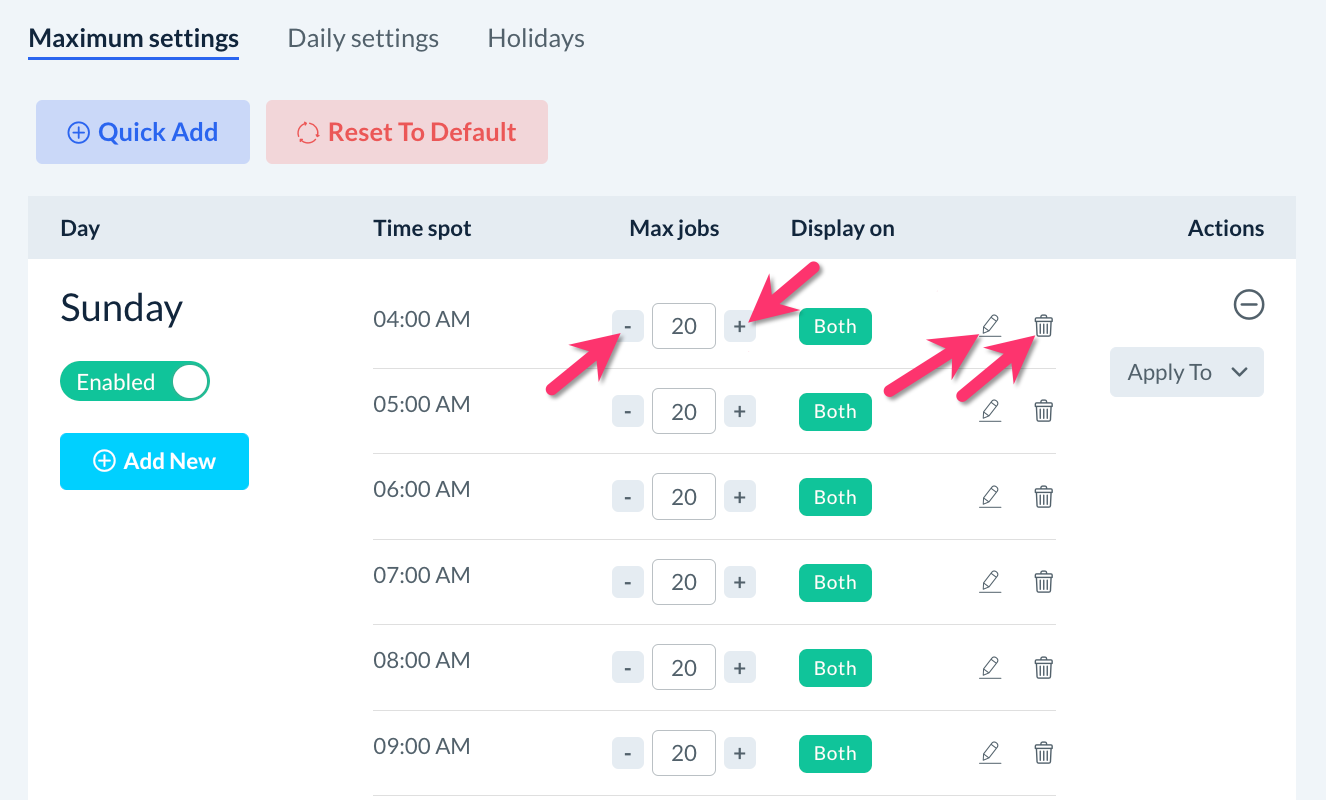
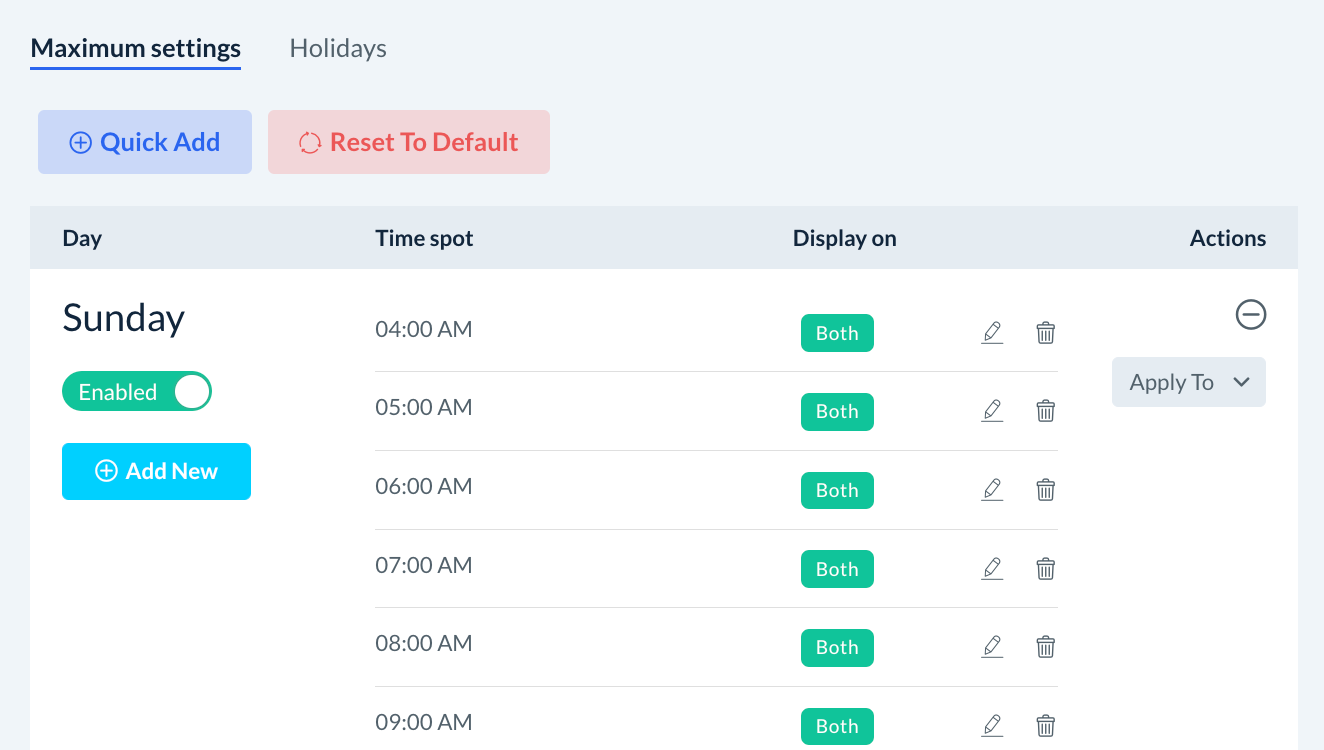
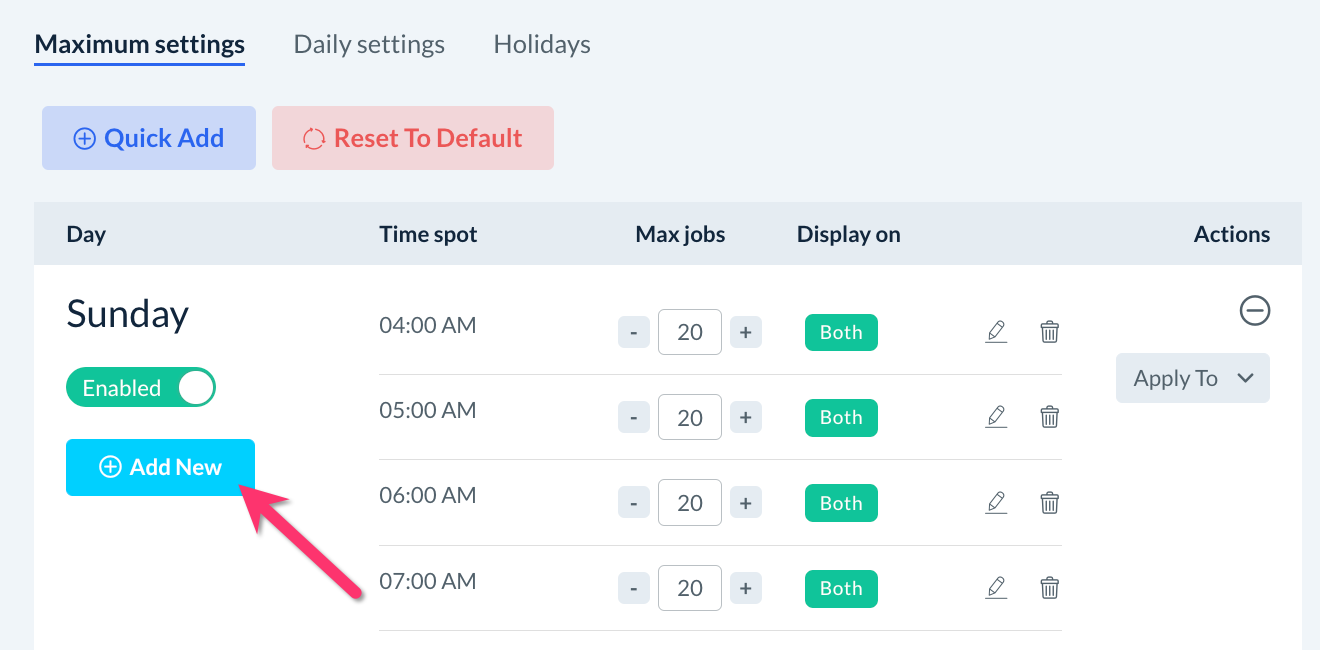
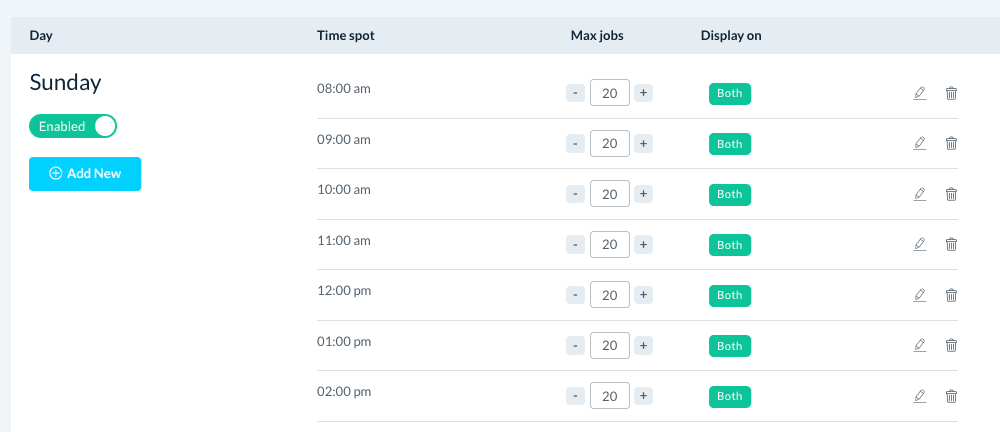
Maximum Settings - This is where you set up and control your default spots.
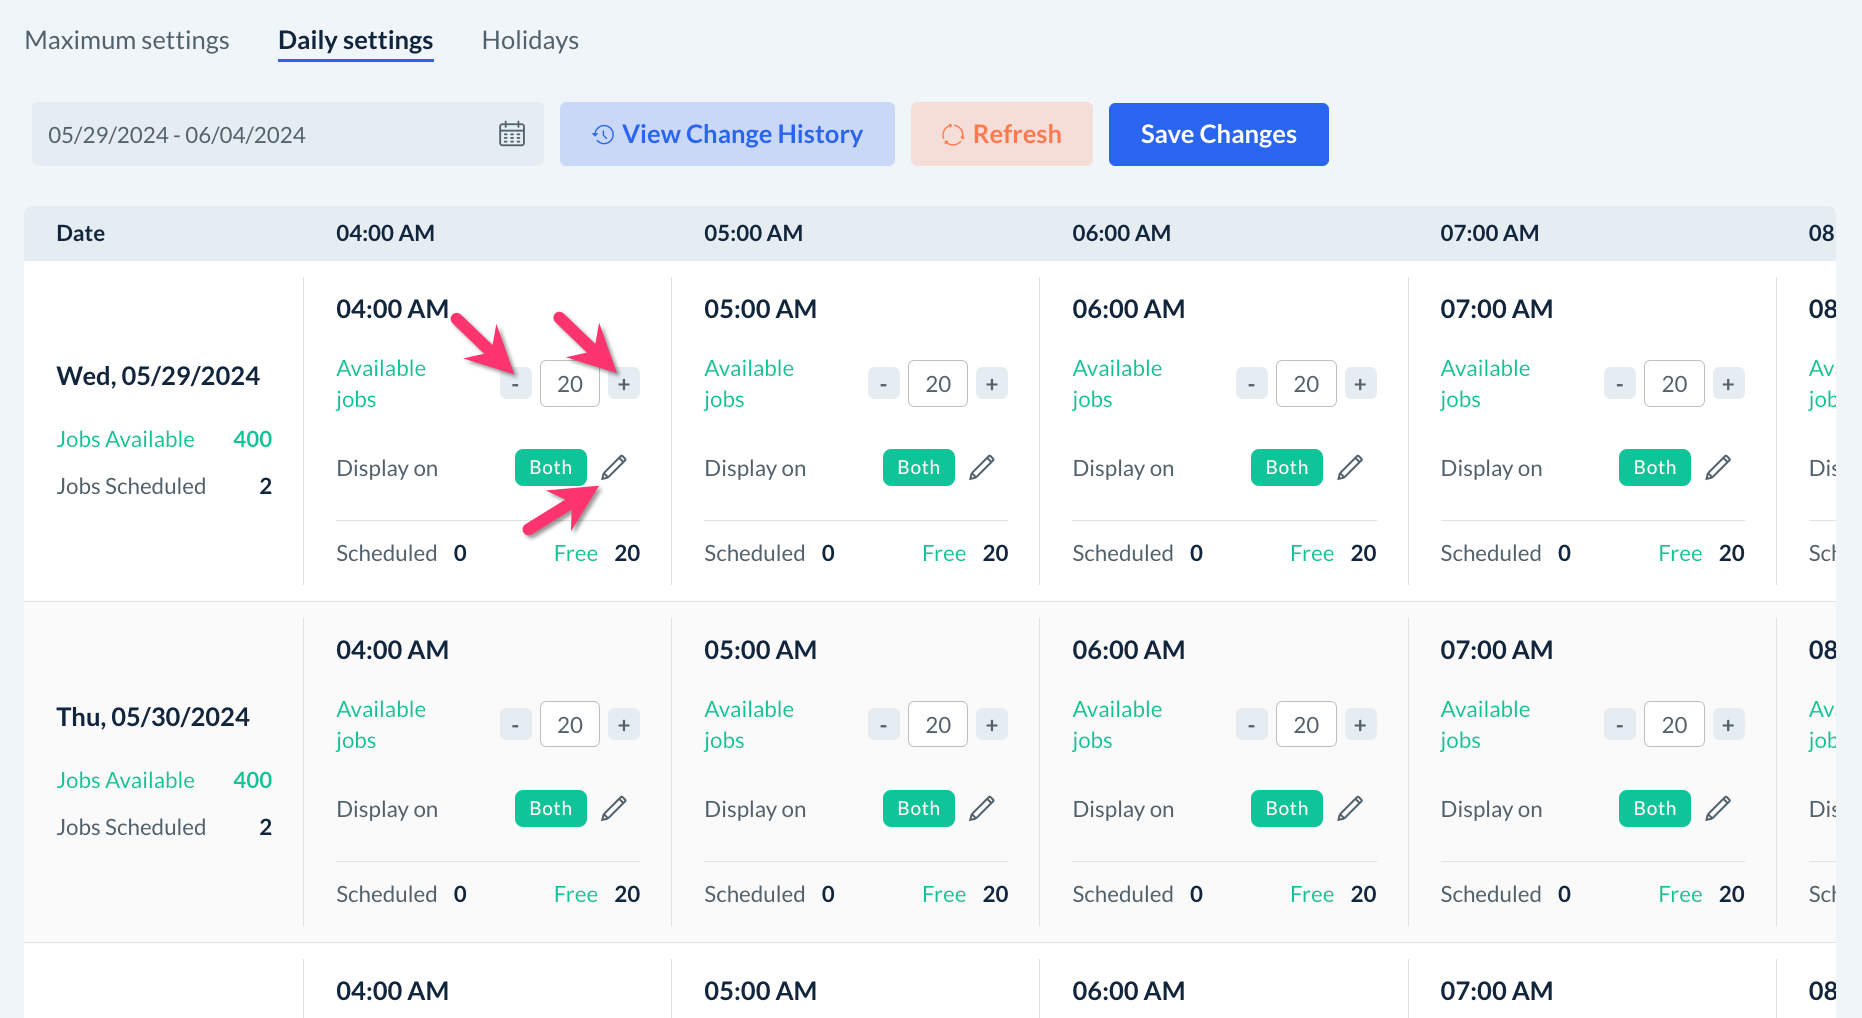
Daily Settings - (If you have enabled spot availability based on limits) This is where you can manage booking spots for a specific date.
Holidays - This is where you can close down booking spots for holidays or other days you need to block customers from booking on.
To enable spot availability based on limits, go to:
Settings > General > Store Options > Scheduling tab > Booking Spots section
For the question, "Would you like to manage spot availability based on limits?",
Select "Yes" to add spot limits, including the daily settings sections, to manage your availability.
There will be spot limits on the Maximum Settings page. For example, if you have 25 teams available to work but have a spot limit of 20, only up to 20 jobs can be booked.
There will be a Daily Settings section.
The Daily Settings section will allow you to manually adjust spots per date, time, and location for each date and time.
Select "No" to base spot availability solely on provider availability. For example, if you have 5 independent providers available at 3 PM, 3 PM has 5 spots.
There will be no spot limits on the Maximum Settings page.
There will not be a Daily Settings section.
Setting Up Booking Spots By Location
If your business offers different start times or arrival ranges depending on the location of the service, you may want to enable provider and availability per location.
For example, let's say an auto repair business has two locations: Uptown and Downtown. The Uptown location lets customers book for an exact start time. The Downtown location offers arrival ranges instead as it is has a larger staff and can accommodate more flexibility.
To make sure customers see the correct options, they have enabled provider availability and schedules per location. This allows them to set up separate booking spots for their Uptown and Downtown locations.
To learn how to configure this for your store, click here.
Modifying Booking Spots and Spot Limits
If you wish to keep most of your booking spots and would like to make some changes, there are multiple options to customize your spots. To make updates to your default booking spots, go to the Maximum Settings tab.
Add a New Time Spot
To add a new time slot, find the day of the week you wish to add a new spot to and click the blue "Add New" button.
A pop-up window will open.
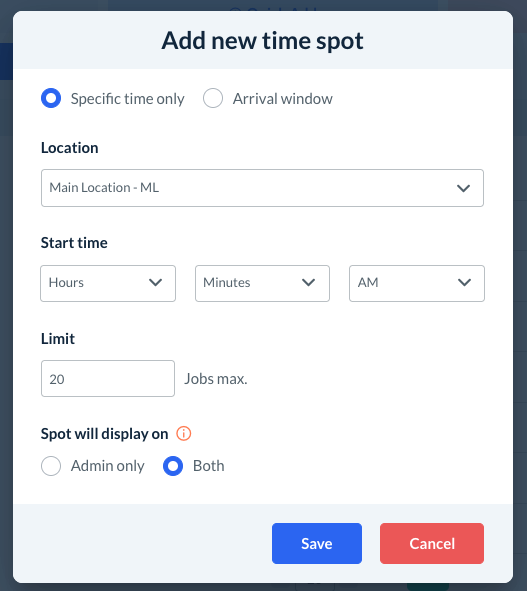
First, select whether you want to add a "specific time only" or an "arrival window".
Specific time only - Select this to create a spot with one fixed start time.
Arrival window - Select this to create a spot with an arrival range between two times.
If you have enabled provider availability and schedules per location, you can also select a specific location from the Location drop-down menu, or click "All".
Next, select the Start time you wish to add.
If you are adding an arrival window, you will see options for both Start Time and End Time.
If you have enabled spot limits in your scheduling settings, there will be a "Limit" box. Click here to learn how to enable this setting.
For the limit, enter the maximum number of spots you would like to offer for this time. The maximum number of spots may differ from the total number of providers you have.
For example: If you have 30 available providers and 20 booking spots open, up to 20 bookings can be saved for this spot.
Under "Spot will display under", decide who will be able to book these spots.
Admin only - Only an admin or staff account can schedule a booking for these spots.
Both - Customers and admin/staff can schedule bookings for these spots.
Once you are finished making your selections, click the blue "Save" button to add the booking spot to that day.
Edit or Delete a Time Spot
Time spots can be modified by clicking the edit or delete icons to the right of each spot.

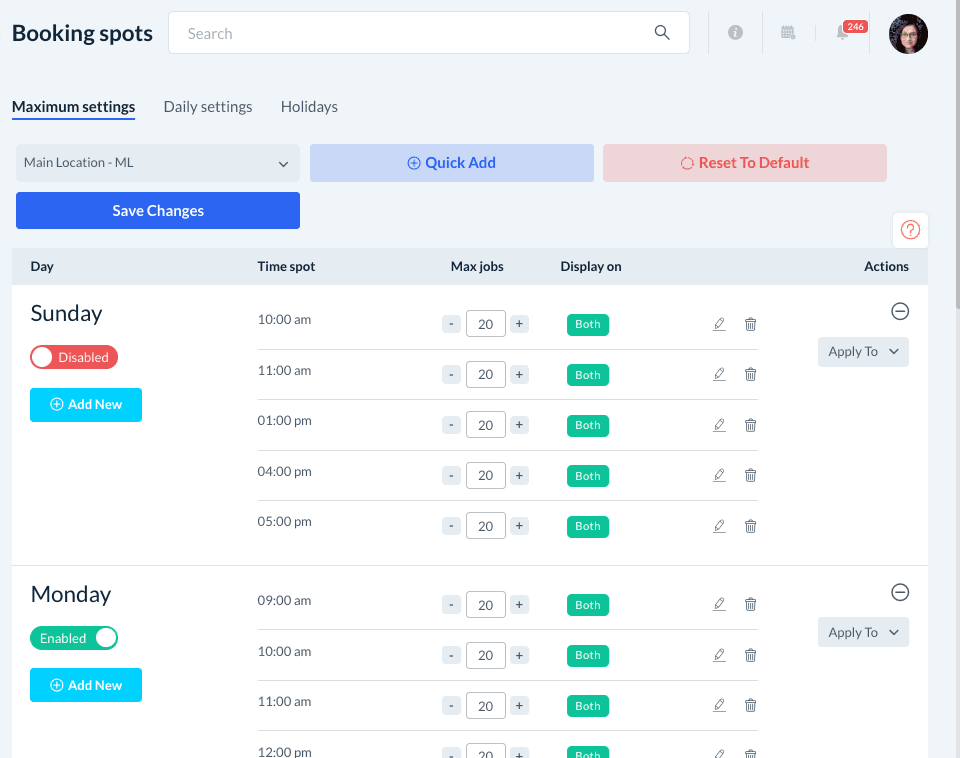
Enable or Disable Days of the Week
You can also enable or disable spots for a specific day of the week by switching the "Enabled" toggle button to "Disabled". A pop-up will appear asking if you would like to disable for "This location only" or "All locations". Select "This location" and click the blue "Yes" button to proceed,
Apply One Day's Spots to Another
If you have set up booking spots for a specific day of the week, you can quickly copy them over to any other day by using the "Apply To" button. This button is located on the far right side in each section for the day of the week.
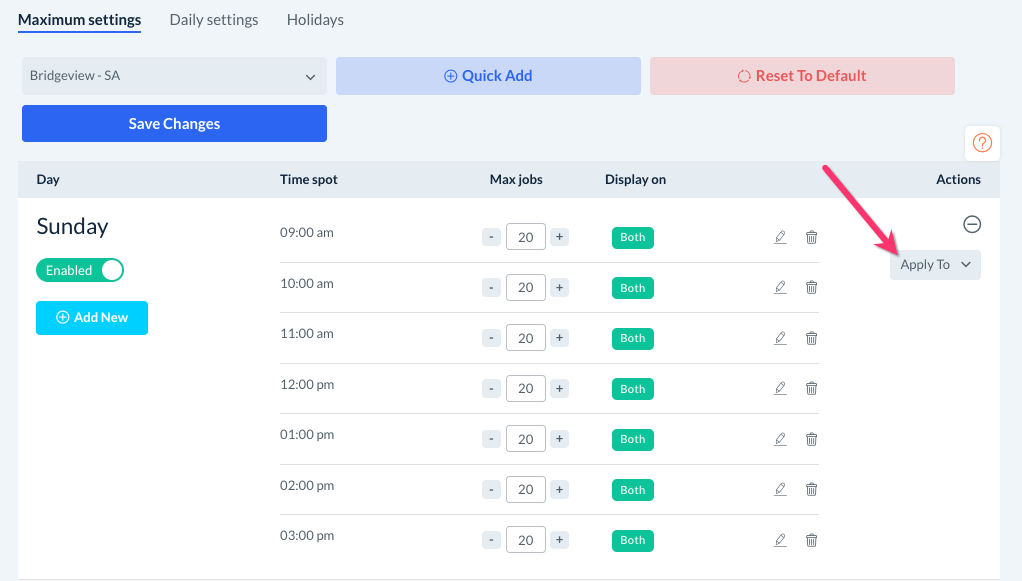
Check the box next to the day(s) you would like to copy the booking spots over, or select "All" to apply these spots to all days. Then, click the green "Apply" button to add the spots.
A pop-up window will ask if you are sure you want to make these changes for the selected day(s). Click "Yes" to proceed.
A green system notification will appear in the top-right corner, letting you know the spots have been saved successfully.
Reset to Default
The system's default booking spots are set up as fixed start times, for:
Sunday, Monday, Tuesday, Wednesday, Thursday, Friday, Saturday
Every hour from 8 AM to 5 PM (ex: 8 AM, 9 AM, 10 AM, etc until 5 PM)
If you would like to reset your booking spots back to the system default, click the red "Reset To Default" button at the top of the page.
A pop-up window will appear, asking if you are sure you want to reset the booking spots to the default. Click "Yes" to proceed.
A green system notification will appear in the top right corner, letting you know that the spots have been reset successfully.
Setting Up Booking Spots Using the "Quick Add" Tool
If you wish to start over, you can delete the existing booking spots and use the "Quick Add" feature to create new spots. To find this, go to:
Settings > Booking Spots > Maximum Settings
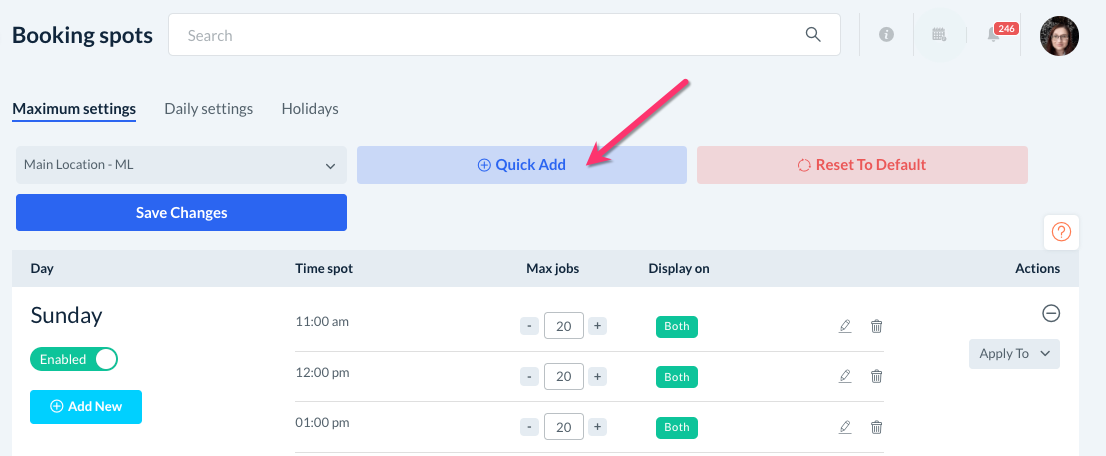
To begin, click the blue "Quick Add" button at the top of the page. A pop-up window will open.
If you have enabled provider availability per location (click here to learn more), you can copy booking spots from another location into this location. Click the radio button next to "Existing Location" and then select which location to copy from the drop-down menu. Click the blue "Copy" button to copy those spots to this location.
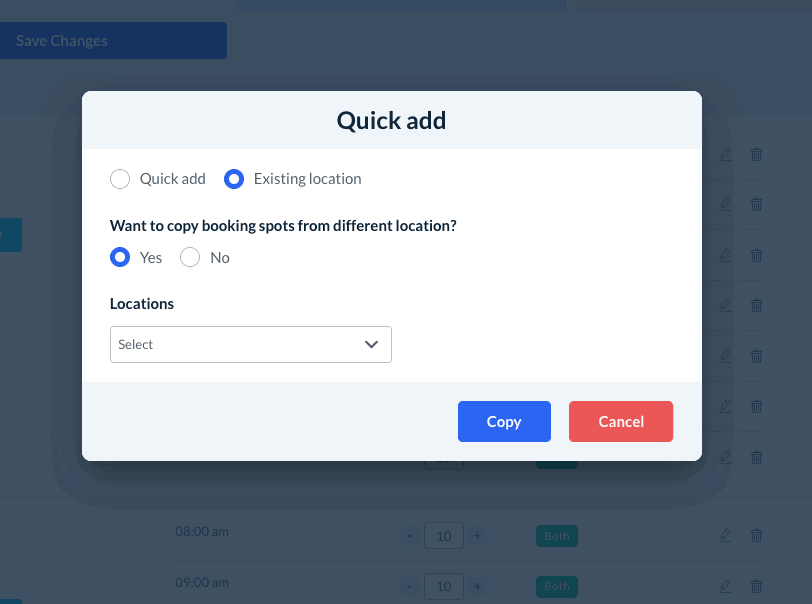
If you have not enabled booking spots per location or would like to set custom spots, continue with the "Quick Add" option.
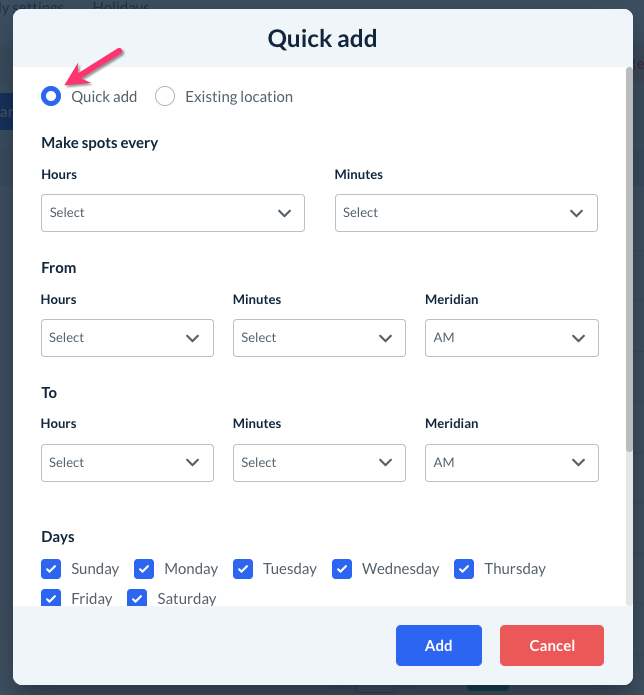
Under "Make spots every", select how often you would like a spot to appear. For example:
If you enter "1" in the "hour" box, booking spots will be generated for 12 AM, 1 AM, 2 AM, 3 AM, etc.
If you enter "0" in the hour box and "30" in the "minutes" box, spots will be generated for 12 AM, 12:30 AM, 1 AM, 1:30 AM, etc.
Select the earliest spot you would like to offer from under where it says "From". For example:
If you enter 8:00 AM, your earliest spot will be for 8 AM.
If you enter 1:00 PM, your earliest spot will be at 1 PM.
Under "To", select the latest start time you would like to offer.
If you enter 11 AM, no spots will be generated after 11 AM.
If you enter 6 PM, no spots will be generated after 6 PM.
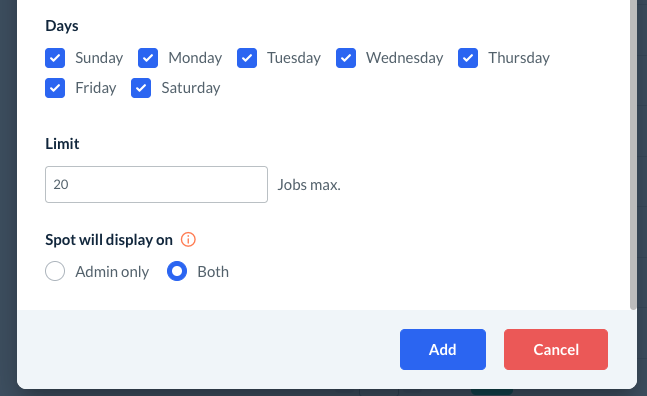
Below "Days", check off the boxes next to each day you would like to have these spots. If you uncheck a box, whatever spots currently exist for that day will remain unchanged.
For the "Limit", enter the maximum number of spots you would like to offer for this time.
Under "Spot will display under", decide who will be able to book these spots: the "Admin-only", or "Both" customers and admin/staff.
Once you are finished making your selections, click the blue "Add" button at the bottom of the pop-up. All of your booking spots will be generated automatically.
Why are my booking spots not showing up on my booking form?
Some reasons that your spots may not be showing are:
Provider schedules are not set up. Please review this article on how to set up your providers' availability.
The job length plus the travel time goes longer than any provider can work. If you do not want the system to check the job length against the provider's availability, please review this article on how to set up your store's availability settings.
Due to the providers ' settings, the job details do not match any provider who can work the job. Learn more about where to update provider job settings in this article, this article, and this article.