The purpose of this article is to help you learn how to:
Edit the checklist name
Require mandatory checklist completion for providers
Display checklists, the checklist progress page, and checklist media to customers
Allow customers to send checklist notes to the admin/staff/provider(s)
Enable automated checklist notifications
Set checklist preferences for recurring services
Allow providers to send checklist notes to the admin/staff/customer
Set default checklist notes for the customer and/or the provider(s)
Manage tags used for checklist media and tasks
Getting Started
This article goes over how to customize the checklist settings section for a new or existing checklist in the Checklist Module. If you have not created a checklist yet, click here to learn how to add and build a checklist.
The Checklist "Settings" Section
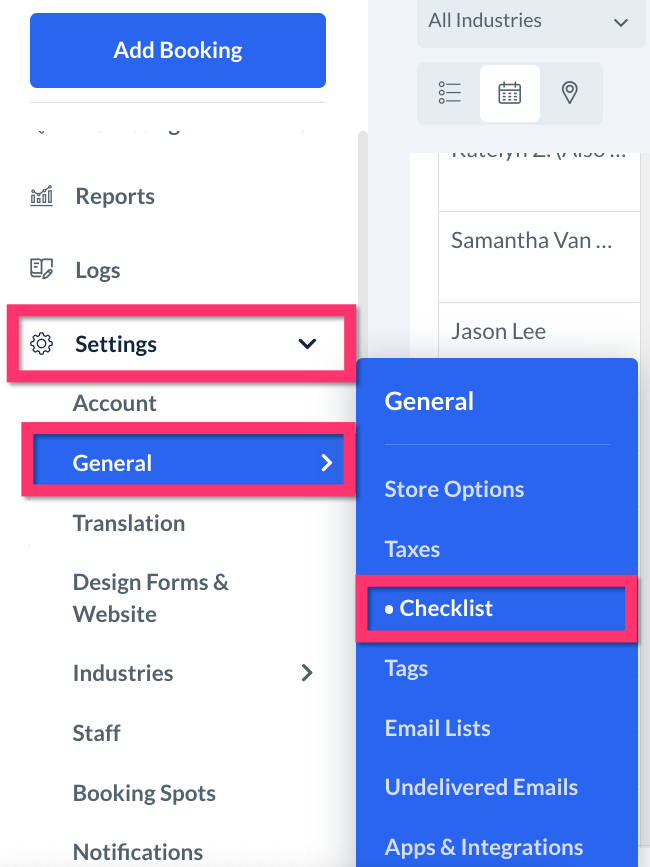
As an admin or staff member with permission, you can access the admin checklist dashboard from the left-side menu in the admin/staff dashboard under:
Settings > General > Checklist
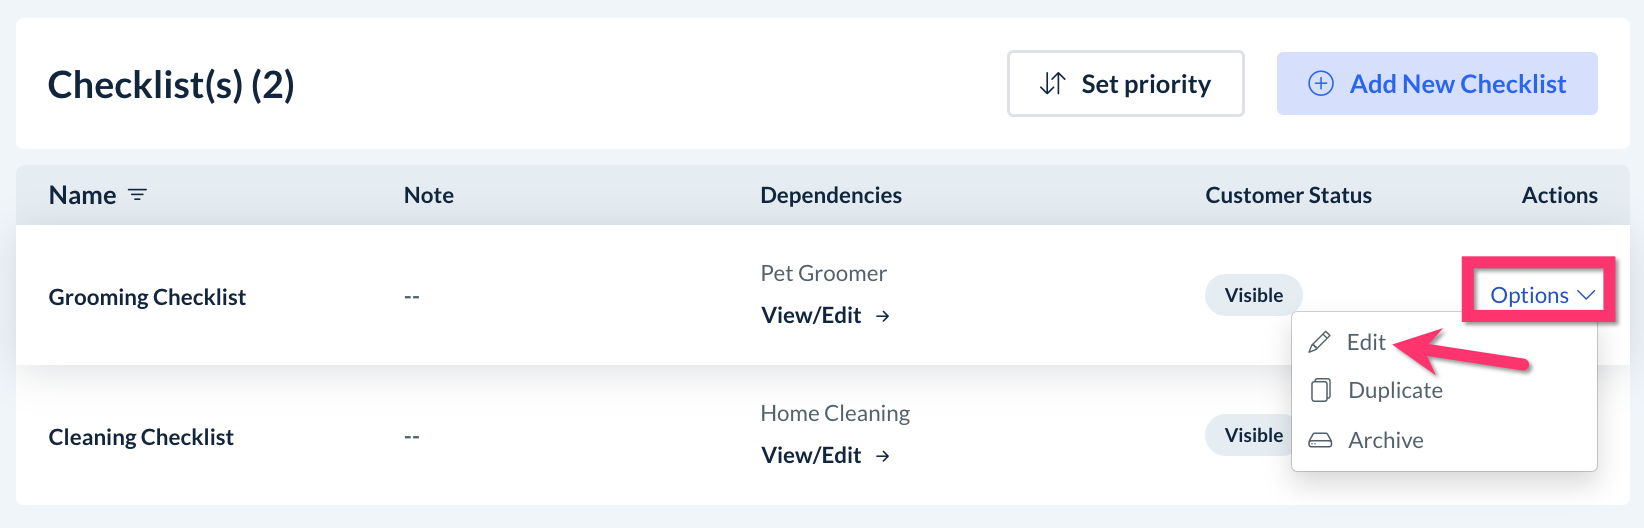
Once the dashboard has opened, select "Options" then "Edit" under the "Actions" column to open a specific checklist.
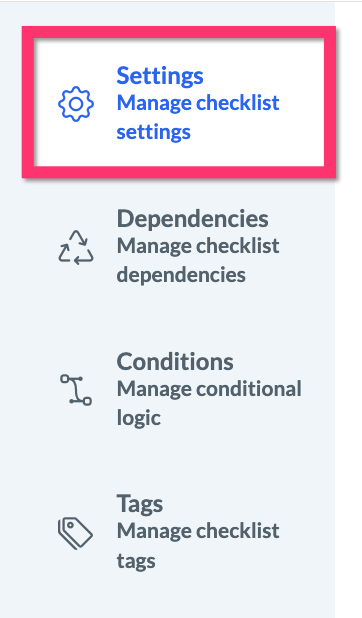
To view a checklist's settings, click on the "Settings" tab to the right of the "Builder" tab at the top of the Checklist Builder page.

By default, the "Settings" tab always directs to the "Settings" section located at the top of the left-side menu.
Checklist Name
The topmost field allows you to edit the name of this checklist.
Mandatory Checklist Settings
The next setting is "Is the provider/team required to complete the checklist before clocking out?"

Select "Yes" to block providers from clocking out of the booking until the checklist has been completed.
Select "No" to allow providers to clock out without first completing the checklist.
If you selected "Yes" for the previous question, there may be an additional question below.*
"How should the system handle an incomplete checklist if the provider(s) are automatically clocked out?"
Select "Send a push notification to remind the provider(s) to complete the checklist" so the provider is prompted to complete the checklist before clocking out.
Select "Automatically mark the checklist as complete if the provider(s) are automatically clocked out" to have the system mark any remaining tasks as "complete" when the provider clocks out.
*This question will only appear if you have enabled automatic clock-outs under the GPS & Time Logs settings section under Settings > General > Store Options > Provider tab.
Customer Checklist Settings
The next setting is "Would you like customers to be able to see the checklist?"

Select "Yes" to allow customers to see the checklist associated with their booking(s).
Select "No" if customers should not be able to see the checklist, regardless of whether it has been completed or not.
If you selected "Yes" for the previous question, there will be a few additional questions to set your preferences for customer checklist visibility.
"When will the checklist be displayed to customers?"

Select "Always display the checklist to the customer" to allow customers to see the checklist associated with their booking(s) before and after it has been completed.
Select "Only display the checklist after it has been completed" if you only want customers to see the checklist after it has been completed. Customers will not be able to reference the checklist before the day of the service.
"Would you like customers to see a checklist progress bar that displays the percentage of completed tasks/subtasks?"

Select "Yes" to allow customers to see a checklist progress bar in their dashboard that displays the percentage of tasks/subtasks completed.
Select "No" to hide the checklist progress bar from customers.
"Should customers be able to see who completed a task on the checklist?"

Select "Yes" to allow customers to see a name associated with each completed task.
Select "No" to hide the name of the person or company who completed each task.
If you selected "Yes" for the previous question, there will be a few additional options to set your preference for whose name will be displayed.
Select "Show the name(s) of the provider(s), team, admin, or staff" to display the name of the individual(s) who completed the task.
Select "Show your business name" to display the business name next to each completed task.
If you selected "Show your business name" for the previous question, the system will display your default business name as set under the Settings > General > Store Options > General > Store Info section.
You can also edit the business name as displayed in this checklist using the field just below the "Show your business name" option.*
*If you change the business name using the option above, any future changes applied to the business name in the "Store Info" section will not impact the name used for this checklist.
For example, if your business name in the "Store Info" section is "Better Services LLC", the default business name used for the checklist will also be "Best Services LLC".
If you change the business name in the checklist to "Even Better Services LLC", it will NOT change the store name "Better Services LLC" set in the "Store Info" section.
If the business name in the "Store Info" section is later updated to "Best Services LLC", the checklist business name will NOT be updated and will still be displayed as "Better Services LLC".
"Would you like the customer to see files added to the checklist?"

Select "Yes" to allow customers to see files that have been uploaded to the checklist.
Select "No" if only the staff, providers, and admin should be able to see files uploaded to the checklist.
If you selected "Yes" for the previous question, select one or more tags from the drop-down menu below to allow customers to see media using these tags. The "Select All" option at the top of the menu will allow customers to see files associated with any/all possible tags.
"Tags" are labels that can be applied to job media added to the checklist. The system has three default tags: "Before", "After," and "Damages". Custom tags can be added from the "Tags" section.
Click here to learn more about checklist tags and how to create your own.
"Should customers be able to add notes to the checklist?"

Select "Yes" to allow customers to add notes to the checklist. The "checklist notes" feature is a chat-based communication tool that allows the admin/staff/provider and the customer to interact by sending notes associated with the checklist's tasks/subtasks.
Select "No" to disable the "checklist notes" feature for customers. Only admin, staff, and providers (if permitted) will be able to send and view notes added to the checklist.
If you selected "Yes" for the previous question, there will be an additional option to configure just below.
"Would you like to allow customers to add notes for individual tasks/subtasks or should the notes be added for all tasks/subtasks?"

Select "Individual tasks/subtasks" if you would like to allow customers to send/add notes for specific tasks or subtasks on the checklist.
If you selected "Individual tasks/subtasks", decide which tasks/subtasks the customer can send notes about using the "Select task(s)/subtask(s)" drop-down menu.
Select "All tasks/subtasks" if you would like the customer's notes to be associated with all tasks/subtasks in the checklist.
Checklist Notifications
"Would you like to enable automated notifications when the checklist is complete?" This option controls if notifications will be automatically sent by the system when the checklist is complete.
Select "Yes" to enable the checklist notifications.
Check the box(es) next to "Email" and/or "SMS" to enable the notification type(s).
Check the boxes next to "Admin" and/or "Customer" to enable notifications for each user type.
Select "No" to disable the automated checklist notifications.
Recurring Service Checklist Settings
"If the service is recurring, would you like to display this checklist for all bookings in the series?"
Select "Yes" to use/display the same checklist for all bookings in the recurring service.
Select "No" to set a finite number of bookings to display this checklist.
If you selected "No" to the previous question, there will be two different options to set which booking(s) in the recurring series will use/display this checklist.
Select "Display this checklist for the first [#] appointments" to enable the checklist for the first 1 to 10 bookings. Any bookings after the first [1-10] as designated here will not use this checklist.
Select "Display this checklist after [#] appointments" to enable the checklist after 1 to 10 bookings have occurred. Any bookings before the first [1-10] as designated here will not use this checklist.
Provider Checklist Note Settings
"Should providers be able to add notes to the checklist?"

Select "Yes" to allow providers to add and send checklist notes. The "checklist notes" feature is a chat-based communication tool that allows the admin/staff/provider and the customer to interact by sending notes associated with the checklist's tasks/subtasks.
Select "No" to disable the "checklist notes" feature for providers. Only admin, staff, and customers (if permitted) will be able to send and view notes added to the checklist.
If you selected "Yes" for the previous question, there will be two additional questions just below.
"Would you like to allow providers to add notes for individual tasks/subtasks or should the notes be added for all tasks/subtasks?"

Select "Individual tasks/subtasks" to allow providers to send/add notes for specific tasks or subtasks on the checklist.
If you selected "Individual tasks/subtasks", decide which tasks/subtasks the provider can add/send notes regarding by using the "Select task(s)/subtask(s)" drop-down menu.
Select "All tasks/subtasks" if you would like the provider's notes to be associated with all tasks/subtasks in the checklist.
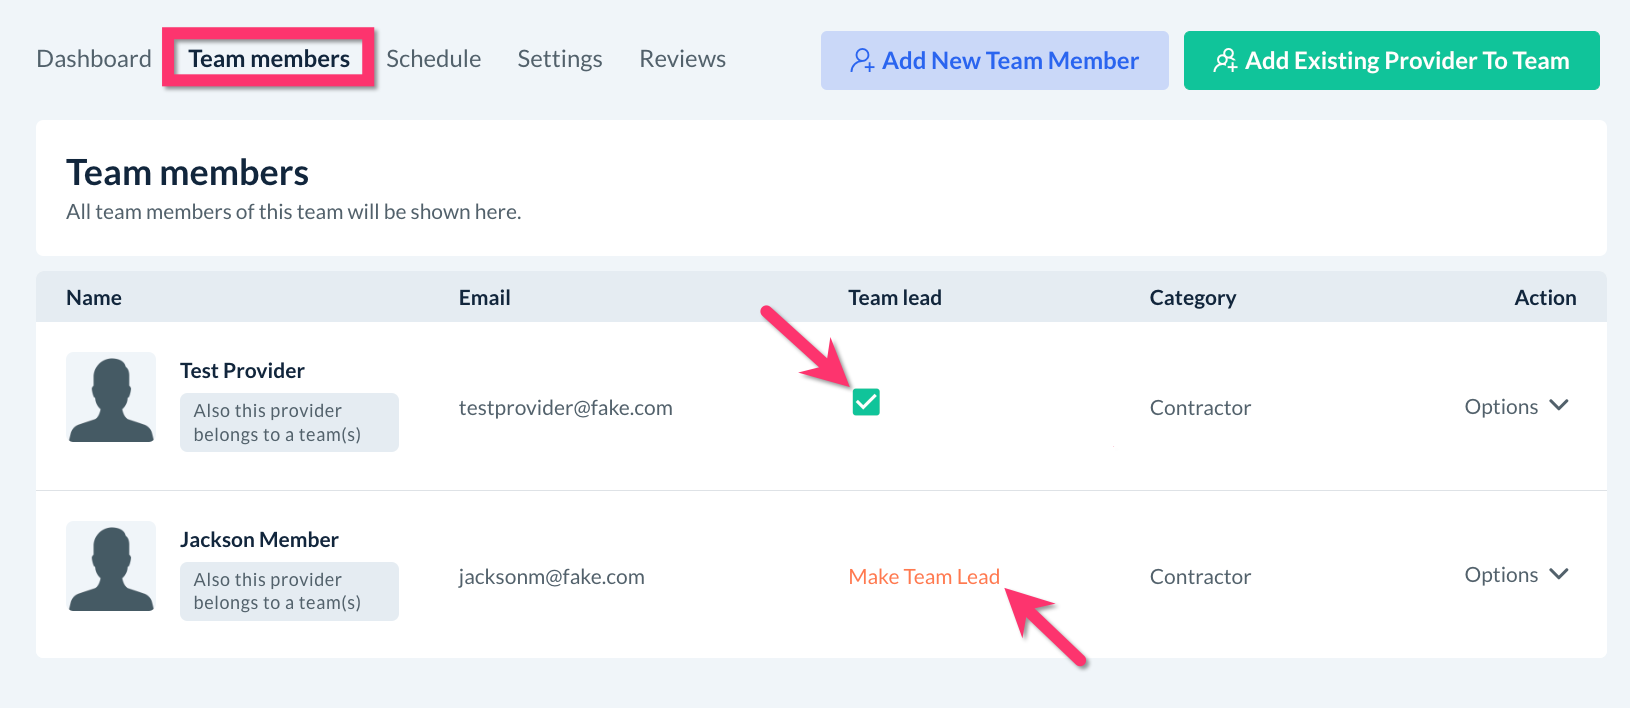
"If a team is assigned to the booking, who will be allowed to add notes to the checklist?"

Select "Team leader only" if you would only like team members designated as the "team leader" to add/send checklist notes.
You can check and edit a team's leader by going to Providers > Providers > [Team Name] > Team Members tab.
Select "Everyone (individually)" if you would like all team members to have access to the checklist notes feature.
Default Checklist Note Settings
The next two options allow you to set a default note that is displayed to customers and/or providers when they access the checklist.
"Would you like to set up a default checklist note to display to customers?"
Select "Yes" to set up a default note for customers.
Select "No" if a default note for customers is unnecessary.
If you select "Yes" for this option, use the text editor to construct the default note that customers will see for this checklist.
The text editor includes options to apply style and formatting to the text. To do so, highlight the test with your cursor and then click on an icon to select a different font, color, alignment, etc.
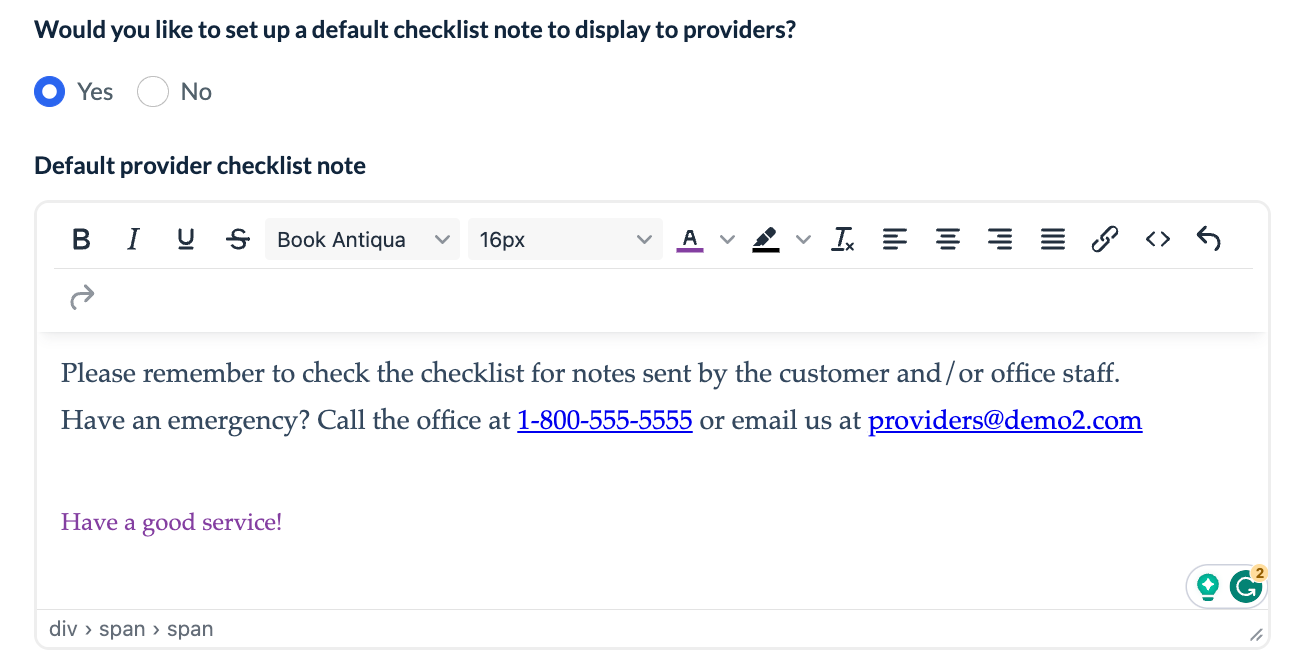
A default checklist note for providers can be set for providers as well by selecting "Yes" for the question, "Would you like to set up a default checklist note to display to providers?"
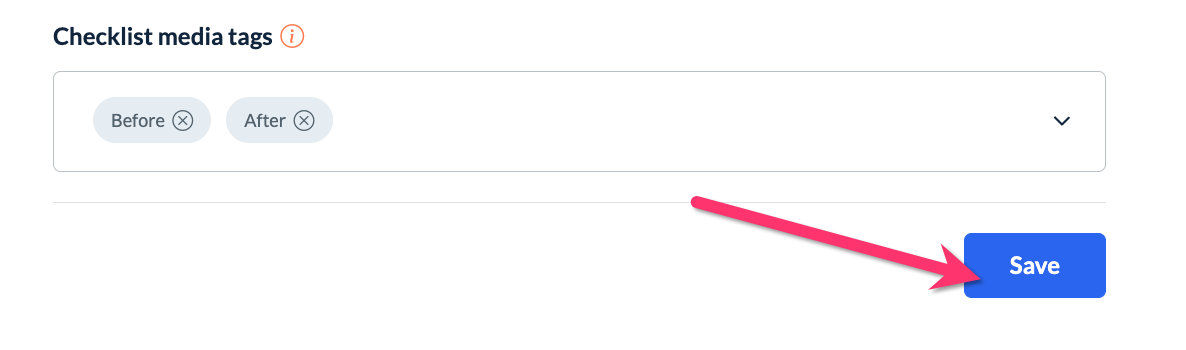
Checklist Media Tag Settings
Tags can be used to label and filter media (previously referred to as "Job Pictures") that have been uploaded to the checklist.

The system includes three default tags: "Before", "After", and "Damages". You can add your custom tags from the Tags section on this page (covered in an upcoming section).
To enable one or more tags for this checklist, check the box next to each tag number from the "Select tag(s)" drop-down menu, or chose "Select All" to enable all possible tags for use in the checklist.
Saving Changes to the Checklist Settings
At the very bottom of the "Settings" section, be sure to click the blue "Save" button if you have made any changes to your checklist's settings.
Save and Publish
Once you've finished making changes, please remember to click the "Save & Publish" button to save the new checklist settings.
Next Steps
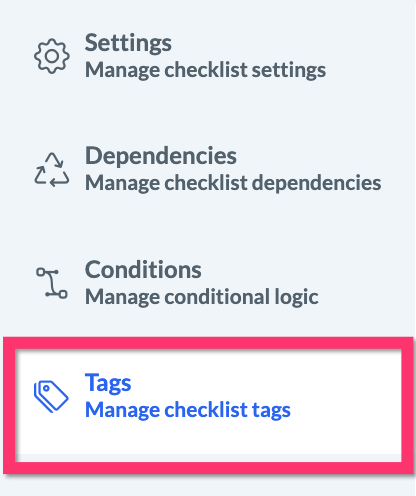
Once you have gone through the checklist's main "Settings" section, you should review the three other sections located in the "Settings" tab: Dependencies, Conditions, and Tags.
Click here to learn how to use the "Dependencies" section to set up checklists for different job types or combinations of services.
Click here to learn how to display or hide certain tasks/subtasks using conditional logic in the "Conditions" section.
Click here to learn how to set up and manage checklist tags under the "Tags" section.
You can also return to the Checklist Builder if you need to further customize the tasks and subtasks used by this checklist.
Click here to learn how to create a new checklist by adding tasks, subtasks, and other elements from the Checklist Builder.