The purpose of this article is to help you learn:
How to add multiple addresses to a customer's profile
How to add a credit/debit card for a specific location
Multiple Addresses
Whenever you schedule a booking for a customer, the address will be saved into their profile under the "Address" section. You can also manually add addresses to this section to help expedite the booking process.
To manually add an address to a customer's profile, go to:
Customers > Customers
Search for the customer's name, email address, phone number, or address in the search bar or locate them in the list below.
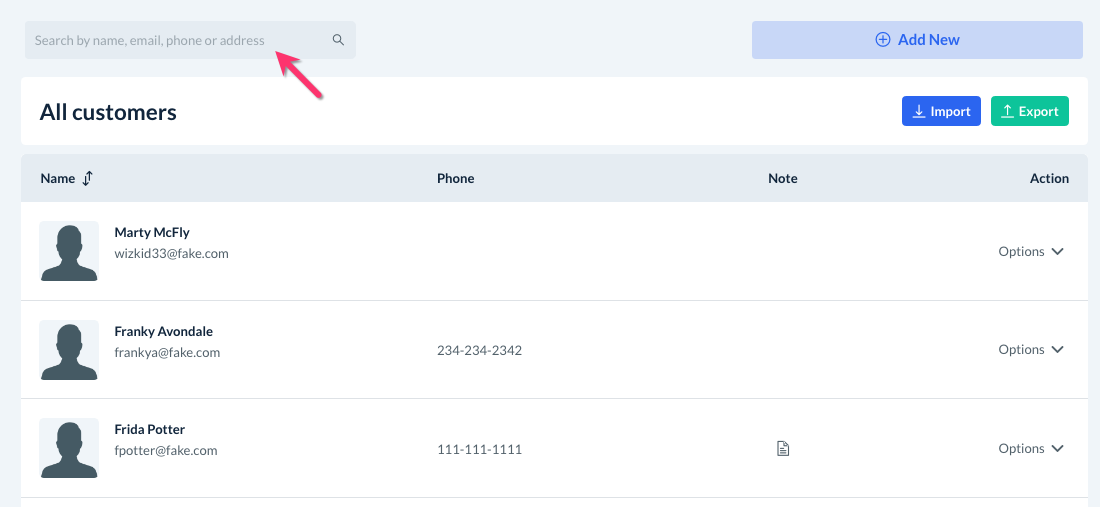
Click on the customer's name to be redirected to their dashboard. Next, click the "Profile" tab at the top of the page.

Scroll down until you see the "Addresses" section. Click the blue "Add New" button to add a new address.

An "Address" pop-up window will appear. Type the address into the field(s) and check the box next to "Make Default" if you would like to set this as the customer's primary address.
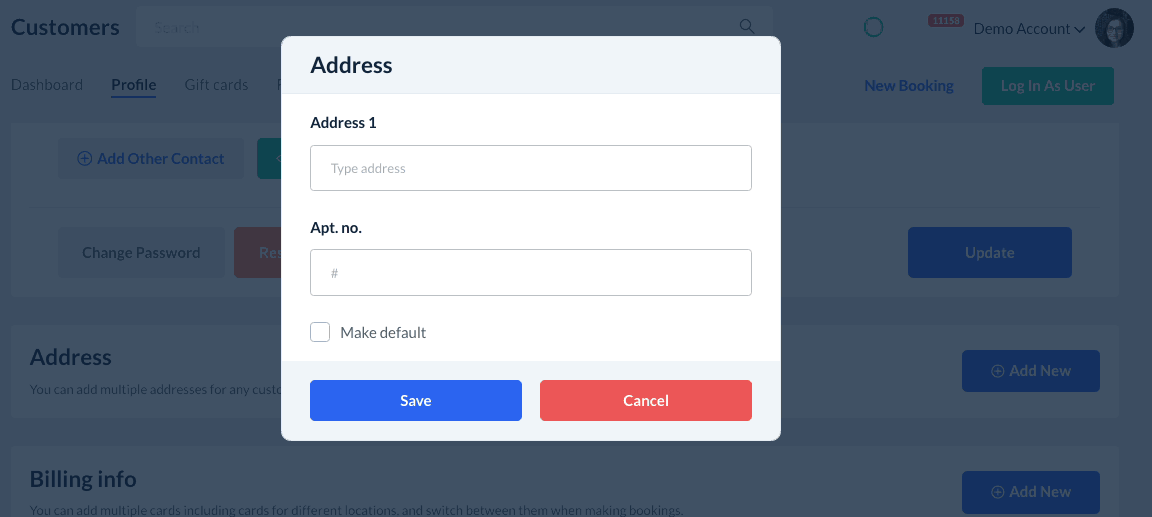
Once you click the blue "Save" button, the address will be added to the customer's profile.
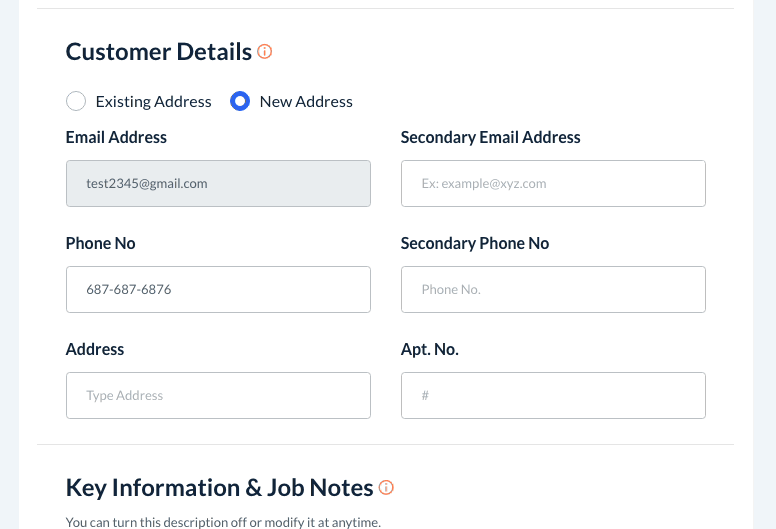
Once an address has been saved into a customer's profile, you can select it from the "Existing Address" section of the booking form.
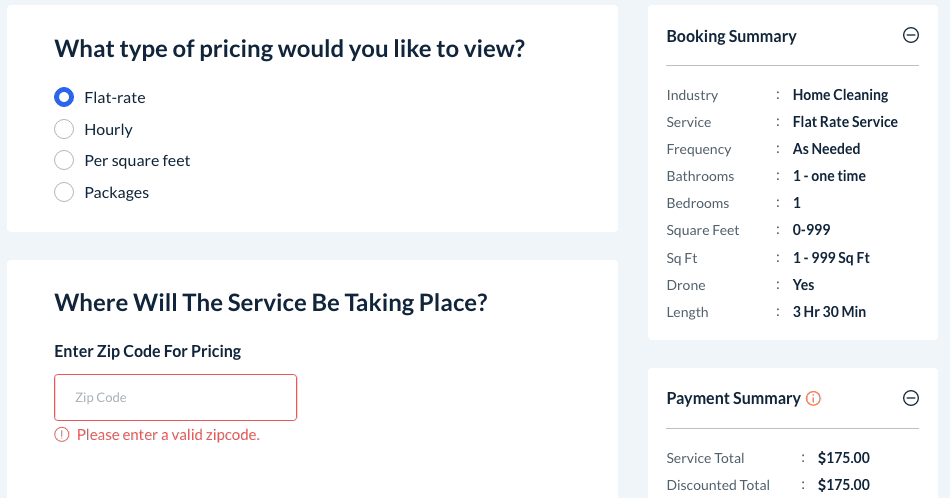
If you use zip-code-based locations, the address will be automatically selected when you enter the zip code at the top of the form.
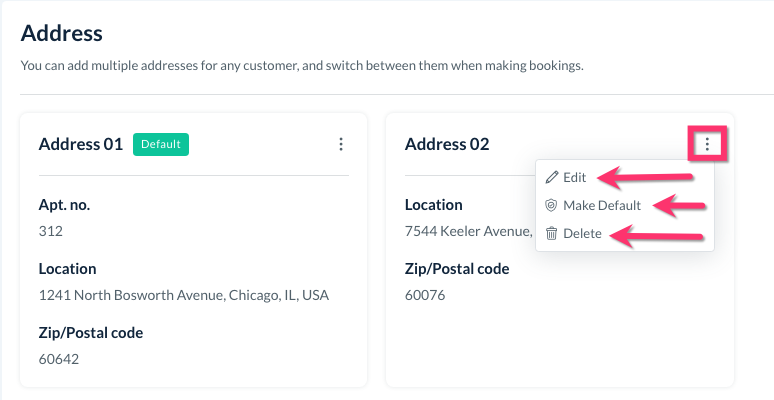
If you ever need to edit, delete, or switch the default, click on the three dots icon in the top right corner of the address box.
Multiple Cards
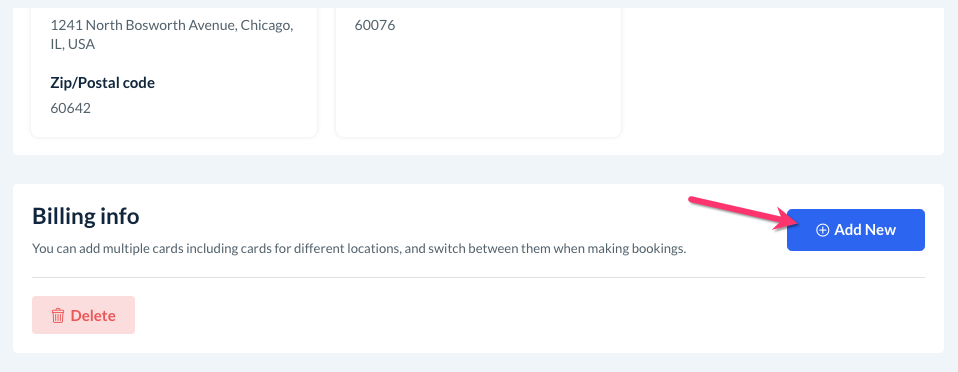
Whenever you schedule a booking for a customer, their credit or debit card will be saved into their profile under the "Billing Info" section. You can also manually add cards to this section to store them for future use.
To manually add a new card to a customer's profile, go to:
Customers > Customers
Search for the customer's name, email address, phone number, or address in the search bar or locate them in the list below.

Click on the customer's name to be redirected to their dashboard. Next, click the "Profile" tab at the top of the page.

Scroll down until you see the "Billing Info" section. Click the blue "Add New" button to add a card on file.
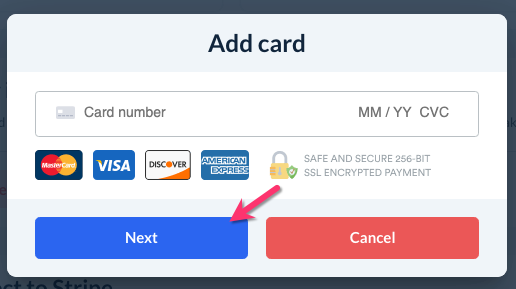
An "Add Card" pop-up window will appear where you will enter the full card number, expiration date, and the 3 or 4-digit CVC (security code).
If you have multiple Stripe or Square accounts connected to your locations, you will see an additional option to select a location for the card.
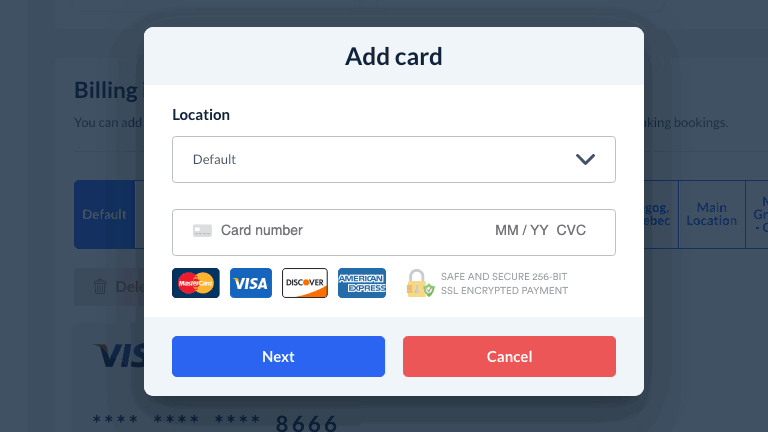
You can pick "Default" to save the card for use in all locations, or pick a specific location from the drop-down menu. This feature allows you to save a card that can only be used for a specific location.
If the customer has pending upcoming bookings on their schedule, there will be a "Next" button. This displays a second pop-up with options to update pending or upcoming bookings with the new card.
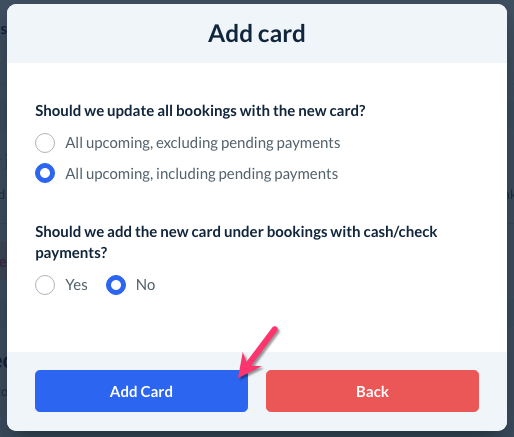
For "Should we update all bookings with the new card?" select one of the options:
"All upcoming, excluding pending payments" will set the new card as the default for all upcoming bookings, including any pending services.
"All upcoming, including pending payments" will set the new card as the default for both pending and upcoming appointments.
For "Should we add the new card under bookings with cash/check payments?", select one of the following options:
Yes - Any bookings that have been saved with "Cash/Check" as the payment method will be updated with the new card information.
No - "Cash/Check" bookings will not be updated with the new card.
Finally, click the blue "Add Card" button to save the card into the profile.
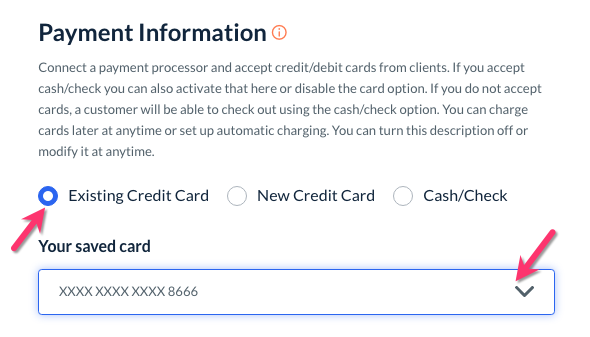
Once a card has been saved into a customer's profile, you can select it from the "Existing Credit Card" section of the booking form.
If you have connected multiple Stripe or Square accounts for your locations, you can click on the location tabs under the "Billing Info" section to view the card(s) saved for that location.
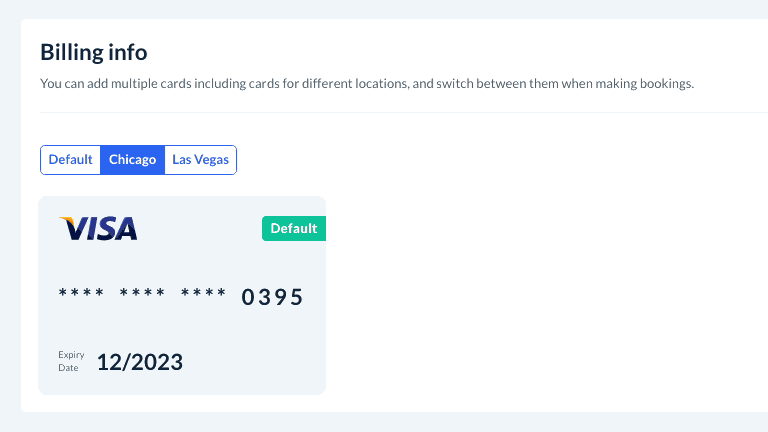
Whenever you schedule a new booking for this location, the correct card will be linked to the booking.