The purpose of this article is to help you understand:
Setting up your locations
Creating a service area
Use the map tool to create a service area
Enable secondary locations
Create a merchant or online location
With BookingKoala, you can set up multiple locations/zones and control different pricing points and sales tax per location if needed. Later you can run reports based on each one of these locations to find metrics your business needs.
Before You Begin
Before you begin, if you haven't done so already, you will need to flush the test data out of the system. Every new BookingKoala account includes a few fake customers, providers, and bookings to better help you understand the system and test your settings. It is important to flush the test data before starting to build your locations so it does not interfere with your settings.
To flush the test date, go to:
Settings > General > Store Options > Admin Tab
At the very bottom of the page, click the red Flush Test Data button. A pop-up box will appear, confirming you would like to delete the data. Select Yes to continue.
Please note: If the "Flush Test Data" button or section is missing, the data has already been deleted and you can proceed with the next step.
Getting Started
To begin setting up your locations, go to:
Settings > Industries > [Industry Name] > Form [#] > 1. Locations
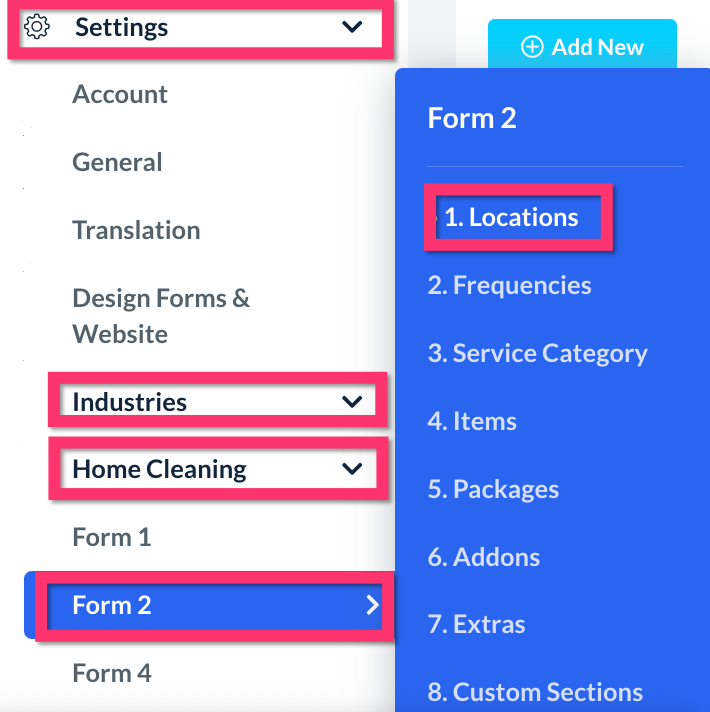
If Locations is NOT displaying, go to:
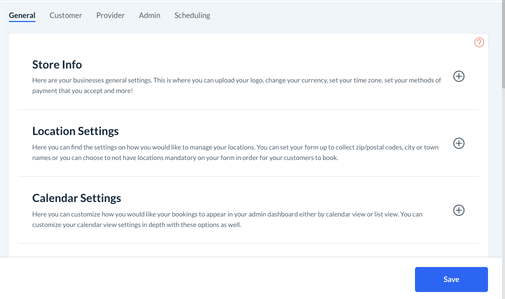
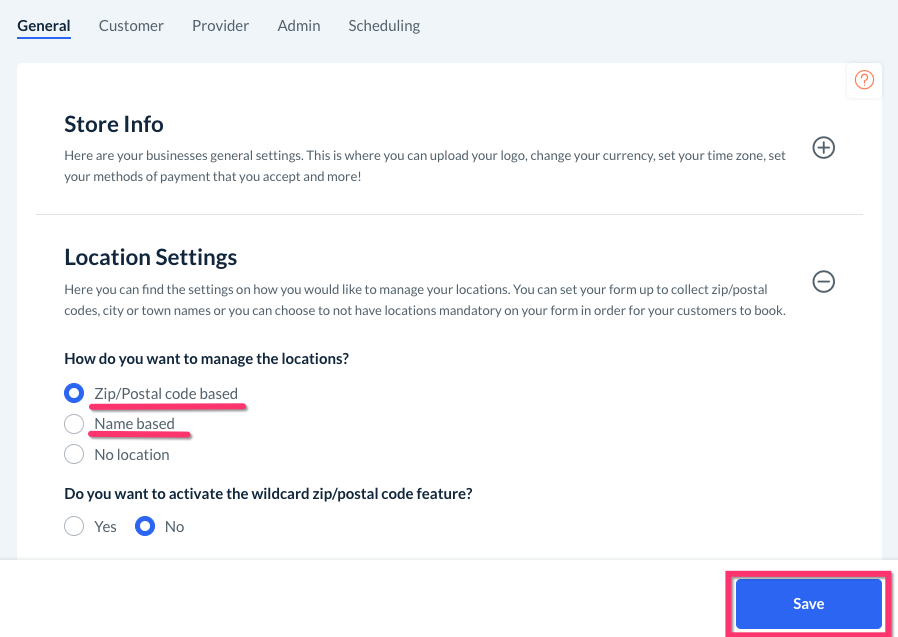
Settings > General > Store Options > General > Location Settings
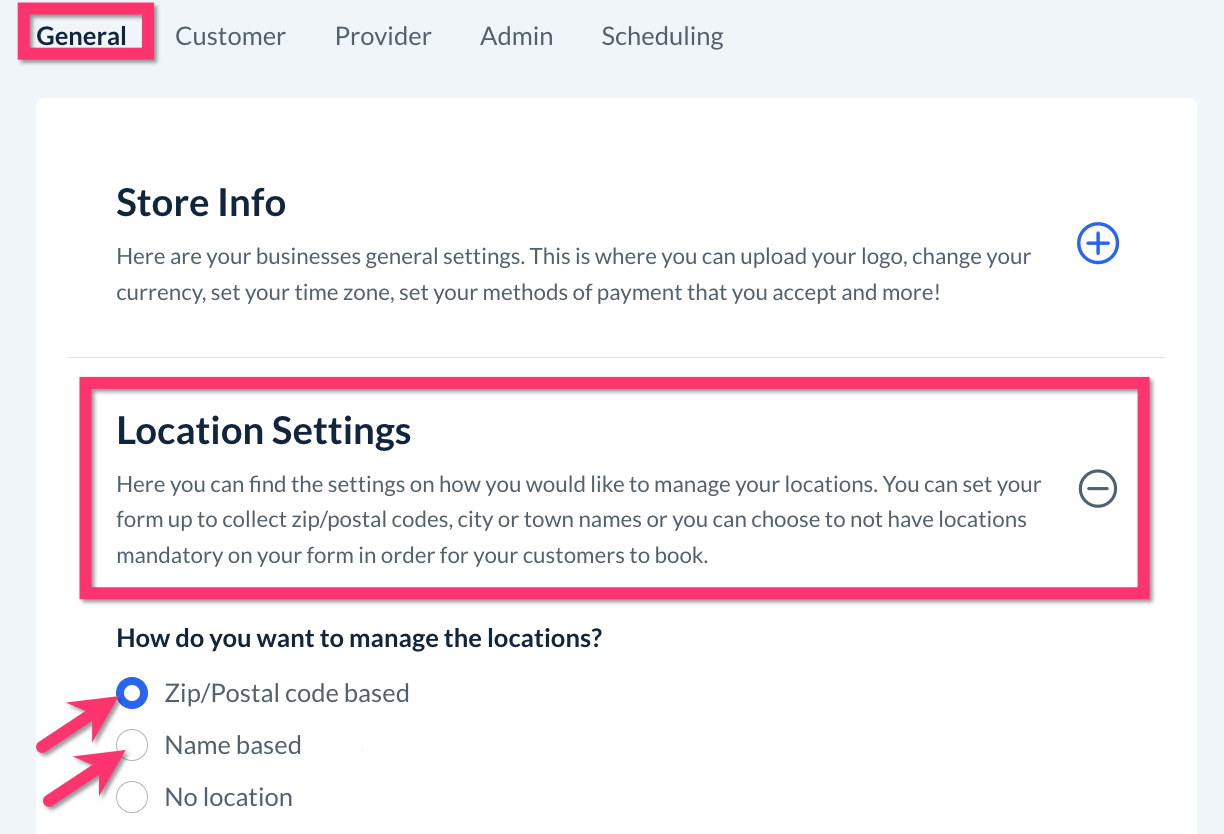
Expand the "Location Settings" section and make sure that either Zip/Postal code-based or Name-based has been selected, then click Save.
Once locations have been enabled, go to:
Settings > Industries > [Industry Name] > Form [#] > 1. Locations
At the top of the Locations page, click the blue "Add New" button at the top of the page to create a new location.

Setting Up Client Locations
If you selected "Client location" under your form settings, you will be setting up a service area for your location.

First, add a name for the location. The system does not allow for duplicate location names.
Zip-Postal Code-Based Locations
If you have selected zip/postal code-based locations, there will be a map tool that you can use to draw your service area and retrieve the zip/postal codes inside.
Using the Map Tool
Click and hold your cursor on the map to reposition and find your location. You can use the zoom buttons to hone in on your service area. Then, click once on the map to drop your first point. After three points are placed, you will start to create the circumference of your map. You can make additional points or move the points you already created to extend or shorten your area.
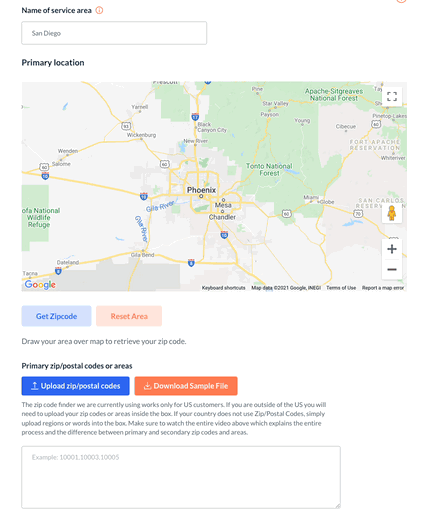
Once you are satisfied with the highlighted service area, click the blue Get Zipcode button to capture the zip codes within your radius. The codes will be automatically imported into the box below. If you want to start over, click the "Reset Area" button and it will clear the map points and zip codes.
Please note, the zip code finder we use only works for US customers. If you are outside of the US, you will need to upload your zip codes/areas inside the box below the map.
If you already have a list of zip codes, you can paste them in the Primary zip/postal codes or areas box below the map. Please be sure that each zip code is separated by a comma only and no spaces.
For example: 10001,10002,10003,10005,10007,10009,10011
Uploading Zip Codes Manually
You can also upload a spreadsheet with your saved zip codes if you have one by clicking on the blue "Upload zip/postal codes" button and selecting the file from your computer. To make sure your file has been formatted correctly, click the "Download Sample File" button. You can also edit the information into this file and re-upload it.

Additional Location Settings
Below the zip/postal code or place name box, there are several more settings questions to answer.
"Would you like to activate secondary locations?"
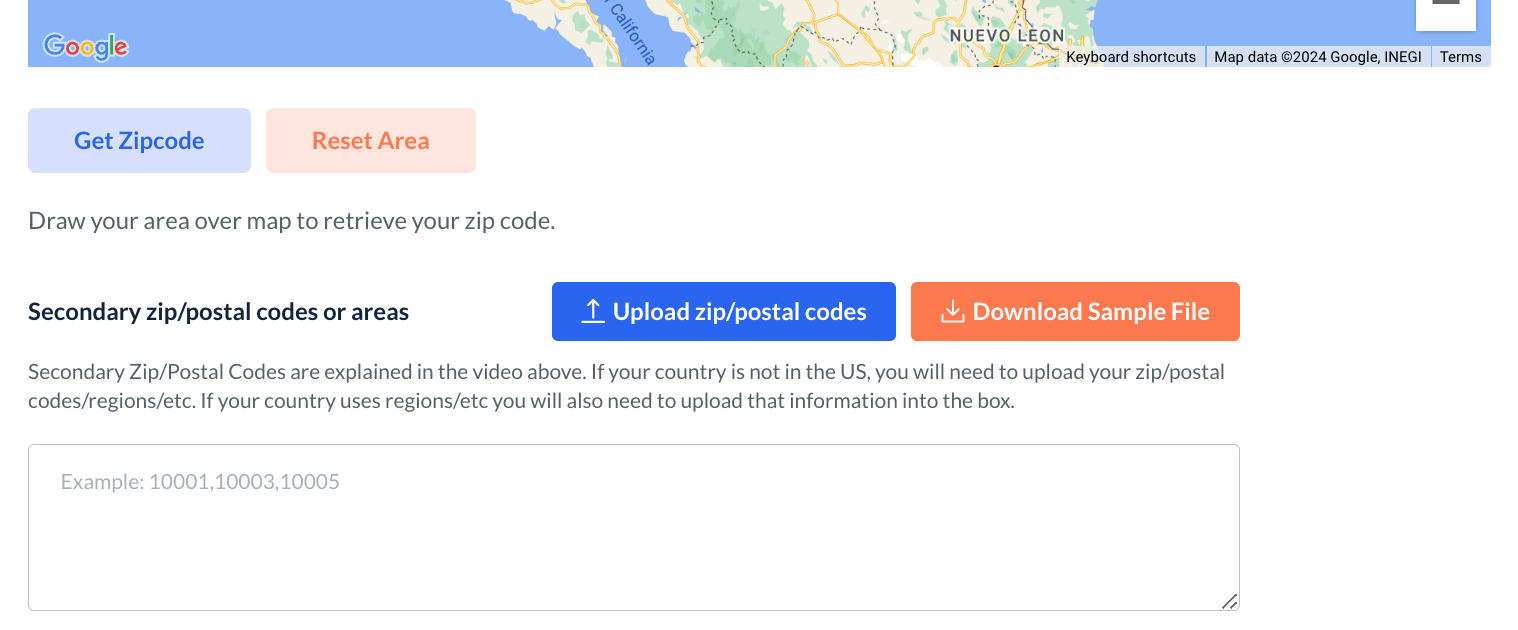
Secondary locations are areas that can only be booked by an admin or staff member, and cannot be booked by clients through your booking form. There are several different reasons why you may want to use secondary zip codes.
If you are looking to expand soon, you can start to build a customer base before offering these locations as a booking option online. Perhaps, you’d like to have more control over booking in areas that are a bit farther than your regular service area. Whatever the case may be, the secondary areas can be added or imported using any of the methods described above.
Whenever a customer types in an area that falls in this secondary list, they will receive a message that they are not in your service area or any other message you'd like to set up. They will not be able to make a booking for this location online and will need to contact you if they are interested in setting up a booking.
When the admin enters the area into the booking form, they will receive a message saying this is a secondary zip/postal code, but you will still be able to proceed with scheduling the booking. If you ever decide to include a secondary area into your primary service area, you can simply copy and paste it from the bottom list to the top list.
"Will you charge a service fee for traveling to the location?"
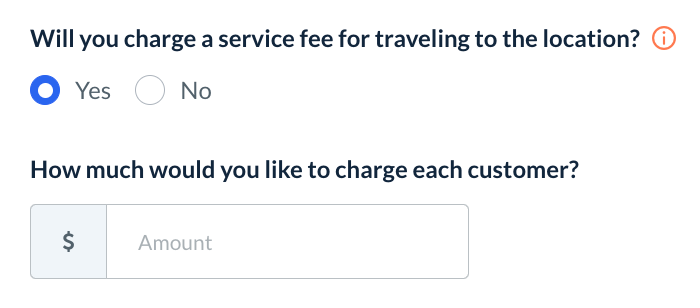
This option allows you to charge for a provider traveling to the customer's location. This is a flat fee that is added to the booking total. If you enable this option, then the "Pay for Parking" option will be disabled so the customer does not feel like they are being overcharged.
"Do you wish to exempt sales tax for this location?"

This option allows you to enable or disable sales tax.
If you do want to charge sales tax and you are in the U.S., you can connect a great app called Taxify to automatically calculate and update local taxes, or you can simply create your tax calculation by visiting:
Settings > General > Taxes
Tax rates can be set for each location or you can use one tax rate for all locations.
Next Steps
If you have not connected a payment processor to your account yet, you can click the blue Save button at the bottom of the page. A green box will pop up box will appear in the top right-hand corner saying "Location Saved Successfully".
If you have connected a payment processor, click the blue Next button at the bottom of the page.
If you use Stripe or Square as your payment processor, you will be asked "Do You Want To Setup Different Account For This Location?"

If you select "No, use the default", this will use the Stripe account that you set up in your Store Options. If you select "Yes, add a new account" or "Yes, use an existing account", this will allow you to use a separate Stripe account for this location. For more information on how to set up your custom locations, visit our articles on connecting Stripe or Square as your payment processor.
Once that has been configured you will click the blue "Next" button to set up your Dependencies (covered at the end of this article).
Named-Based Locations
If you are adding a name-based location, you will be brought to a shorter "Add Location" page.
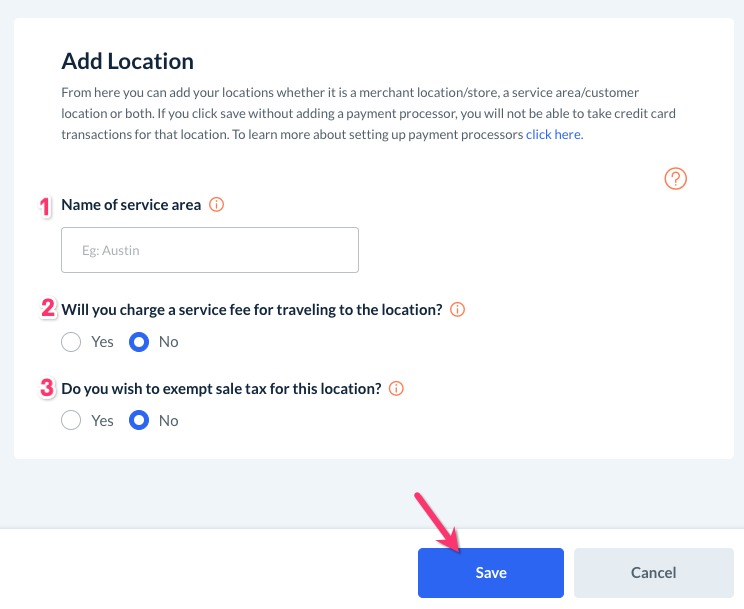
Name of service area - Add a name for the location. The system does not allow for duplicate locations names.
Will you charge a service fee for traveling to the location? - Select "Yes" if you would like to charge an extra fee for clients who book for this location. This fee will be added to their total price.
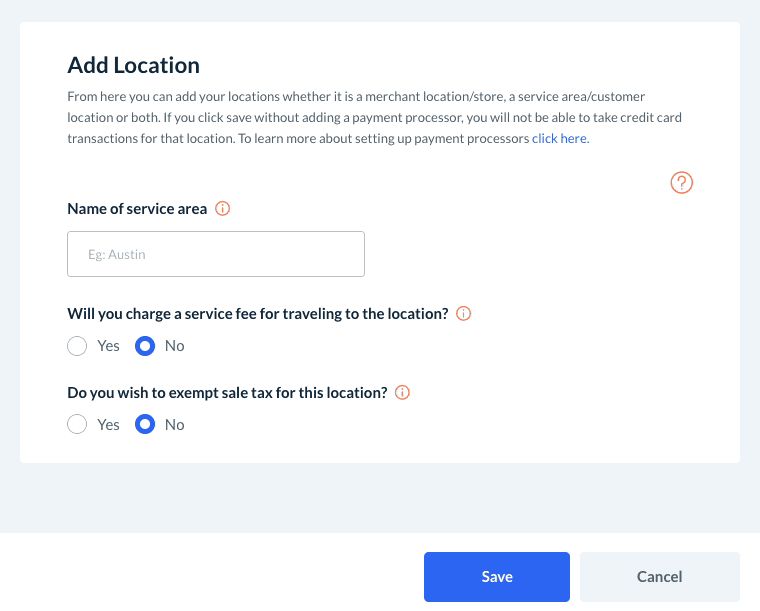
Do you wish to exempt sales tax for this location? -
Select "Yes" if you do not want to charge sales tax for this location.
If you select "No", you can later set up your tax options by going to Settings > General > Taxes. Tax rates can be set for each location or you can use one tax rate for all locations.
Once you have finished setting up your options, click the blue "Save" button at the bottom of the page.
For more information on how to enable name-based locations for your form, click here.
Setting Up My Location or Online
If you select "My location or online" under your form settings, you will be setting up a store location instead.

Store Address
First, you will then name your store location and enter the address into the boxes below. There is also an option to hide the address on the booking form if you'd prefer customers not to see the exact address.
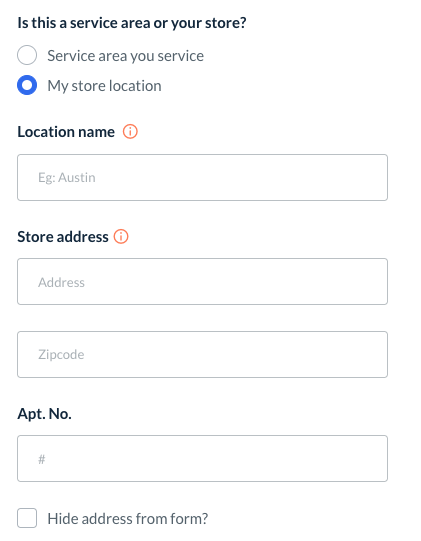
Additional Location Settings
Below the address boxes, there are two more options for your location settings.
"Do you wish to exempt sales tax for this location?" allows you to enable or disable sales tax.
You can also upload an image for your booking form when a customer selects this location. The image size should not exceed 300x300 pixels.
Next Steps
If you have not connected a payment processor to your account yet, you can click the blue Save button at the bottom of the page. A green box will pop up box will appear in the top right-hand corner saying "Location Saved Successfully".
If you have connected a payment processor, click the blue Next button at the bottom of the page.
If you use Stripe or Square as your payment processor, you will be asked "Do You Want To Setup Different Account For This Location?"
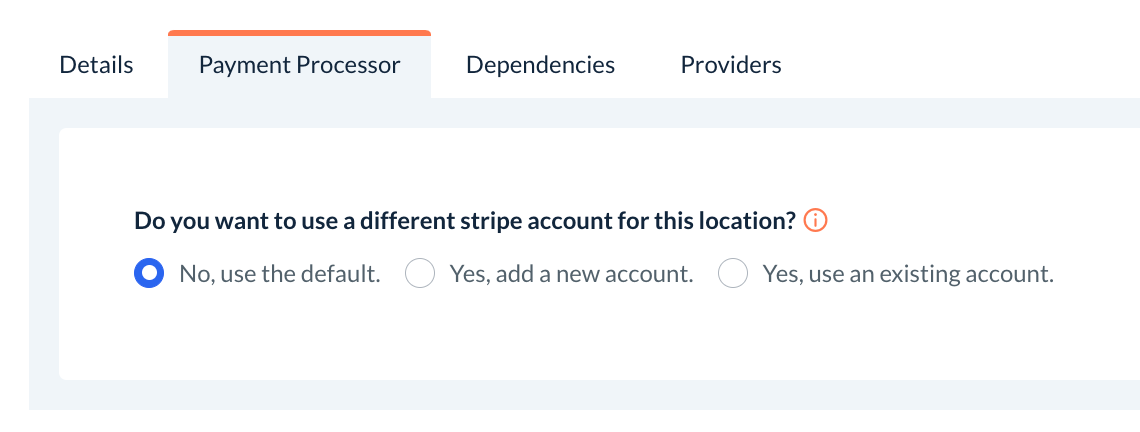
If you select "No, use the default", this will use the Stripe account that you set up in your Store Options. If you select "Yes, add a new account" or "Yes, use an existing account", this will allow you to use a separate Stripe account for this location. For more information on how to set up your custom locations, visit our articles on connecting Stripe or Square as your payment processor.
Dependencies
Once you have added locations to your booking form, you can choose to set up "dependencies" based on location. When you enable a dependency for a category, you customize how other categories will display when this option is selected. Simply put, one category's options will depend on the selection(s) in another.
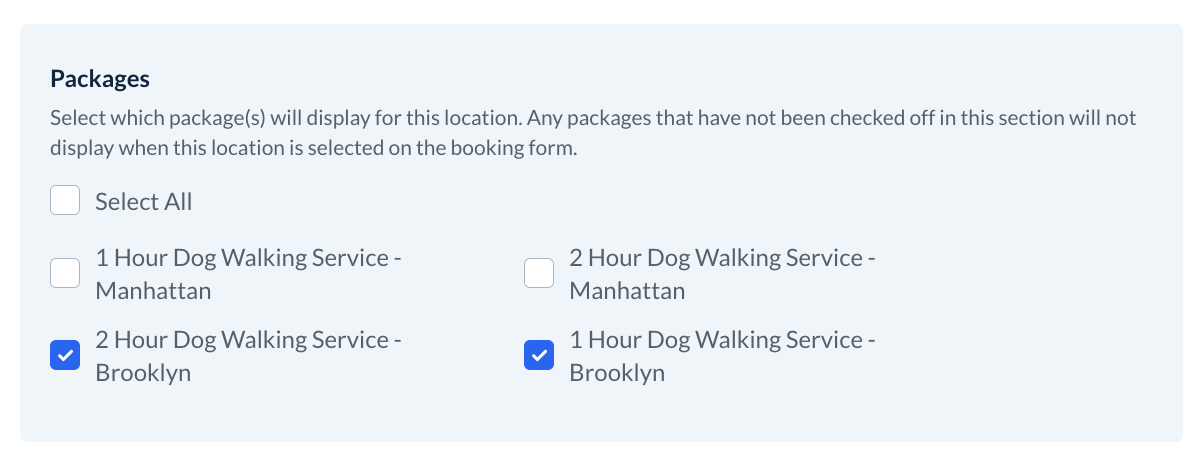
Location dependencies can be set up for any type of form component. For example, let's say you offer different-priced packages depending on your client's location. You can set up location dependencies on packages which allows you to create the same package but with different prices for different locations. In the image above, the location dependencies for packages are displayed for the location "Brooklyn". When the client indicates on the booking form that they are in the Brooklyn service area, they will only see the packages enabled here.
To learn how to set up different service options on a location-to-location basis, click here.
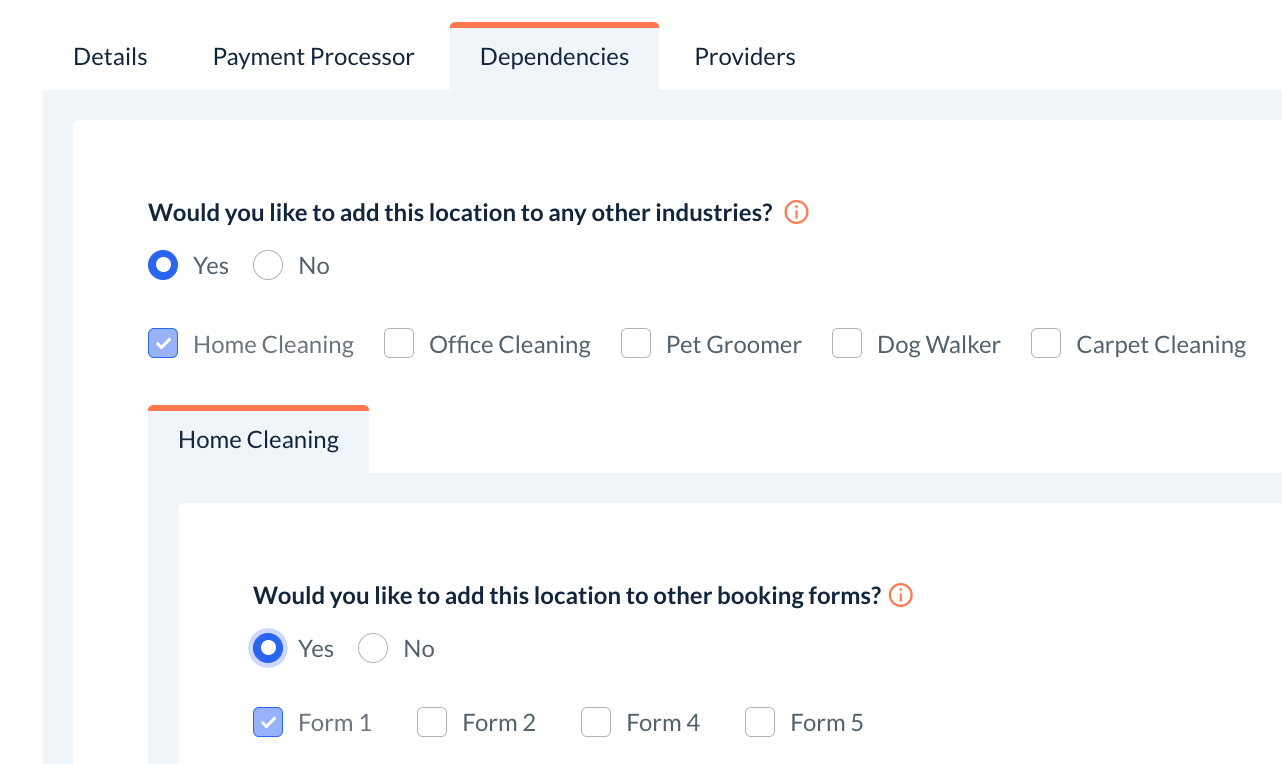
Also in the dependencies section are the options to add this location to other industries and forms. Answer "Yes" for the questions "Would you like to add this location to any other industries/booking forms?" and then check the box(es) next to the industry(ies) and form(s) you would like to add the location to.
Providers
When you first create a location, you have the option to exclude any providers from that location in this tab (this can also be performed from the provider or team's form settings at any time). This optional step is helpful if you know of any providers that do not service this location.
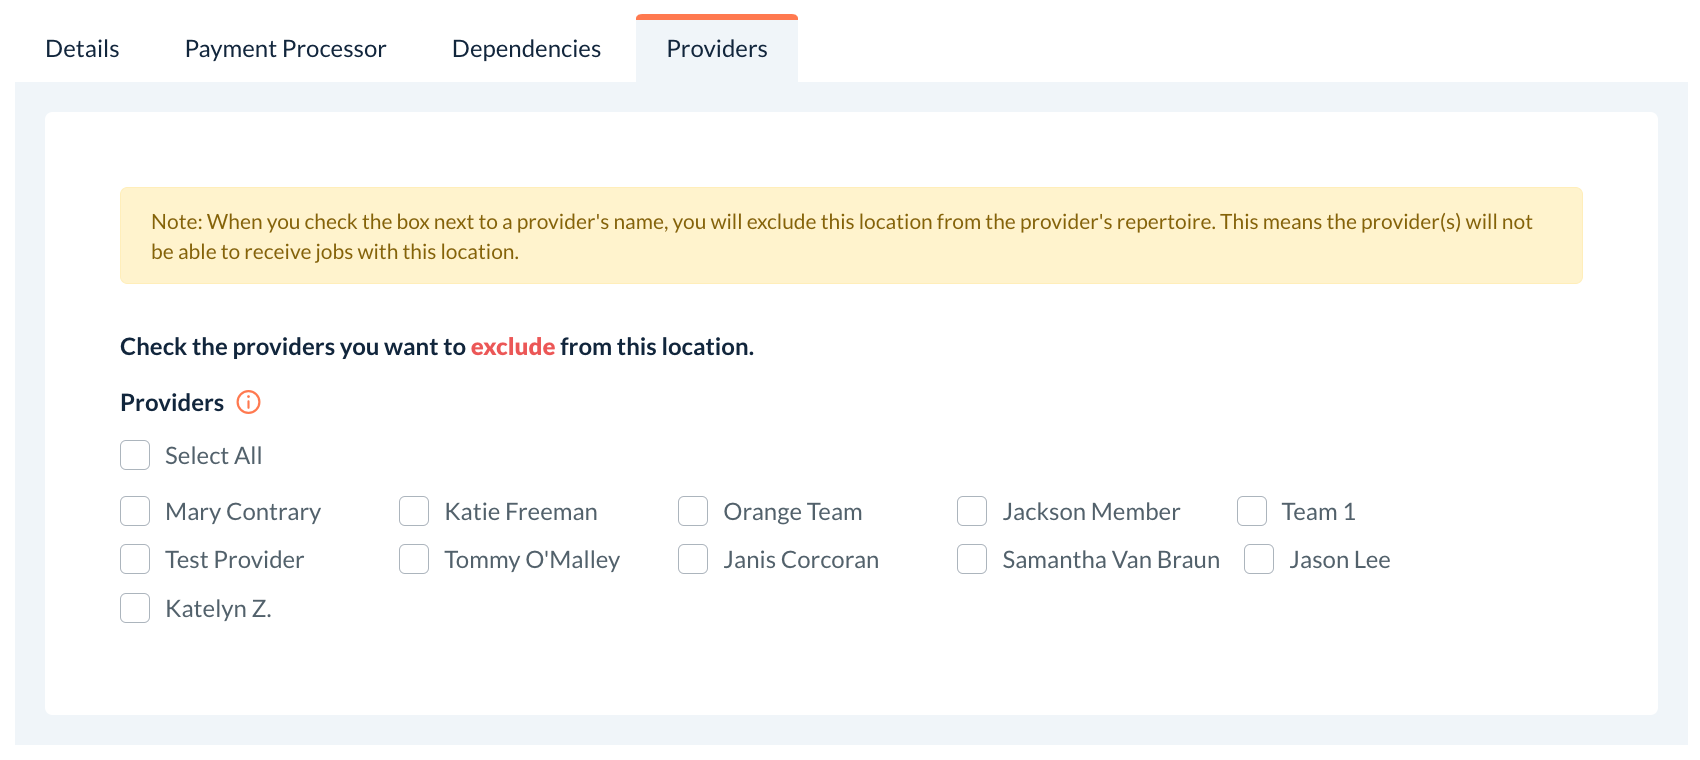
Check the box(es) next to the provider(s) you want to exclude from this location. This means that the provider will not be able to receive jobs at this location unless you visit the provider's form settings and enable the location for them.
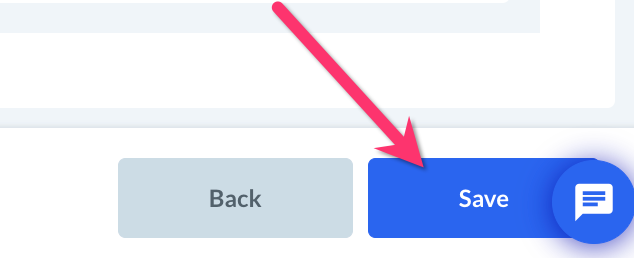
Finally, click the blue "Save" button at the bottom right corner of the page to add your location.
Repeat these steps until you have added all of your locations.