The purpose of this article is to help you learn:
How to get started with processing customer payments
Where to locate the "Pending Charges" section
How to manually charge bookings
Where to locate the "All Charges" section
Where to locate the "Declined" charge section
Where to locate the "Card Holds/Declined" section
Where to locate the "Invoices" section
Before You Begin
Accepted Forms of Payment
One of the great features of BookingKoala is that you can process customer charges directly from inside your dashboard. Before you begin processing charges, you must first determine what kind of payment methods you would like to accept from customers. Currently, BookingKoala has two options for charging customers: credit/debit card or cash/check.
To enable which payment methods you'd like to accept, go to:
Settings > General > Store Options > General
Click on the "Store Info" section to expand it. Then, scroll down until you see the "Accepted Forms of Payment" section.
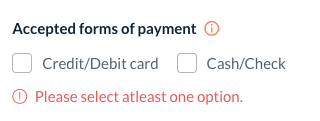
Check the box(es) next to at least one of these options so customers have a way to check out, then click the blue "Save" button at the bottom of the page.

Payment Collection
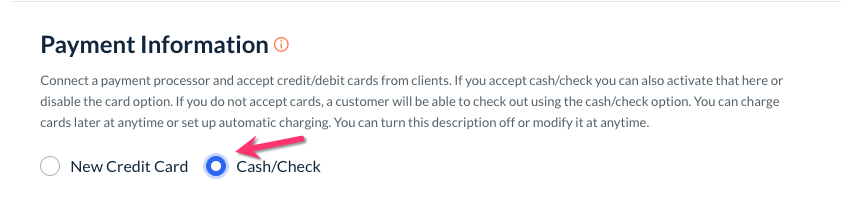
If you would like to charge customers by credit/debit card, you will need to connect a payment processor like Stripe, Papal, Square, or Authorize.net to safely collect and store card information. Click here to learn more about payment processors and see guides on how to connect one to your store.
If you allow customers to pay with "Cash/Check", you will need to collect the payment using a method outside of BookingKoala.
Please note, even if you have disabled the "Cash/Check" option for customers, staff and admin will still be able to use it as an option to save quotes or booking drafts.
Payment Settings
Next, you'll want to set up your Payment Settings section. This section goes covers rules for how unassigned bookings are charged, setting up automatic charging, and how the system will handle pre-charges and refunds. Click here to view a step-by-step guide to each setting in this section.
If you use Stripe, Square, or Authorize.net as your payment processor you can set up the charge descriptions for all credit and debit card transactions. Customers will see these descriptions on their bank statements. To customize the descriptions, please go to:
Settings > General > Store Options > Admin
Scroll down to the "Payment Descriptions" section. Enter your descriptions into the boxes below and then click the "Save" button to update your settings.
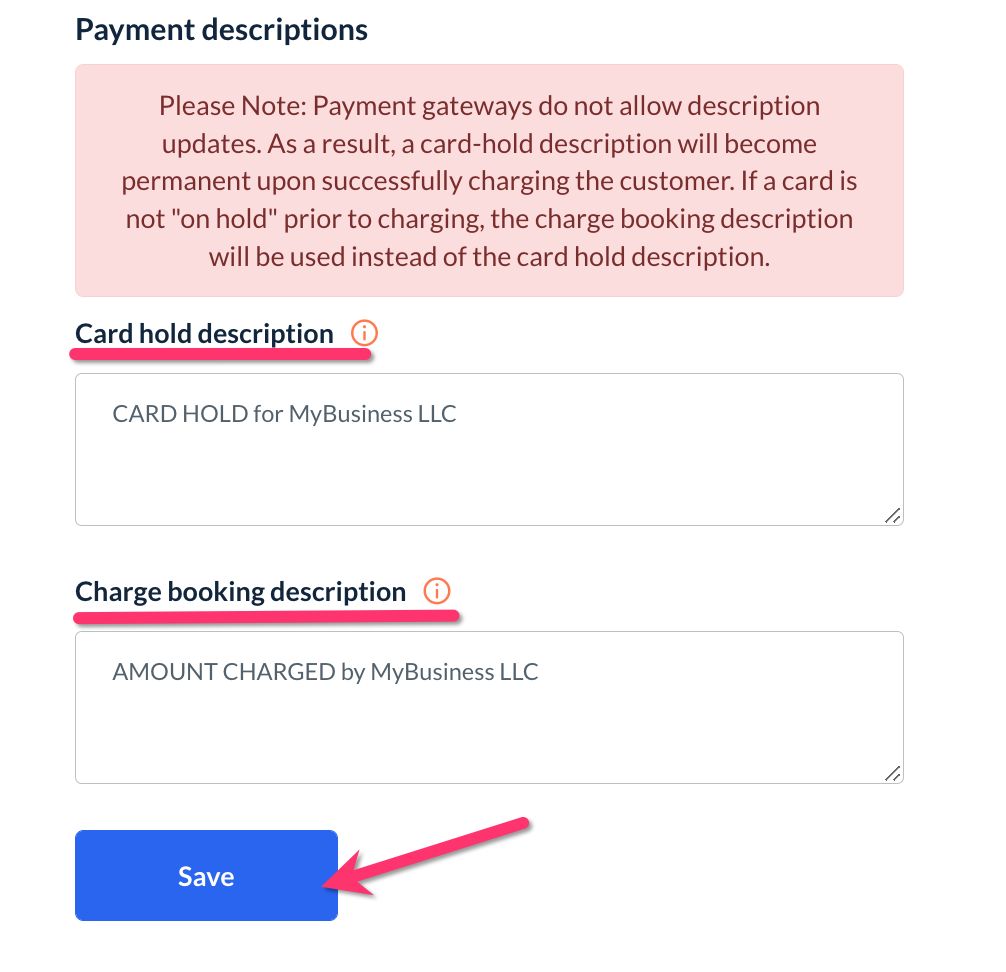
The "Card Hold Description" is used whenever a card hold has been placed on a customer's transaction.
The "Charge Booking Description" is used to show that the charge has been finalized.
Please note: Payment gateways do not allow description updates. As a result, a card-hold description will become permanent upon successfully charging the customer. If a card is not "on hold" prior to charging, the charge booking description will be used instead of the card hold description.
Booking Form
Finally, check that you have finalized your pricing in your booking form. This will ensure that customers are being charged the correct rates for your services. The following form sections contain options to assign prices and fees to your services:
Locations (in the form of Service Fees)
Pricing Parameters (used in Form 1)
Pricing Parameters (used in Form 4)
Packages (used in Form 2)
Items (used in Form 2 and Form 3)
Add-Ons (used in Form 2)
Add-Ons (used in Form 3)
Once your form is set up, you can begin booking and charging customers.
Pending Charges
BookingKoala allows you to charge customers manually, automatically, or a combination of both. If you'd like to learn how to set up some or all charges to be processed automatically, click here.
To begin processing charges manually, go to:
Bookings > Booking Charges
You will land on the "Pending Charges" tab.

All bookings that have been completed with be located in this section. A booking is considered "complete" once the job length has passed in the system.
For example, if you schedule a 3-hour job at 8:00 AM, the system will consider the job finished at 11:01 AM.
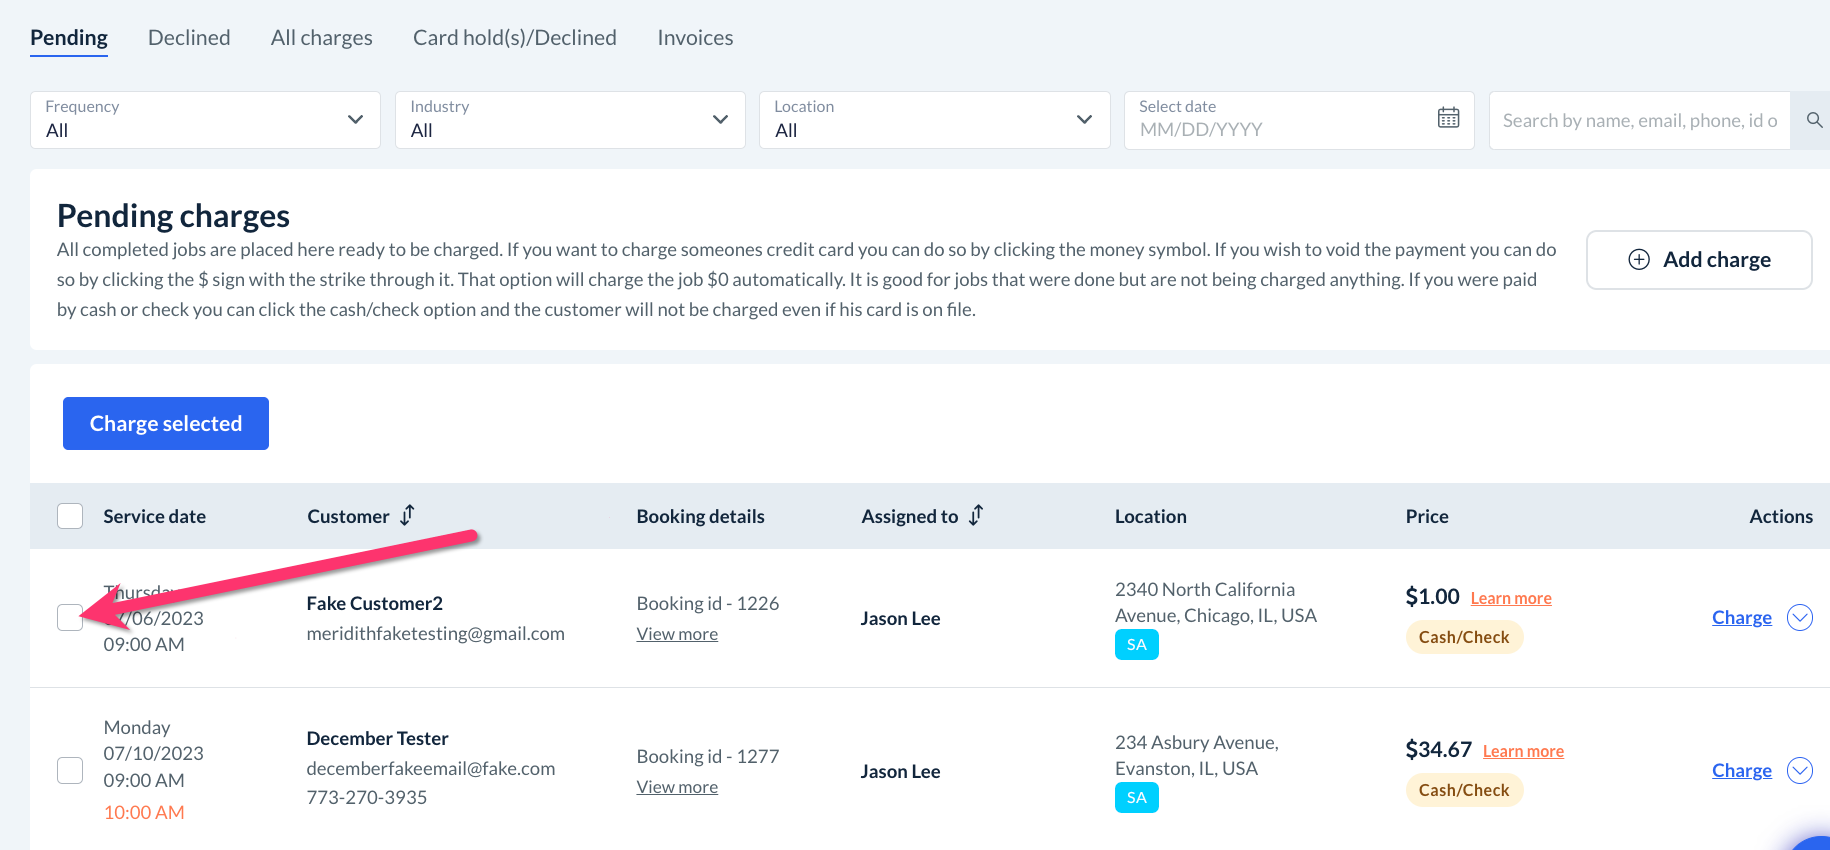
You can use the filters at the top of the page to view pending charges for specific frequencies, industries, and locations.
You can select the date(s) you'd like to view pending charges for and use the search bar to look up a customer's charge by name, email address, phone number, booking id, or address.

Charging Fixed-Rate Bookings
If your bookings are fixed rates, that is, the price does not depend on how long the job takes, they will be ready to charge as soon as they are completed in the system. These pending charges will have a checkbox all the way to the left.
Check the topmost checkbox in the menu, just to the left of "Service Date", to select all confirmed pending charges.
Then, click the blue "Charge Selected" button at the top left side of the screen to charge all of the bookings you have selected.
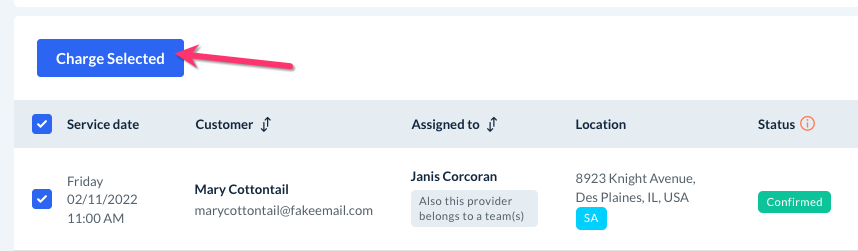
Give the system a moment to process, especially if you are bulk charging more than a few appointments. Once it is finished, you will see a green system notification in the top-right corner of the page, letting you know that the charges have been processed.
You can also charge a single booking by clicking on the "Charge" button to the left of the customer's price under the "Actions" column.

Charging Hourly Bookings
If your bookings are hourly, or the price depends on the total length of time it takes to complete the job, there is an additional step to take in order to process payments. As you can see, unconfirmed hourly bookings will be missing a checkbox.
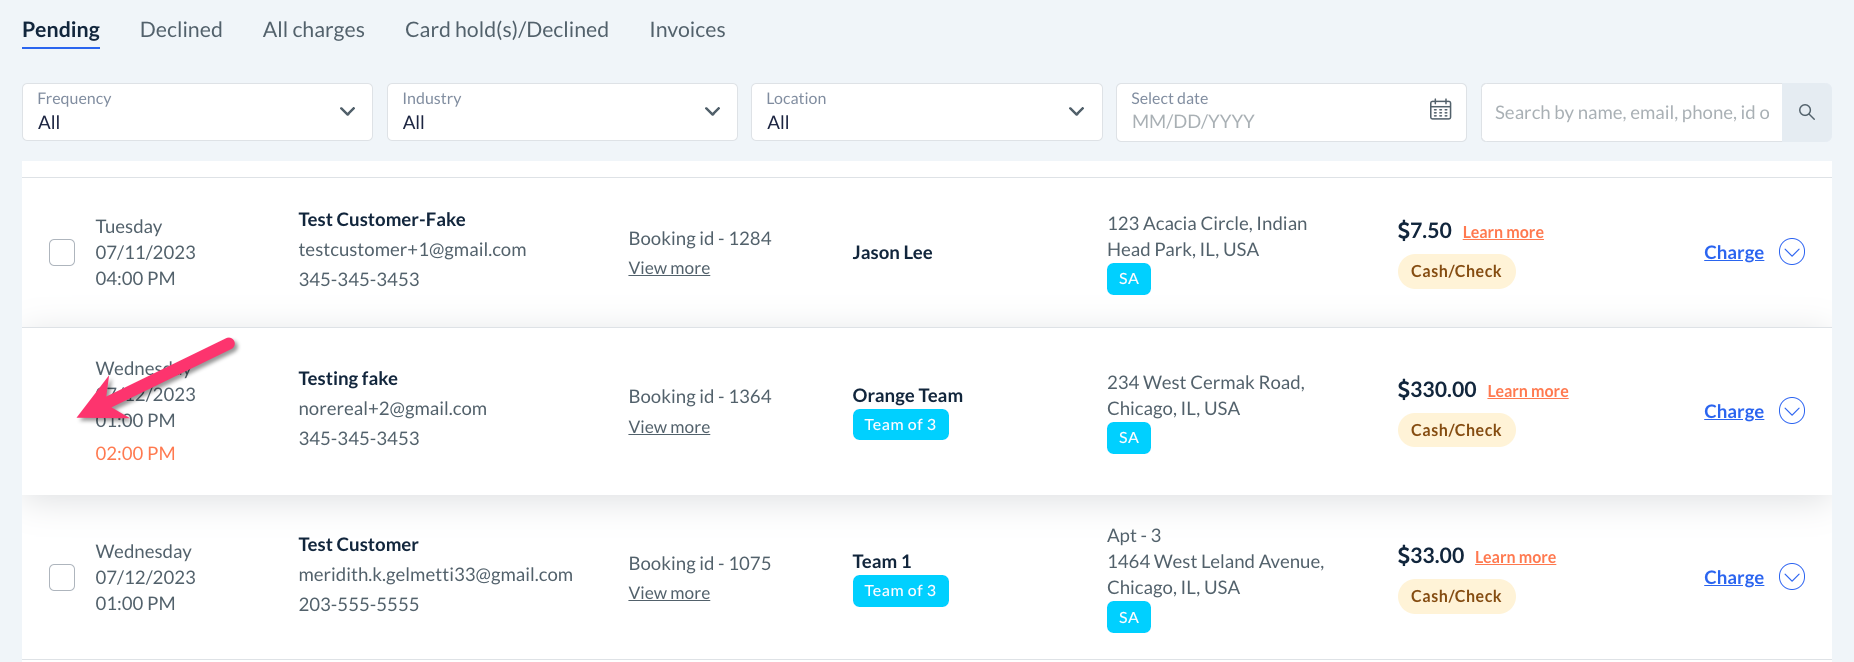
This step ensures that you do not accidentally charge a customer for the wrong amount of time, as the exact job length often varies from the estimate provided.
To confirm the charge, click on the Charge button and a pop-up window will appear. Enter the hours and minutes for the booking into the boxes, and then click the blue "Save & Charge" button.
A green system notification will appear in the top-right corner, letting you know the booking has been updated and charged successfully.
If your providers use the GPS clock in/out feature to log their booking hours, you have an additional option to push your booking time log information into the pending charged section. To do this, please go to:
Settings > General > Store Options > Provider > GPS & Time Logs
Scroll down until you see the question, "Would you like time adjustments in the time logs to be updated on the booking as well?" and select "Yes". Then click the blue "Save" button at the bottom of the page to update your settings.
Click here to learn more about booking time logs including how to create, edit, and approve them.
Using the Add Charge Option
Click here to learn how to charge one or more bookings or add an extra charge outside of a booking.
Void a Charge
Click here to learn how to void a charge from the "Pending Charges" section.
All Charges
If you have processed a charge successfully, it will end up in the "All Charges" tab at the top of the page. This section contains additional options for your completed transactions.

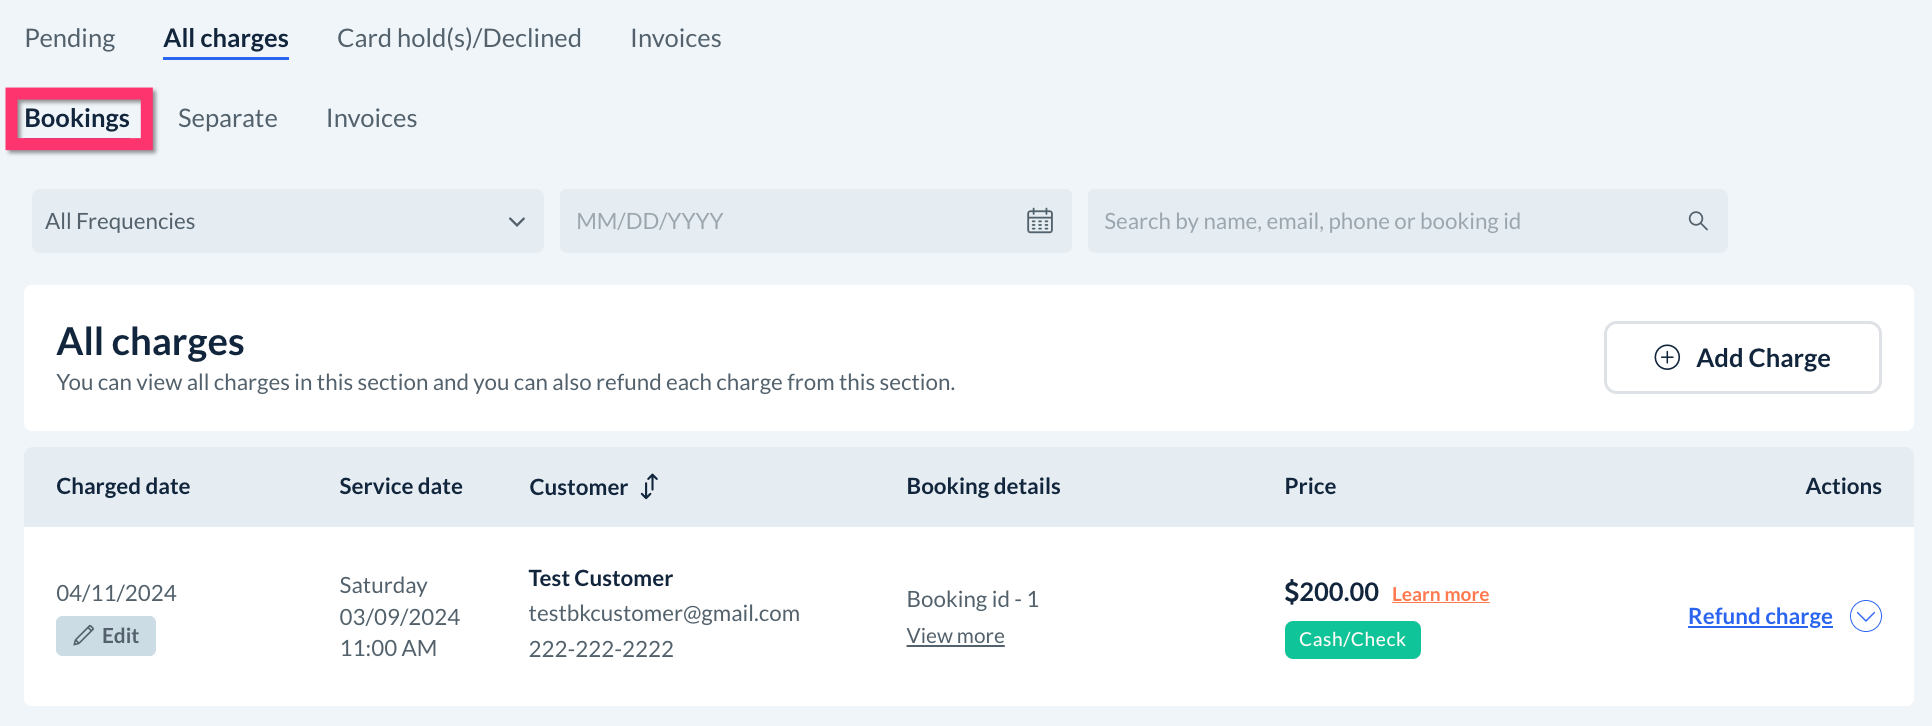
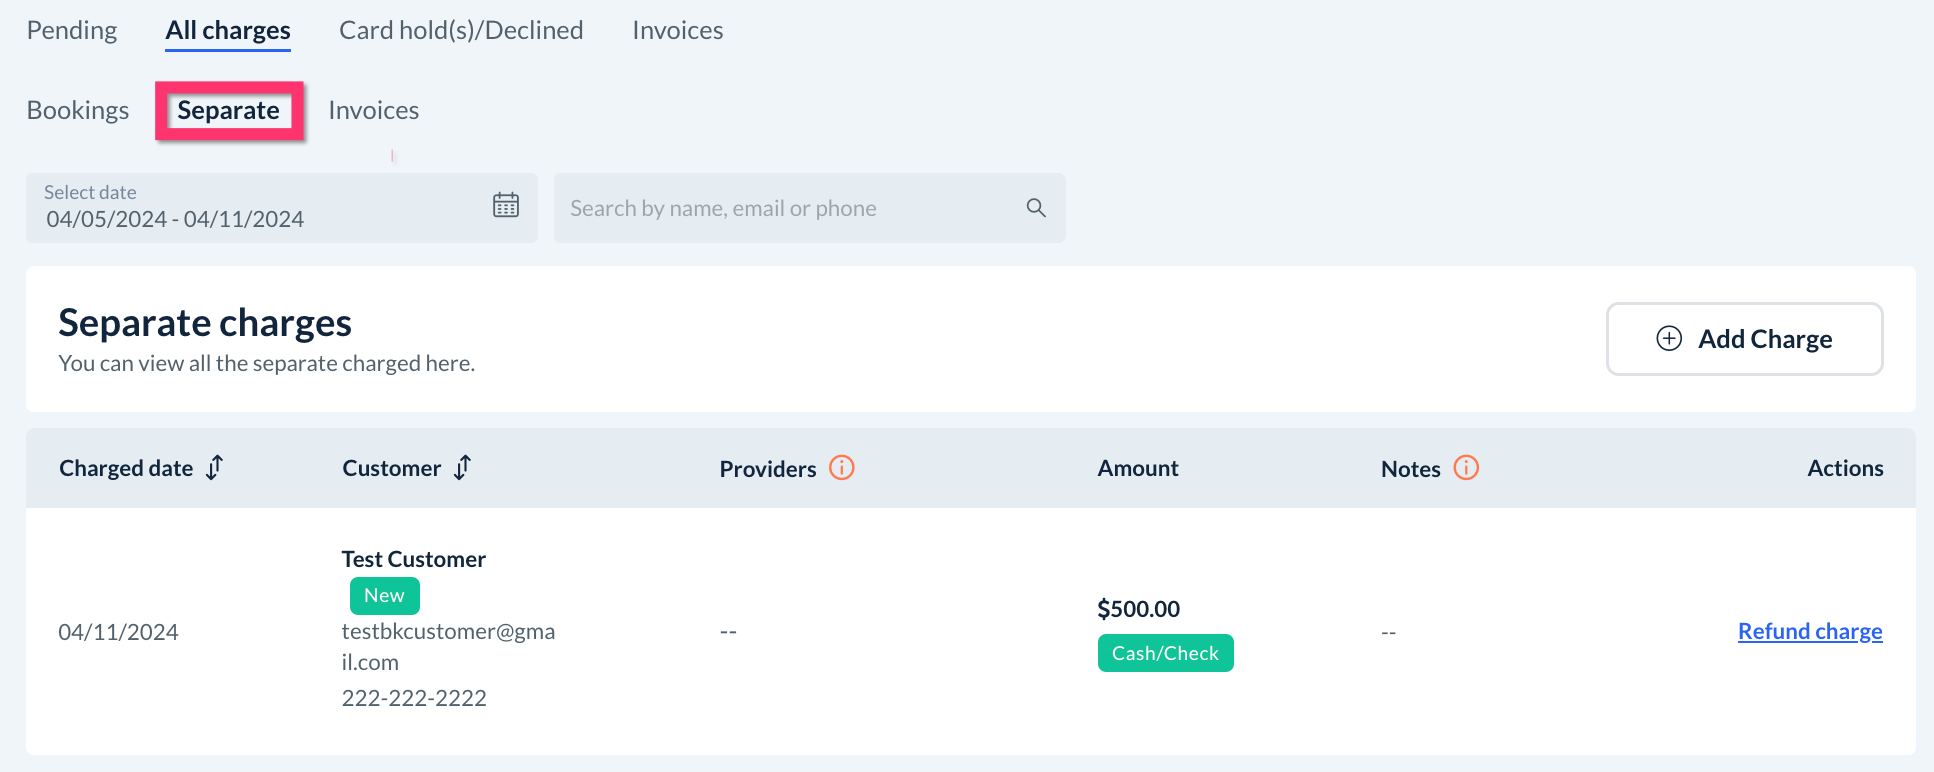
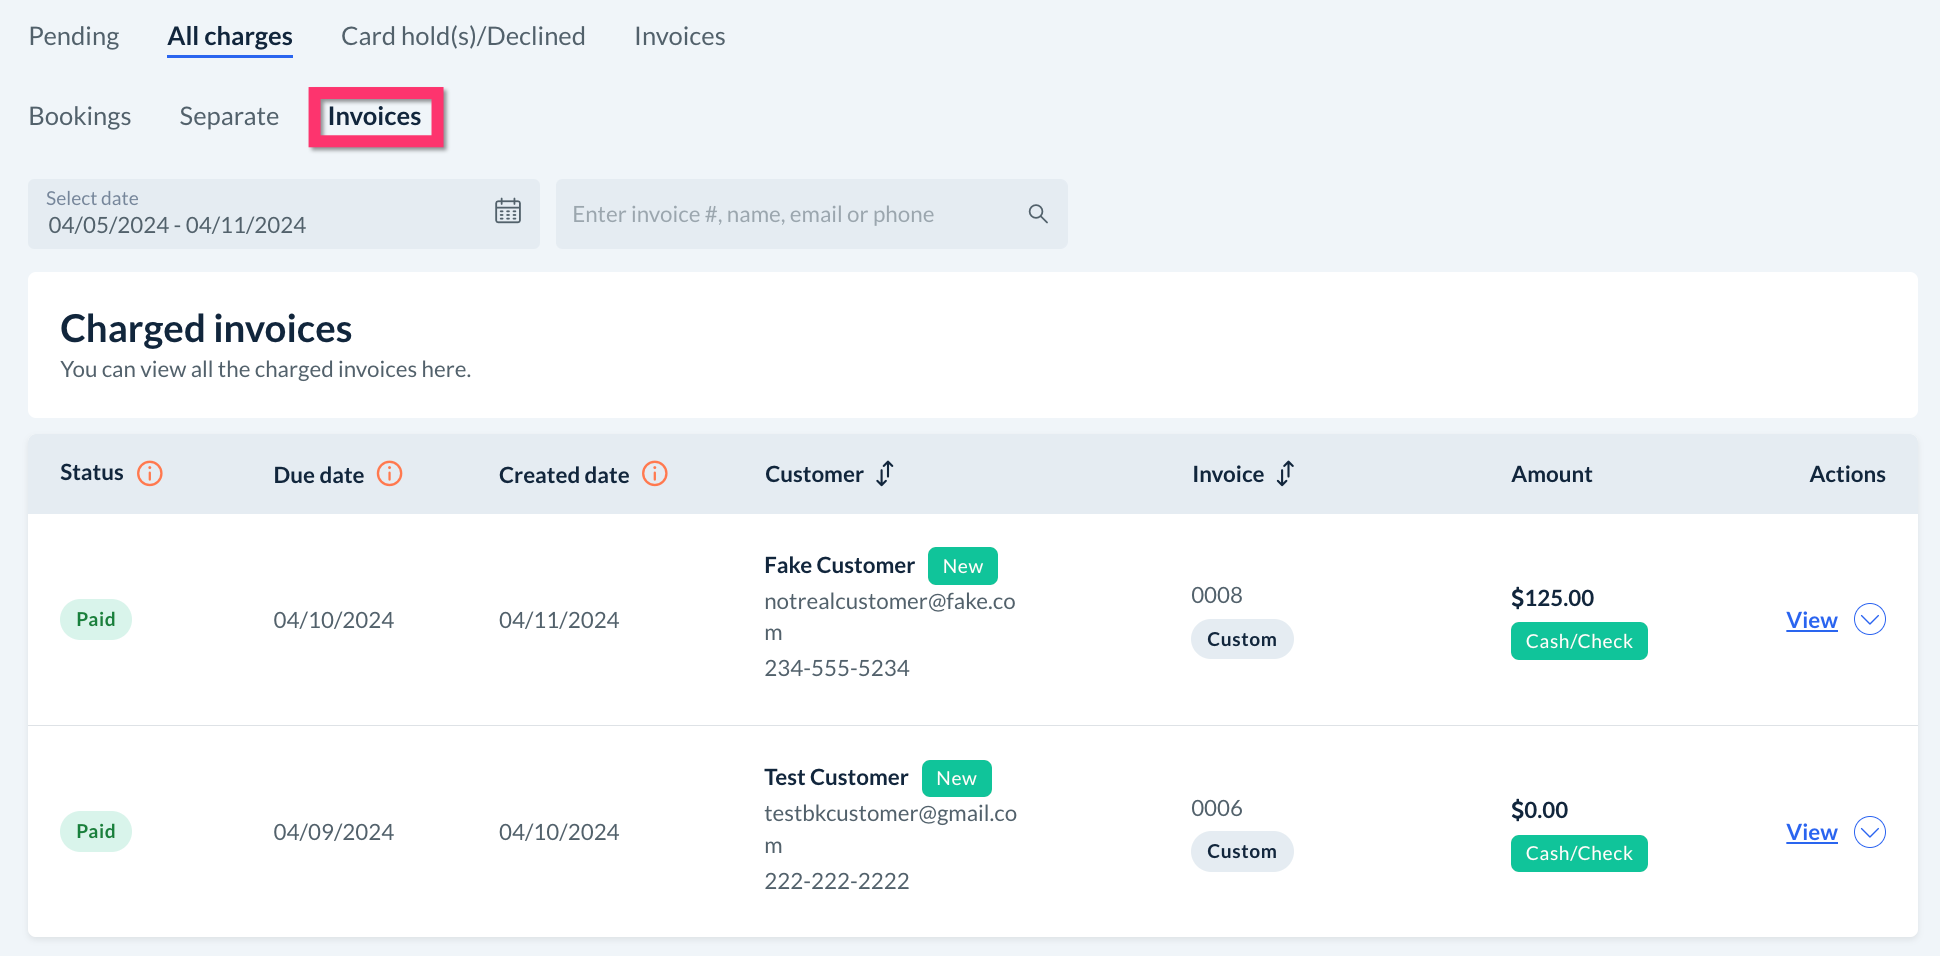
There are three subcategories related to the All Charges tab: Bookings, Separate, and Invoices.
The Bookings charges section shows all charges that are related to bookings in the system.
The Separate charges section shows all charges that were made outside of booking or invoice charges.
The Invoices section shows all charges that were collected via invoice.
Each section also contains filters and search options so you can look up a specific charge by frequency, industry, location, date, name, email address, phone number, or booking ID.

Below, you will see a list of successful charges with the most recent charge located at the top of the list.
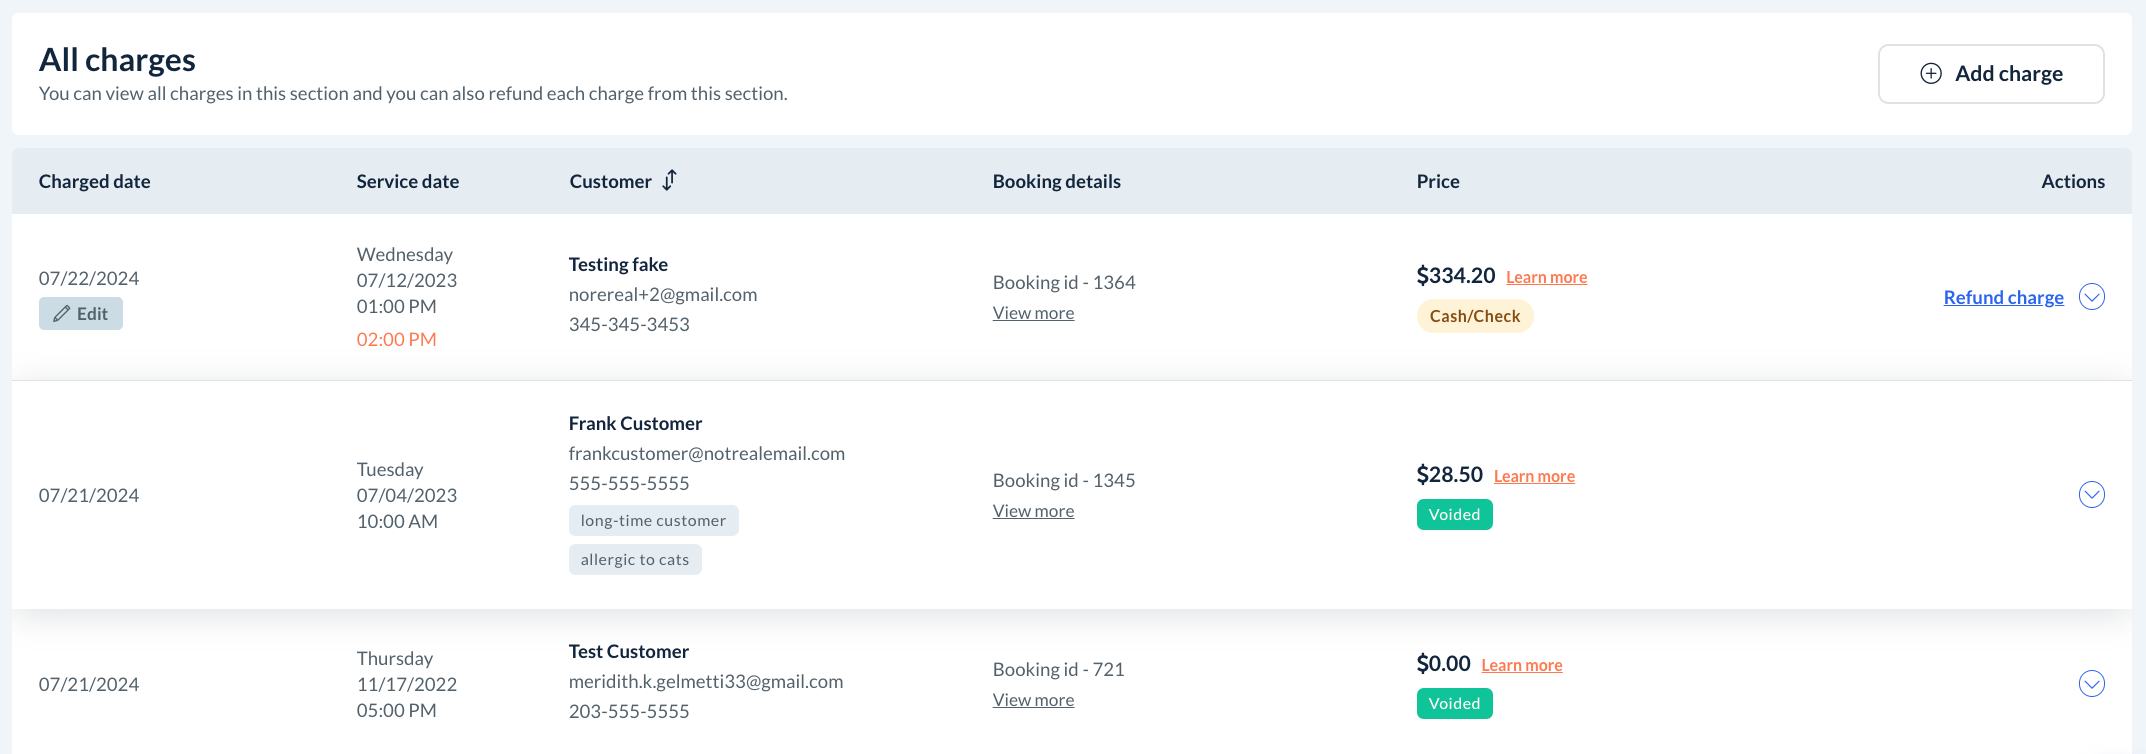
There will be green labels to give you additional insight into the transaction, such as if it was paid for with a credit card, or "CC", if it was voided, or if it was paid in cash/check.
Refund a Charge
Click here to learn how to process full or partial refunds.
Charge an Additional Fee
Click here to learn how to charge an additional fee after you have already charged a customer.
Add a Tip After Charging a Customer
Click here to learn how to add a tip for a provider if you have already charged the customer.
Declined Charges
If you try to process a charge but the funds are not captured, that charge will be automatically moved to the "Declined" section.

This section will only display if you have any declined charges. If you do not, you will only see tabs for Pending, All Charges, and Card Hold(s)/Declined.

This section also contains filters and search options so you can look up a specific charge by frequency, industry, location, date, name, email address, phone number, or booking ID.

Below, you will see a list of declined charges.
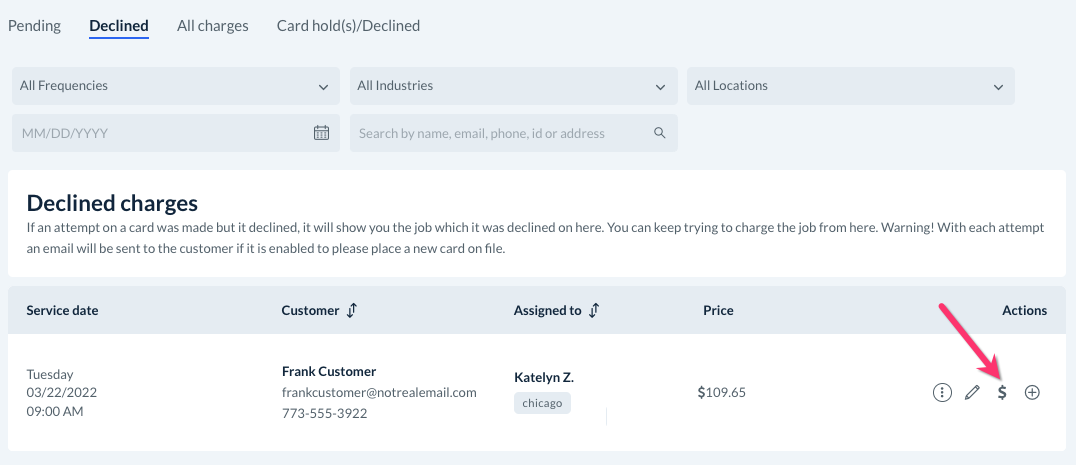
To try recharging a card on the declined list, click the "$" icon located under the "Actions" column.
If the charge is successful, a green system notification will appear in the top right corner letting you know the charge has been processed. If not, you will see a red "Declined" message letting you know the charge was still unsuccessful.
Retry a Declined Charge
Click here to learn how to switch forms of payment on your booking to retry a declined charge.
Card Holds/Declined
If you have enabled credit card preauthorization, or "card holds", you can capture your customers' funds before you process their payment. Card holds ensure that the amount you are going to charge is held in reserve, so there is no chance that the payment will decline.
Card holds can be placed automatically based on the settings you have selected under the Customer Store Options section. There are options to control whether the hold is placed the day of the service at a specific time or a number of days before the service is set to take place. You can also decide whether you would like card holds to be placed on bookings that are charged manually, automatically, or both. In addition to this, you can place holds for new bookings, rescheduled bookings, or both.
Click here to learn how to enable credit card holds and set up your settings.
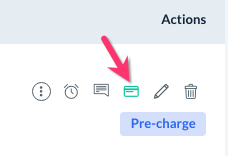
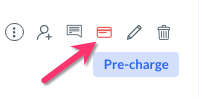
Once you've enabled card preauthorization, you can verify a hold was successful by looking for a little red or green credit card icon under the "Actions" column on any of the booking pages like "Today's Bookings", "Upcoming Bookings", and "Unassigned Bookings".
When the icon is green, the booking total has been held successfully.
When the icon is red, the hold has declined so funds have not been reserved.
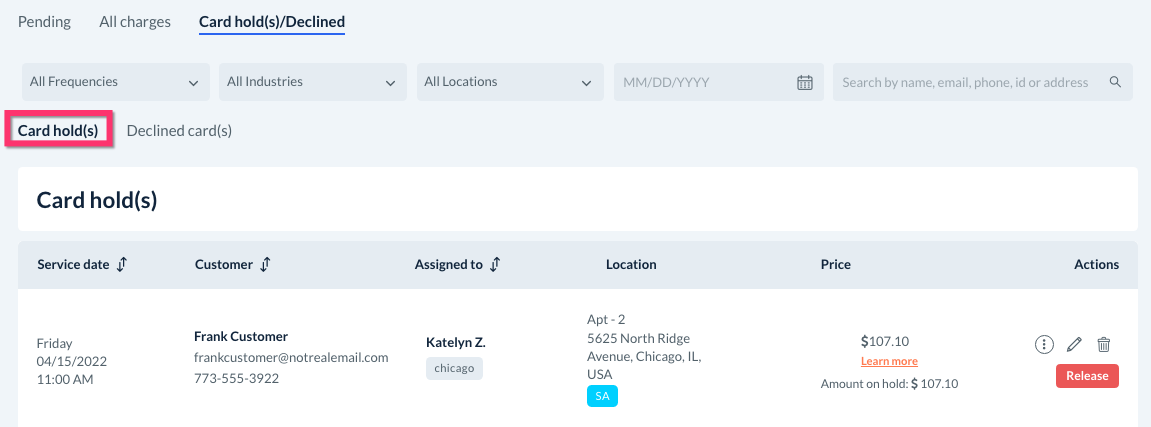
There will also be a "Card Holds/Declined" tab under your Booking Charges section where you can manage your card holds. To view this, go to:
Bookings > Booking Charges > Card Holds/Declined

This section also contains filters and search options so you can look up a specific charge by frequency, industry, location, date, name, email address, phone number, or booking ID.

Under this section, you will see a list of all bookings set to have card holds. If a card has been held successfully, it will be listed under the "Card Holds" section.
Release a Card Hold
Click here to learn how to release a credit card hold.
Manually Place a Card Hold
Click here to learn how to manually place a credit card on hold.
Invoices
The final tab under the Customer Charges section in the Invoices section. The Invoice Module is designed to help you send invoices to customers, track invoice status, and charge invoice payments. An invoice is a bill that lists the services provided to the customer with a statement of the total payment due. Invoices can be created for new or existing customers, for bookings, or custom invoices.
Click here for a general overview of how to use the invoice module.
Create a New Invoice
Click here to learn how to create an invoice for a new or existing customer.
Charge or Change the Status of an Invoice
Click here to learn how to charge an invoice or change the invoice status to paid, void, or uncollectible.