The purpose of this article is to help you understand:
How SMS notifications work
How to set up and connect your Twilio account
Where to enable and disable SMS notifications
How do SMS notifications work?
SMS notifications are notifications that get sent out from BookingKoala to a user's phone number via text message through the use of a third-party integration called Twilio. Whenever a certain action takes place inside BookingKoala, a corresponding text will be sent to the phone number associated with the account.
The types of email notifications send out are managed on the Email Notifications page under Settings > Notifications.
SMS notifications are sent out to the admin, customers, and providers, as long as the notification template has been enabled under the SMS Notifications section.
Notifications can also be enabled for specific users by going to their profile and clicking on the Notifications tab.
Setting Up and Connecting Your Twilio Account
For SMS notifications to be fully operational, you will need to have a Twilio account connected to your BookingKoala account.
This takes place under:
Settings >Notifications > General
Scroll down to the second section of the page called "SMS Settings".

Click here to visit our guide on how to set up and link your Twilio account.
How to Enable/Disable SMS Notifications
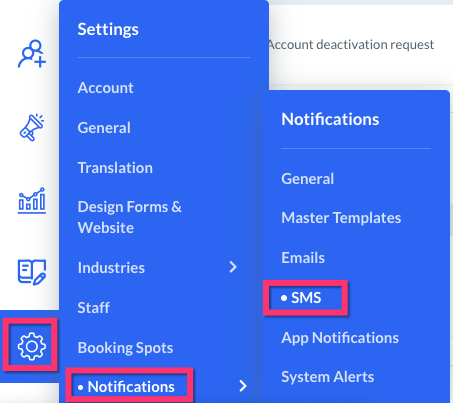
Once you have created and linked your Twilio account, you can take a look at all of the possible notification templates BookingKoala has to offer. Go to:
Settings > Notifications > SMS Notifications
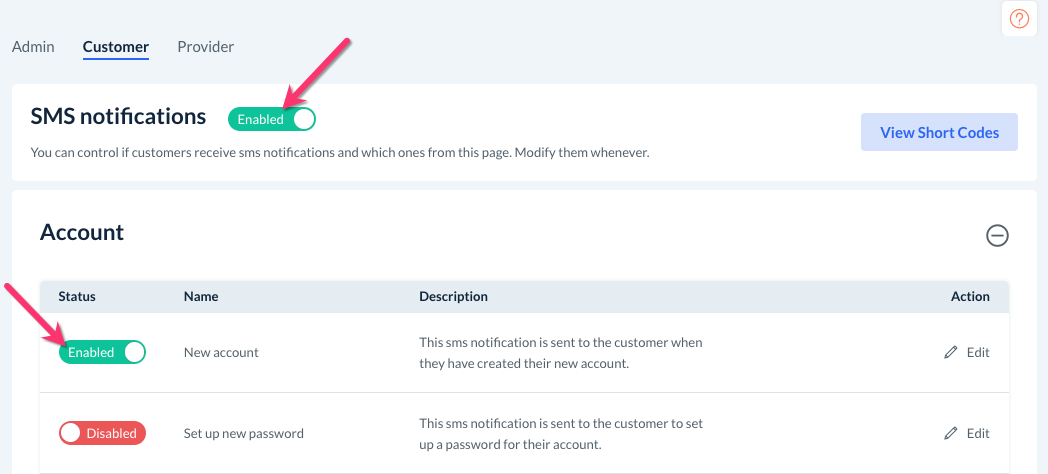
As mentioned earlier, email notifications can be sent to admin, customers, and providers. To see notifications for each type of user, click the tabs at the top of the page.
All of the notifications are grouped into categories. To view the notifications in a category, click the "plus sign" or anywhere in the heading to expand it.
If a notification is green and reads "Enabled", this means that the notification is live and will notify the user when that action has been taken.
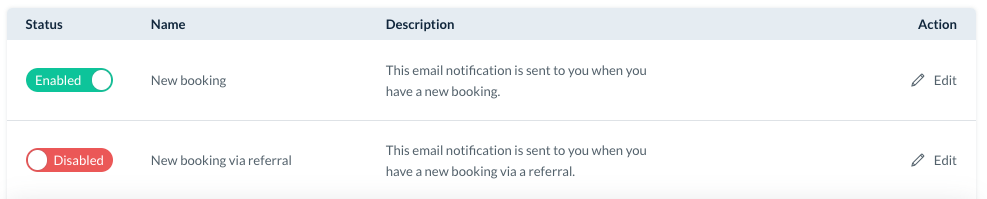
If the notification is red and reads "Disabled", this means that the notification is not live and will not be triggered when the action has been taken.
If you wish to enable/disable an SMS notification, all you will need to do is click on the "Enable/Disable" button to switch the status. A pop-up will appear asking if you are sure you want to make this change. Click "Yes" to proceed and the notification will be updated.
Editing SMS Notifications
You can customize the message the user sees when they receive your SMS notifications. To modify an SMS notification, click the "pencil icon" to edit it.

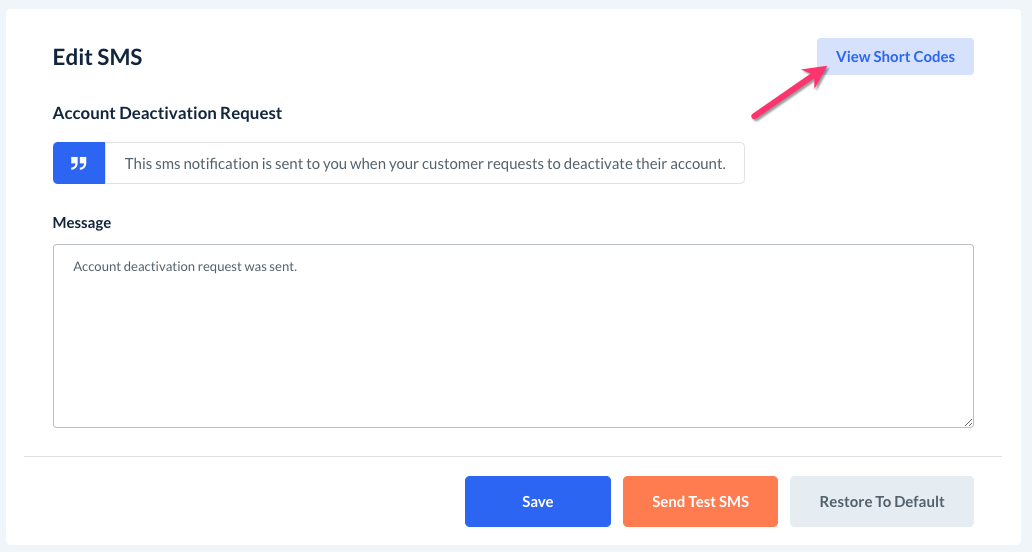
You will be redirected to an "Edit SMS Template" page.
At the very top right side of the page, there is a blue button that says "View Short Codes". Click this to view a list of "shortcodes", or placeholders for specific user information. Shortcodes can be inserted into your SMS templates to create a more custom experience for the recipient.
To learn more about how you can use shortcodes in your templates, click here.
The message's name and the trigger will be written at the top of the page for your reference. For example, this SMS notification "Account Deactivation Request" is sent out whenever a new customer requests to deactivate their account.

The box at the bottom of the page is the message editor box. To edit the text, click on the box and begin typing.
Please note: if you use a link in your SMS messages, the link will be converted into a short URL using the domain "https://urlnm.com". This is done to avoid large URLs, as Twilio charges more per SMS segment and a longer URL may split your message into multiple segments. To learn more about this, please click here to read Twilio's article on character limits.
If you'd like to send a test SMS to see what the message will look like when it is received, click the orange "Send Test SMS" button at the bottom of the page, and then enter the phone number you want to send it to.
Please note that any shortcodes will NOT be populated as the system will not know which account to pull the information from. Instead, those fields will be populated with dummy data.
Once you are ready to use the notification, be sure to click the blue "Save" button at the bottom of the page. You can also click the grey "Restore to Default" button to restore the template to the system default.
