The purpose of this article is to help you learn:
Why two "thank you" pages can help with targeting your hiring ads
How to add a second "thank you" page to a hiring form
How to use conditions to send prospects to a specific thank you page
How does having two "thank you" pages help with attracting leads?
If you use ads to attract leads from Facebook, Google, or another site, you may benefit from using more than one "thank you" page for your prospect forms.
Most marketing platforms use tracking codes inserted in web pages to gather information on who accessed that page. Whenever a new user lands on the page, the platform looks at their data and uses it to find similar users.
If you are using one "thank you" page for your prospect form, the system will use all applicants' information to target your ads. By creating a second "thank you" page that identifies and tracks the high-quality applicants, your ads will become more focused on attracting similar leads.
Add a Second "Thank You" Page
To set up a second "thank you" page, you will first need to have created a form in the hiring module. For more information about how to build a hiring form, click here.
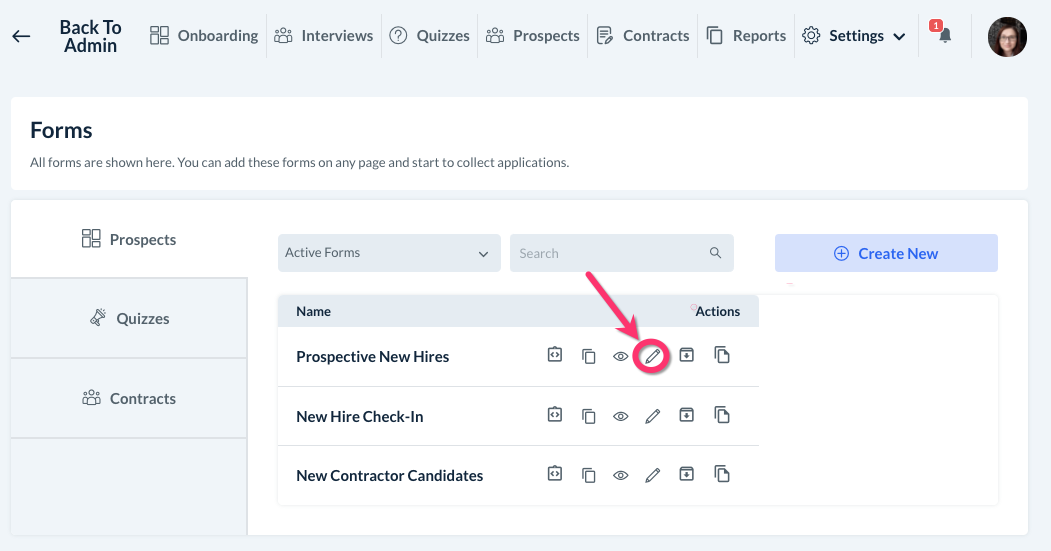
To start, open the Hiring Module and go to:
Settings > Forms > Prospects
Click the pencil/edit icon next to the form you would like to modify.
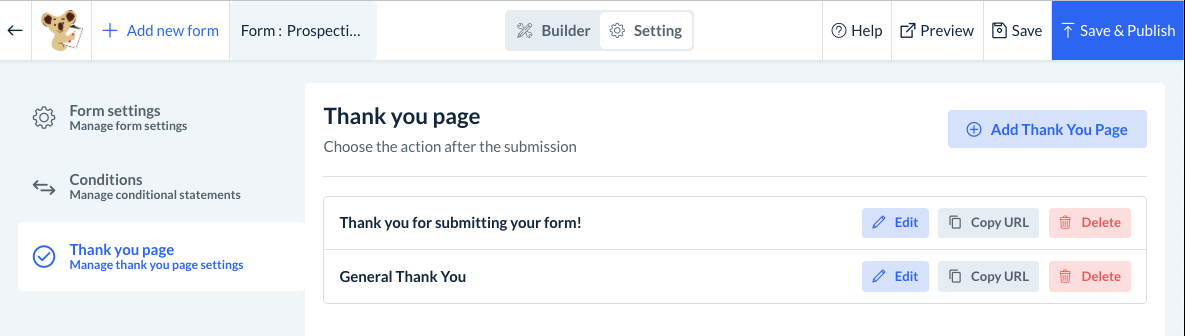
You will be brought into the Form Builder. Click on "Settings" at the top-center of the page, and then select the "Thank you page" tab on the left-side menu.
Click the blue "Add Thank You Page" button at the top right corner of the page.
First, create a Name for the page. The Page URL will auto-fill with the name you enter. You can change the URL to something else by clicking inside the text box.
Next, create the Page Content. If you would like to use a default template for the page, you can insert one by clicking the grey "Choose Template" button.
You can modify or add new content using the tools in the text editor box. You can edit/insert text, font style/size/color, graphics, etc.

Once you are finished editing the page content, paste your Tracking Code into the box at the bottom.
Remember to click the blue "Save" button at the top of the page to save your new "thank you" page. You will see a green system notification letting you know the page has been saved successfully. You will now see both pages listed in the Thank You Page section.
Setting Up "Thank You" Page Conditions
After you have created the second "thank you" page, you will need to set up conditions so only qualified applicants will land on the page.
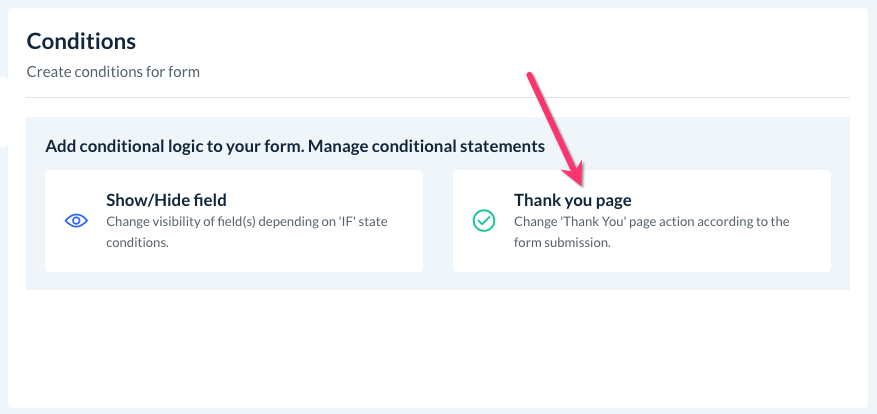
Under the form's Settings section, click on the "Conditions" tab in the left-side menu.
Click on the "Thank you page" box to begin adding the conditions.
You will be redirected to a Conditions page. Here, you will create the conditional statements that lead to your new "thank you" page. Each conditional statement is built by selecting options for "IF", "STATE", and "Do".
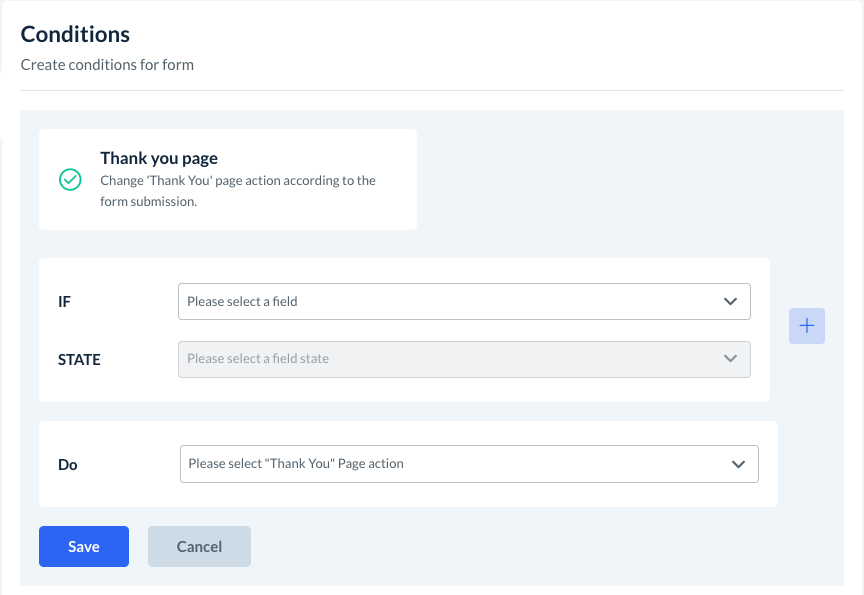
If
First, select which field or question you would like to add a condition. The drop-down menu will display any part of the form where the prospect can submit an answer.
In this example, we have selected the question "Do you have any of the following? (Check all that apply)".
State
Next, select the field state for the question. The field state lets the system know it should compare the prospect's answer to the answer you have designated.
The options for the state depend on the field you selected. However, the four most common options are:
Is Equal To - The action will be performed if your answer is equal to the prospect's answer
Is Not Equal To - The action will be performed if your answer is NOT equal to the prospect's answer
Is Empty - The action will be performed if the prospect left the answer empty.
Is Filled - The action will be performed if the prospect has filled out an answer.
Some fields, like first name, last name, phone number, and today's date, will only have states for "Empty" or "Filled" .
Other fields, like email addresses, have additional states like "Starts With", "Doesn't Start With", "Ends With", "Doesn't End With", "Contains", and "Does Not Contain". For more information on different states and how they work with conditions, click here and scroll to the section titled "Conditions".
In this example, we selected "Is Equal To".
Target
If you have selected any state besides "Is Empty" or "Is Filled", you will need to designate a target. The target is the answer/answers that will be compared to the prospect's input.
The TARGET menu has two options: Value and Another Field.
Value
If you select "Value", this means you will select an answer from this question for comparison.
In this example, we selected the answer "Personal liability insurance".
Another Field
If you select "Another Field", you will select an answer from a different question in the form to compare.
In this example, we selected the compare the answer for this question to the answer for another question, "Which services do you have prior experience in?"
Multiple IF Rules and Actions
You can also add multiple rules for a condition by clicking the blue "+" icon.
If there is more than one IF statement, you can select whether you want the actions to be performed if Any or All rules are met.

In this example, we added a second value to the condition, "Legal authorization to work in the US". Then, we updated the box below to "All". This means that the action will only be performed if the prospect selected both of these answers for this question.
4. Do
After you have finished setting up your IF/STATE fields, you will need to select which action is triggered by the condition. Click the drop-down menu next to "Do" and select the new "thank you" page you just created.
Click the blue "Save" button at the bottom of the page to save the condition for the "thank you" page.

You will see a green notification in the top-right corner letting you know the form has been saved and published successfully. The new condition will now be listed under the Conditions tab.
Once your form has been published, you can start using it to gather leads for your business. By only inserting a tracking code onto the new "thank you" page for qualified candidates, your marketing platform will start to target more qualified leads similar to these.