The purpose of this article is to help you learn:
how to set up your general settings
how to view the logs section
where to control your form settings
where to control your notifications settings
c
Where are the hiring settings?
All of the settings that impact hiring are located in a special settings section inside the hiring module.

There are four sections in the "Settings" menu: Forms, Notifications, Logs, and Settings.
Forms
Select "Forms" to view and manage all of your forms. There are three tabs to organize your forms by type: Prospects, Quizzes, and Contracts.
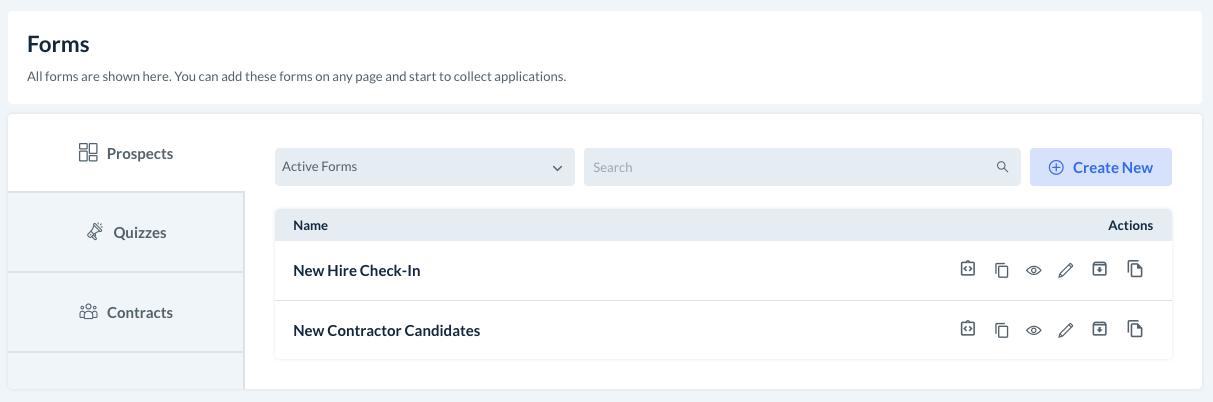
Each tab has a menu where you can switch from viewing Active Forms to Archived Forms or Draft Forms.
You can also use the search bar to search for a form by name.
Click the blue "Create New" to add a new form of this type.
For a detailed guide on how to set up a new prospect form, click here.
For a detailed guide on how to set up a new quiz, click here.
For a detailed guide on how to set up a new contract, click here.
All Active Forms will have a list of action buttons next to them.
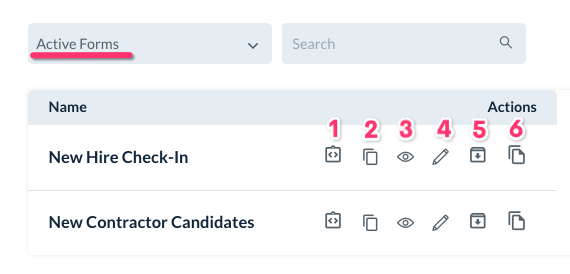
Embed Code - View and copy the form's code to embed it into a webpage. Click here to learn more about how to embed forms.
Copy Link - Copy a link to this form to share with someone else.
View Prospects - Click this to be redirected to the Prospects section to view a list of all prospects who have been sent or completed this form.
Edit - Click "edit" to open the form builder.
Move to Archive - Click this to move the form to the archived list. Archiving will permanently stop the flow of applications to this form. You can reactivate the form at any time, and all data that you received from form submissions will also remain saved.
Duplicate - Create a duplicate of this form. This will launch the form builder where you can make any modifications.
All Archived Forms will also have a list of action buttons next to them.
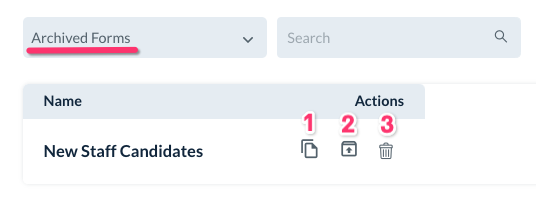
Duplicate - Create a duplicate of this form. This will launch the form builder where you can make any modifications.
Restore As Active - To resume using a form you have previously archived, click this icon. The form can now be used again by your prospects.
Delete - Click this icon to permanently delete the form and its submissions. This cannot be undone. A pop-up window will ask you to confirm you are sure you want to delete it. Click "Yes" to proceed.
All Draft Forms will have action buttons as well.

Embed Code - View and copy the form's code to embed it into a webpage. Click here to learn more about how to embed forms.
View Prospects - Click this to be redirected to the Prospects section to view a list of all prospects who have been sent or completed this form.
Edit - Click "edit" to open the form builder.
Duplicate - Create a duplicate of this form. This will launch the form builder where you can make any modifications.
Delete - Click this icon to permanently delete the form and its submissions. This cannot be undone. A pop-up window will ask you to confirm you are sure you want to delete it. Click "Yes" to proceed.
Notification Settings
All of your hiring notifications are controlled within the Notifications section of the settings. There are three subcategories within Notifications to help you better manage our settings for Emails, SMS, and System Alerts.
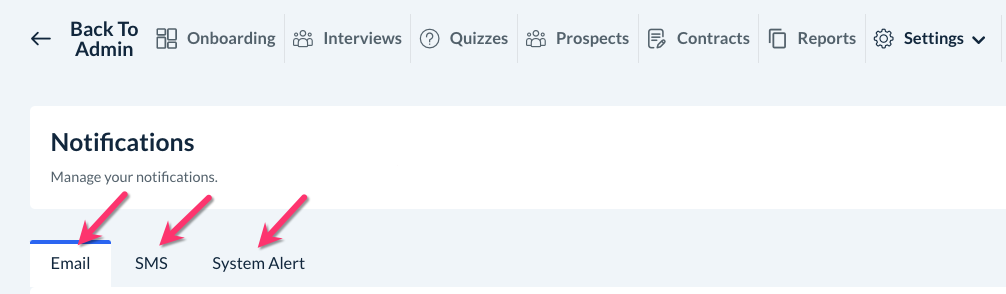
For an in-depth guide on how to set up your notifications for each section, click here.
View Logs
Click Logs to view activity logs inside the hiring module. There are three sections of logs: System Logs, Email Logs, and SMS Logs.
System Logs
The System Logs page allows you to view and filter activity from inside the hiring module.
System logs can be filtered by clicking the "All" drop-down menu and selecting:
Prospects
Interviews
Onboarding
Funnels
Quizzes
Contracts
Forms
Notifications
Settings
You can also select a date or date range to see logs for a specific time period.
Use the search bar to type in a prospect name or type of activity to view logs for that term.
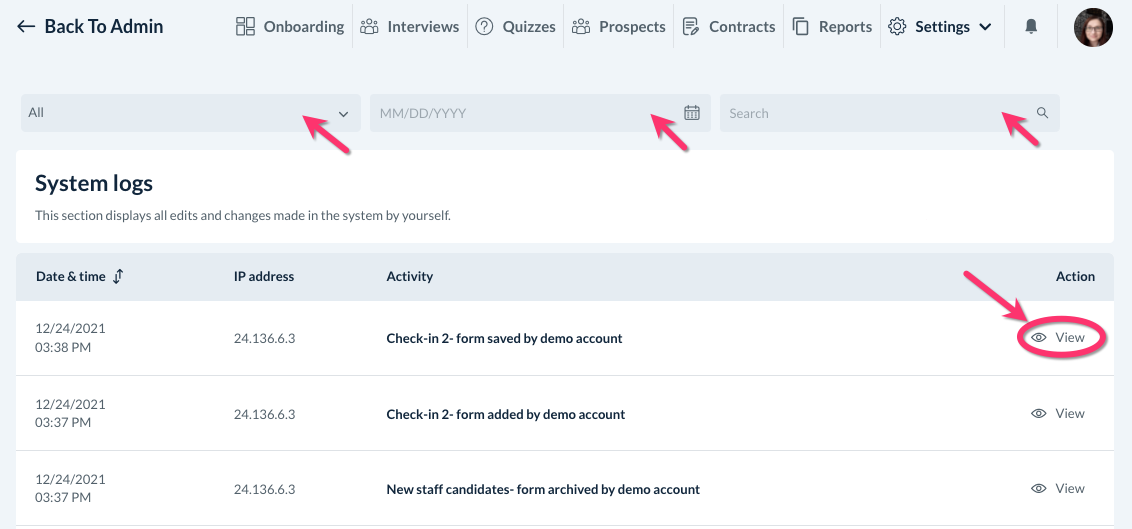
To view a more detailed description of the log activity, click View. You can also see a link to any submitted forms, quizzes, or contracts from inside the detail view.
Email Logs
Email Logs will display if you have set up a sender email in your notification settings.
Select a date or date range to see email logs for a specific time period.
Use the search bar to type in a prospect name or email address to view logs for that prospect.
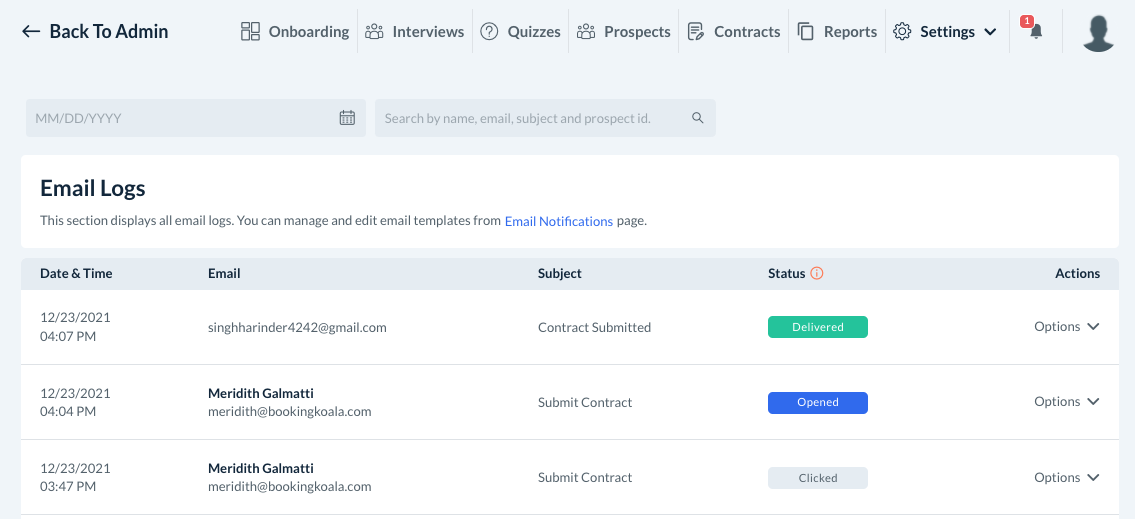
Each email log will have also have a Status. The following are used to help you see the current status of the sent email:
Sent - The "send email request" to the hiring email server was successful and it will attempt to deliver the message.
Rejected - The hiring email server accepted the email, determined that it contained a virus, and rejected it. The server did not attempt to deliver the email to the recipient's mail server.
Bounced - The recipient's mail server permanently rejected the email.
Complained - The email was successfully delivered to the recipient, but the recipient marked the email as spam.
Delivered - The hiring email server successfully delivered the email to the recipient's mail server.
Opened - The recipient received the message and opened it in their email client.
Clicked - The recipient received the message, opened it in their email client, and clicked a link inside.
SMS Logs
SMS Logs will display only if you have set up a sender phone number in your notification settings.
Select a date or date range to see SMS logs for a specific time period.
Use the search bar to type in a prospect name or phone number to view logs for that prospect.
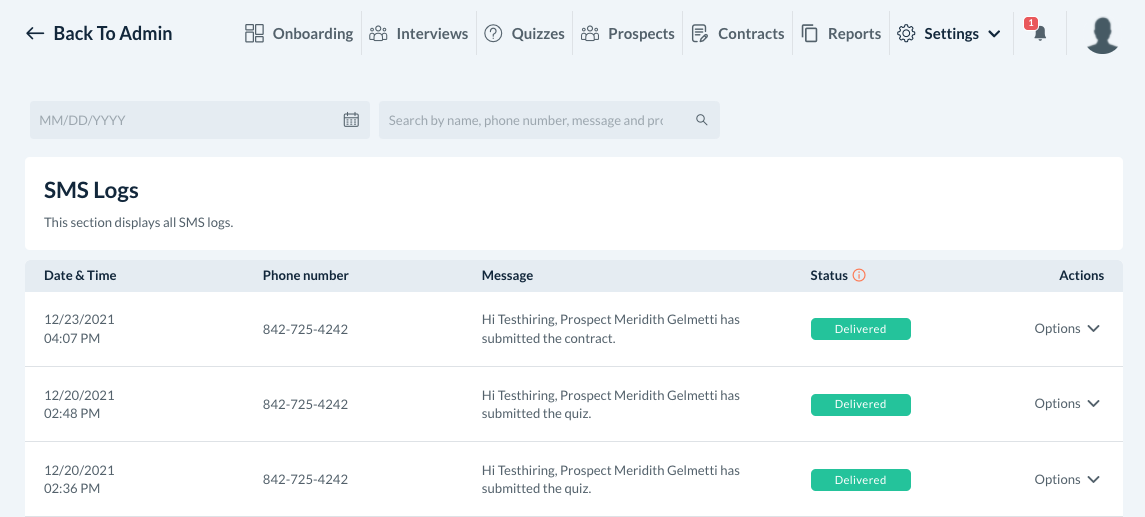
Each SMS log will have also have a Status. The following are used to help you see the current status of the sent SMS:
Sent - The "send SMS request" to the hiring server was successful and it will attempt to deliver the message.
Delivered - The hiring server successfully delivered the SMS to the recipient's phone.
General Settings
The last section in the "Settings" menu is general Settings for the entire hiring Module. There are two subcategories within this section: General, and Notifications.
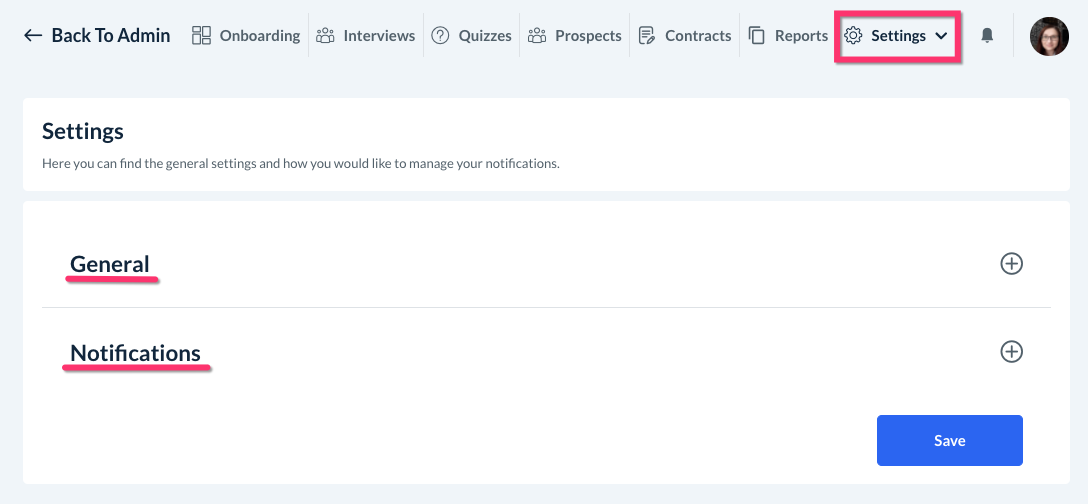
General
To view the General settings, click the "plus sign" icon on the left to expand the section. To hide the section, click on the "minus sign" icon.
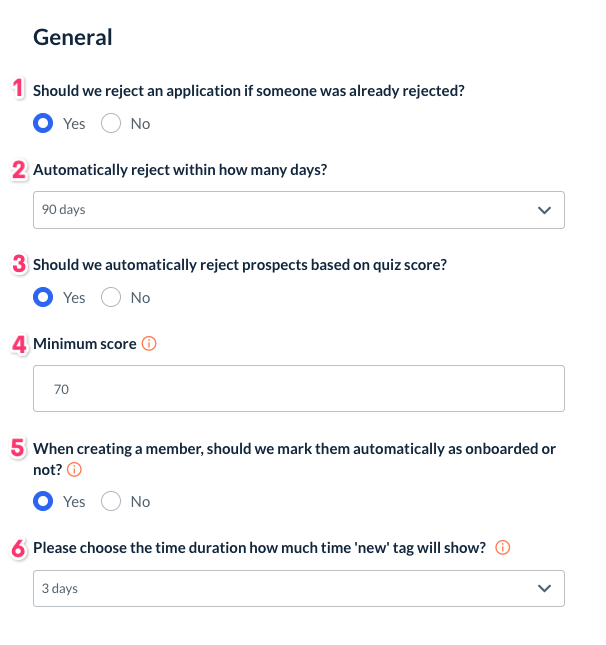
Should we reject an application if someone was already rejected?
Yes - If you select "Yes", any new applications that match a rejected prospect's application will be automatically rejected by the system.
No - If you select "No", the system will show new applications for previously rejected candidates.
Automatically reject within how many days?
If you selected "Yes" for the previous question, select the time frame in which new applications will be automatically rejected: within 30 days, 60 days, or 90 days.
For example, if you select "90 days", all new applications from the rejected prospect will be automatically rejected if they are received within 90 days from the initially rejected application.
Should we automatically reject prospects based on quiz scores?
Yes - If you select "Yes", prospects will be automatically rejected by the system if they do not achieve a certain score on their quiz.
No - If you select "No", all quizzes will come in without rejecting any prospects based on their final score.
For more information on how to set up automatic rejection of prospects, click here.
Minimum score
If you selected "Yes" for the previous question, use the arrows to adjust the minimum score the prospect must receive to pass the quiz.
When creating a member, should we mark them automatically as onboarded or not?
Yes- If you select "Yes", your prospect's status will be changed from "prospect" to "onboarded".
No - If you select "No", your prospect's status will remain as "prospect" in the hiring module.
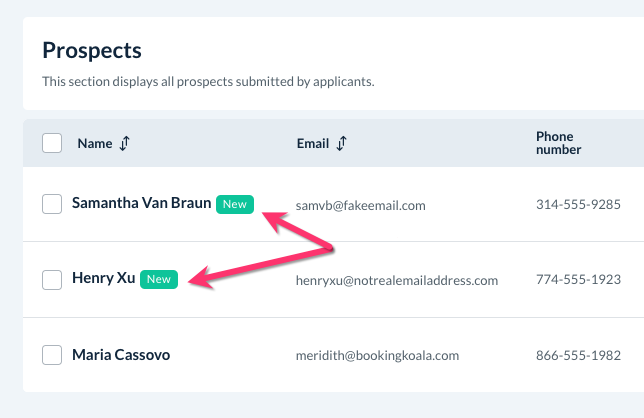
Please choose the time duration how much time the "new" stage will show?
This setting controls when the green New tag is displayed next to a prospect in the hiring module. You can select as little as one day or as many as seven days before the tag is removed.
Notifications
The Notification settings are listed right below the General section. Click the "plus sign" icon on the left to expand the section. To hide the section, click on the "minus sign" icon.
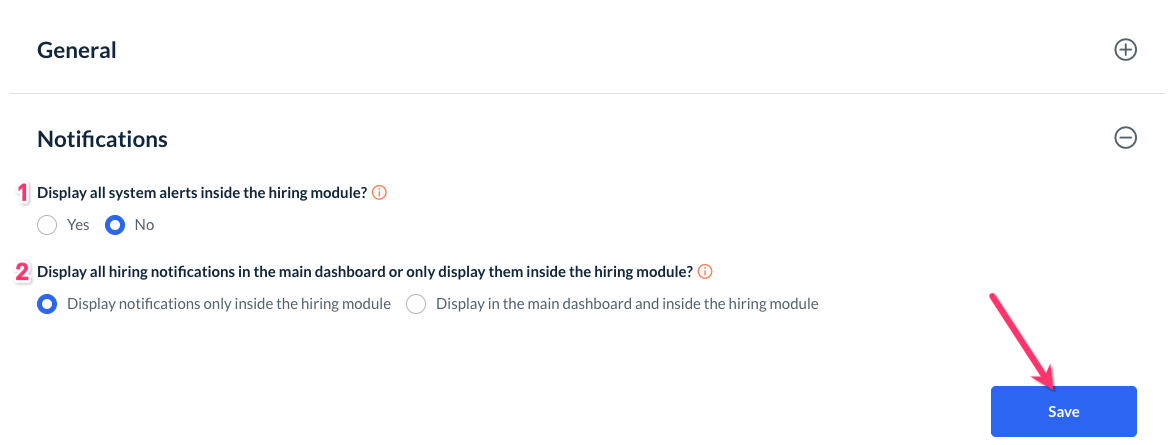
Display all system alerts inside the hiring module?
Yes - If you select "Yes", all general system alerts from your main dashboard will be displayed from within the hiring module so you do not miss any other activity in your account. Click here to learn more about setting up your notifications.
No - If you select "No", only the system alerts you have enabled in the notifications settings section will display while you are inside the hiring module.
Display all hiring notifications in the main dashboard or only display them inside the hiring module?
Display notifications only inside the hiring module - Select this option if you only want to see hiring system alerts when you are inside the hiring module.
Display in the main dashboard and inside the hiring module - Select this option if you would like to display your hiring module system alerts in your main dashboard.
Once you have finished making your selections, please be sure to click the blue Save button at the bottom of the page.