The purpose of this article is to help you understand:
How to manage the audiences connected to each form
Managing Audience Lists
When you first sign up for a Premium subscription with BookingKoala, your account comes with several pre-built, pre-connected audience lists inside the Campaign Module. These lists collect contact information as it is entered into the system.
However, you may want to reconfigure or segregate your audience into different lists depending on which form or industry a customer has booked. You can manage these settings inside the Campaign Module "Settings" section.
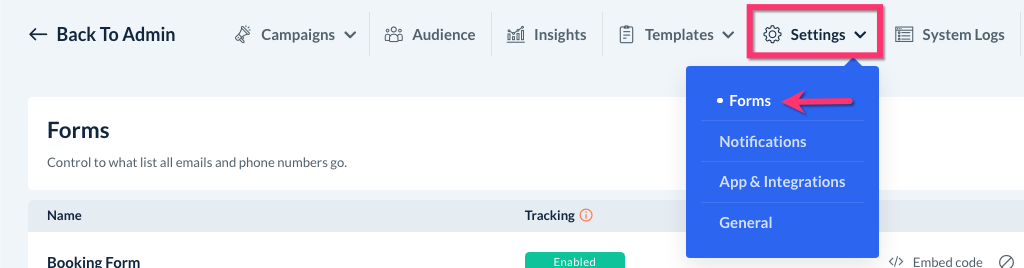
To open the Campaign Module, click on the "Marketing" tab in the left-side menu and select "Campaigns".
Next, click on:
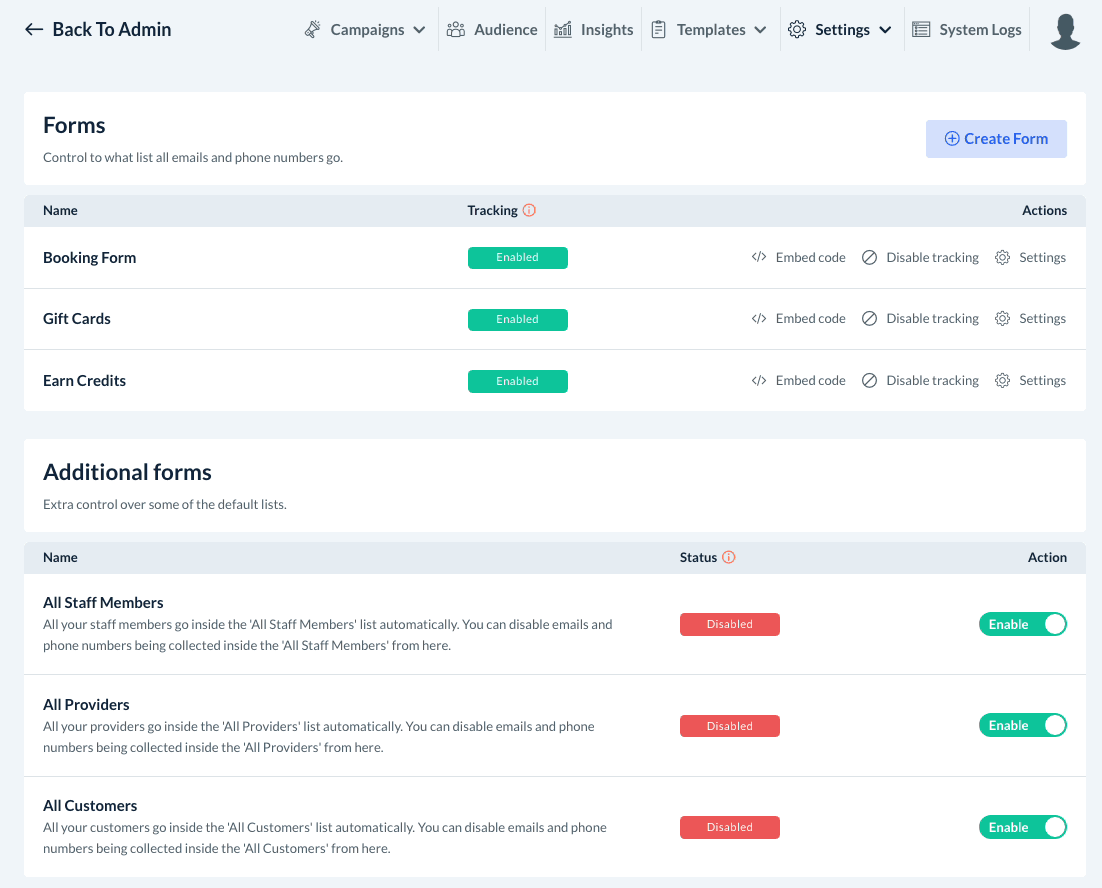
Settings > Forms
There are two sections on this page: Forms and Additional Forms.
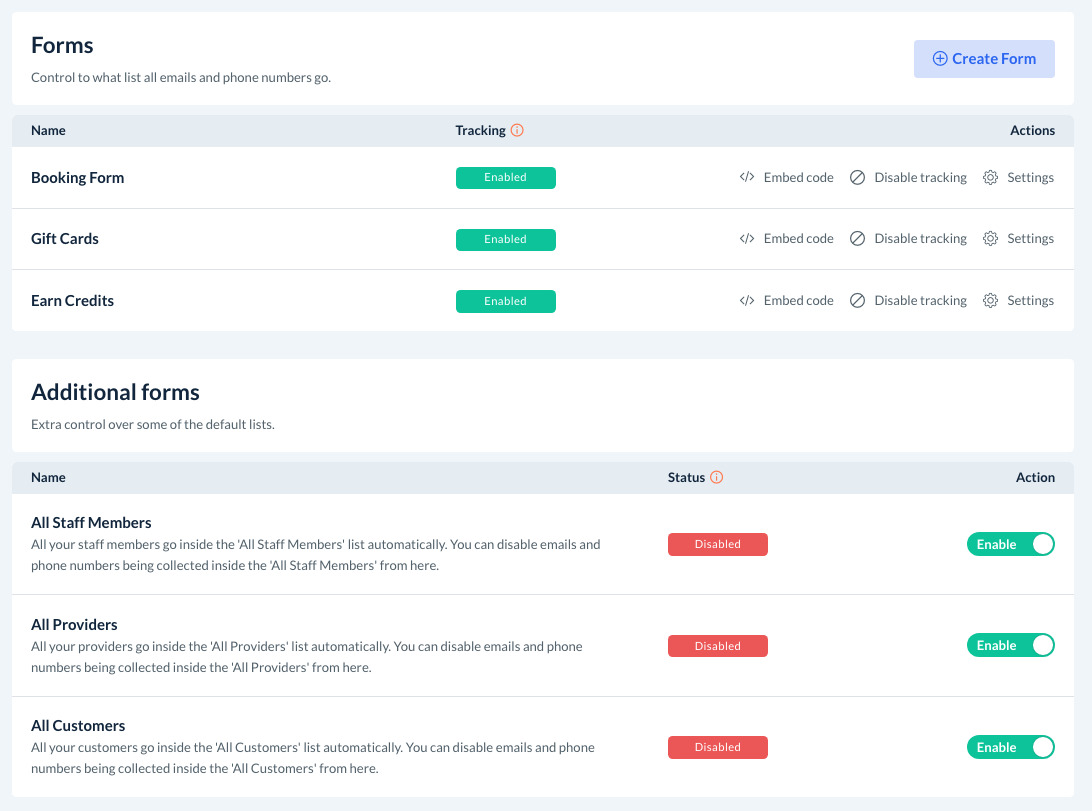
Forms
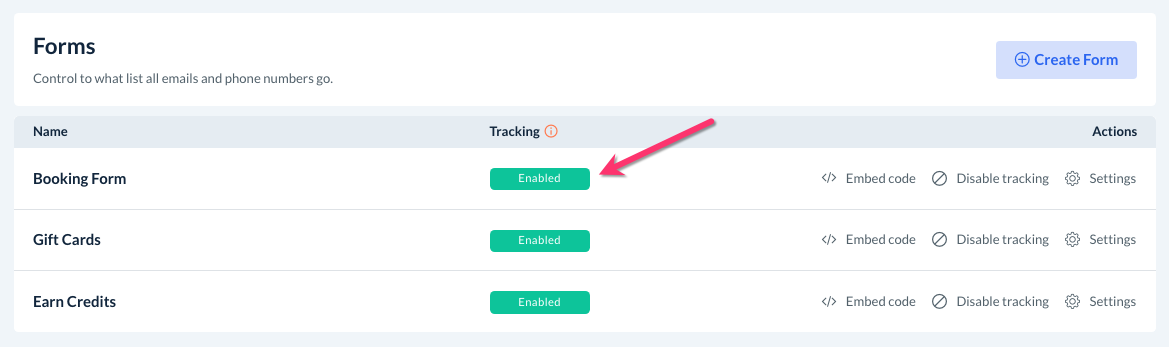
The top section, "Forms", contains settings for your Booking Form, Gift Cards, and Earn Credits pages. Tracking for these forms is enabled by default. This means that whenever the form is filled out, the contact information will be added to the designated audience list.
If you would like to disable tracking, that is, stop collecting new customer information for a particular form, click the "Disable Tracking" button under the "Actions" column.

To manage which audience is connected to a form, click the "Settings" button under the "Actions" column.

A menu will open on the left side of the screen displaying the settings for the form.
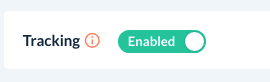
You can disable tracking from this section by switching the green "Enabled" button to "Disabled" at the top of the menu.
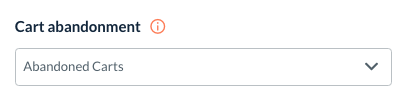
Beneath "Cart Abandonment", you can select which list will collect the contact information of customers who filled out the form but did not schedule a service. By default, the "Abandoned Carts" audience is selected.
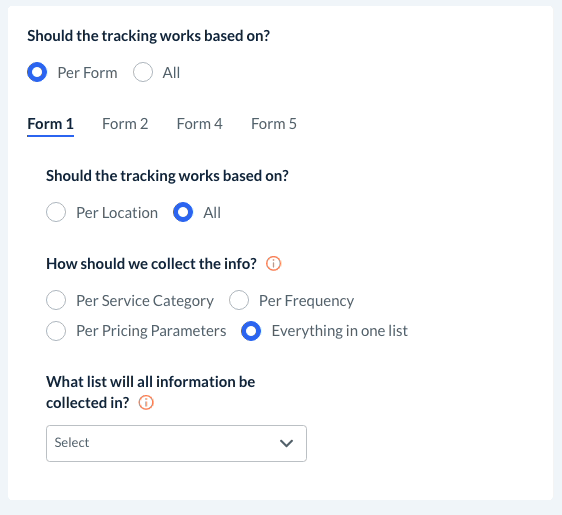
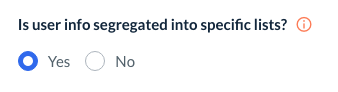
Next, you can decide if you would like to segregate your audience list into specific lists.
If you select "No", all customers who schedule services through any booking form will be collected in the "All Customers" audience by default.
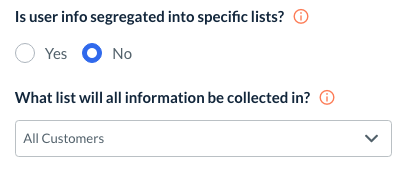
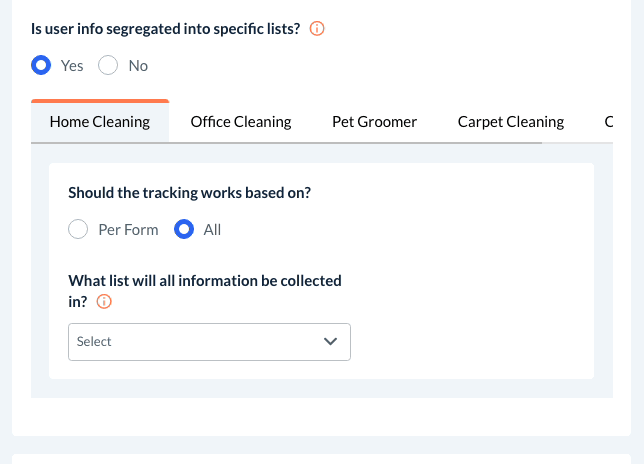
Select "Yes" if you would like to segregate your user's information into specific lists.
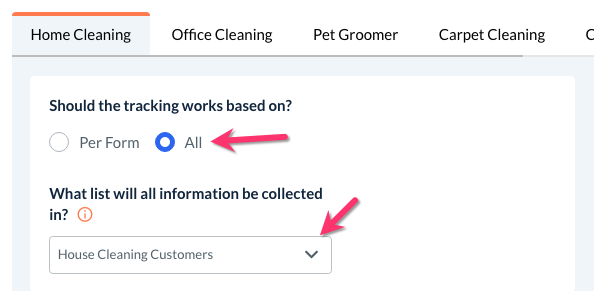
If you have more than one industry, click the industry tabs at the top of this section to set your audience list(s) per industry.
If you would like to all contacts in a particular industry to be sorted into the same list, select "All" and pick the audience list from the dropdown box below.
If you would like to further segregate your audience lists based on the form details, select "Per Form". Then, click on the form tabs to set your audience list for each form.
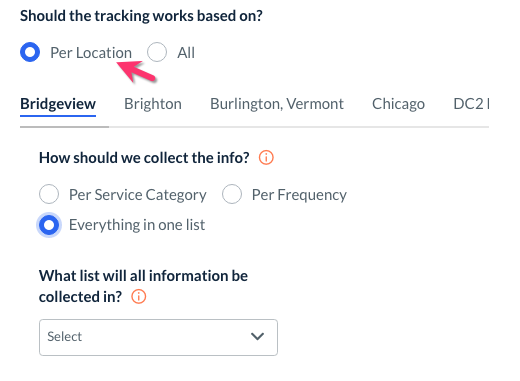
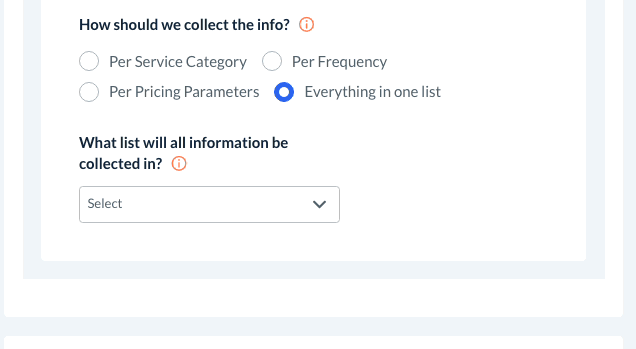
If you would like to set up audience lists for each location, select "Per Location". From here, you can select "Everything in one list" or further segregate based on the categories you use in your forms.
If you would like to set up audience lists based on a selection made in the booking form, select "Per [Category Name]" below where it says "Show should we collect the info?"
After you have selected the audience list(s), scroll down to the next question, "Should user information be removed from other lists if they end up in the 'Cart abandonment' list?"
Select "Yes" to have the system automatically remove customers from other audience lists if they end up in the "Abandoned Cart" list. Select which list(s) you want them to be removed from using the box below.
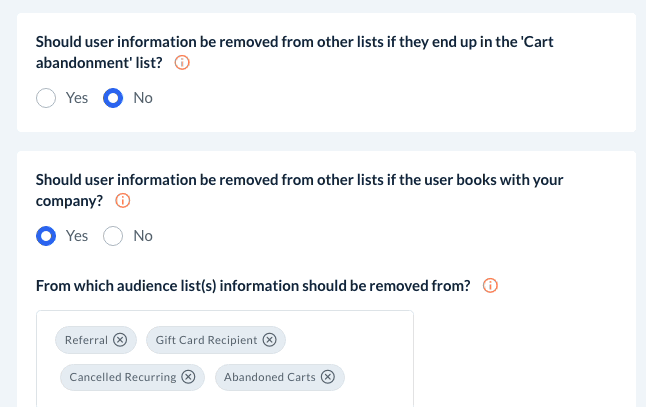
Select "No" to keep customers on other audience lists if they are added to the abandoned cart audience.
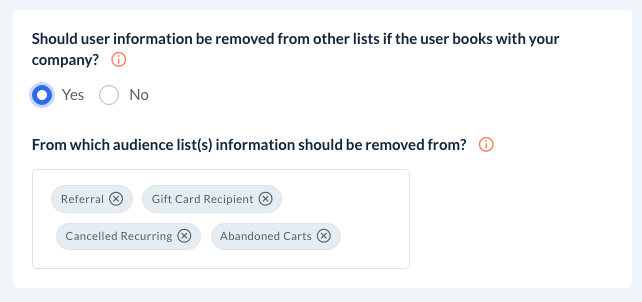
Next, select an answer for, "Should user information be removed from other lists if the user books with your company?"
Select "Yes" if you'd like a user's information to be removed from any audience lists once they book with your company. Select which list(s) you want them to be removed from using the box below.
By default, this is set up to remove customers from the following lists: Referral, Gift Card Recipient, Cancelled Recurring, and Abandoned Carts.
Select "No" to keep the user information in other lists even if they schedule a service.
Next, select an audience list to collect information if a one-time booking is canceled. The default audience is set to "One Time Customers".

Finally, select an audience list to collect information if a recurring service is canceled. The default audience is set to "Canceled Recurring".

At the bottom of the side menu, click the blue "Save & Close" button to update your campaign form settings.

Additional Forms
The second section on the form settings page is called "Additional Forms". These forms are disabled by default.
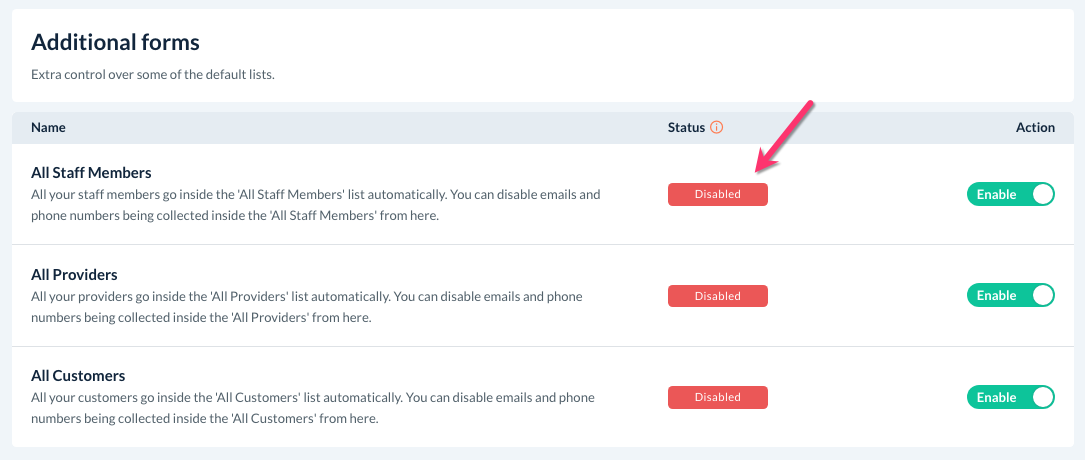
The three additional forms correspond with your "All Staff Members", "All Providers", and "All Customers" audience lists. When enabled, these forms will automatically collect each staff member, provider, and customer's contact information in the appropriate audience list.
To enable one of the additional forms, click the green "Enable" button under the "Action" column.
A pop-up window will appear, asking if you are sure you want to start collecting all contacts inside this list. Click the blue "Yes" button to proceed.
The form status will be switched to "Enabled" and the system will now start collecting user information as it is saved into the system.