The purpose of this article is to help you understand:
How to view campaign activity in the Campaign Module
What user data is collected from your audiences
How to gain additional campaign insights
Campaign Activity
Campaign Stats
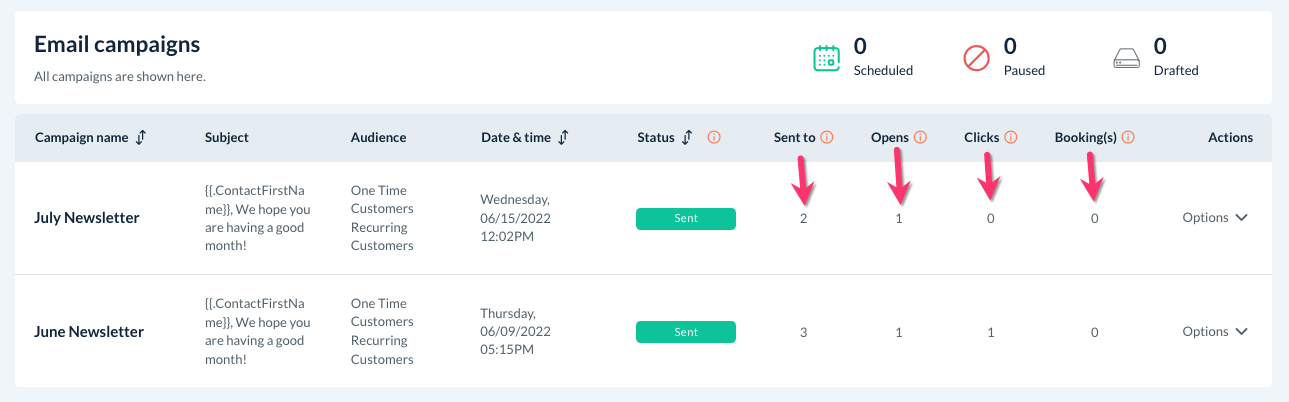
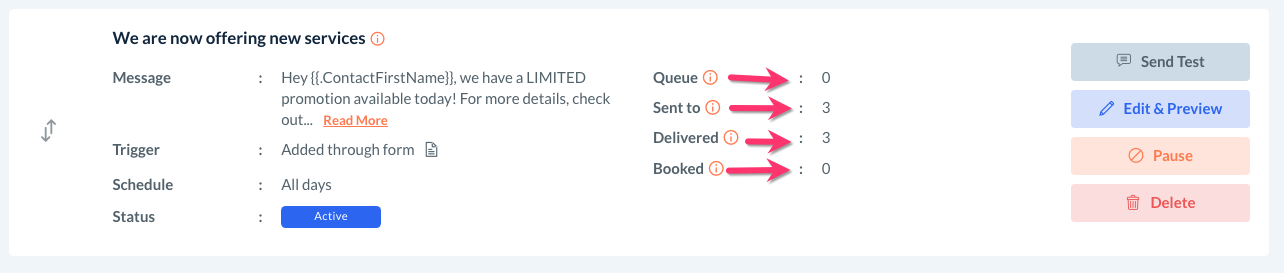
Once you have sent out your first email or SMS campaign, you'll be able to track several important pieces of information:
How many people the campaign was sent to
How many users opened the campaign
How many users clicked the link in the campaign (email campaigns only)
How many bookings resulted from the campaign
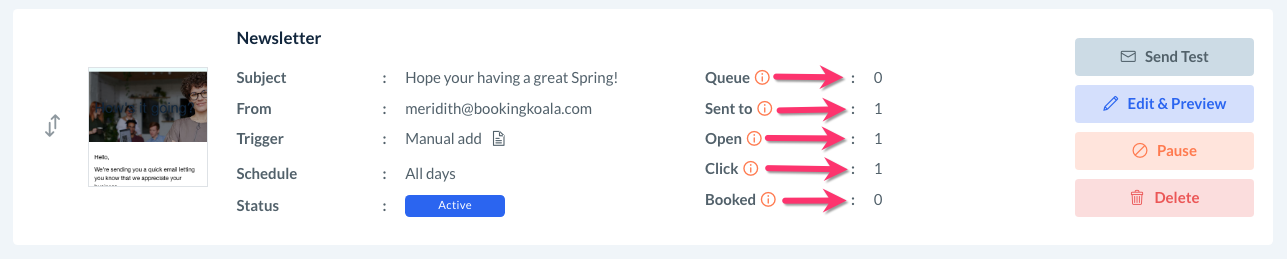
How many contacts are queued for a campaign (automatic campaigns only)
To view this information for manual email campaigns, go to:
Campaigns > Email > Campaigns
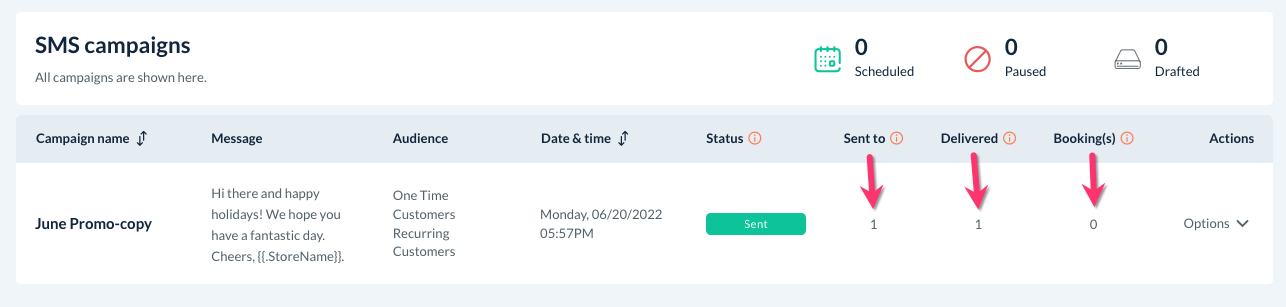
This information for manual SMS campaigns is displayed in the same fashion. Go to:
Campaigns > SMS > Campaigns
To view this data for automated email campaigns, go to:
Campaigns > Email > Automations
Select "Options", then "Edit" to the right of the campaign in which you'd like to view stats.
To view this data for automated SMS campaigns, go to:
Campaigns > SMS > Automations
Select "Options", then "Edit" to the right of the campaign in which you'd like to view stats.
Campaign Logs
In addition, each campaign contains a campaign logs section so you can specifically see:
Which users received the campaign email(s) or SMS message(s)
If any emails or phone numbers bounced
Which users clicked the campaign link (emails campaigns only)
If any customers booked as a result of the campaign
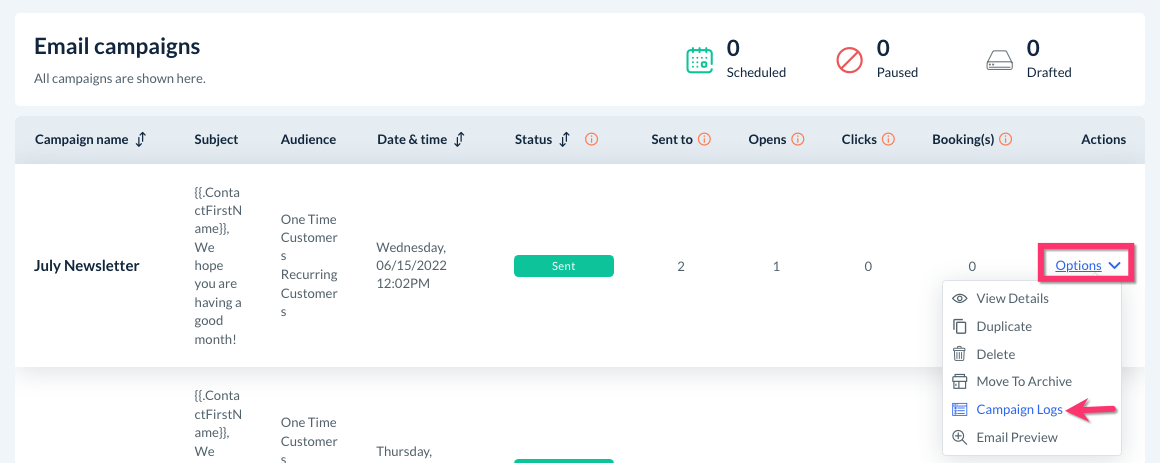
To view this information for email campaigns, go to:
Campaigns > Email > Campaigns
Select "Options" and then click on "Campaign Logs".
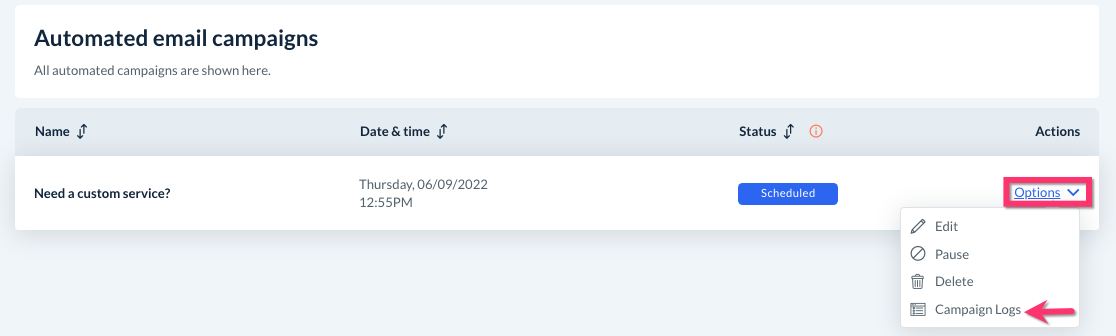
The same option is available for automated email campaigns by going to:
Campaigns > Email > Automations
On the "Email Logs" page, there are several different actions you can take in addition to viewing the logs.
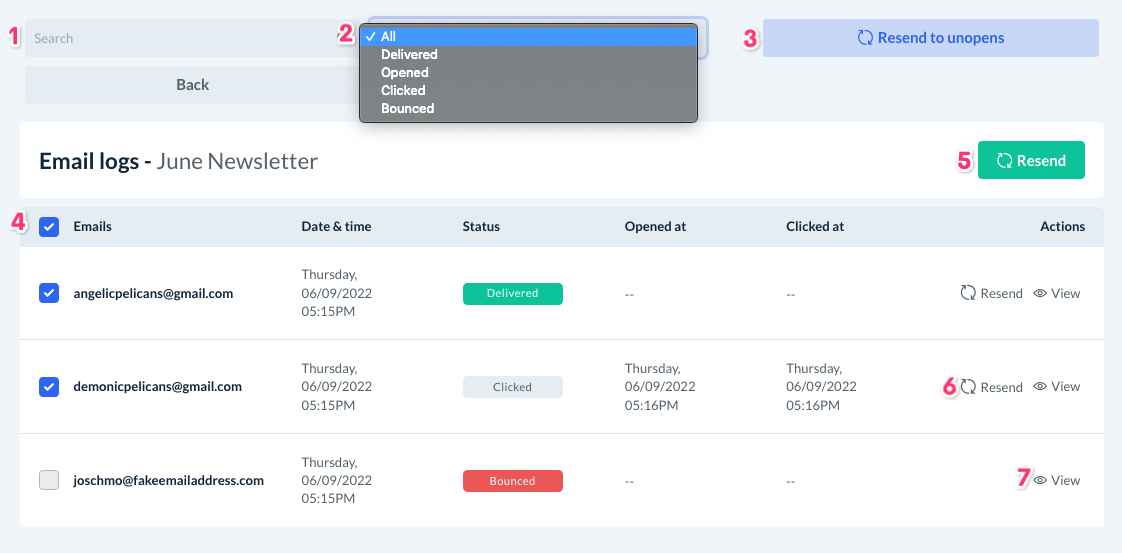
Search - Enter a name, phone number, or email address to search for specific logs.
Filter - Use the filter to view only view logs that have been delivered, opened, clocked, or booked.
Resend to Unopens - Click this button to resent the campaign to all recipients who did not open the campaign.
Checkboxes - Check the boxes to the left of specific logs to select which contacts you'd like to resent the campaign to.
Resend Button- Click this button to resend the campaign to the selected contacts.
Resend Icon - Click this icon to the right of an individual log to resend the campaign.
View Icon - Click this icon to view the contact's campaign profile (discussed later in this article).
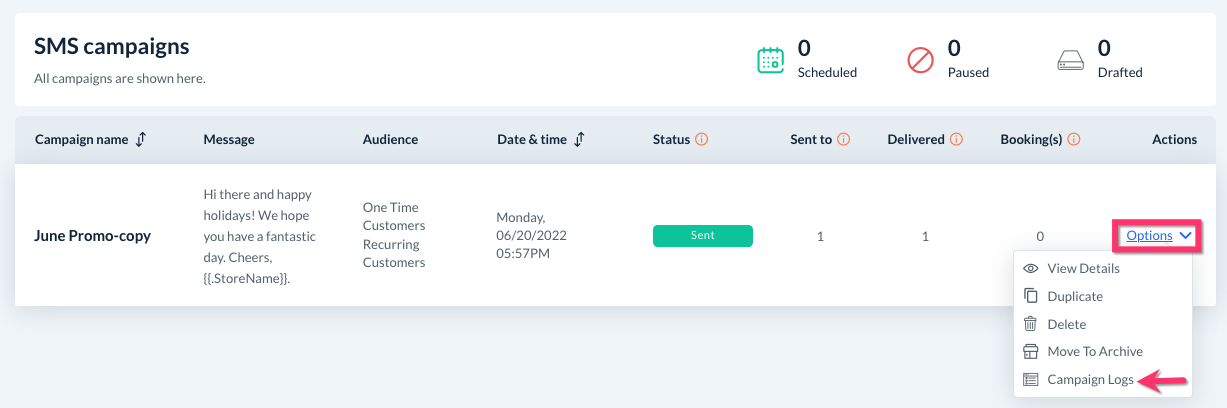
To view logs for SMS campaigns, go to:
Campaigns > SMS > Campaigns
Select "Options" and then click on "Campaign Logs".
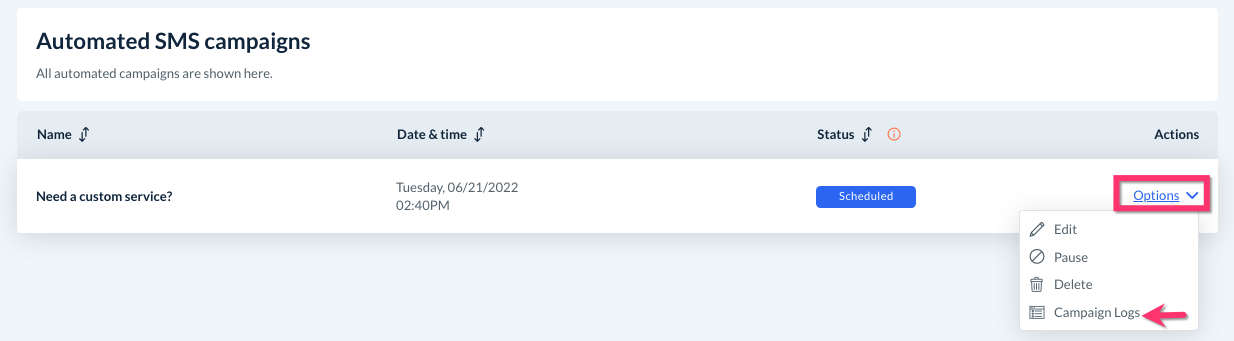
The same option is available for automated SMS campaigns by going to:
Campaigns > SMS > Automations
On the "SMS Logs" page, there are several different actions you can take in addition to viewing the logs.
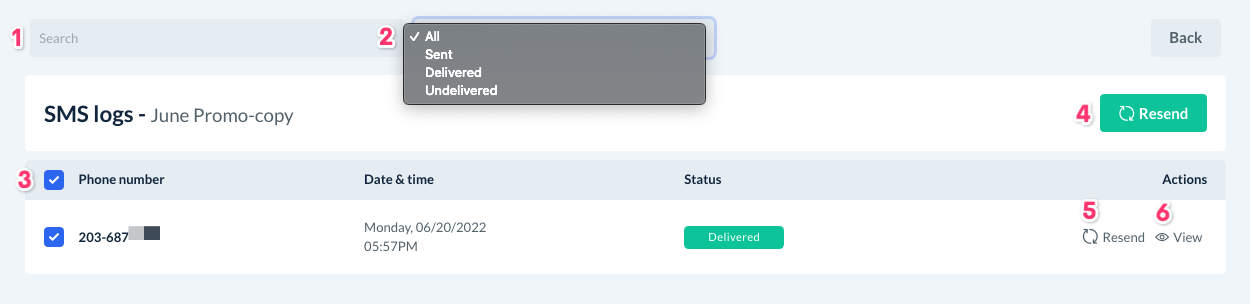
Search - Enter a name, phone number, or email address to search for specific logs.
Filter - Use the filter to view only view logs that have been delivered, opened, clocked, or booked.
Checkboxes - Check the boxes to the left of specific logs to select which contacts you'd like to resent the campaign to.
Resend Button- Click this button to resend the campaign to the selected contacts.
Resend Icon - Click this icon to the right of an individual log to resend the campaign.
View Icon - Click this icon to view the contact's campaign profile (discussed later in this article).
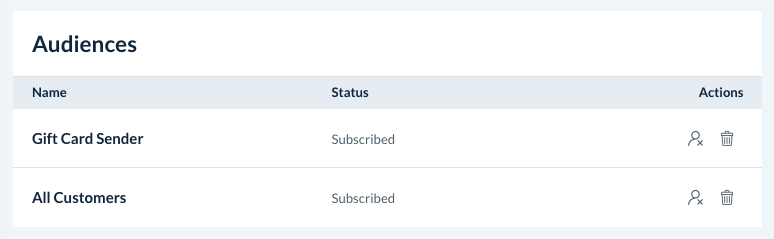
Audience and User Activity
You can also track campaign activity per lead/client. Inside each audience, you can see if a user booked, bought gift cards, or simply opened your campaigns.
View Contacts
To begin, go to the "Audience" tab and click on "Options", then "View Contacts" under the "Actions" column.
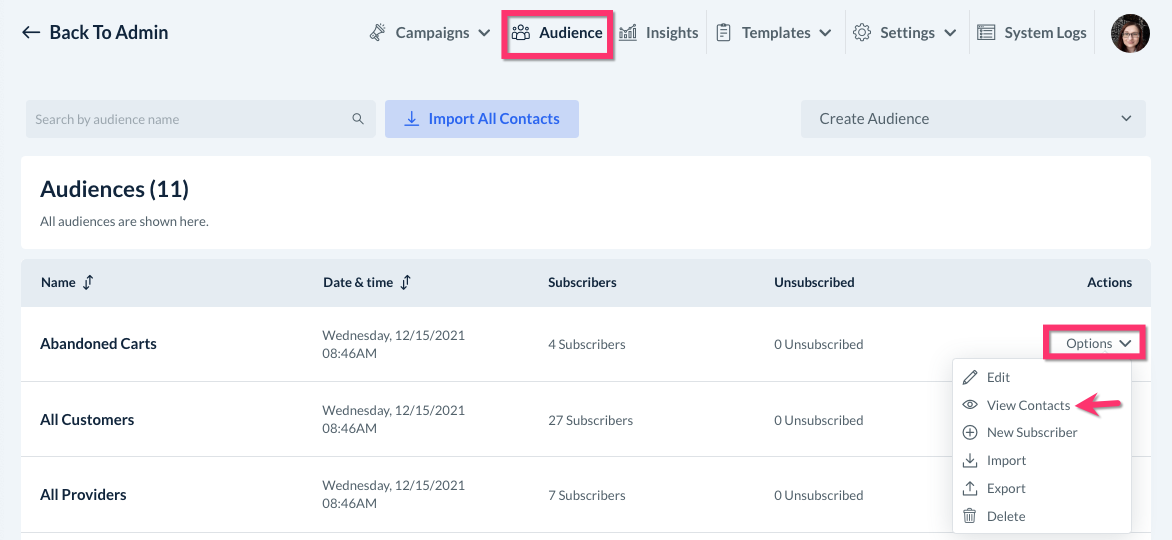
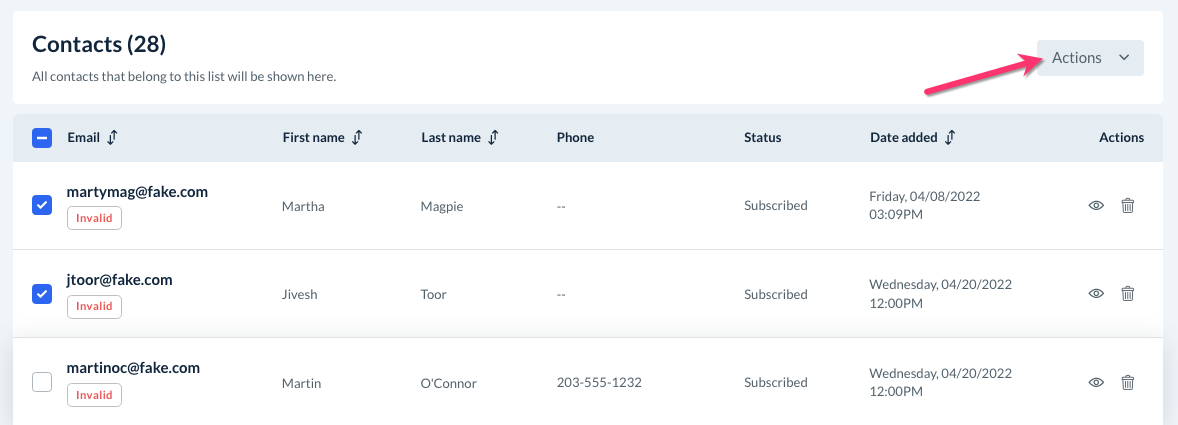
You will be redirected to the "Contacts" page.

Here, you can see which user information has been collected, the date it was added to the list, and if the user is currently subscribed or unsubscribed.
Bulk Actions
You may notice there are checkboxes located next to each of the rows in your audience. Once you select one or more contacts, an "Actions" menu will appear on the top right corner of the page.
This menu allows you to do the following actions for one or more contacts:
Subscribe unsubscribed contact(s)
Unsubscribe subscribed contact(s)
Delete contact(s) from the audience
Copy contact(s) to another audience
Move contact(s) to another audience
Action Buttons
There are also several action buttons located under the "Actions" column to the far right of every contact.
Click on the trash can icon to delete a user from the list.

Click the eye icon to view a detailed profile of the user's campaign profile.
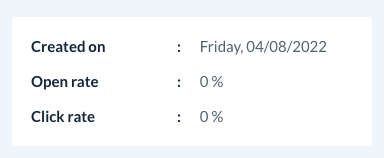
Here, you can view the following data:
Created on - The date the user was first created or tracked by the list.
Open rate - How many times the user has opened your campaigns.
Click rate - How many times the user has clicked a link inside your campaigns.
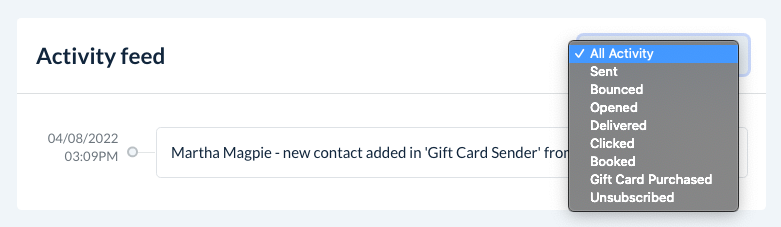
Activity feed - Displays all campaign-related activities.
Logs - Displays all email or SMS campaigns sent to the user.

Audiences - Shows which audience(s) this user is subscribed to.
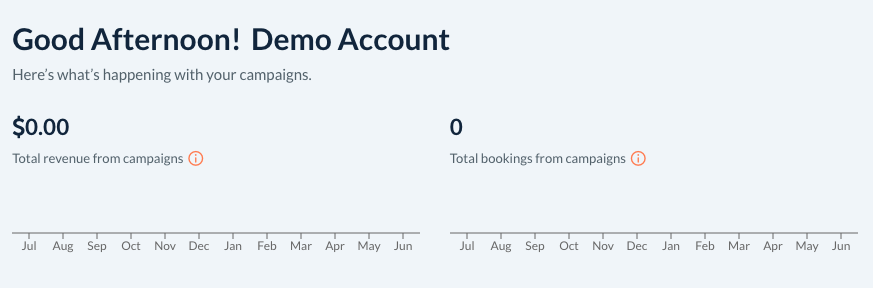
Campaign Insights
To see statistics on the overall performance of your campaigns, click on the "Insights" tab at the top of the Campaign Module.

At the top of this section, you can view your total revenue from all campaigns, as well as the total number of bookings that have resulted from clicks inside a campaign.
Below, there are three main tabs to view more specific reports:
General
Campaigns
Audience
General
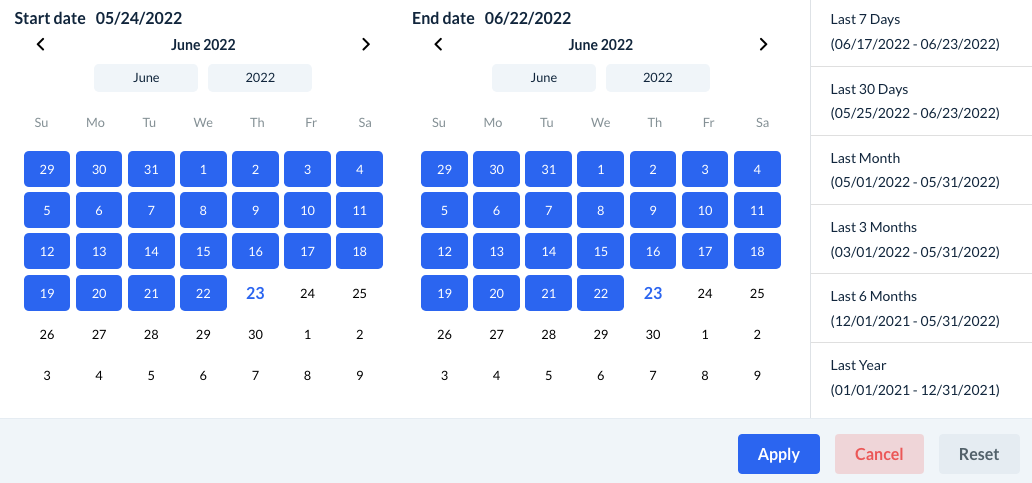
Once you click on the "General" tab, select a date range using the option at the top of the page. You can click on two specific dates to select a custom range, or select one of the pre-defined ranges from the side menu.

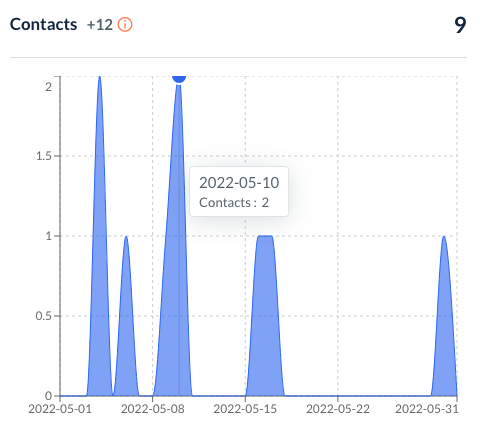
The Contacts Report displays all the contacts you've been collecting.
If a new user is added to a list, it will be counted as a contact regardless of it you collected their email, phone number, or both.
If a user switches between audience lists or is added to a new list, they will still be counted as one total user in this report.
If a user unsubscribes or is deleted from an audience list, the contact will be subtracted from this report unless they remain active in a separate list.
Keep in mind that this report displays data for the selected date range at the top of the section.
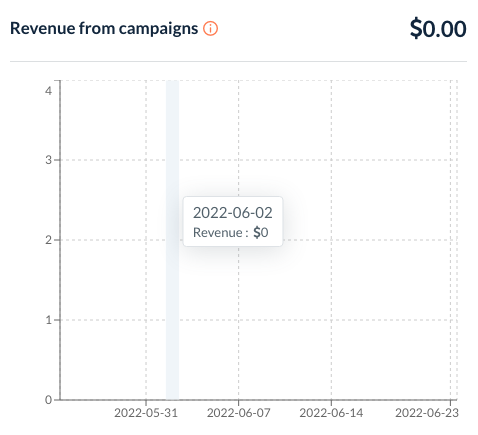
The Revenue from Campaigns Report displays revenue for all of your campaigns combined.
For example, if you earn $200 in revenue from bookings generated in one campaign and $300 from another, the total revenue would be for all campaigns would be $500.
If bookings are canceled or voided, the report will automatically adjust and remove revenue from these bookings.
If a recurring service is booked, each booking in the service will be counted towards your revenue.
Keep in mind that this report displays data for the selected date range at the top of the section.
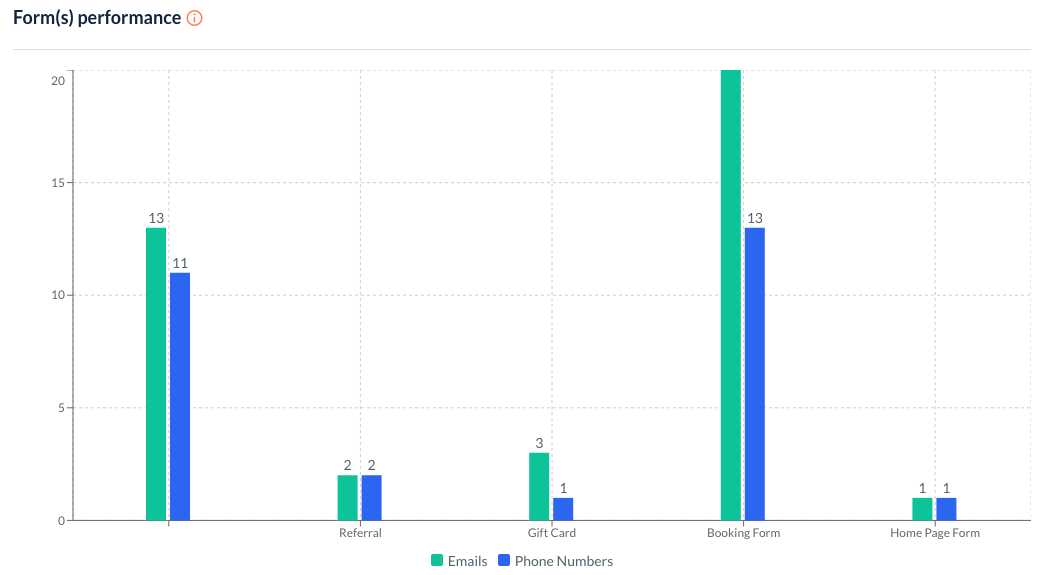
The Form(s) Performance Report displays the success rate of each form you use in terms of gathering new contacts.
If a form is designed to capture emails only, this report will count every new email gathered through that form.
If a form collects both emails and phone numbers, the report will display a column for phone numbers (in blue) and another for email addresses (in green).
If a user enters both their email address and phone number into a form, this report will display that the form has captured 1 email and 1 phone number.
Keep in mind that this report displays data for the selected date range at the top of the section.
Campaigns
Once you click on the "Campaigns" tab, you can use the drop-down menu on the top left side to view data for all campaigns or a specific campaign.
You will also select a date range using the option at the top of the page. You can click on two specific dates to select a custom range or select one of the pre-defined ranges from the side menu.
Use the "Email/SMS" tabs to select which campaigns you would like to view data for.
Below, you can view the following information for the selected campaign(s) and date range:
Scheduled - Displays how many emails or messages are scheduled but have not been sent out yet.
Total - Displays how many campaign emails or messages have been sent out.
Bookings - Displays how many bookings resulted from email or SMS campaigns. If a user books a recurring service and they have two bookings during your selected date range, it would count as two separate bookings.
Revenue - Displays how much revenue has been earned during the date range. If a user books a recurring service and they have two bookings during your selected date range, it will count the revenue from both bookings.

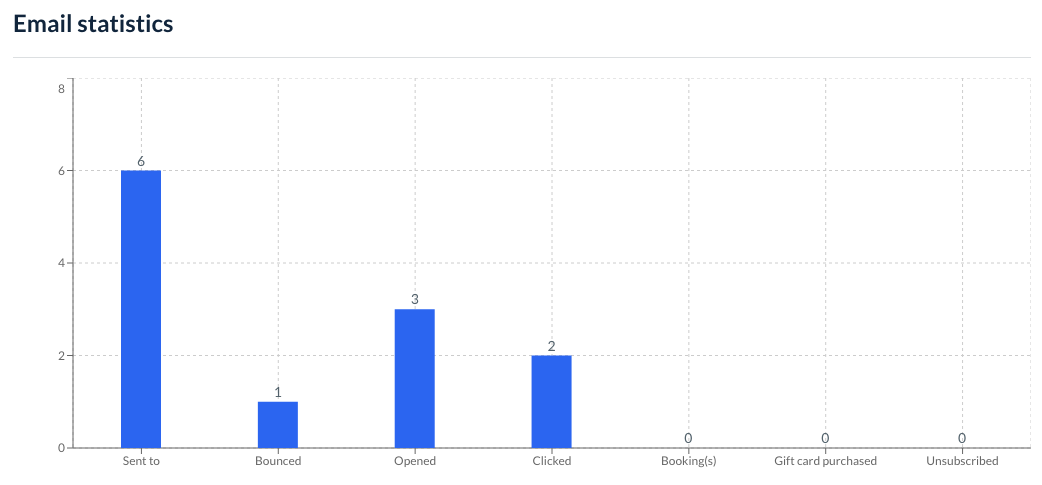
Below, the Email Statistics Report shows how many emails or messages were sent out, bounced, opened, clicked, resulted in bookings, gift card purchases, and unsubscribed during the selected period.
Audience
Once you click on the "Campaigns" tab, you can use the drop-down menu on the top left side to view data for all audiences or a specific audience list.
You will also select a date range using the option at the top of the page. You can click on two specific dates to select a custom range or select one of the pre-defined ranges from the side menu.
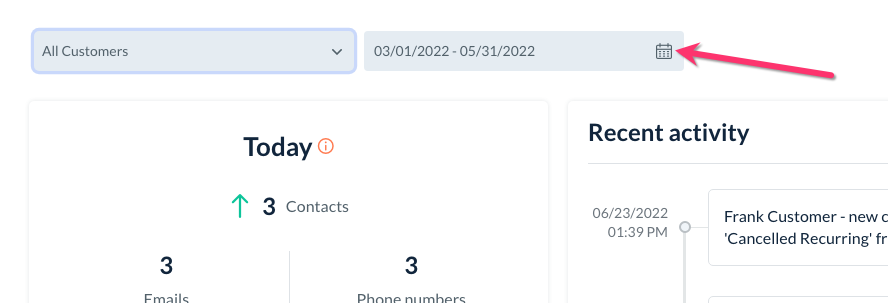
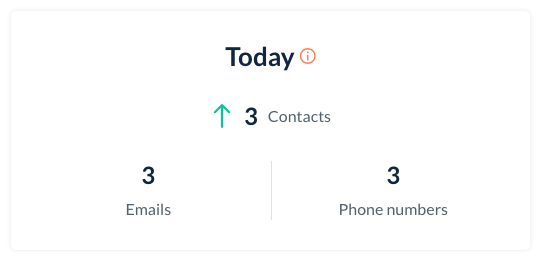
The first section in the report displays how many contacts have been collected Today.
The second section "Total Contacts", displays how many contacts have been collected in your chosen date range.
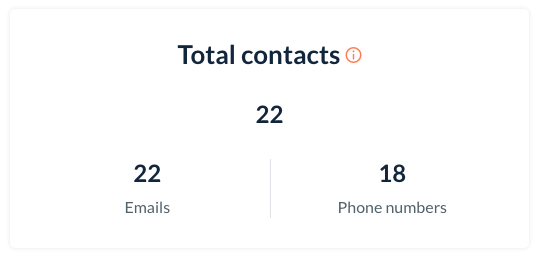
Each user equals one contact.
If one user enters both an email and a phone number, the emails will increase by one and the phone numbers count will increase by one.
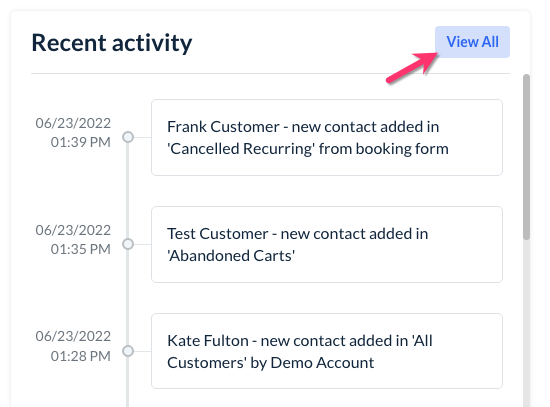
To the right of this section, you can view the Recent Activity section.
Scroll through the list to view all activities from the past day.
Click the blue "View All" button at the top-right corner to be directed to the System Logs section.
A link to the System Logs section is also located at the top of the Campaign Module's menu.

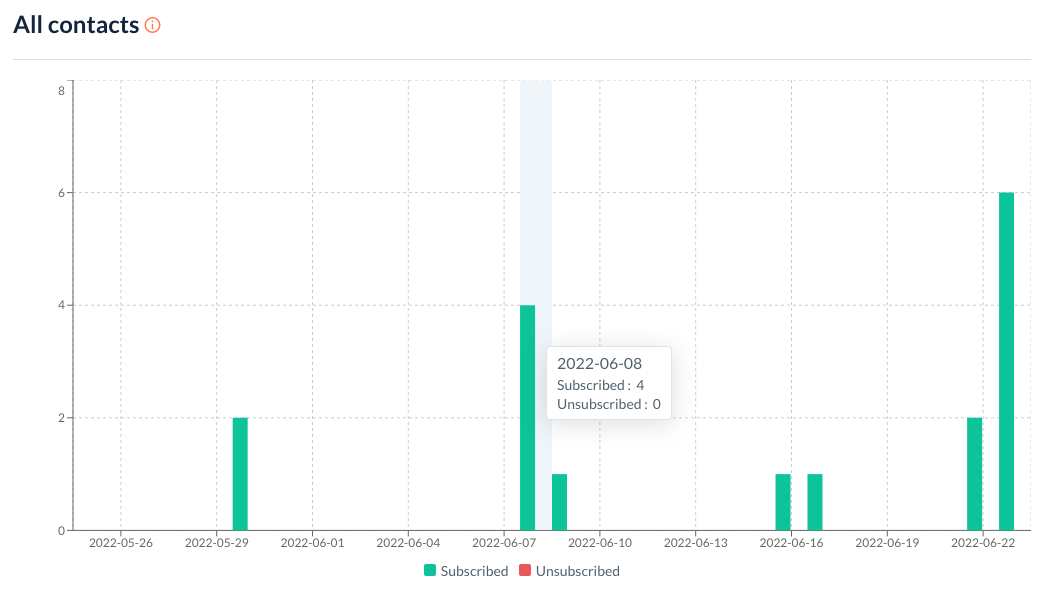
Finally, the All Contacts Report shows how many contacts have subscribed (in green) and unsubscribed (in red) for the dates in your selected date range.