The purpose of this article is to help you learn how to:
Create an Authorize.net account
Flush out any test data
Connect Authorize.net as your payment processor
Creating an Authorize.net account
First, you will need to set up an Authorize.net account if you do not have one already.
For questions about how to set up your account, please contact Authorize.net Support for more information.
Please Note: Authorize.net can only accept currencies from certain countries. Click here to see a full list of which currencies and countries are compatible.
Flush your test data
Next, if you haven't done so already, you will need to flush the test data out of the system. Every new BookingKoala account includes a few fake customers, providers, and bookings to better help you understand the system and test your settings. It is important to flush the test data before incorporating your payment processor, as any existing bookings with payment options may affect the accuracy of your revenue and earnings reports.
Click here to learn how to remove the test data from your account.
Find Your Authorize.net API Keys
You will connect your account by entering three API keys from your Authorize.net account into your BookingKoala settings.
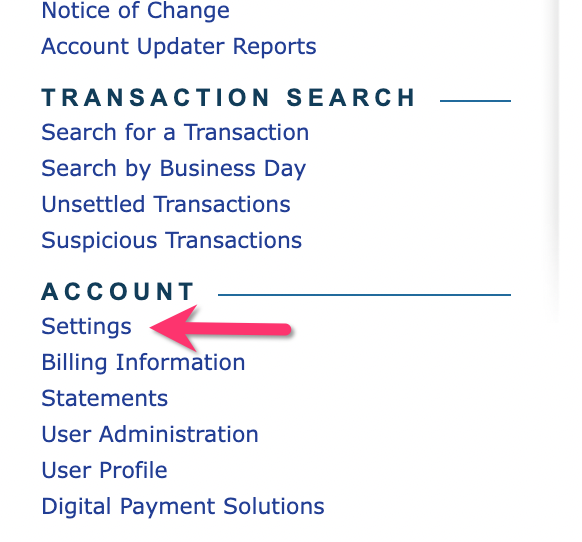
To locate your keys, log in to your Authorize.net dashboard and click on "Settings", which can be found under the "Account" section in the left-side menu.
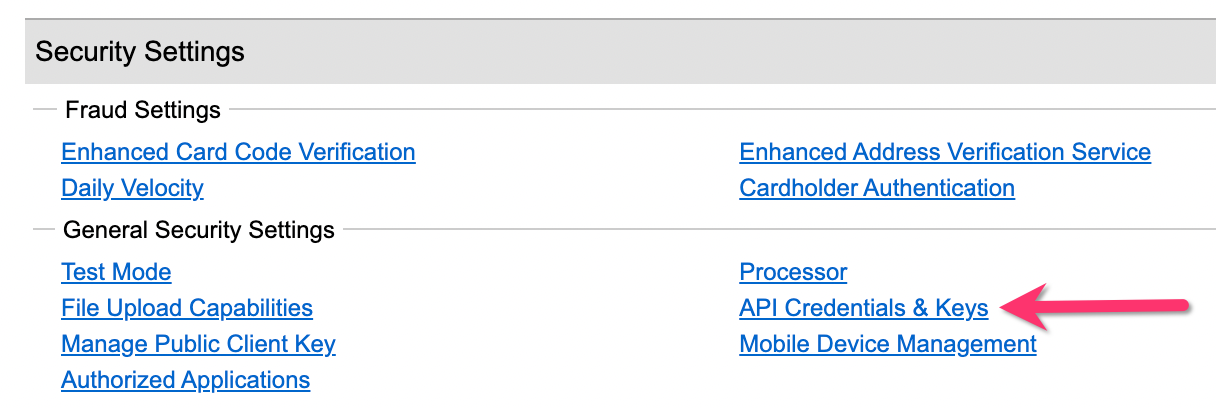
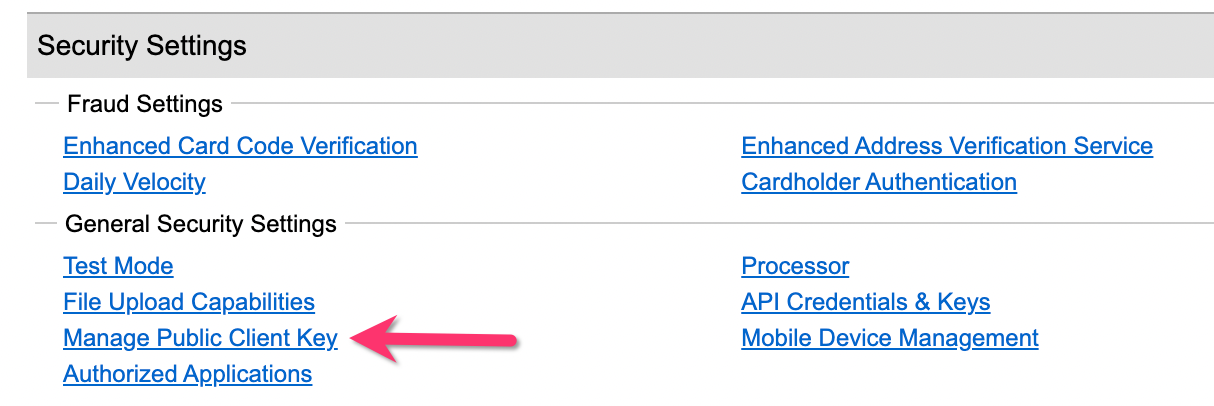
Next, locate the "Security Settings" section and click the "API Credentials & Keys" link.
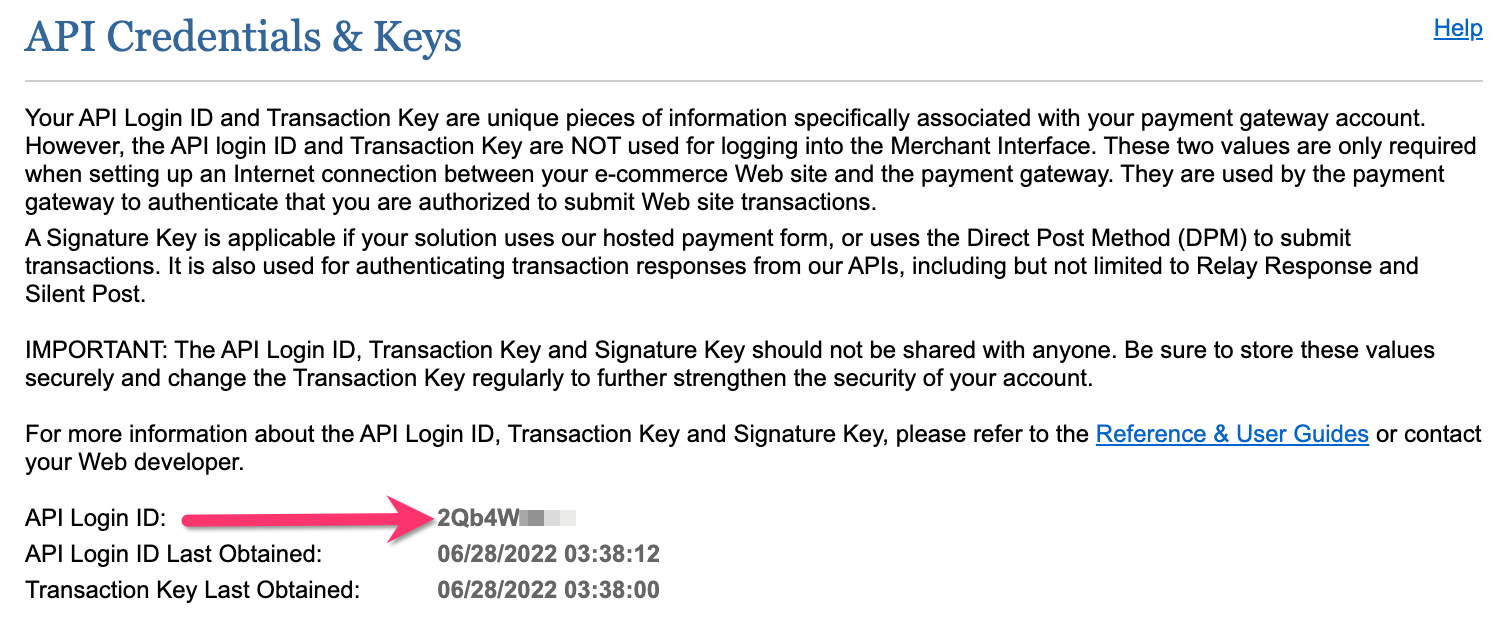
The first key you will need to copy is the API Login ID. This is located below the paragraphs at the top of this section.
The next key you will need, a Transaction Key can be generated from this page. Scroll down to the "Create New Key(s)" section and select the circle next to "New Transaction Key". Then, click the "Submit" button to generate the key.

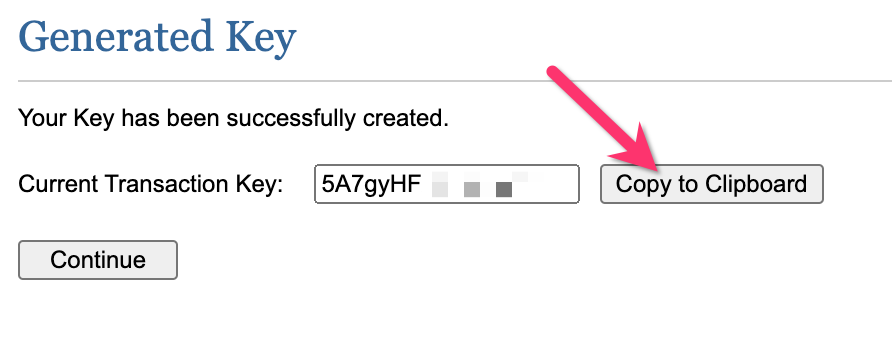
If your account is already verified, a new transaction key will be generated immediately. Click the "Copy to Clipboard" button to copy the key.
If your account has not been verified yet, you will be prompted to complete that process by sending a pin to your email and using the pin to proceed to the "Generated Key" page.
To get the final key, navigate back to the "Home" page in your Authorize.net dashboard.

Again, click on "Settings", which can be found under the "Account" section in the left-side menu.

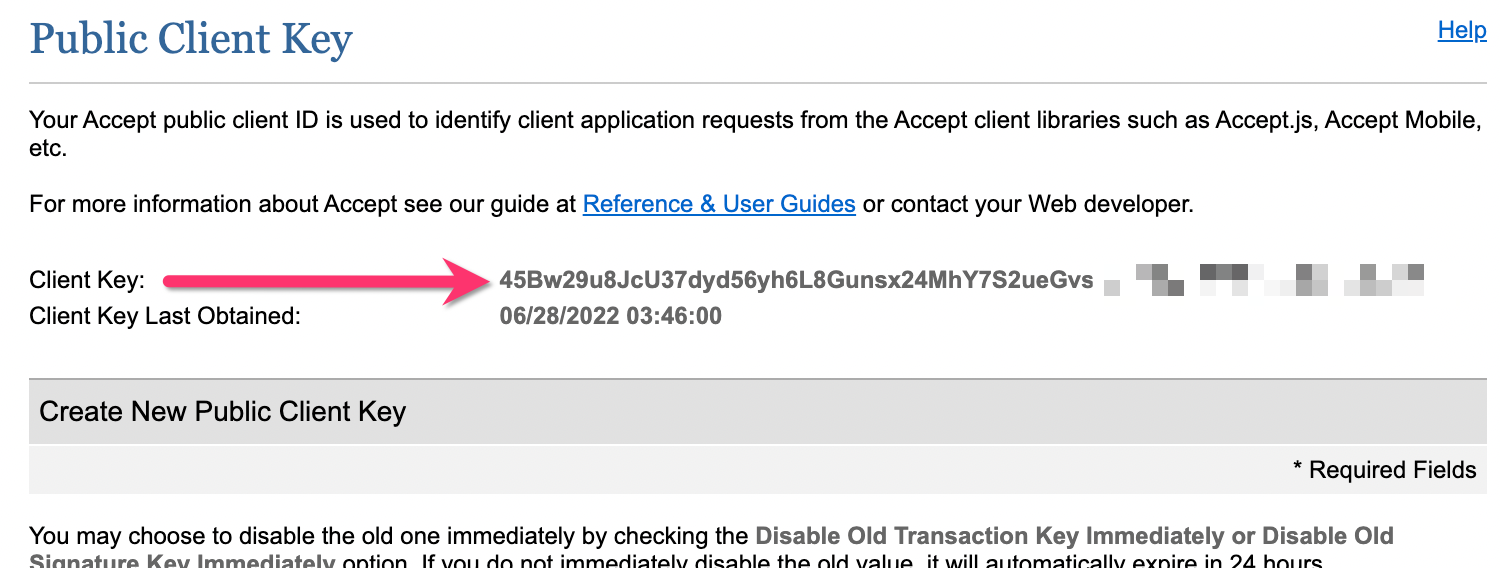
Locate the "Security Settings" section and click the "Manage Public Client Key" link.
Copy the (Public) Client Key. This key is very long so please be sure you have copied the entire code before proceeding.
Now that you've gathered your API Login ID, Transaction Key, and Public Client Key, you are ready to connect. your account to BookingKoala.
Connecting Your Authorize.Net Account to BookingKoala
After locating your API keys, log into your BookingKoala account go to:
Settings > General > Store Options > Admin
Scroll down to the Connect Payment Gateways section at bottom of the page. Next to the option "Enable or disable your payment processor", click the red "Disabled" button. A pop-up window will appear, click Yes to continue.
Next, click on the Authorize.net tab from the side panel.

Here, you will paste your API Login ID into the first box, the Transaction Key into the second box, and the Public Client Key into the third box.
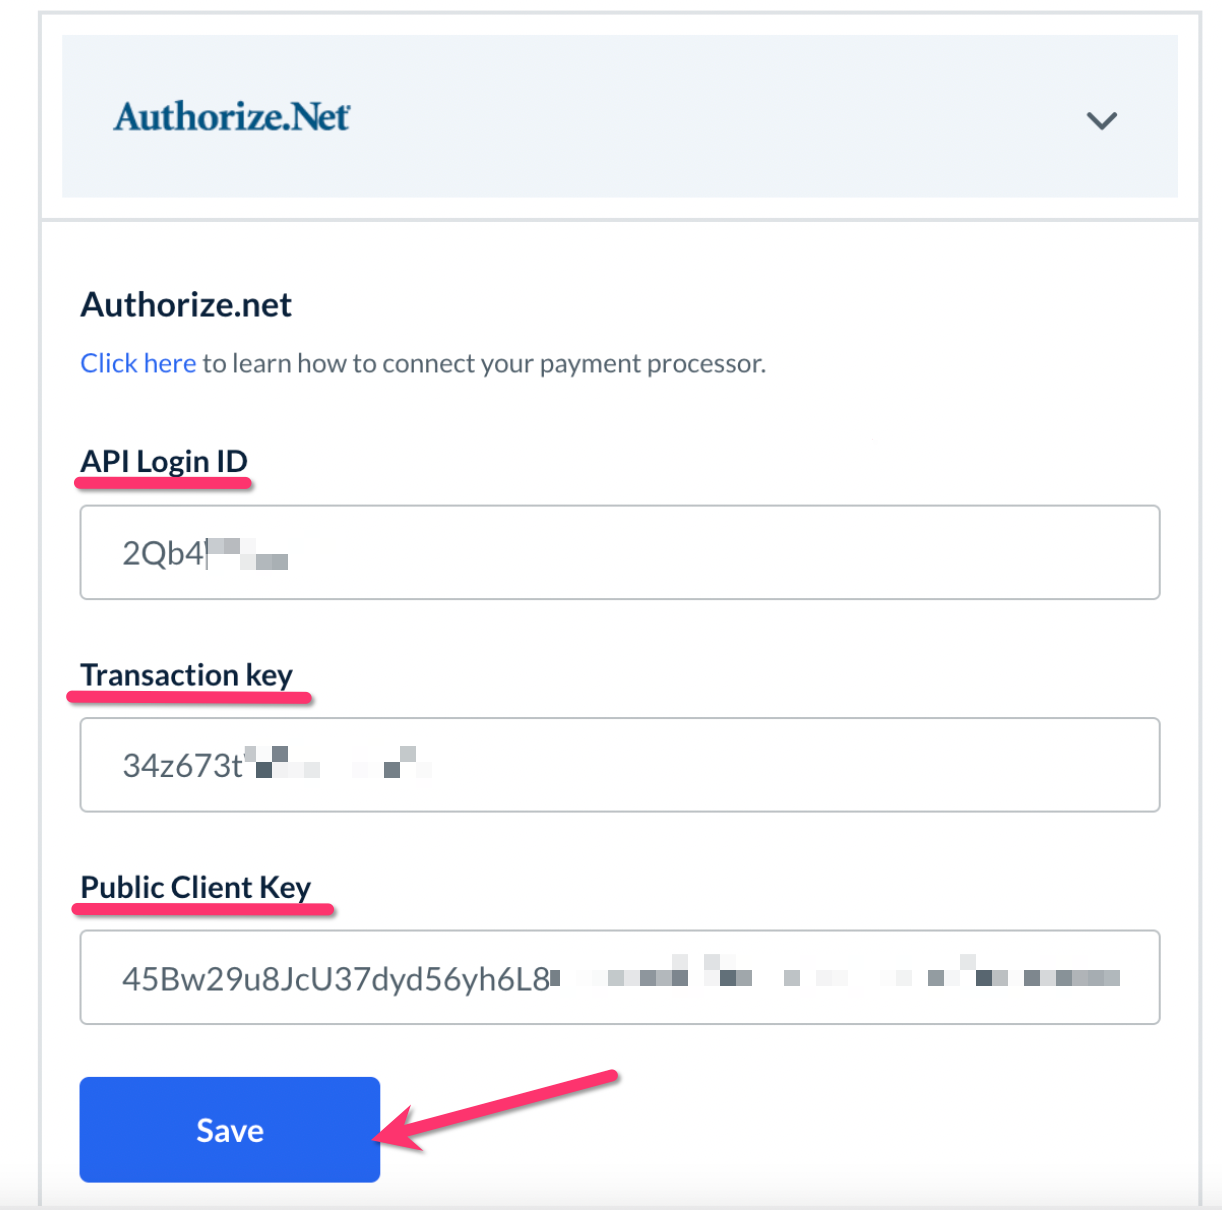
Click the blue Save button to connect the account. You will see a green system alert in the top right corner of the page letting you know the account has been connected successfully.
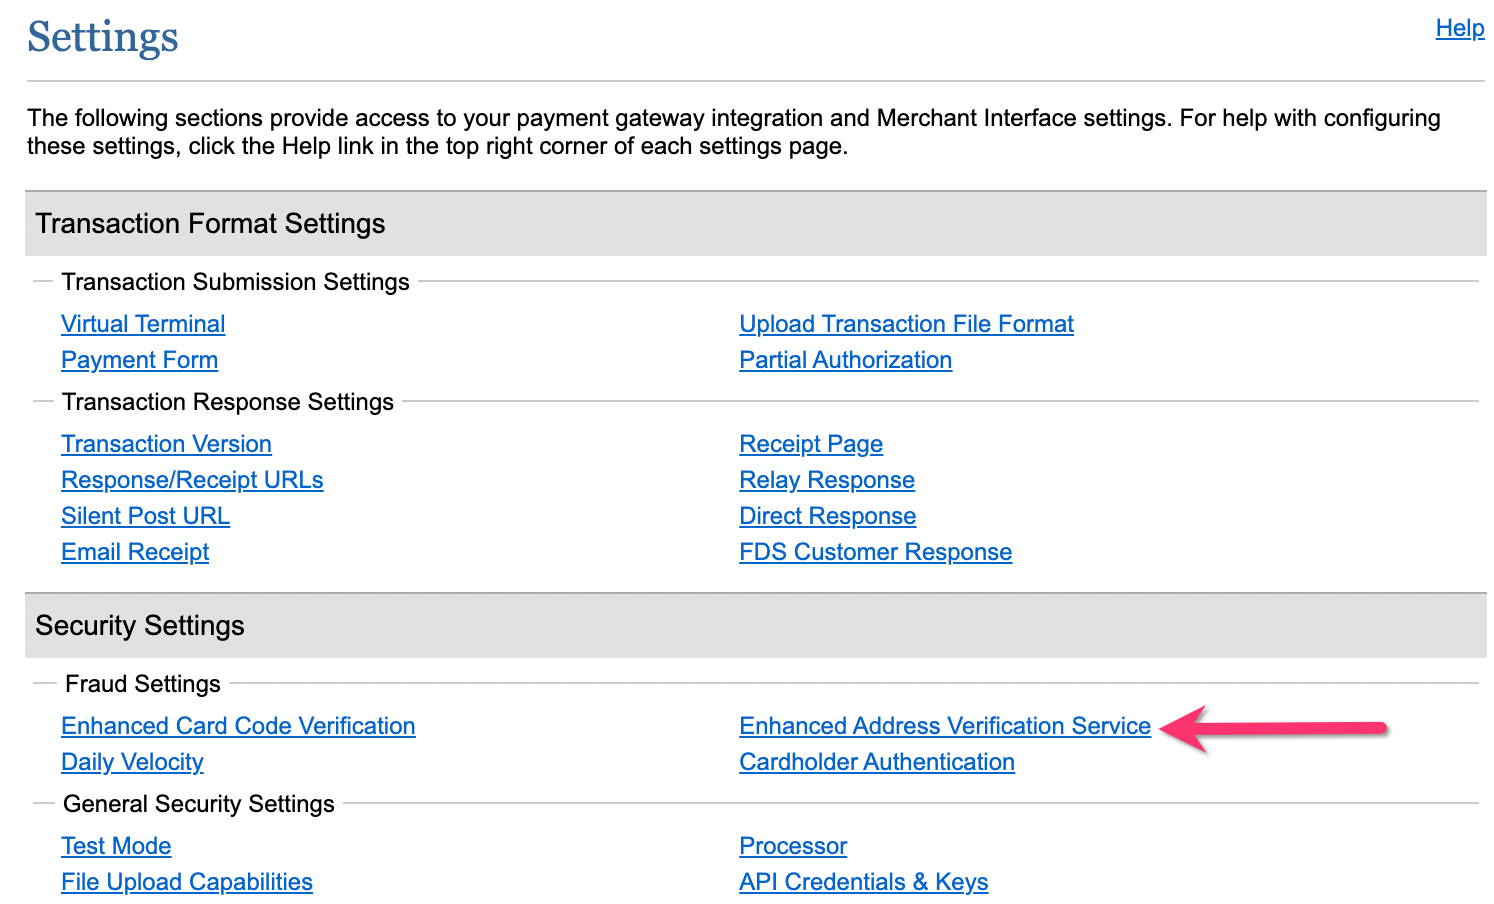
Enhanced Address Verification Service
One feature offered by Authorize.net (absent from PayPal, Stripe, or Square) is the ability to verify credit card authenticity by entering the customer's billing address. This feature can be enabled in your Authorize.net account by going to the "Settings" section and clicking on the "Enhanced Address Verification Service" link.
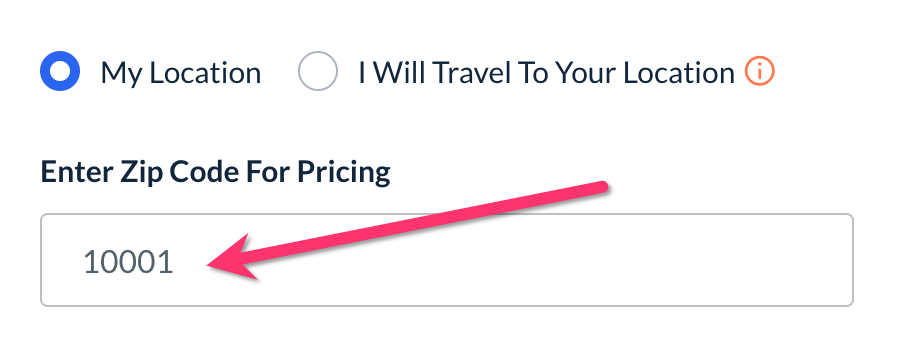
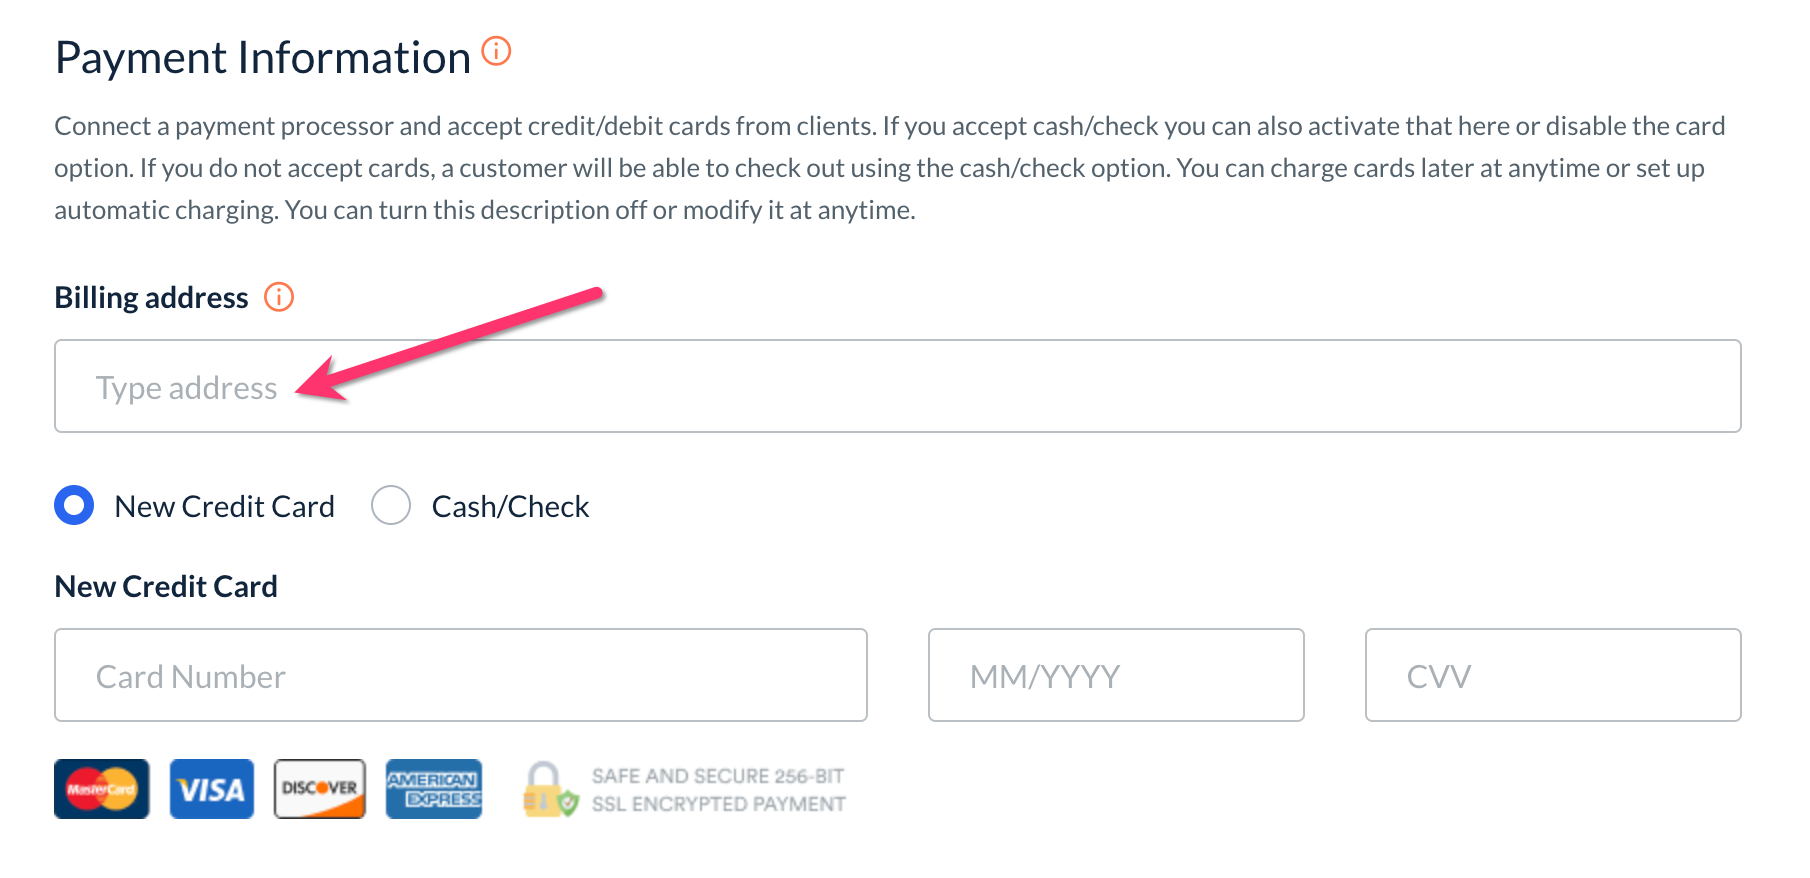
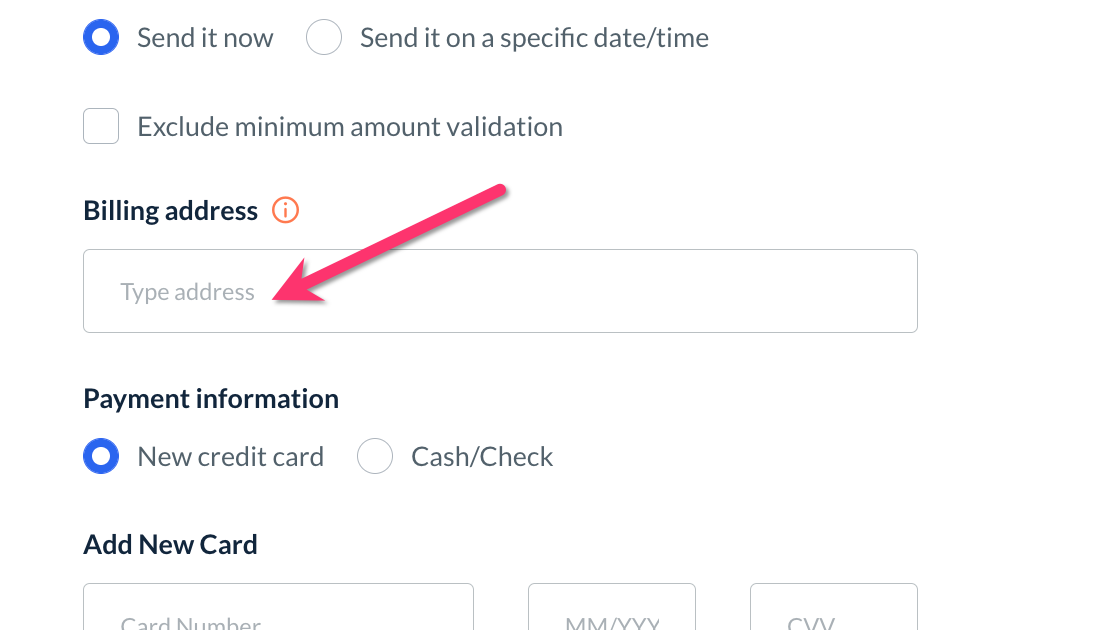
Click here to learn more about how to enable and set up this feature. If you use the enhanced location verification service from Authorize.net, it will require a billing address to save a new booking.
If you are using zip/post-code-based locations, the location for the card will be sourced from the zip/post-code entered at the top of the page.
If you use merchant/online locations, there will be a billing address box at the top of the "Payment Information" section of the booking form.
If you are sending a gift card (or the customer is purchasing one themselves), there will also be a billing address box near the bottom of the page.
Processing Charges with Authorize.net
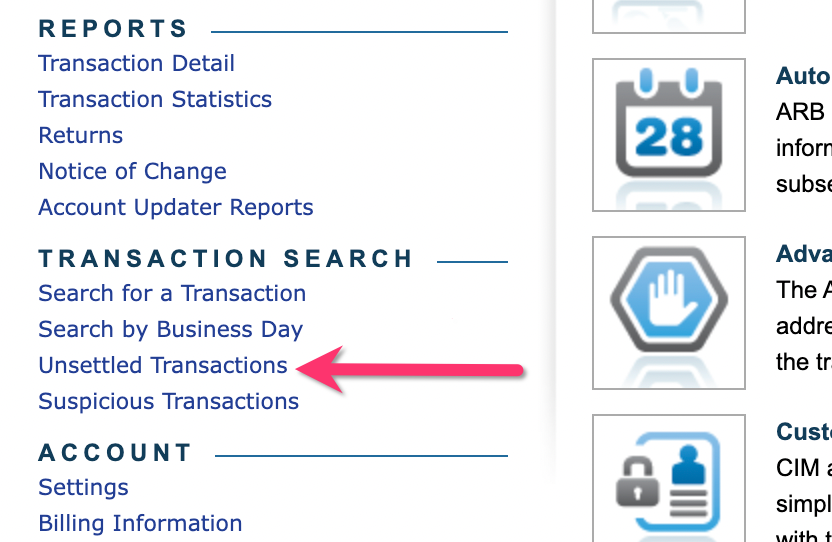
Whenever you charge customers in BookingKoala, those transactions will be logged inside your Authorize.net account as well. Authorize.net finalizes the payment after the charge passes the address and bank verification. Whenever you process charges in BookingKoala, you can find the corresponding transactions under the "Unsettled Transactions" section in Authorize.net.
To see the unsettled transactions, open your Authorize.net dashboard, find the "Transaction Search" section, and click on "Unsettled Transactions".
There are three different transaction statuses used in this section.
"Declined" shows the transactions have not been collected. These can be viewed in BookingKoala by going to Bookings > Booking Charges > Declined.
"Authorized/Pending Capture" means that the transaction has passed the authorization process and is ready to be collected from the bank. These can be viewed in BookingKoala by going to Bookings > Booking Charges > All Charges.
"Captured/Pending Settlement" means that the transaction is a card hold and will be captured once you finalize the payment. These can be viewed in BookingKoala by going to Bookings > Booking Charges > Card Hold(s)/Declined.
Click here to learn more about how to process customer charges in BookingKoala.
Processing Refunds with Authorize.net
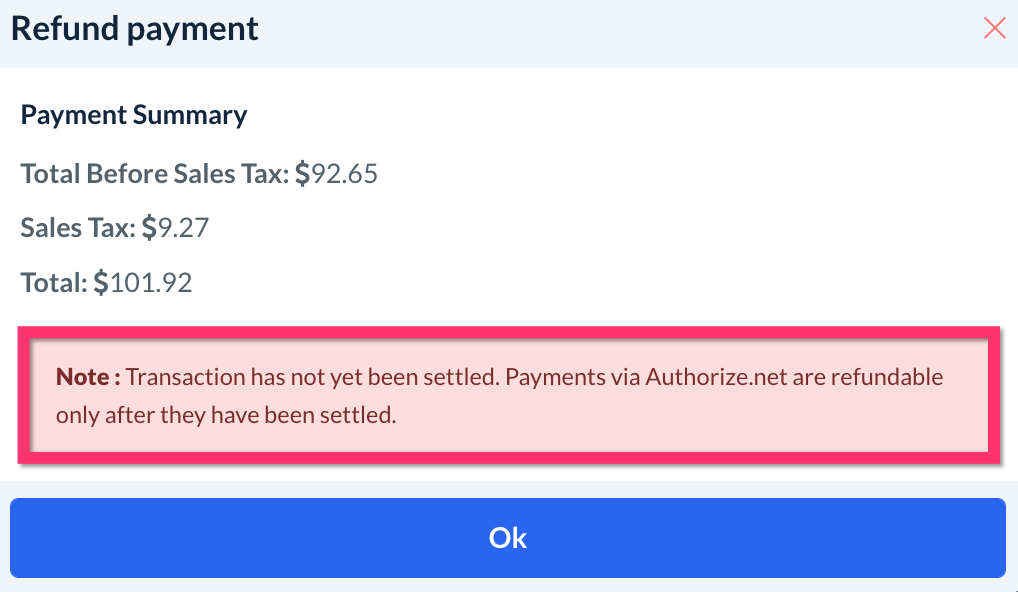
One difference between Authorize.net and the other payment processors integrated with BookingKoala is that a payment cannot be refunded until the transaction is settled in Authorize.net.
If you go to process a refund and see a message like the one below, you'll need to wait until the charge is settled in Authorize.net before performing a refund in BookingKoala.
Click here to learn more about how to process refunds in BookingKoala.
Are you ready to start sending payments to providers?
Click here to visit the guide on how to connect Authorize.net to link your provider's accounts for payouts and deposits.
Once you have integrated Authorize.net with your BookingKoala account, click here to learn how you can connect provider bank accounts to receive payouts.
If you would like your providers to be able to set up or connect their own accounts, click here.