The purpose of this article is to help you understand:
How to submit a Stripe Connect application
How to integrate Stripe Connect so providers can receive payments from your BookingKoala account
Getting Started
To initiate provider payments through BookingKoala, you must have a Stripe account with permission to add Stripe Connect to your services. If you haven’t yet set up your Stripe account to process customer payments, please follow our guide to complete this initial step, as it is required before setting up provider payments.
Creating a Stripe Connect Application
To enable provider payouts from your Stripe account, you must create a Stripe Connect platform. Ensure your Stripe account is fully activated and verified before proceeding.
Access the Connect Set-Up Page:
Click here to navigate directly to the Connect set-up page, or:
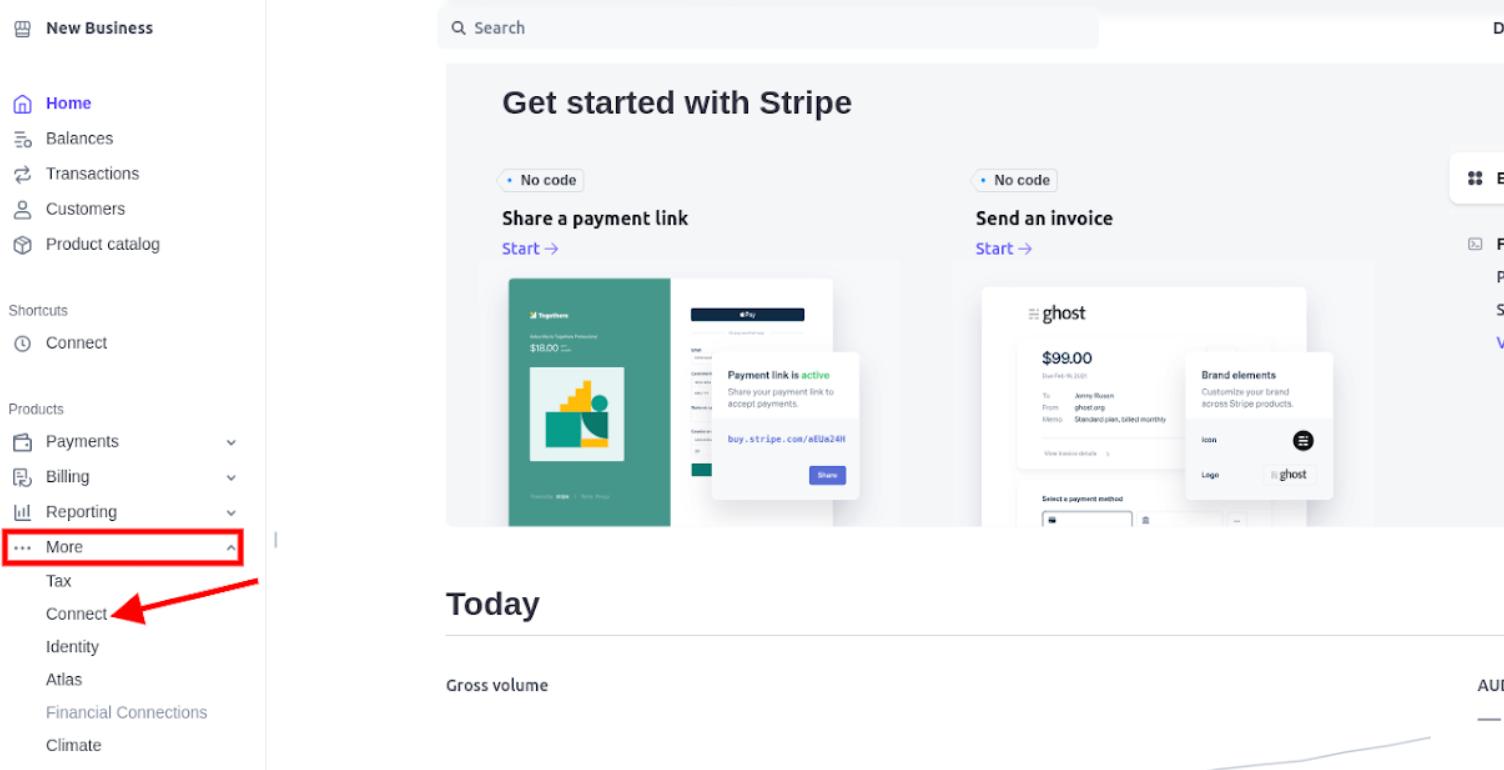
Log in to your Stripe dashboard, click "More" from the sidebar, then select "Connect" from the options.
Initiate the Set-Up Process:
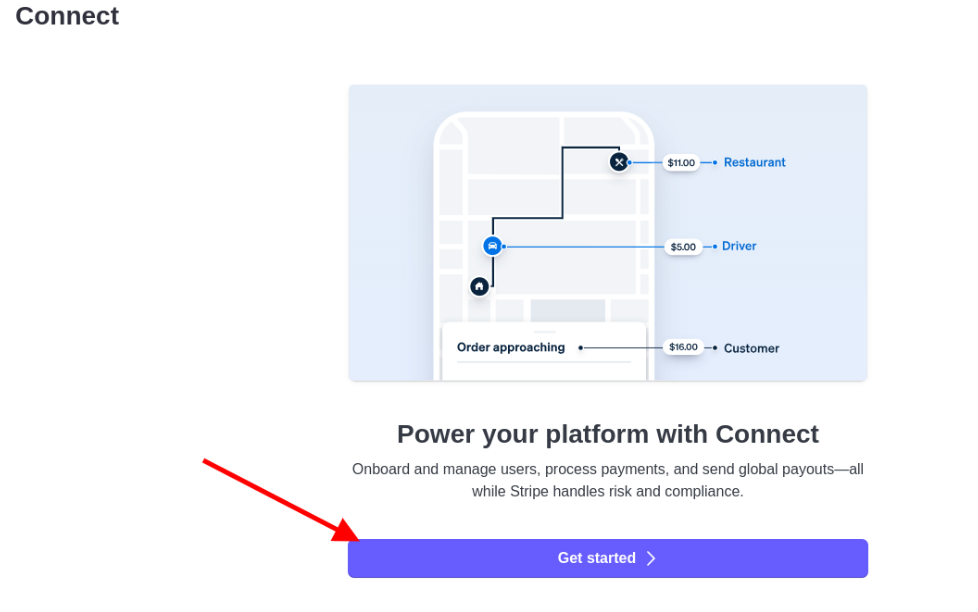
Once on the Connect set-up page, click the "Get Started" button.
You will be redirected to a confirmation page. Click "Continue."
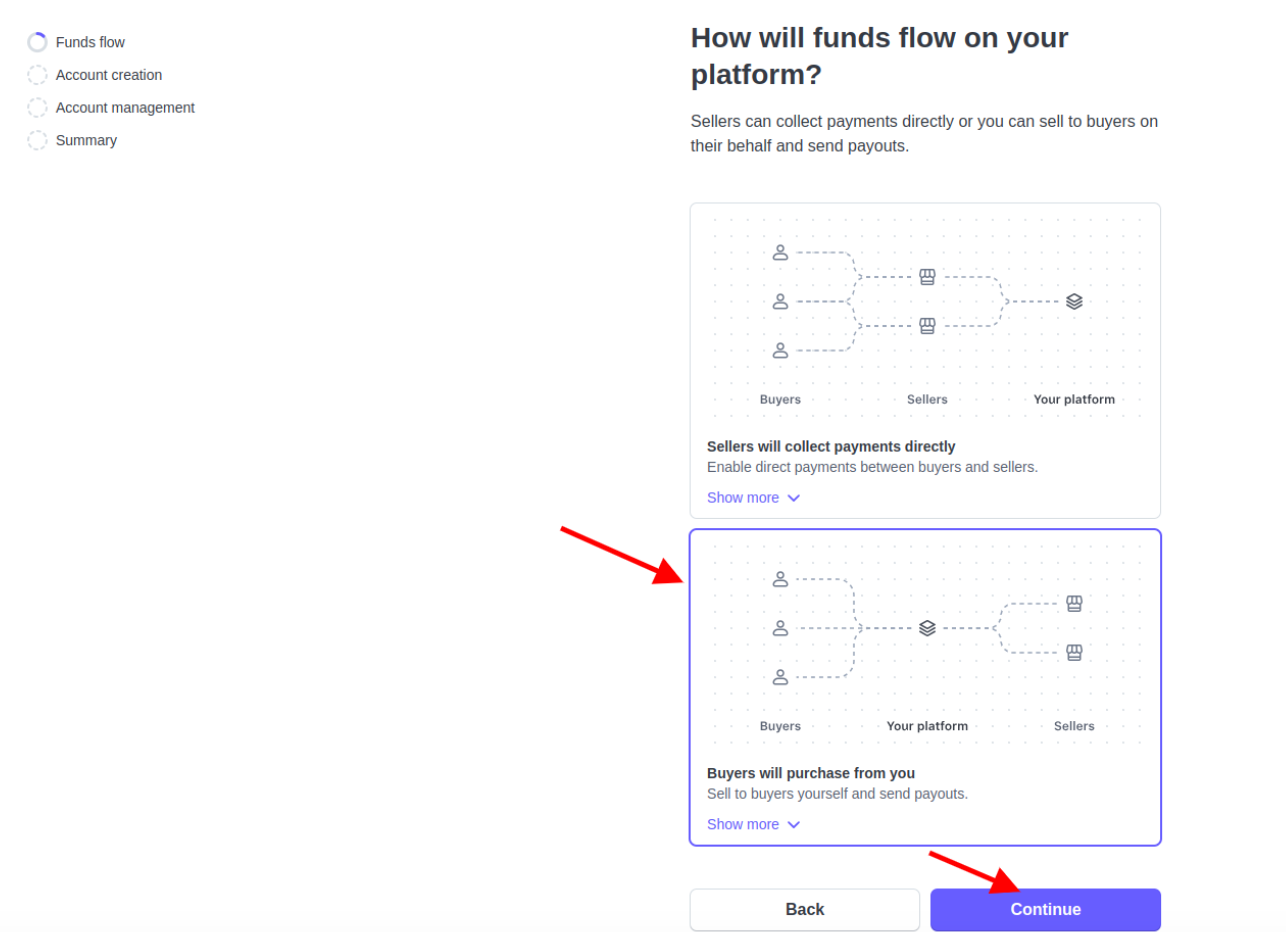
Configure Funds Flow:
When prompted with “How will funds flow on your platform?”, select “Buyers will purchase from you” and click "Continue."
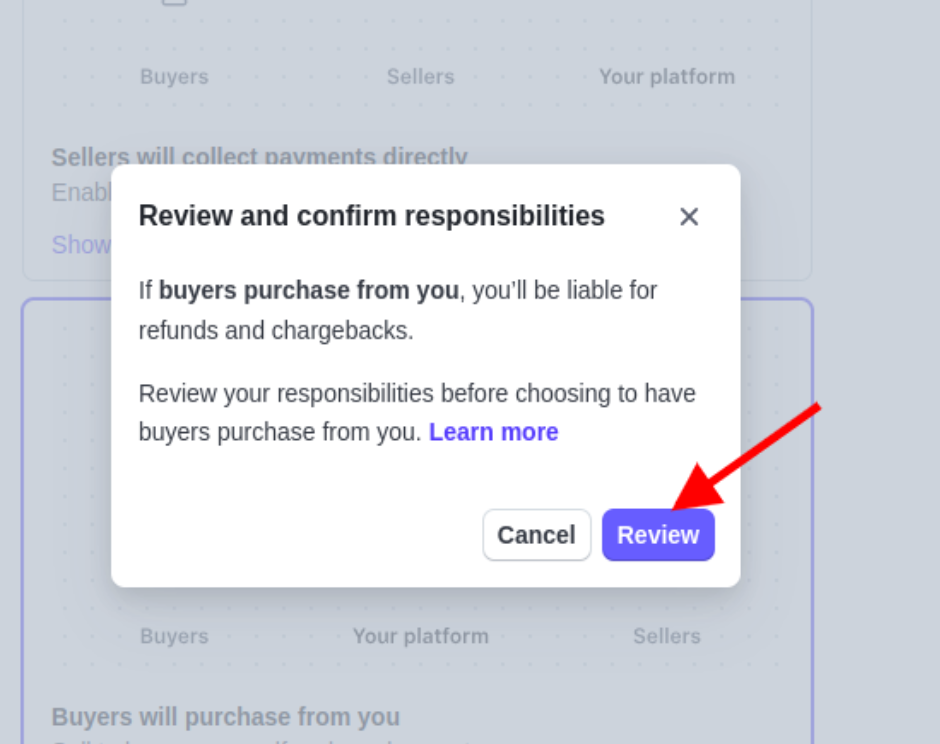
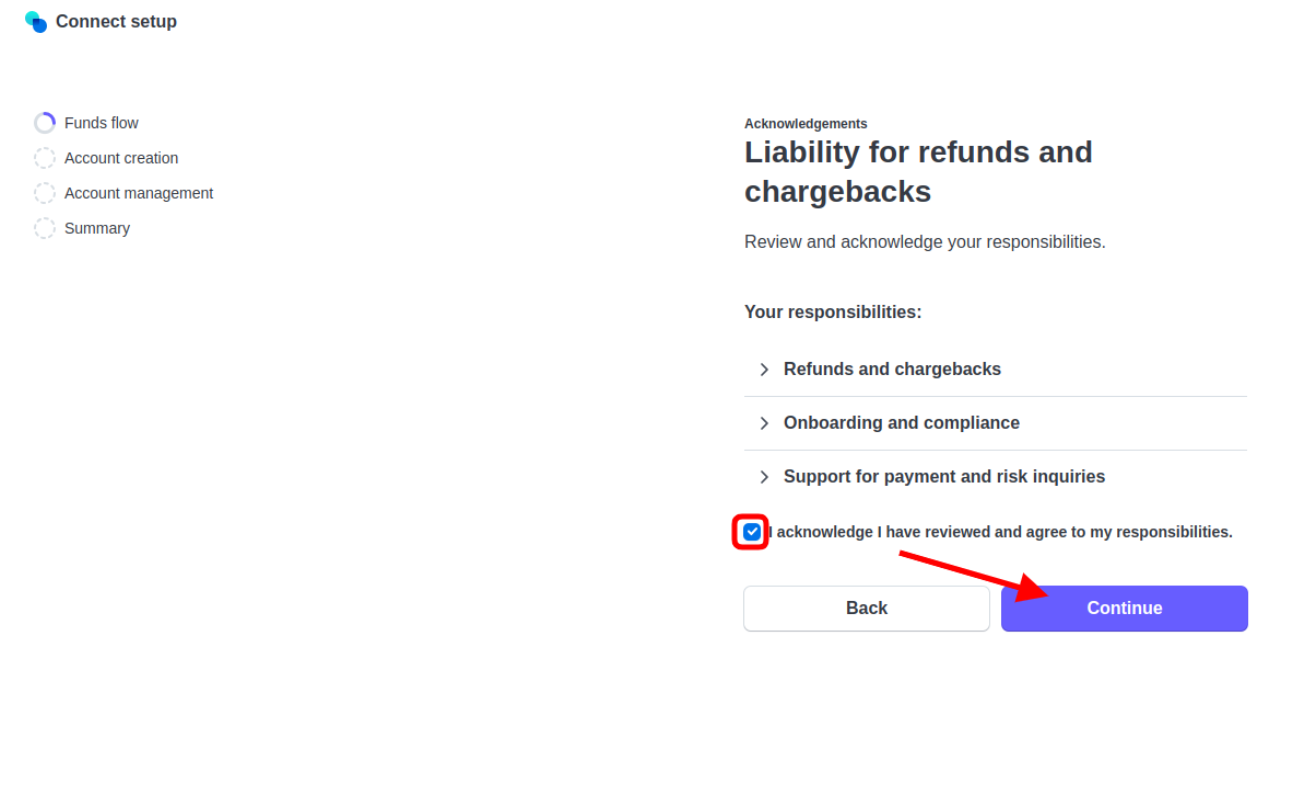
Review your responsibilities in the pop-up dialog box. Click "Review"
Then, check the agreement box and click "Continue."
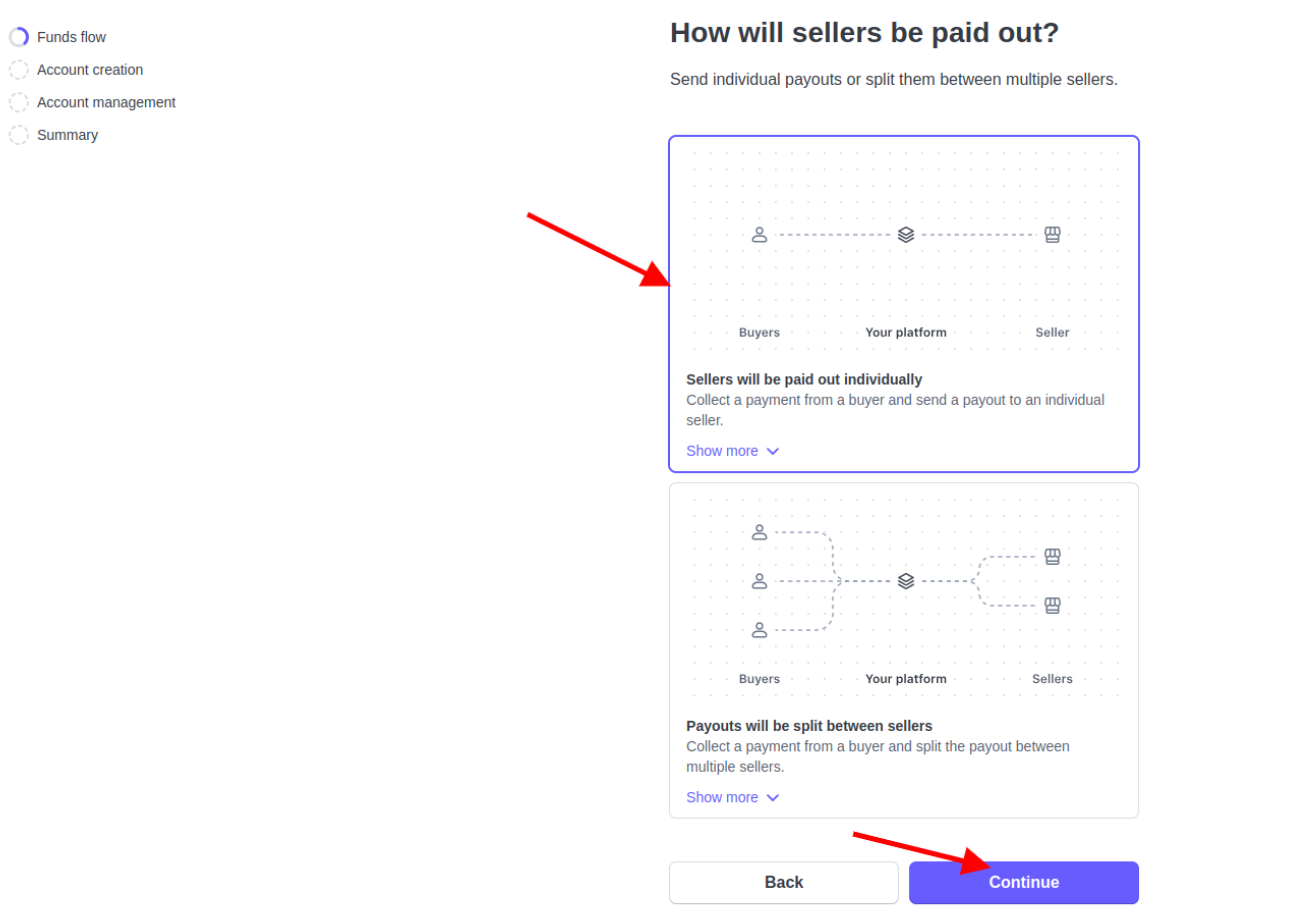
Set Up Seller Payouts:
When asked, “How will sellers be paid out?”, select “Sellers will be paid out individually” and click "Continue."
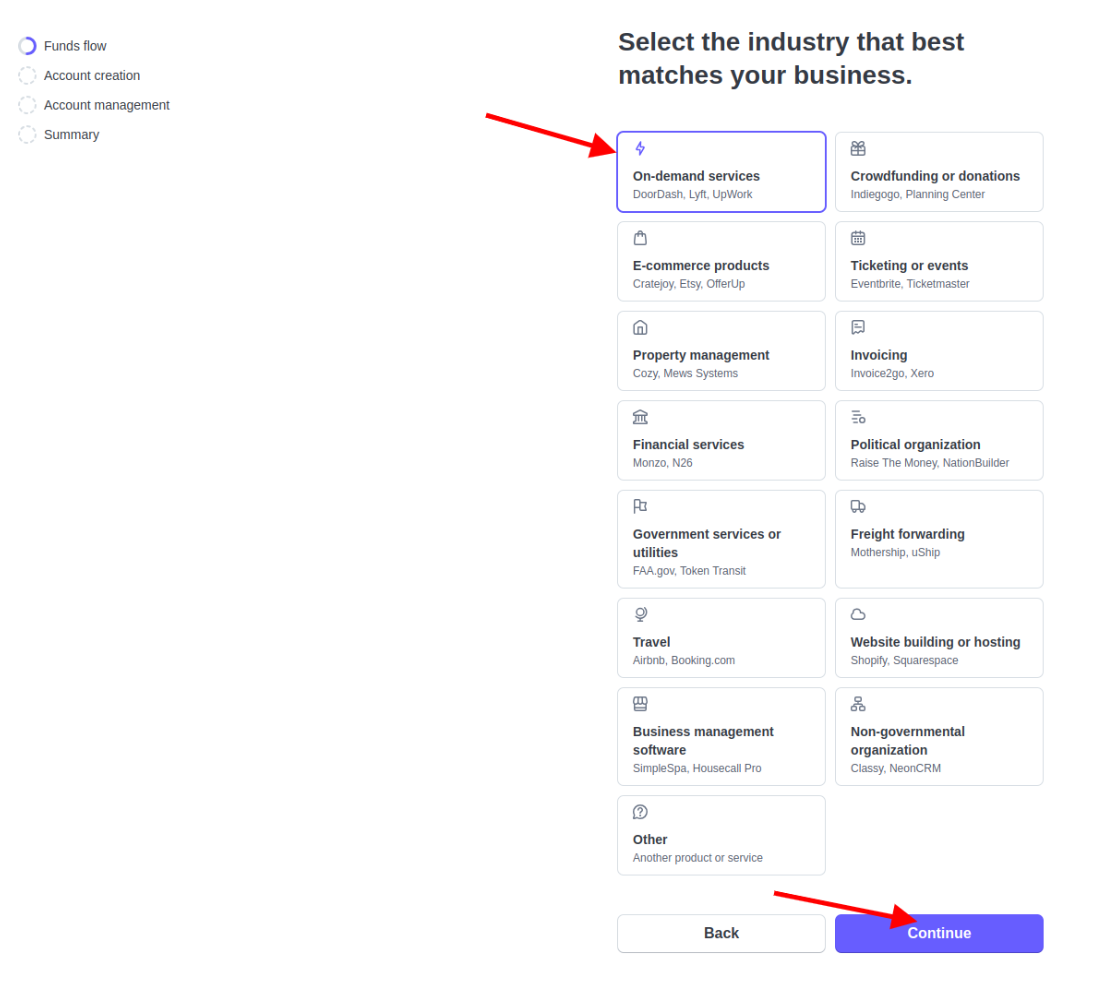
Choose the industry that best matches your business. If unsure, select "On-demand services" and then click "Continue."
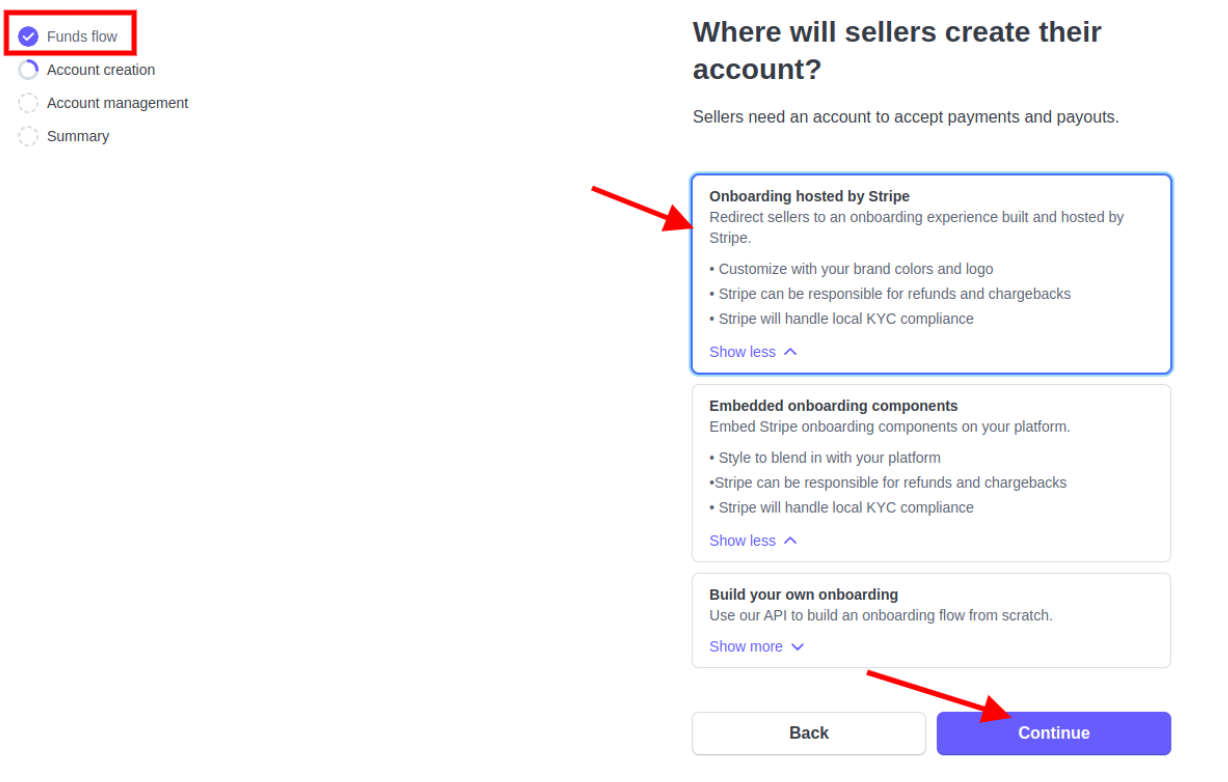
Configure Seller Onboarding:
After completing the funds flow setup, select “Onboarding hosted by Stripe” for the question “Where will sellers create their account?” and click "Continue."
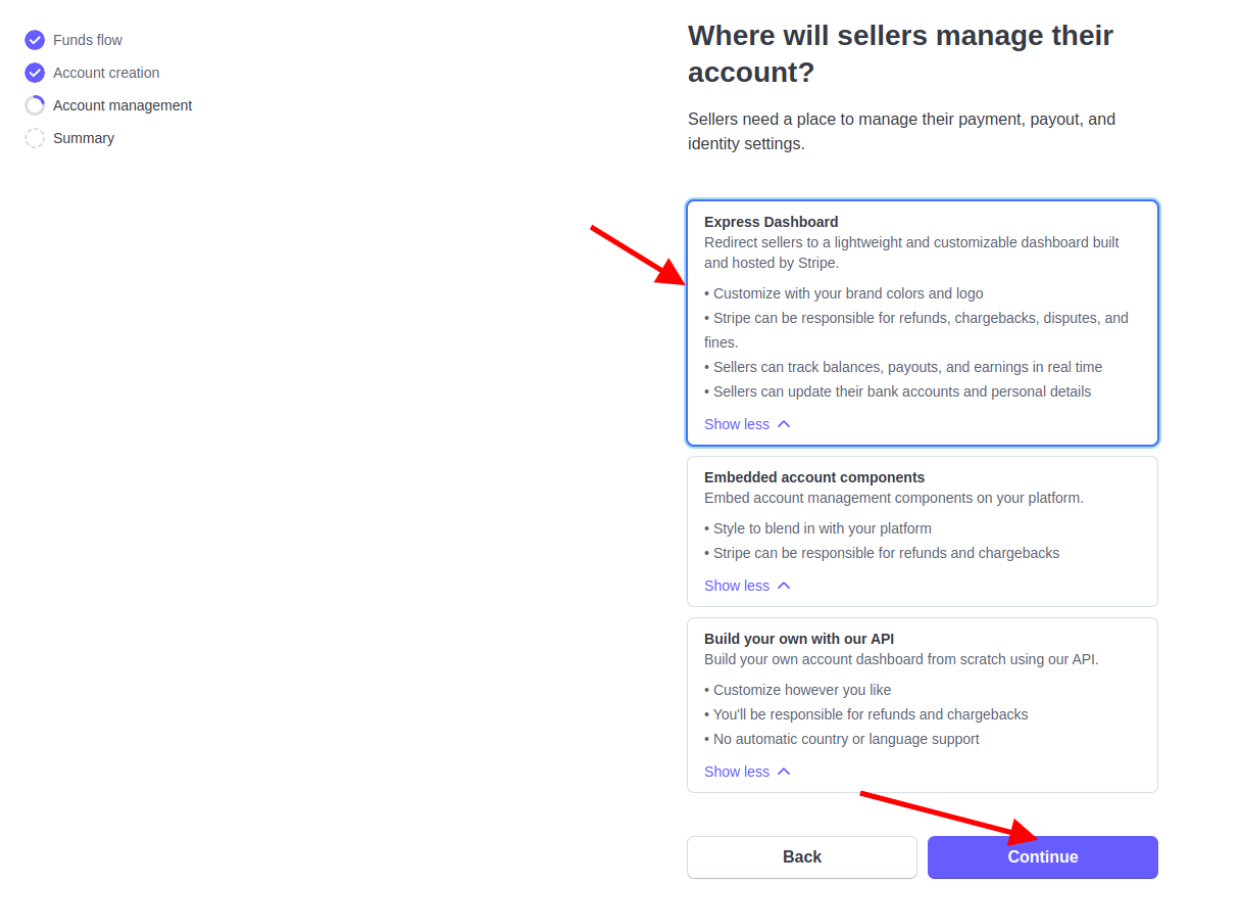
For “Where will sellers manage their account?”, choose "Express Dashboard" and click "Continue."
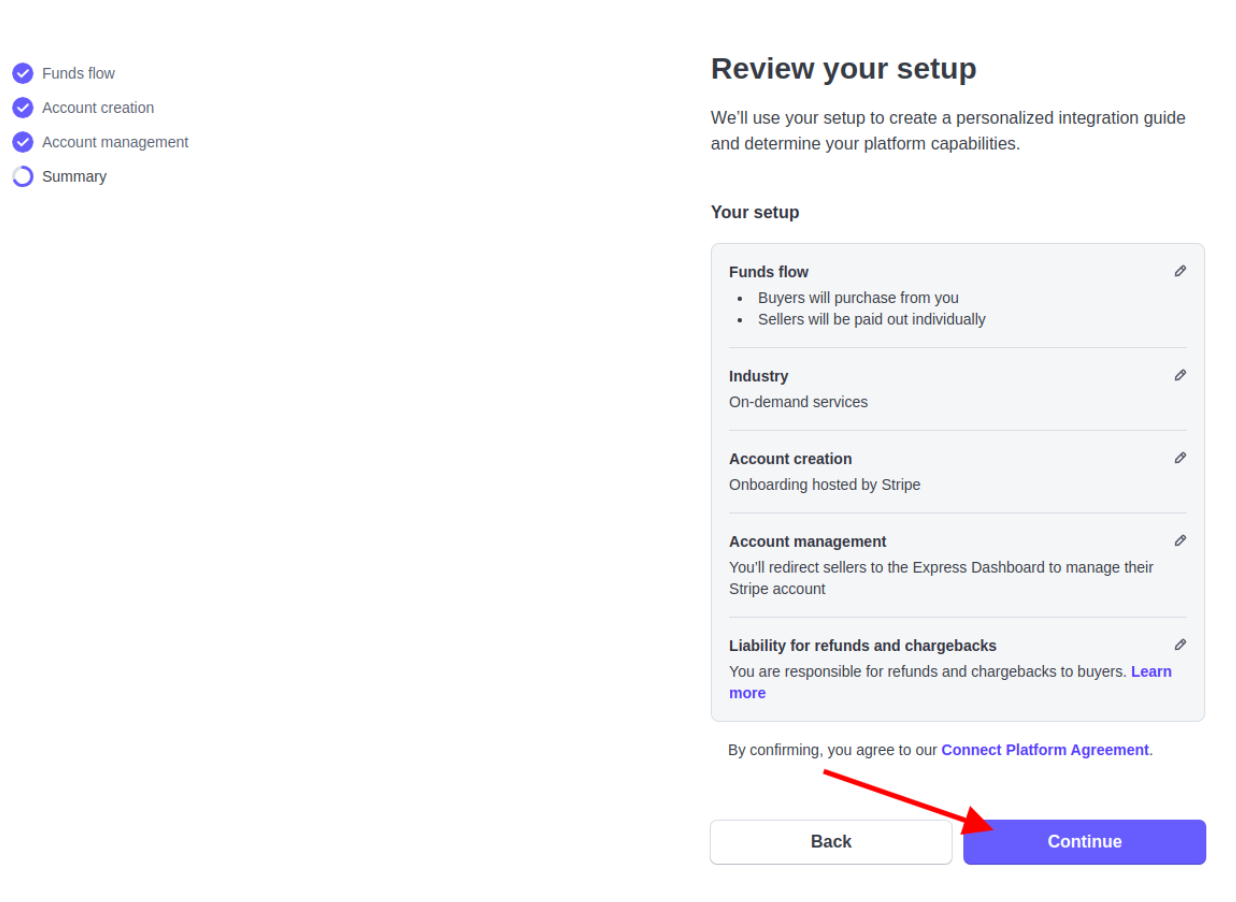
Review all selected options and click "Continue."
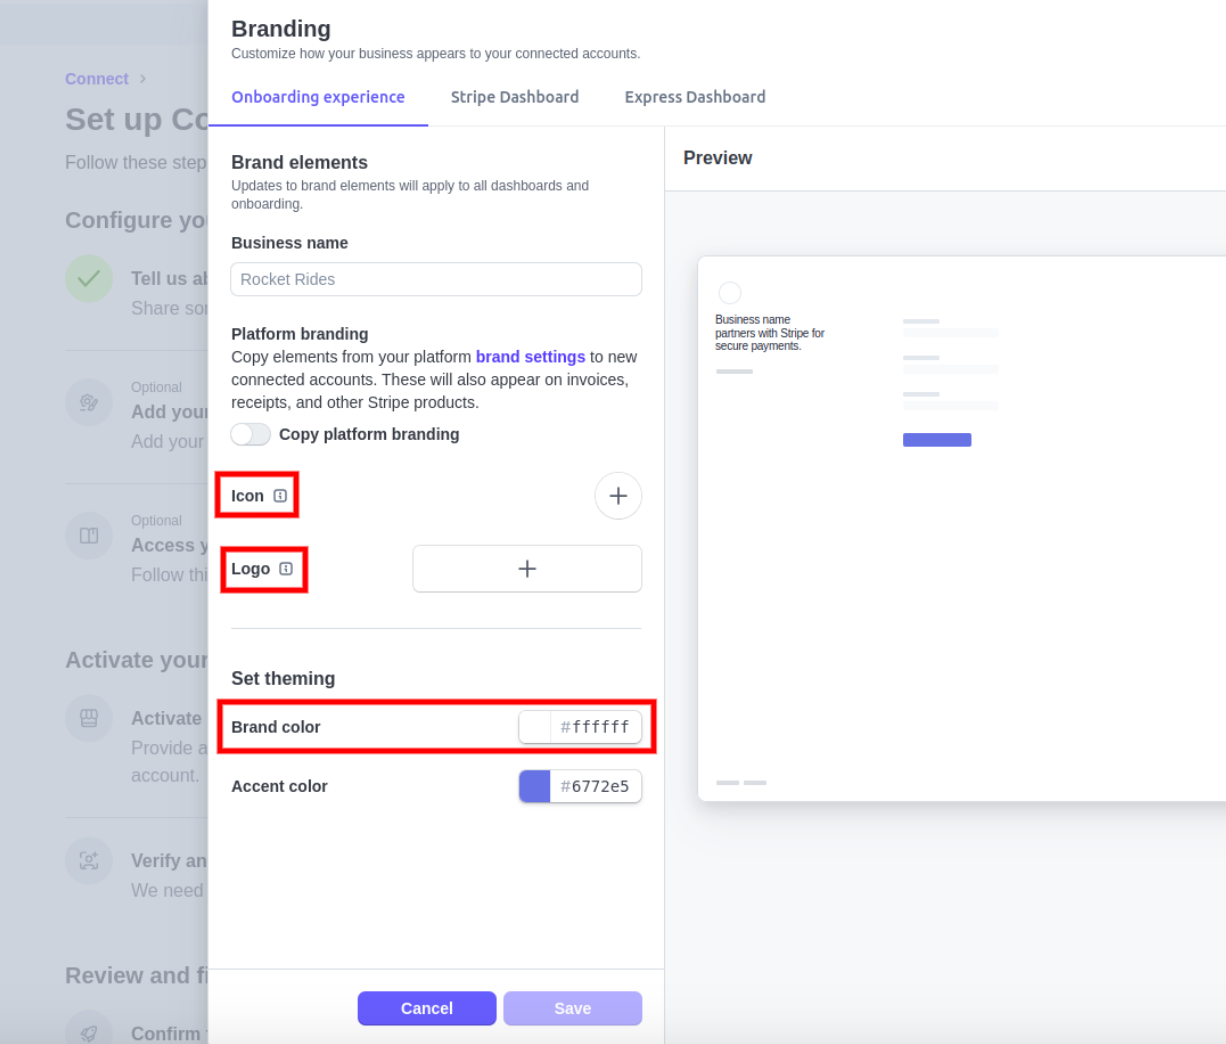
Add Branding Settings:
Click the "Get Started" button to add your business name, logo, icon, and color options.
After inputting this information, click "Save."


Connecting Stripe Connect to BookingKoala
Enable Provider Payments:
Log in to your BookingKoala admin dashboard and navigate to:
Settings > General > Store Options > Admin
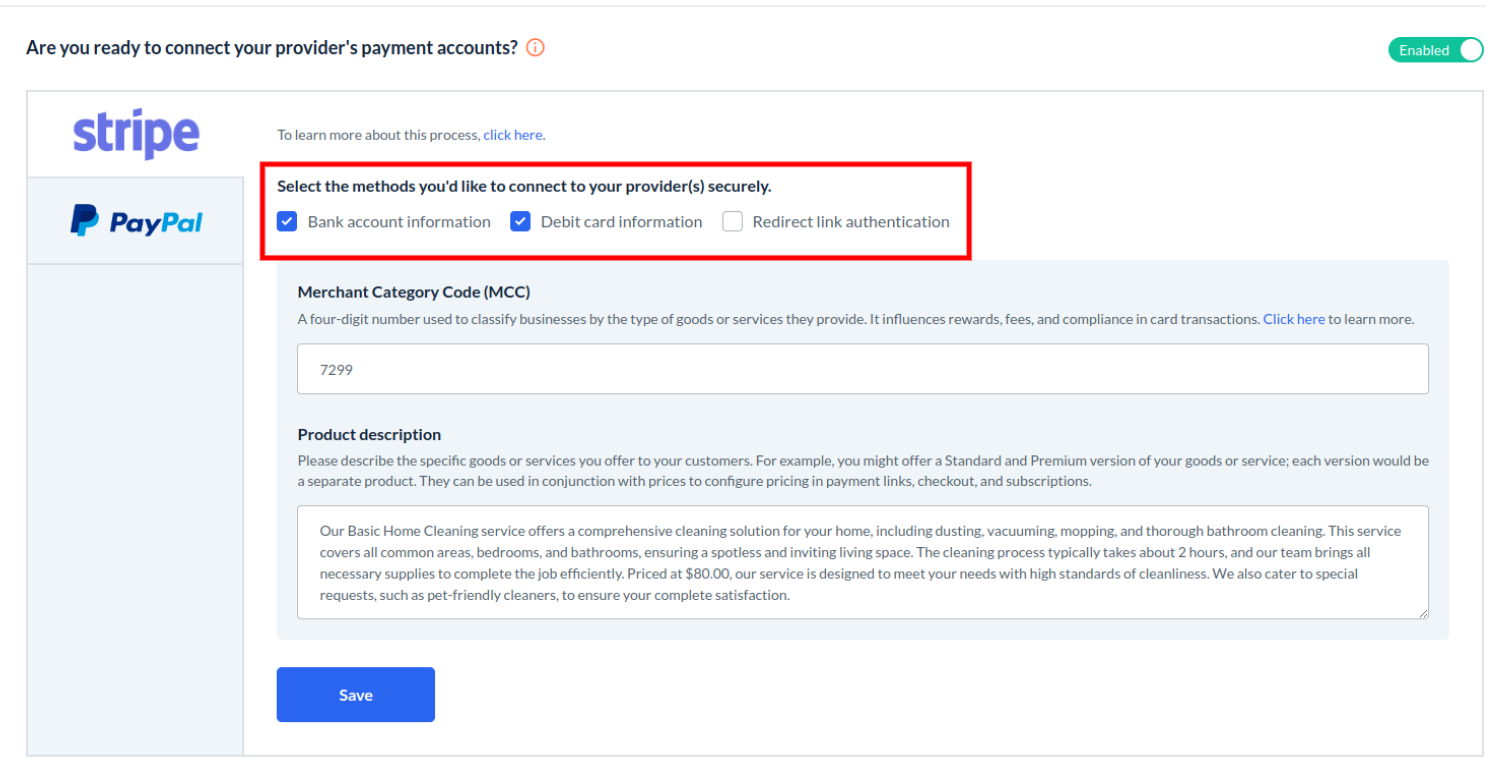
Scroll to the section "Are you ready to connect your provider's payment accounts?" and toggle the setting to "Enabled."
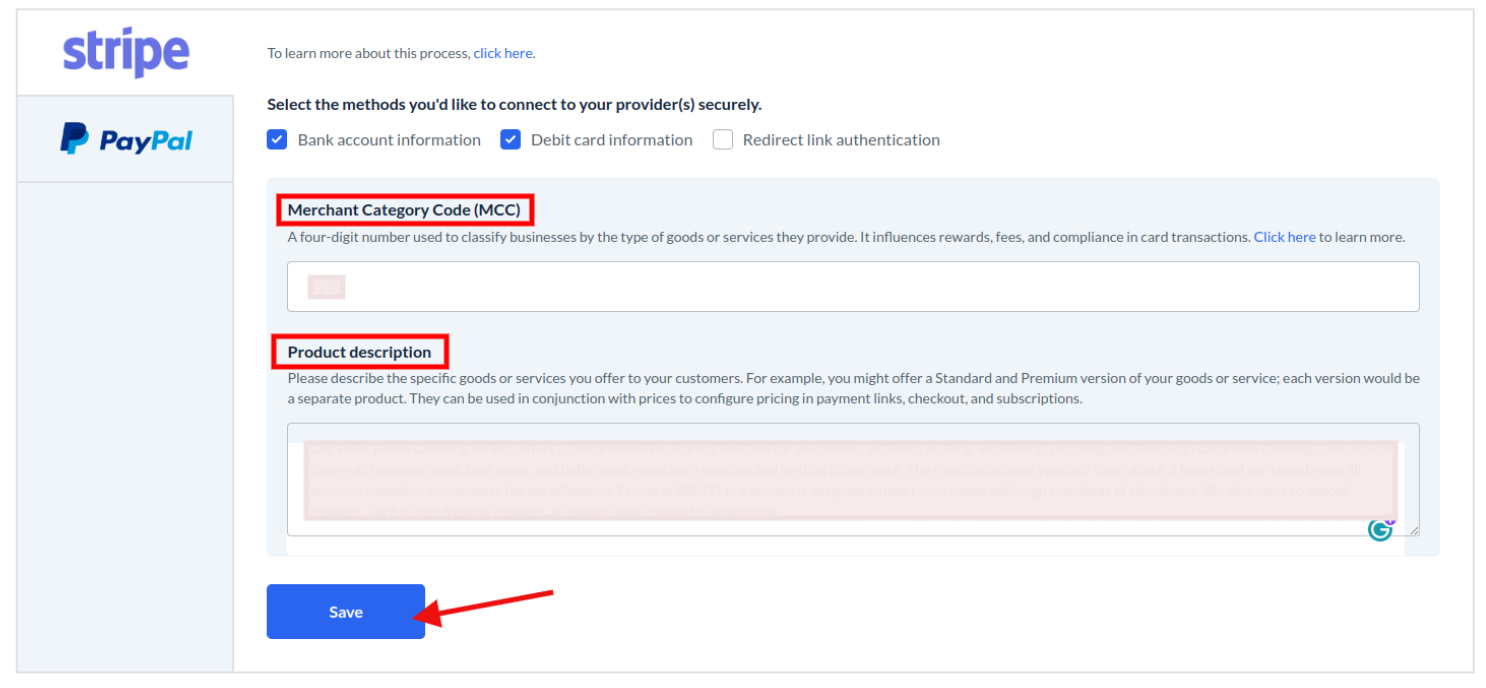
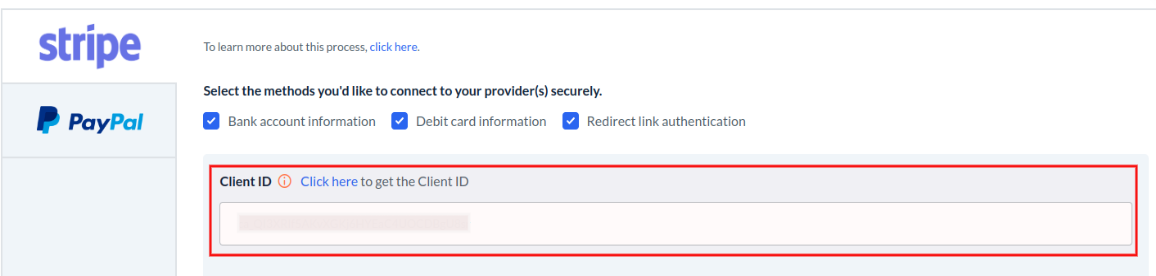
Select Provider Connection Methods:
Choose the methods (e.g., Bank Details, Debit Card) by which providers will connect their Stripe accounts. These options will be visible on the provider payment processor page.
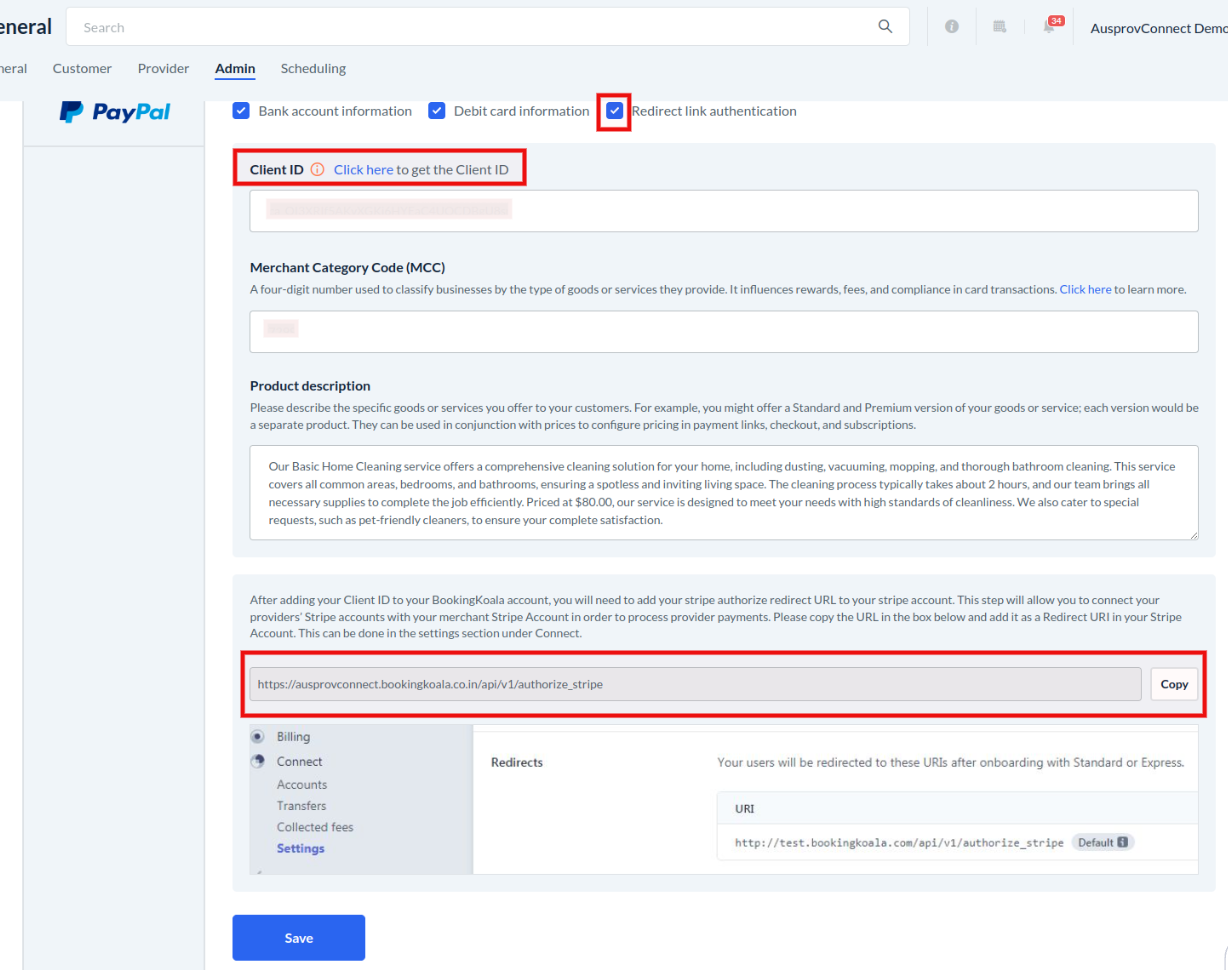
Add Merchant Category Code (MCC) and Product Description:
For the Bank Details and Debit Card options, input the MCC and product description in the settings, then click "Save."
Setting Up Redirect Link Authentication (if applicable):
If you select the Redirect Link authentication option, follow these steps to update the Client ID and redirect URI(s):
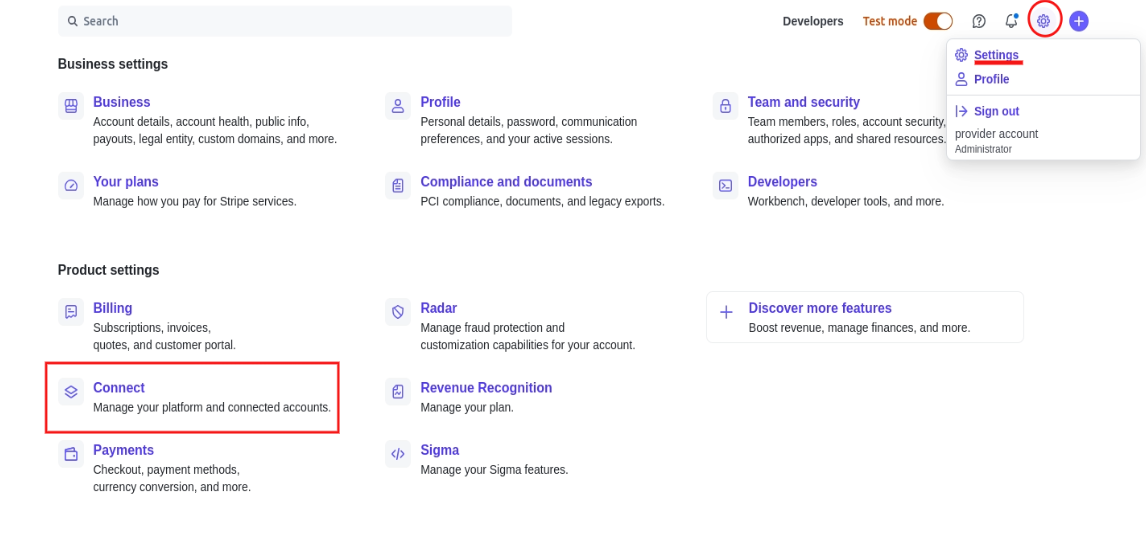
Go to the Connect settings page on your Stripe dashboard by clicking the settings icon at the top right and selecting "Connect."
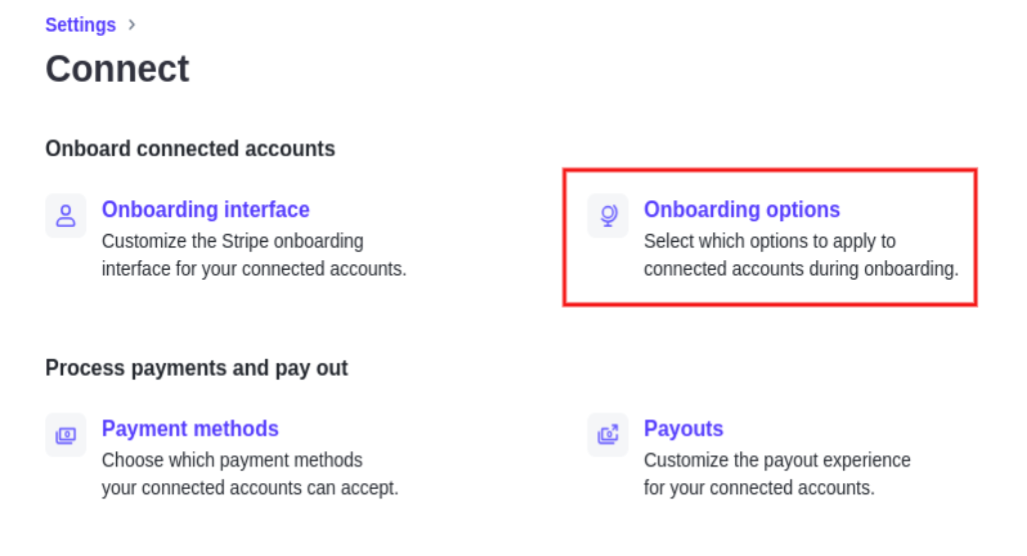
Select Onboarding options from the connect settings page.
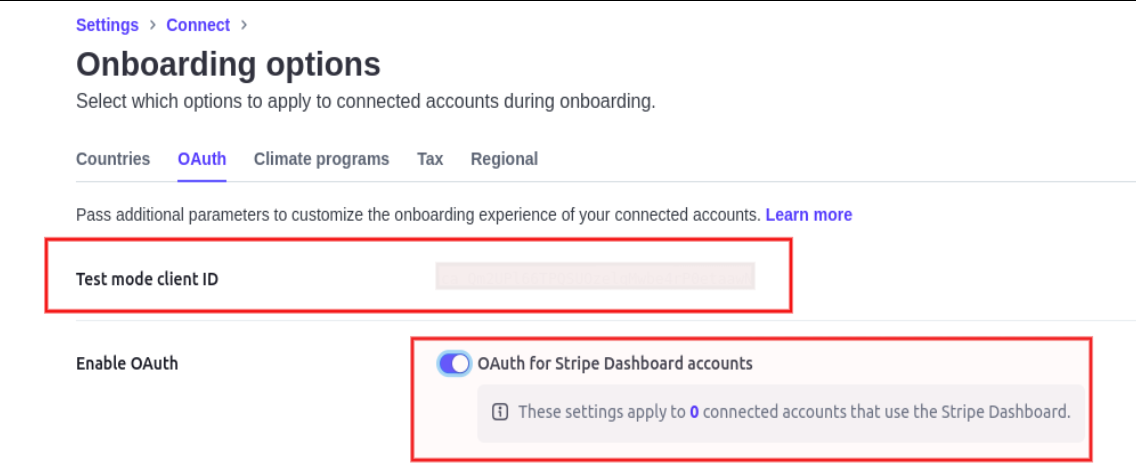
Copy the client ID (live mode client ID) listed under the Connect Settings page. This code always begins with "ca_" and is followed by a long string of numbers and letters.
Ensure OAuth is enabled.
Paste the Client ID into the corresponding field in BookingKoala.
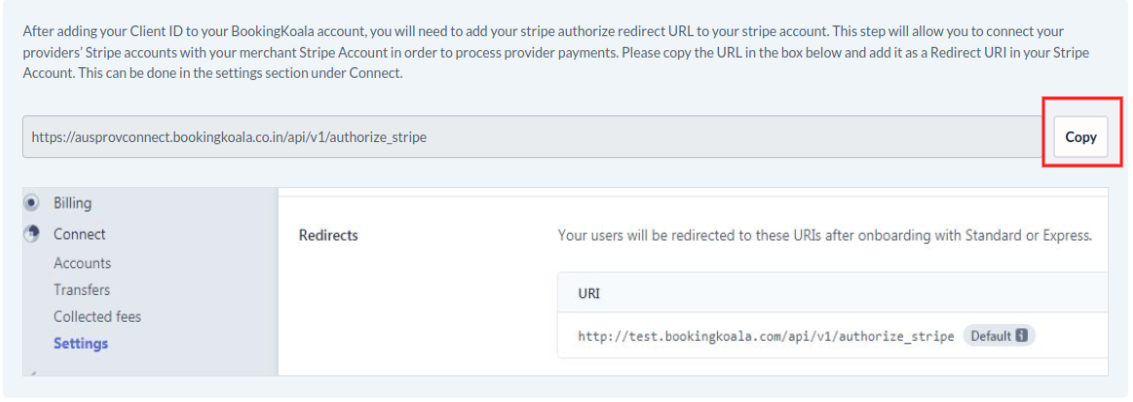
Once you've entered the client ID into the box, scroll down and click the "Copy" button to copy the link from the second box.
Return to your Stripe dashboard and click the white "Add URI" button just below the live mode client ID. Paste the link you copied from BookingKoala into the pop-up and click "Add URI".
Multiple Domain Setup:
If you operate multiple domains, ensure that each has a redirect URI listed.
For example:
Finalizing the Setup:
After updating the URIs in Stripe, click the "Save" button in BookingKoala.


Please Note: Stripe may take up to 48 hours to approve your Stripe Connect application. During this time, connecting accounts or setting up provider accounts may be temporarily unavailable.
Are you ready to send payments to your providers?
Click here to learn how to set up your branding and connect your providers on Stripe.
Click here to learn how you can create and/or connect provider Stripe accounts to receive payouts from your account.
Click here to see an instruction guide for providers on how to set up and connect their own Stripe accounts.