The purpose of this article is to help you:
- Understand what each tag or label in the system means
- Learn how to add your own tags for customers and providers
System Tags and Labels
There are several "tags", or labels, that are found throughout your BookingKoala dashboard. These help with quickly identifying certain information about a booking.
Booking Tags and Labels
When you view any of the booking sections, such as "Today's Bookings", "Upcoming Bookings", or "Unassigned Bookings", you may see the following tags:
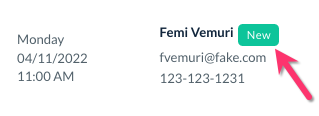
- New customer - This tag can be found to the right of a new customer's name.
- NA - This stands for "Not Available". This tag is displayed below a provider or team's name if a job is assigned to them outside of their regular availability.
For example, if a provider does not have working hours for a booking or it overlaps with another, the provider is considered unavailable by the system.
- Click here to learn more about the "NA" tag and what factors cause it to be added to a booking.
- Team of [#] - This tag lets you know a team has been assigned to the booking.
- Pair - This tag lets you know a pair of providers have been assigned to the booking.
- Hover over the tag with your curser to view which providers have been assigned.
- Hover over the tag with your curser to view which providers have been assigned.
- SA - This stands for "Service Area". This tag is added beneath the "Location" column to let you know that you are traveling to the customer's location.
- ML - This stands for "Merchant Location". This tag is added beneath the booking location to let you know that the job is taking place at your business's location.
- Pending - This tag is added to completed jobs that have not been charged yet. You can view a full list of your pending charges by going to Bookings > Booking Charges.
Pending Charges Tags and Labels
When you go to the "Booking Charges" section under "Bookings", you will see the followings tags and labels:
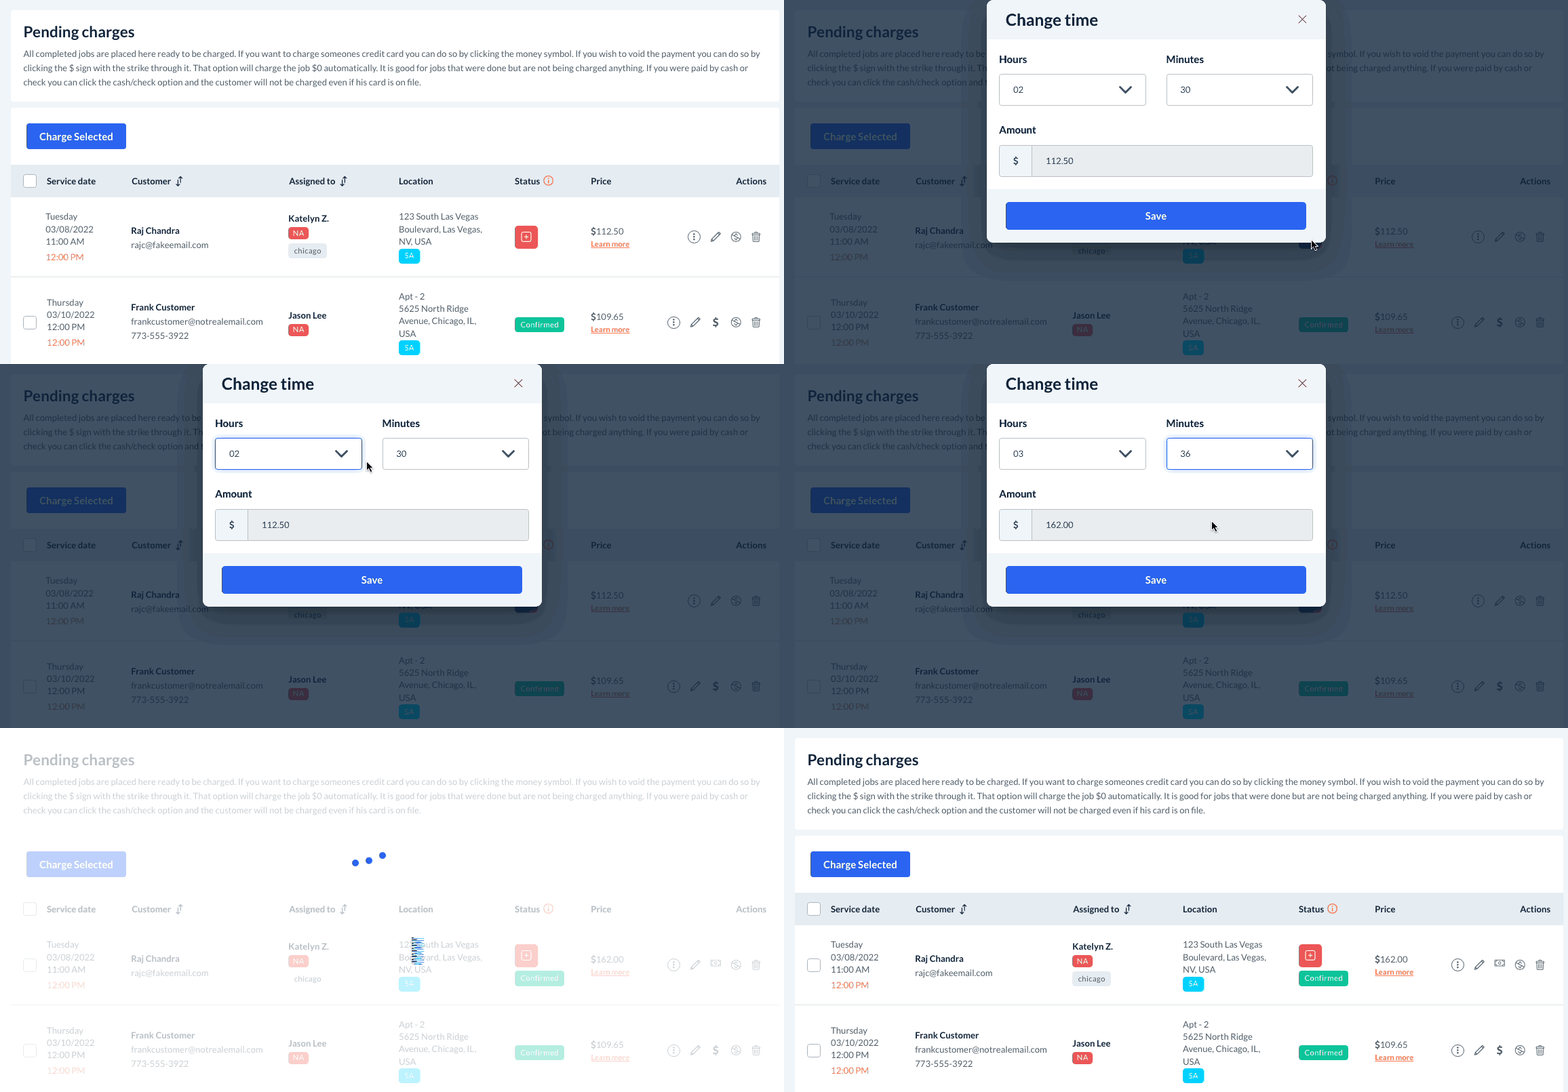
- Confirmed - You will see this tag under the "Status" column on the Pending Charges page. This is added once a booking has been completed, letting you know it is ready to be charged.
- + - The red plus sign icon means that this booking is an hourly job.
- If there is not a green "Completed" tag below, click the plus sign to confirm the provider's hours for the job. A pop-up window will appear where you can confirm or update the working hours, then click "Save".
- If there is not a green "Completed" tag below, click the plus sign to confirm the provider's hours for the job. A pop-up window will appear where you can confirm or update the working hours, then click "Save".
Customer and Provider Tags
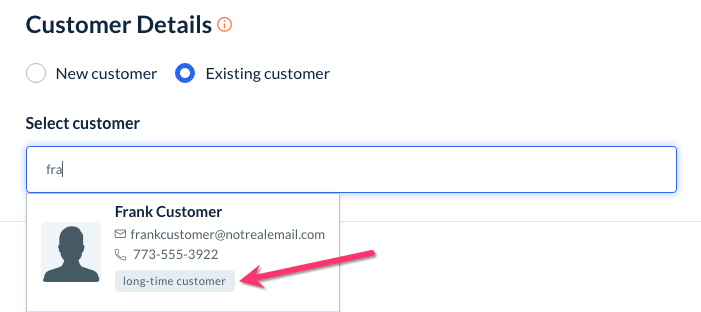
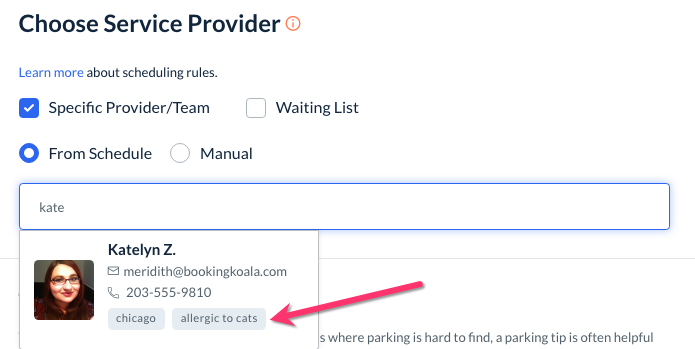
In addition to the system's tags, you can create and add your own custom tags to customer and provider profiles. These tags will be displayed below the provider or customer's name when you are looking at their bookings in the system.
Only admin and staff can view these tags. Providers and customers will not be able to see any tags you have added to either type of profile.
In the booking form, you will see customer tags that have been saved when using the "Existing Customer" option.
You will also see a provider's tags when you are scheduling them.
To add a tag to your customer or provider's profile, you will need to go to their dashboard. This can be done by clicking on the customer or providers name from:
Providers > Providers
or
Customers > Customers
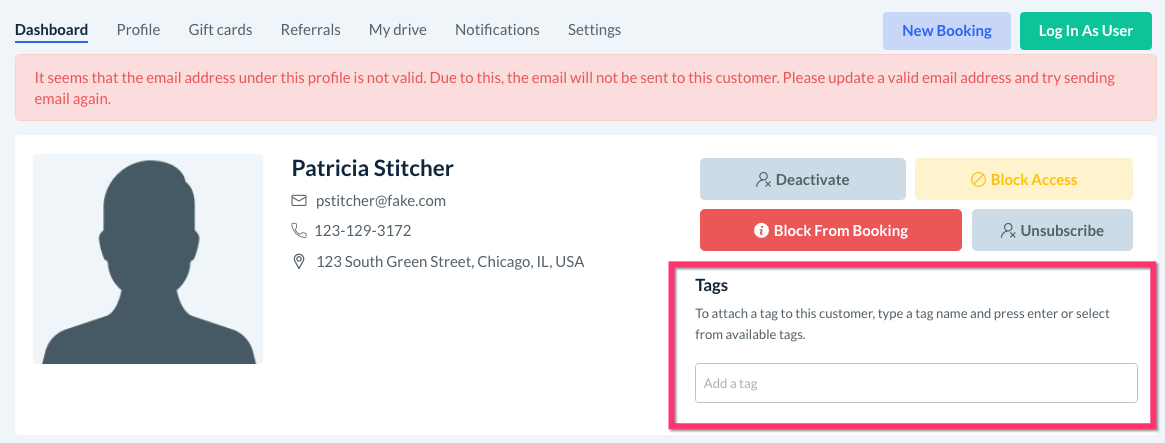
Once you are on the provider or customer's dashboard, locate the "Tags" section just below the various action buttons on the left side of the screen.
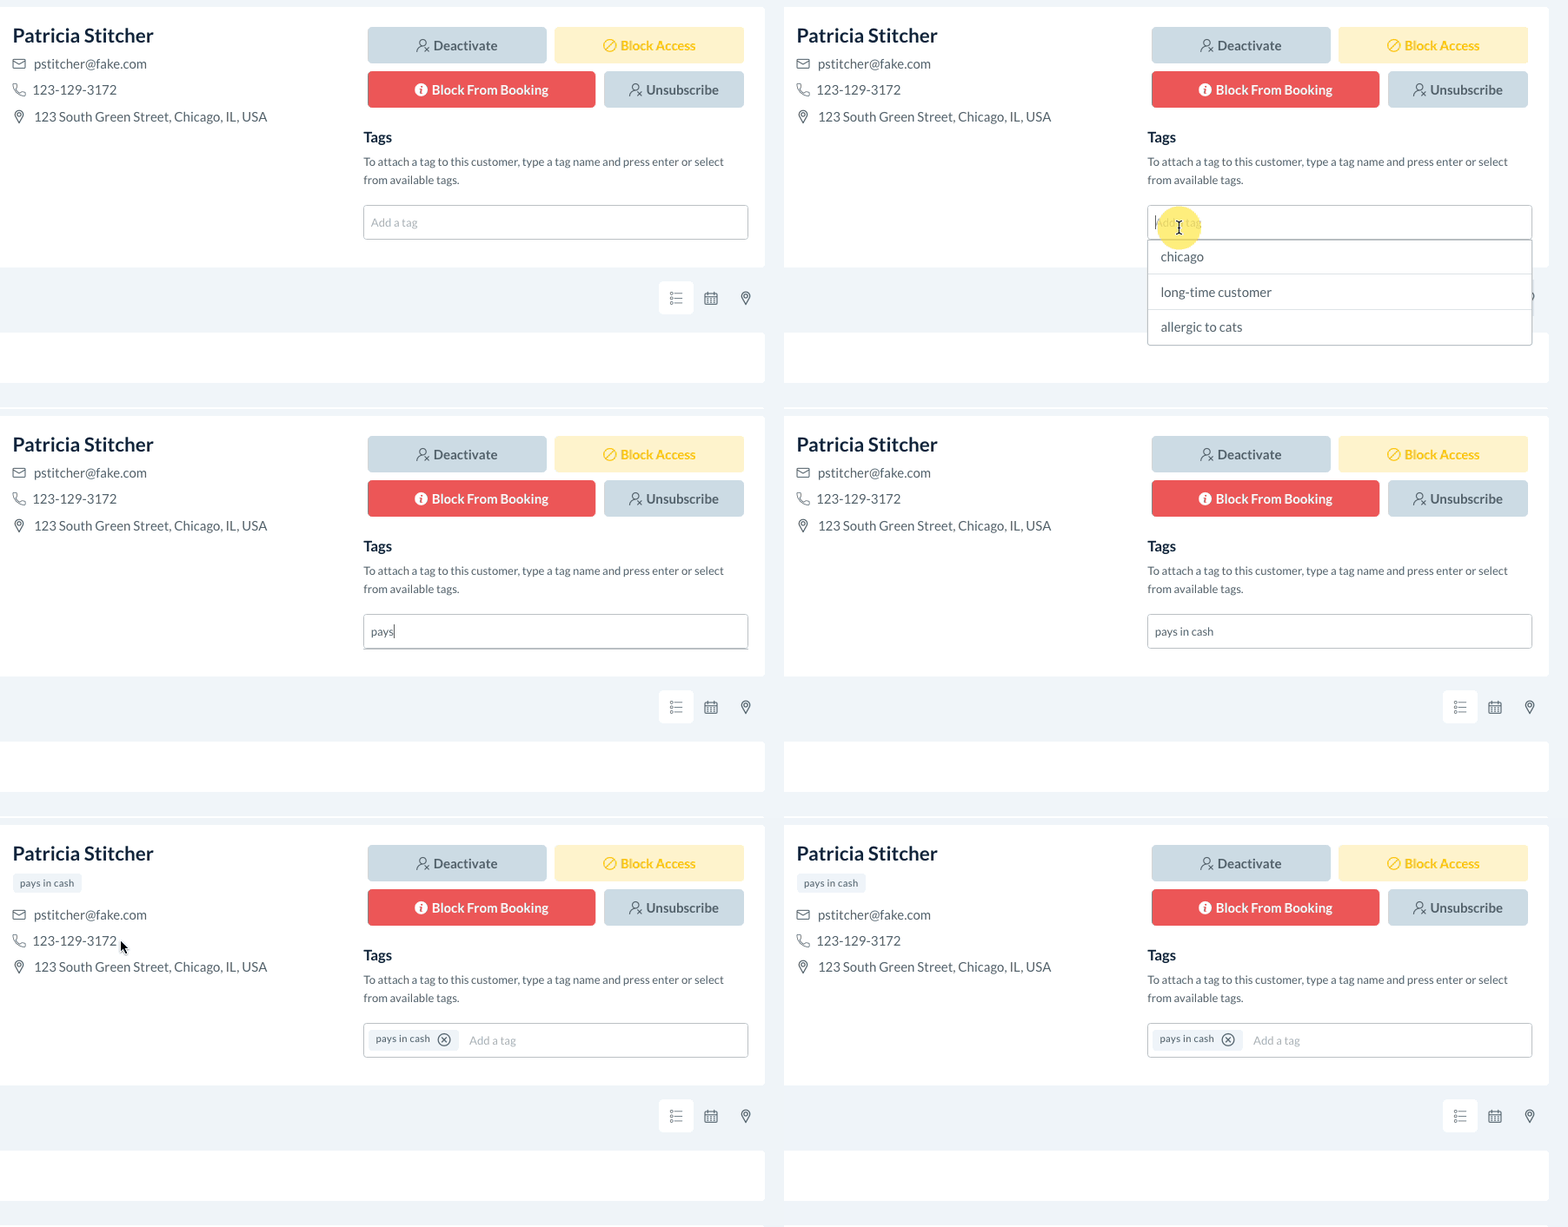
To add a tag, simply type a word or phrase into the "Add a tag" box and then hit the enter key.
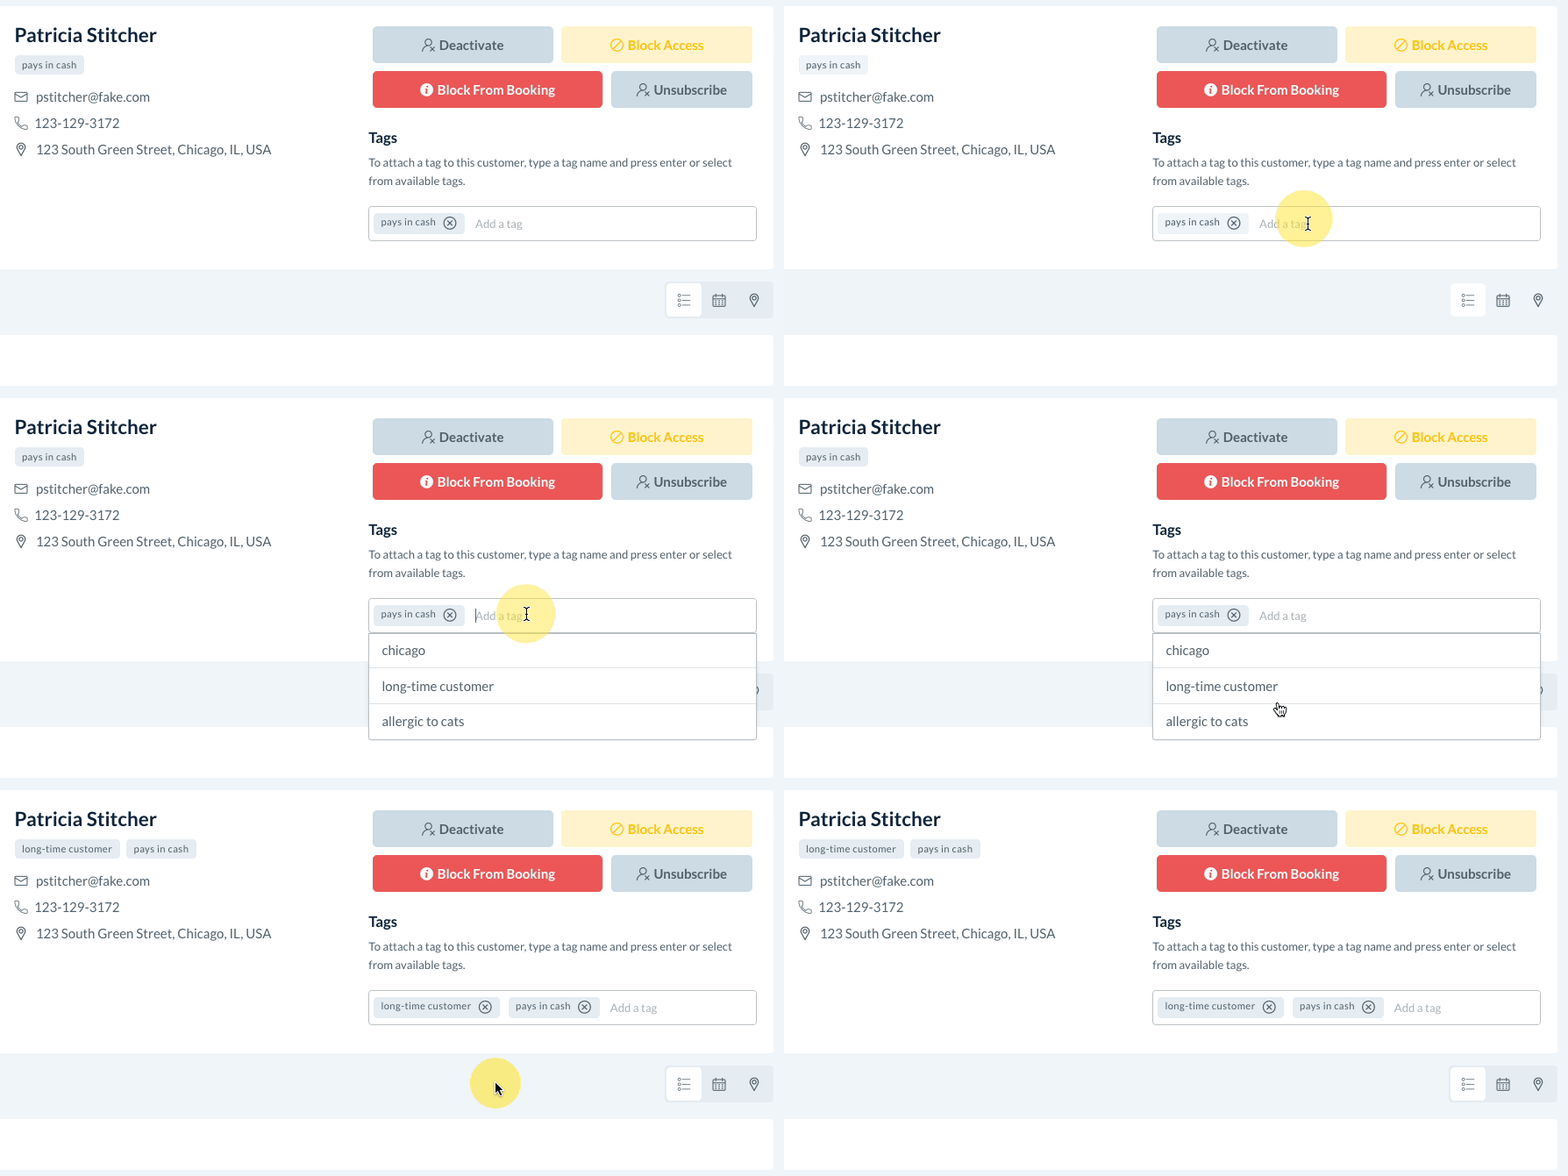
You can also select a tag you've used before from the drop-down list.
Tags are saved automatically as soon as they are entered or clicked on, so no further steps are necessary. You will now be able to view the customer or provider tags through your BookingKoala dashboard.

