The purpose of this article is to help you understand:
What is the quick add tool
How to use the quick add tool to easily modify provider settings
What is the quick-add tool?
The quick-add tool has been created to allow you to quickly and easily make changes to some or all of your providers' settings.
For example, if you want to update the pay rate for multiple providers at the same time, you can use this tool without having to go and update each provider's settings from their dashboard.
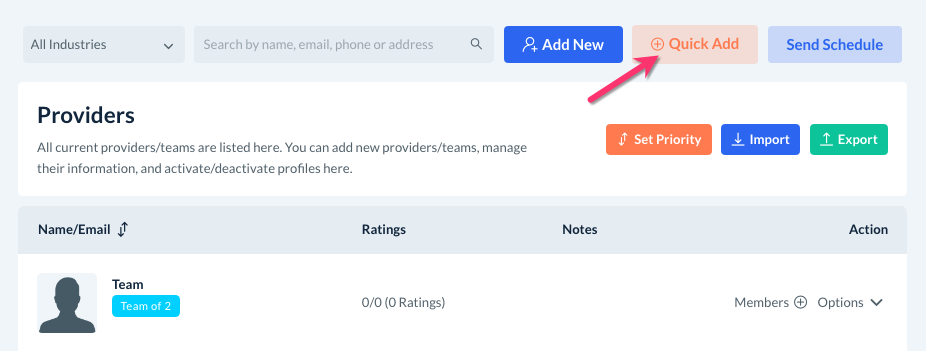
To use the tool, please go to:
Providers > Providers
Then, click on the orange "Quick Add" button at the top right corner of the page.
The "Quick Add" pop-up will appear. At the top of the pop-up, you can select "All" to make changes to all provider settings.
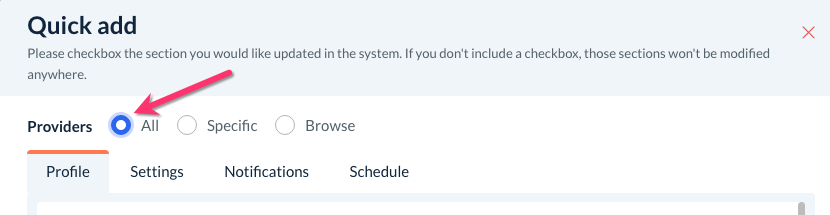
If you select "Specific", you can search and select specific providers to update their settings.
If you select "Browse", a pop-up will allow you to browse through a list of providers and select the ones you'd like to update.
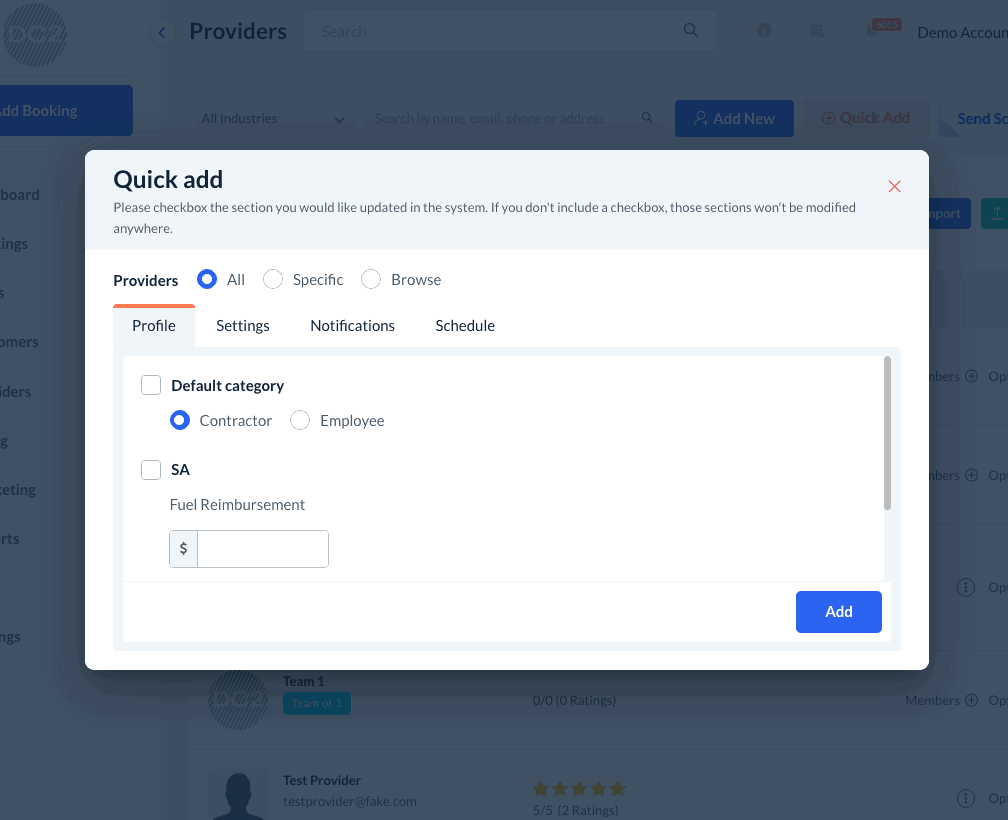
Once you've selected the providers, you can use the tabs in the section below to make changes to their settings.
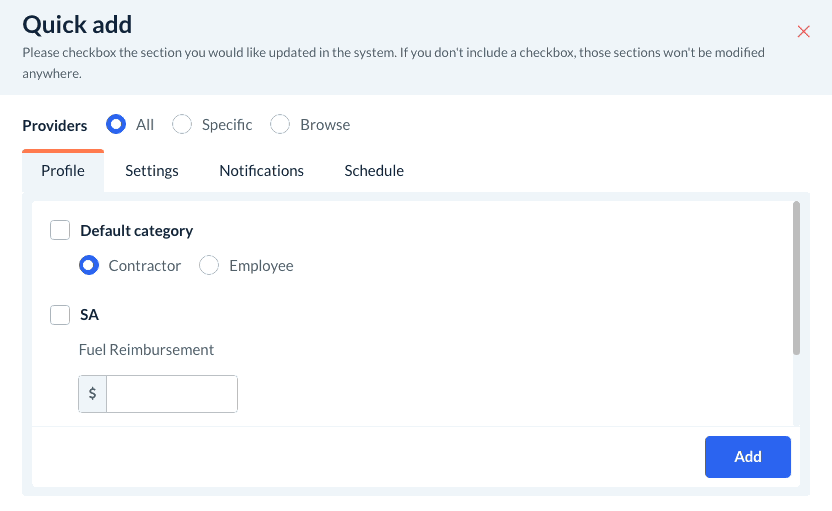
Profile
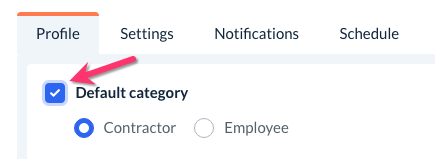
Under the "Profile" tab, you can update the provider's default category to "Contractor" or "Employee" by checking the box next to "Default Category" and then picking an option.
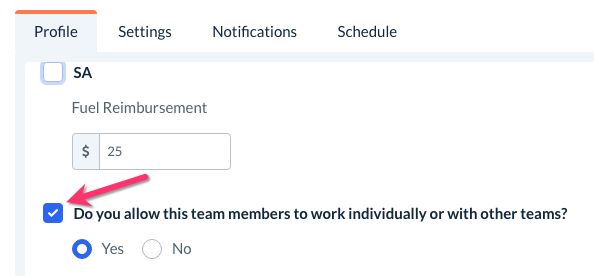
If you have any reimbursements set up, you can check the box next to "SA" (for "service area") or "ML" (for "merchant location") to set a new reimbursement amount for your providers.

You can also change your team settings by checking the box next to "Do you allow these team members to work individually or with other teams?" and selecting "Yes" or "No" below.
Settings
Under the "Settings" tab, there are three subsections: General, Industry, and Form.
General
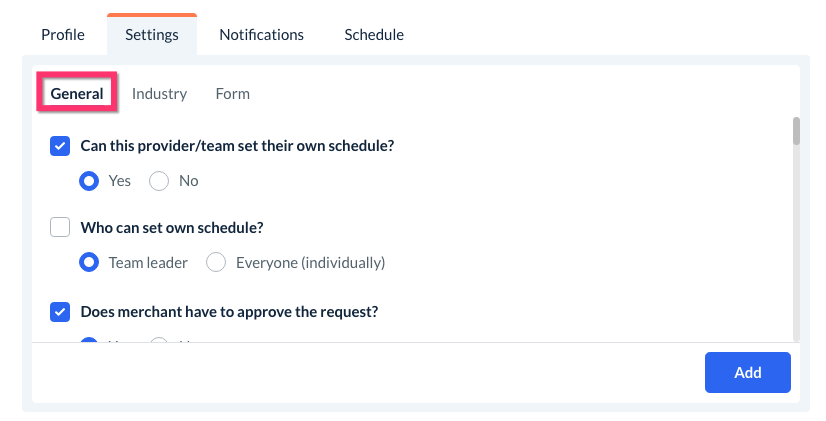
The General tab contains the following settings:
Can this provider/team set their own schedule?
Yes or No
Who can set their own schedule?
Team leader or Everyone (individually)
Does the merchant have to approve the request?
Yes or No
Can this provider/team set their own settings?
Yes or No
Who can set their own settings?
Team leader or Everyone (individually)
Does the merchant have to approve the settings request?
Yes or No
Show unassigned jobs to the provider?
Yes or No
Who will see the unassigned folder in their account if it is a team?
Team leader or Everyone (individually)
Turn off this provider or team from being booked by any customer but can be booked by admin/staff only?
Yes or No
Which location is the default location for this provider/team?
[Select default location]
Turn off this provider or team from being booked for same-day jobs?
Yes or No
Do you want to show the payment method to this provider/team?
Yes or No
Show only for cash/check or Both (cash/check or credit/debit card)
Team leader or Everyone (individually)
Do you want to show the booking price to this provider/team?
Yes or No
Show only for cash/check or Both (cash/check or credit/debit card)
Team leader or Everyone (individually)
Would you like to hide the providers' payment(s) from your provider/team?
Yes or No (show all)
Provider payment, tip, parking, bonus, service fee, reimbursements, total pay
Industry
The Industry tab allows you to enable or disable industries and booking forms for your providers.
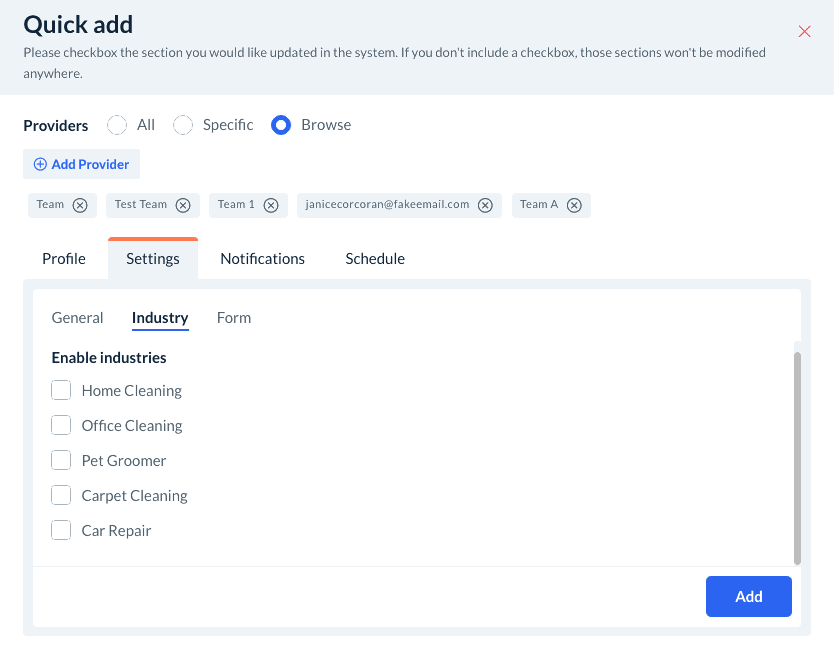
Check the box next to the industry name and then select the boxes next to the booking forms you want to enable beneath that industry.
Form
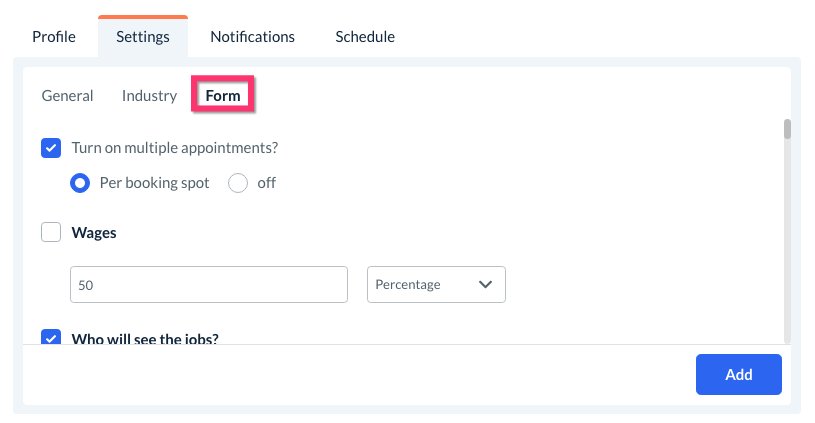
The Form tab controls the following settings:
Turn on multiple appointments?
Per booking spot or Off
Wages
Fixed, Percentage, Hourly
Who will see the jobs?
Team leader or Everyone (individually)
Who will receive payments?
Team leader or Everyone (individually)
Select frequency
[Your frequencies]
Can this individual be combined with other providers (pairs)?
Yes or No
Service category
[Your service categories]
Pricing parameters
[Your pricing parameters]
Exclude parameters
[Your exclusion parameters]
Items
[Your items]
Packages
[Your packages]
Extras
[Your extras]
Customer Locations
[Your customer locations/service areas]
Merchant Locations
[Your merchant locations]
Notifications
The Notification tab allows you to update the notification settings for all of the selected providers.
Check the box next to the notification you would like to update, and then click the red "Disable" button to switch it to "Enabled".
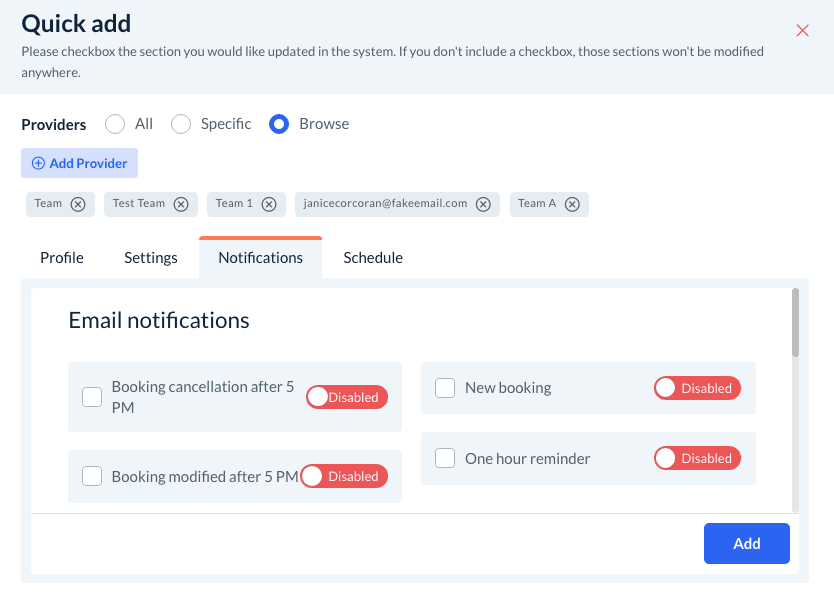
If you check the box but leave the notification on disabled, this will turn off the notification for your providers.
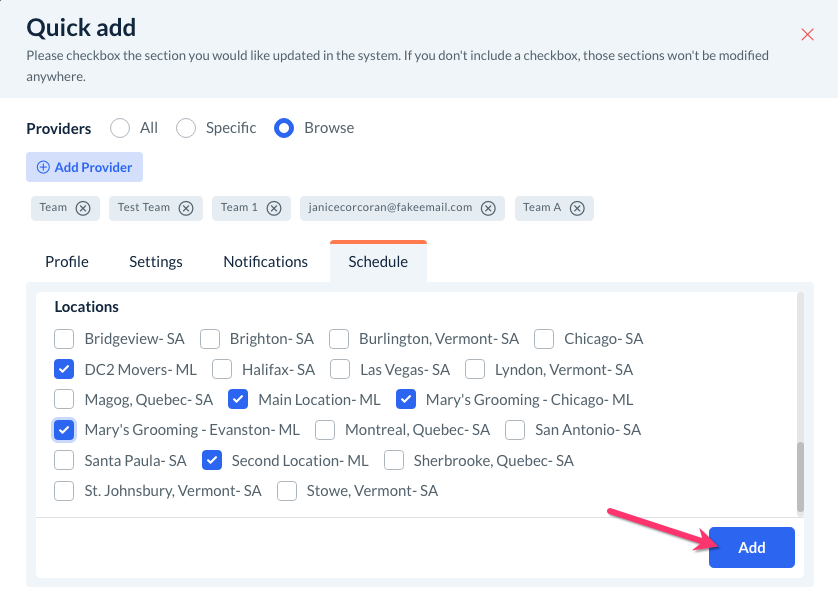
Schedule
To make a mass schedule change, select the "Schedule" tab on the quick-add popup.
Next, select the start time and end time for the schedule.

For the time frame, select "Whole" to update the entire recurring schedule for the selected providers, or pick "Select Date Range" to select the dates you want to update.
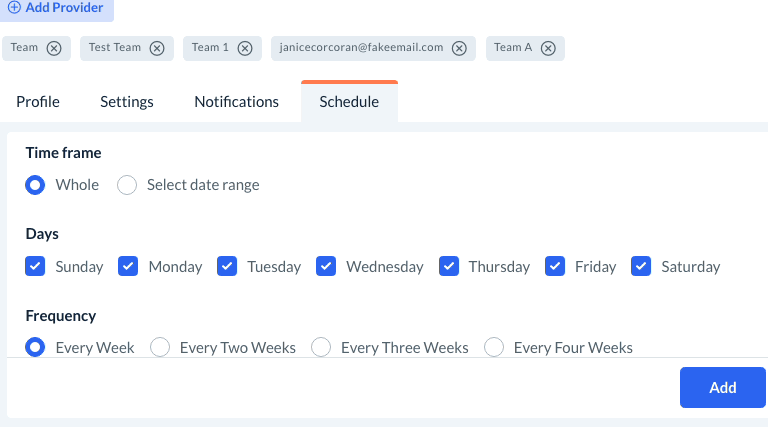
Under "Days", check the boxes next to the days of the week you would like to update.

For "Frequency", select how often you would the shift to occur.

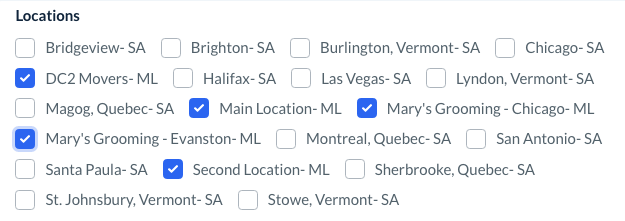
Finally, select which Locations you would like to apply the change.
Remember to Save!
Once you are finished making your selections, click the blue "Add" button at the bottom right corner of the pop-up.
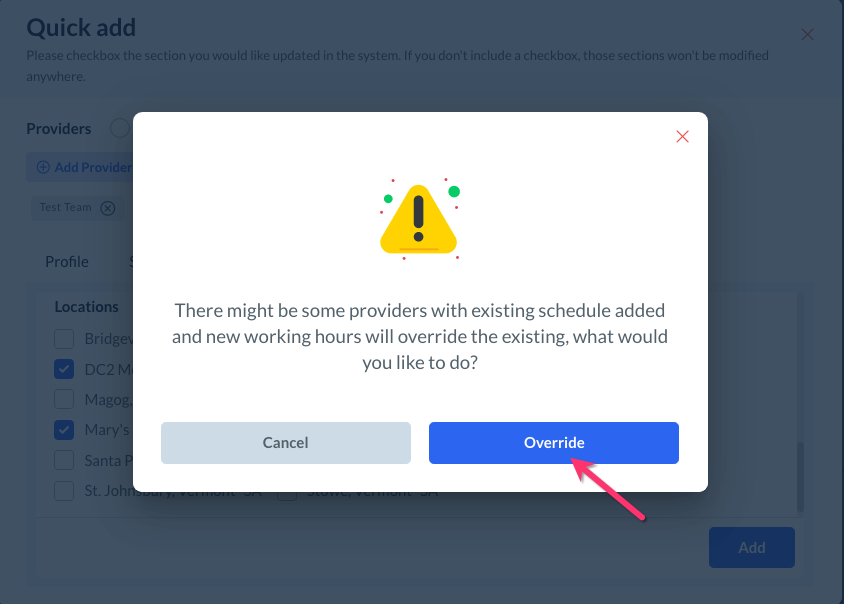
Only the box(es) you have selected a checkbox next to will be updated. You will receive a pop-up message reminding you that providers with existing schedules will be overridden by these changes. If you are sure you want to proceed with the update, click the blue "Override" button.
You will see another pop-up message letting you know the system has begun updating the provider settings/schedule. You can click the red "X" button to close out this window.

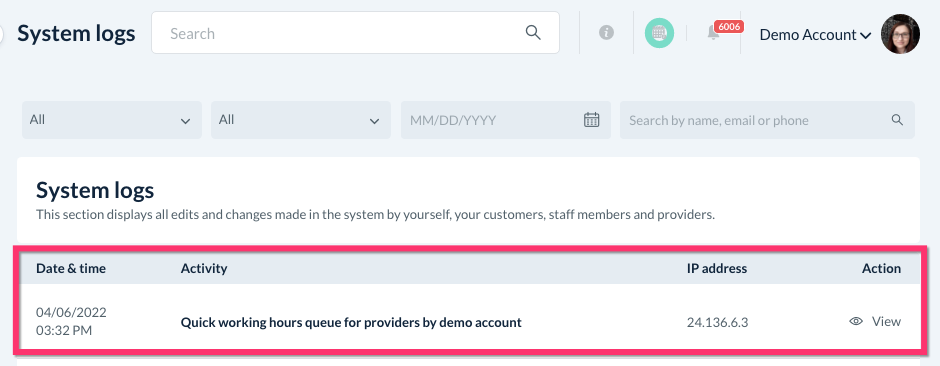
To check on the status of your quick-add, you can go to:
Logs > System Logs
Once the quick-add is finished, it will be logged here.