The purpose of this article is to help you learn how to:
Enable/disable multiple booking spots per booking form/industry
Set your provider's default wage per booking form/industry
Enable/disable provider pairing for a specific provider
Enable/disable providers from being booked for different frequencies, service categories, pricing parameters, items, packages, add-ons, and extras
Enable/disable providers from being worked for certain locations
Setting Up Provider Settings
If you have multiple industries, services, and locations, your providers likely have different preferences for where they work and what types of jobs they can do.
You can go to the Settings section under the provider's dashboard to better control which jobs are unassigned to your providers. To find this, go to:
Providers > Providers > [Provider Name]
Click on the "Settings" tab at the top of the screen.

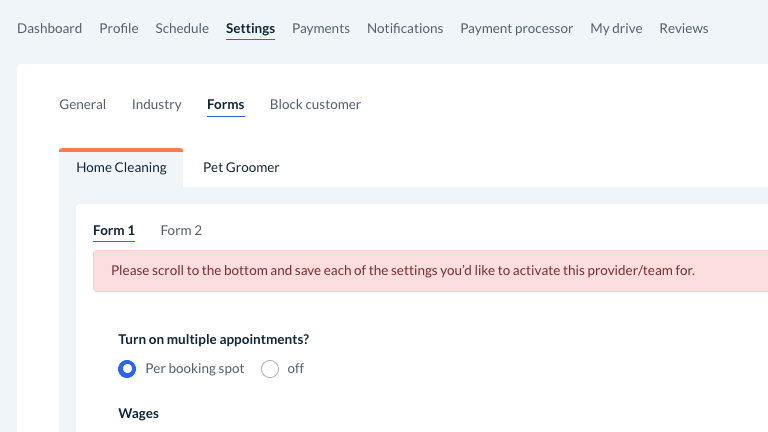
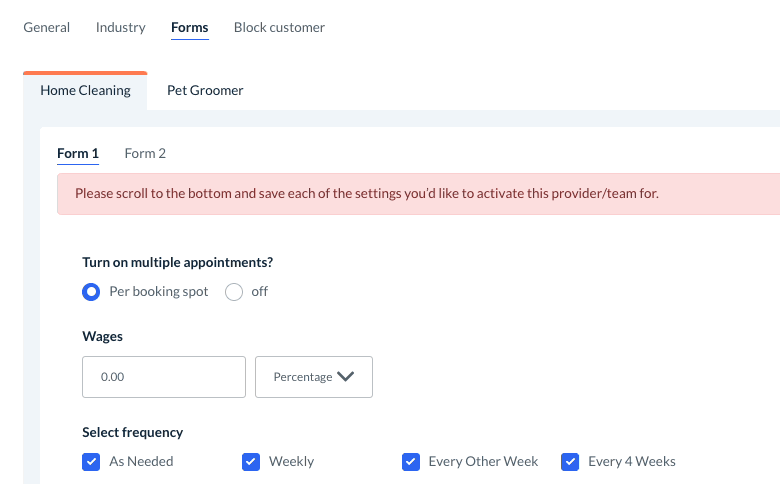
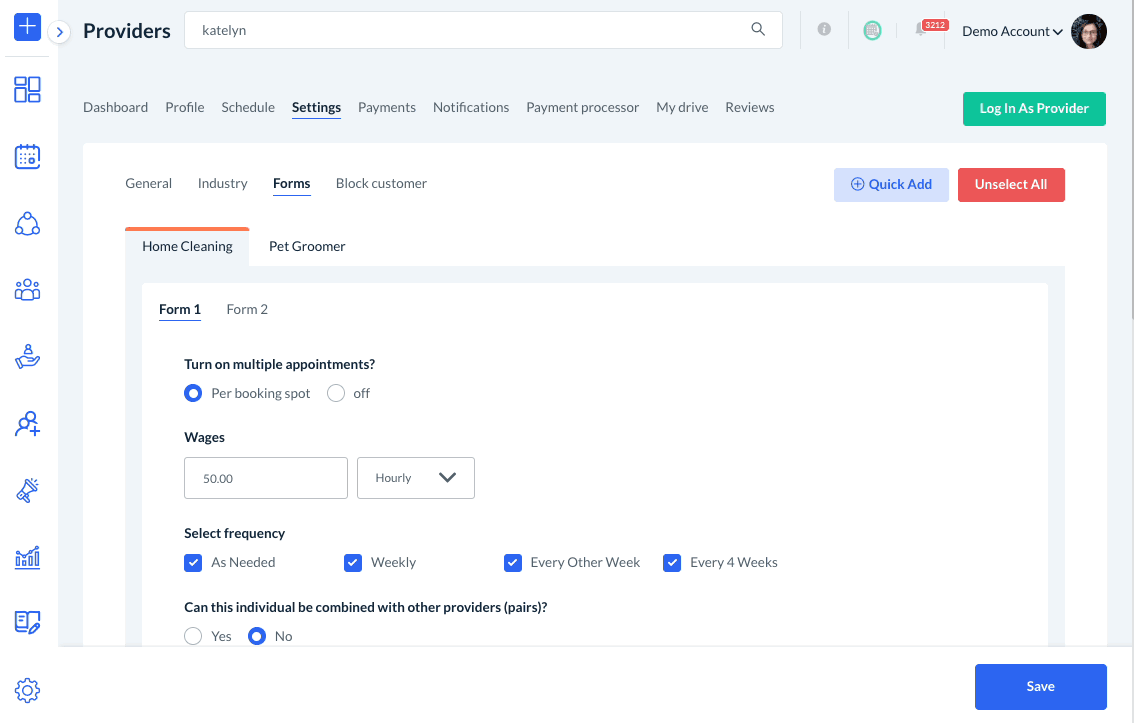
There are four sections under the settings section: General, Industry, Forms, and Block Customer.
This article will go over all the options found under the Forms provider settings section.

To view guides on the other sections, click the links below:
Form Provider Settings
All of your industries and booking form details will be listed in tabs at the top of this section. Click the name in the tab to switch between industries or forms.
Team Settings
Who will see the jobs?

The first team setting asks who is allowed to see the job details. If you select "Team Leader", the other team members will see a message saying, "You are not allowed to see the booking details" when they try to view the job details. If you would like team members to all see the details, please select "Everyone (individually)".
Who can accept or decline the job?

If you have selected "Everyone (individually)" for the previous question, you can also decide if just the team leader can accept or decline jobs, or if everyone (Individually) can. If you select everyone individually, one person can accept or decline bookings on behalf of the team. If one person accepts the job, it is added to the team's schedule. No other team member can take the job if one person declines the job.
Who will receive payments?
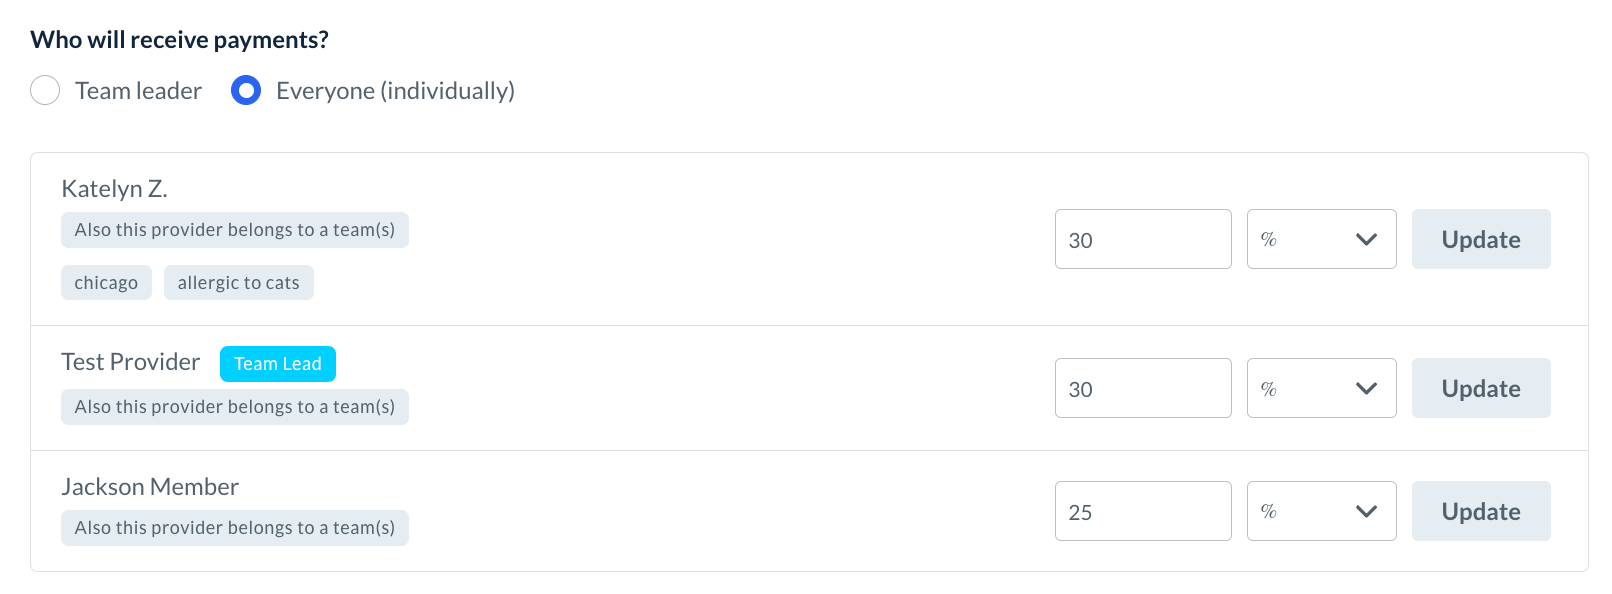
For teams, you can decide if only the team leader receives payment or if each team member does. Once you enter the team member's payment amount, click the grey "Update" button.
Other Settings
Turn on Multiple Appointments
If you've enabled multispot scheduling or multiple appointments per booking spot, you will see the question "Turn on multiple appointments?" at the top of this section.
Select "Per booking spot" to allow customers to book the same spot more than once.
Select "Off" to turn off multispot booking for this booking form. This means customers can only schedule one appointment per booking spot.
Click here to learn more about how multispot scheduling works and how to enable it.
Wages
Under the Wages section, you can set the provider's default payment amount for this booking form.
Click here to learn more about the various options for setting up provider wages.
Click here to learn how to set up provider payments, including setting a default wage for all providers when you first onboard them.
Provider Pairing
You can control whether a provider can be "paired" with other providers for a specific booking form and industry by selecting an answer to "Can this individual be combined with other providers (pairs)?"
Select "Yes" to enabled provider pairing. "Provider pairing" means two or more individual providers can be paired together on a booking-by-booking basis. Pairs differ from "Teams", which contain two or more providers that work together for all of their bookings.
Select "No" to disable provider pairing. Only teams or an individual provider can be assigned to each booking.
If you do not see this section but are interested in setting it up, click here to learn how to enable provider pairing.
Select Frequency/Service Category/Pricing Parameters/Extras/Etc.
To enable or disable a provider from receiving jobs that have a specific frequency, service category, pricing parameter, exclude parameter, item, package, add-on, or extra, simply uncheck the box next to that parameter.
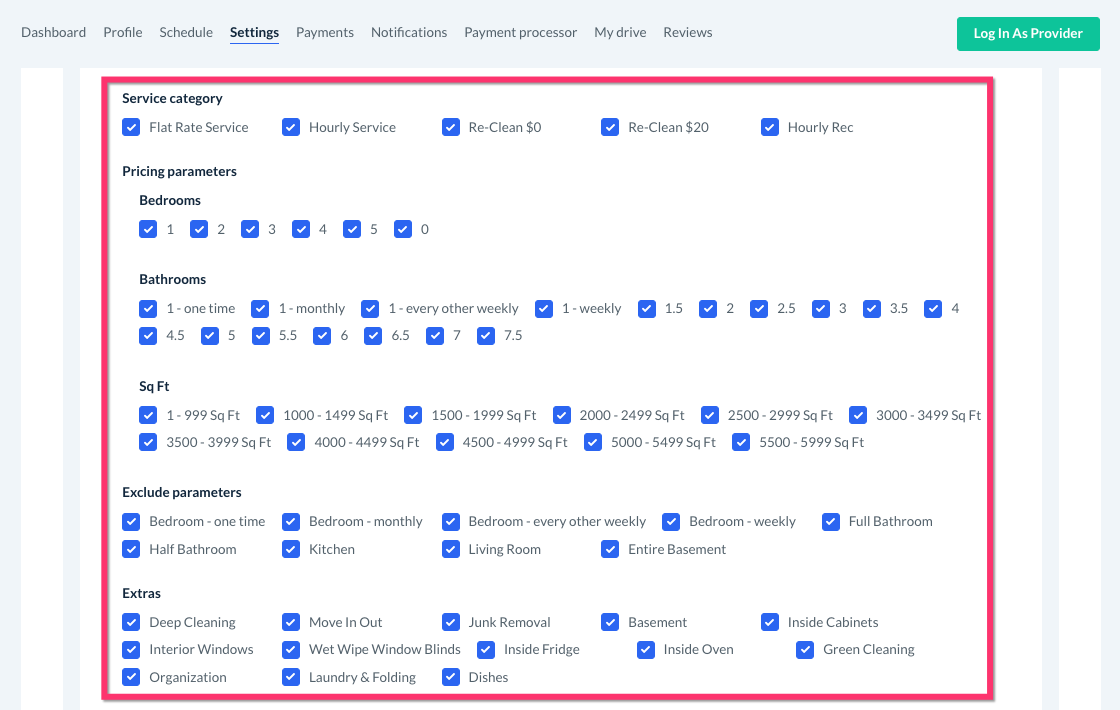
You can use this option to customize the types of jobs that providers will display as "available".
When a box is unchecked, the provider will NOT display under the "Available or Not Available list, and instead will be listed under the "Check Compatability" section.
For example, this provider has been excluded from servicing homes that have more than 4000 square feet.

Once the settings have been saved, the provider will not display as an option for homes when this option has been selected.
Add Locations
To enable your provider to work in a specific location, scroll to the bottom of the section under you see the "Add Locations" section.
By default, your provider will be enabled for all new locations as you add them.
Check/uncheck the box next to the location name to enable/disable it.
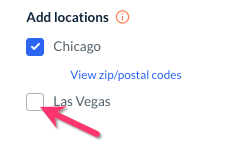
If the location is a service area, click the blue "View Zip/Postal Codes" link to view which areas within that location are enabled.
Check/uncheck the boxes next to each zip code or place name within this section to enable or disable it.
Click the blue "Save" button to update the service area. A green system notification
Then, click the blue "Save" button at the bottom of the page to update the general setting changes.
Remember to Save!
If you have made any changes in ANY of these sections, remember to click the blue "Save" button at the bottom left corner of the page to update your provider's settings.