The purpose of this article is to help you learn how to do the following actions under a provider's general settings:
Allow a provider to set up their schedule
Allow a provider to set up their settings
Enable schedule setting/requests for a provider
Display or hide unassigned jobs
Turn on/off a provider from being booked by customers
Turn on/off a provider from being booked for same-day jobs
Display or hide the customer's payment method
Display or hide the customer's booking price
Display or hide the provider's payment amount
Set a default location for the provider
Set up travel and non-travel break times
Setting Up Provider Settings
If you have multiple industries, services, and/or locations, your providers likely have different preferences for where they work and what types of jobs they can do.
To better control which jobs are unassigned to your providers, you can go to the Settings section under the provider's dashboard. To find this, go to:
Providers > Providers > [Provider Name]
Click on the "Settings" tab at the top of the screen.

There are four sections under the settings section: General, Industry, Forms, and Block Customer.
This article will go over all the options found under the General provider settings section.
To view guides on the other sections, click the links below:
General Provider Settings
Can this provider/team set their own schedule?
Select "Yes" to allow this provider/team to set their own schedule, either automatically or via admin approval.
Select "No" to make all provider schedule changes on the staff/admin end.
Who can set their own schedule? (for teams only)
Select "Team Leader" to only allow the designated team leader to make changes to the team's schedule.
Select "Everyone (individually)" to allow all team members to make schedule changes.
Can this provider/team set their own settings?
Select "Yes" to allow providers to modify their settings, either automatically or via admin approval.
Select "No" to make all provider setting changes on the staff/admin end.
Who can set their own settings? (for teams only)
Select "Team Leader" to only allow the designated team leader to make changes to the team's settings.
Select "Everyone (individually)" to allow all team members to make setting changes.
If you selected "Yes" to either of the previous two questions, you will also see this option:
Does the merchant have to approve the request?
Select "Yes" for all provider schedule/setting changes to be submitted as a request
Select "No" to allow all provider schedule/setting changes to be updated automatically.
Show unassigned jobs to the provider/teams?
Select "Yes" to allow this provider/team to see and pick up unassigned jobs from the Unassigned Folder. Click here to learn more about how the unassigned folder works.
Select "No" to hide the Unassigned Folder from this provider's dashboard.
Turn off this provider or team from being booked by any customer but can be booked by admin/staff only?
Select "Yes" to turn OFF the provider from being booked by customers. This means that the provider will not display at all for customers when they are checking availability.
For example, if you only have one provider and they have this setting enabled, your booking form will show no open spots.
Select "No" to allow customers to schedule this provider for services.
Turn off this provider or team from being booked for same-day jobs?
Select "Yes" to turn OFF the provider/team from being booked for all same-day jobs.
Select "No" to allow this provider/team to receive same-day bookings (if you allow customers to do so).
Do you want to show the payment method to this provider/team?
Select "Yes" to show some or all payment types to the customer. This means they will be able to see if the customer is paying with a credit/debit card or paying with cash/check.
Select "No" to hide the payment method from the provider. They will not be able to see how the customer is making payment for their service.
If you selected "Yes" to this question, select which payment methods you would like the provider to see:
Show only for cash/check - The provider will only see the payment method if it is "cash/check". Otherwise, they will not see anything.
Both (cash/check or credit/debit card) - The provider will be able to see both "cash/check" and "credit/debit card" type payments on the booking.
If this is a team of providers, select whether you want just the team leader or all team members to be able to see the payment method.
Team Leader - Only the team leader can see the payment method
Everyone (Individually) - All team members will be able to see the payment method.
Do you want to show the booking price to this provider/team?
Select "Yes" to show the customer's booking price to the provider. This means they will be able to see what the customer is paying your business for the service.
Select "No" to hide the booking price from the provider. They will not be able to see how much the customer is paying.
If you selected "Yes" to this question, select which circumstances in which you would like the provider to see the booking price:
Show only for cash/check - The provider will only see the booking price if it is "cash/check". Otherwise, they will not see the booking price at all.
Both (cash/check or credit/debit card) - The provider will be able to see the booking price for both "cash/check" and "credit/debit card" type bookings.
Would you like to hide the provider's payment(s) from your provider/team?
Select "Yes" to customize which types of payment the provider will be able to see.
Check the box next to the field you would like to HIDE from the provider.
The options are:
Provider payment
Tip
Parking
Bonus
Service Fee
Reimbursements
Total Pay
Select "No (show all)" to show the provider any/all of the applicable payment types above.
Which location is the default location for this provider/team?
Click the "Select Location" drop-down menu to select which location to set as the "default" for your provider.
This will set the default location on the provider's dashboard to that location when viewing bookings on their dashboard and checking their schedule.
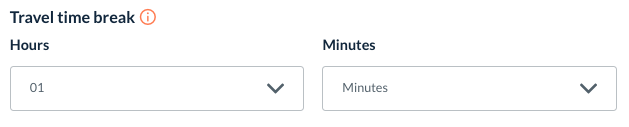
Break Time
If you have set up travel time breaks for your providers, you can customize those breaks for each provider or team in this section.
Set a Travel Time Break by entering the hours and minutes into the boxes below.
A "travel time break" identities if a provider is traveling to a different location and inserts a "buffer" of time after that first job. This buffer prevents customers from booking appointments too close together, especially if they are not in the same location.
You can also set up a Non-Travel Time Break.
A "non-travel time break" identifies if a provider's next job is in the same location as the previous job, and then inserts a buffer after the first job. This is optional but can be used to set a shorter break after an appointment if the following booking is in the same area.

Click here to learn how to enable travel and non-travel time breaks for your providers.
Remember to Save!
If you have made any changes, remember to click the blue "Save" button at the bottom left corner of the page to update your provider's settings.