The purpose of this article is to help you understand:
How admin can allow providers like yourself to create/connect a Stripe account
How to create/connect your Stripe account to receive payments
Getting Started
Before you can receive payments through BookingKoala, the admin must first set up and integrate Stripe Connect. If they have not done so already, they can click here to follow the step-by-step guide.
Admin must also give permission for providers to set up their own Stripe accounts. To enable this, they can go to:
Settings > General > Store Options > Providers > Bookings
Expand this section and scroll down to where it says "Would you like to allow your providers the ability to edit their profiles?" and select "Yes".
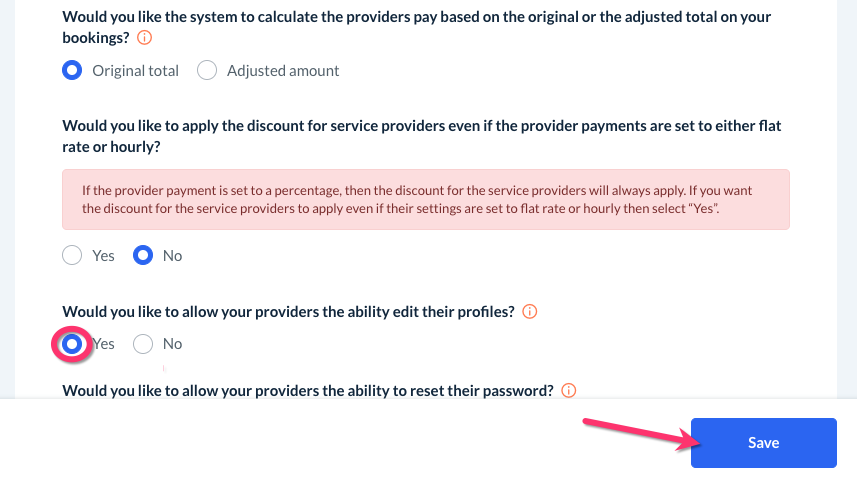
Then click the blue "Save" button at the bottom of the page.
Connecting Provider Stripe Accounts
Once the admin has set up and connected their Stripe Connect platform, you are ready to connect a Stripe account so you can receive payments. You can get connected in a few different ways depending on what the admin has enabled.
Connect a bank account to receive payments
Connect a debit card to receive payments.
Manually connect an existing Stripe account or make a new Stripe account and manually connect it to receive payouts.
If you would like the admin to help set up your stripe account, they can click here to view detailed instructions.
For Providers: Connect a Bank Account
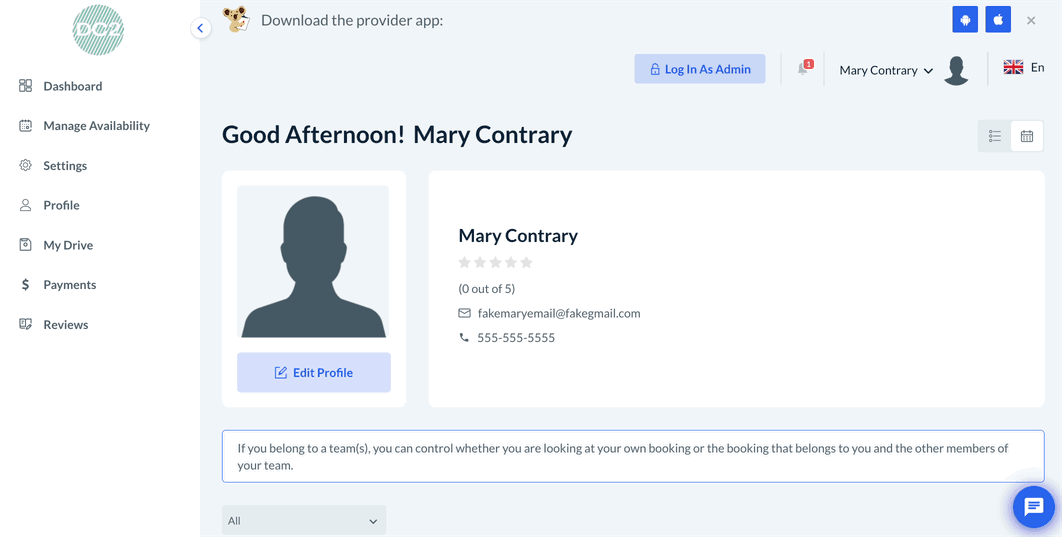
To connect your account to BookingKoala, sign in to your BookingKoala provider dashboard in the app or via a web browser. Click on the "Profile" tab, then select the "Payment Processor" tab. The "Bank account" option will be selected automatically.
Scroll down the page and fill out the following fields:
Legal first name - Your first name as it appears on official documents and IDs.
Legal last name - Your last name as it appears on official documents and IDs.
Date of birth - Your legal birth date.
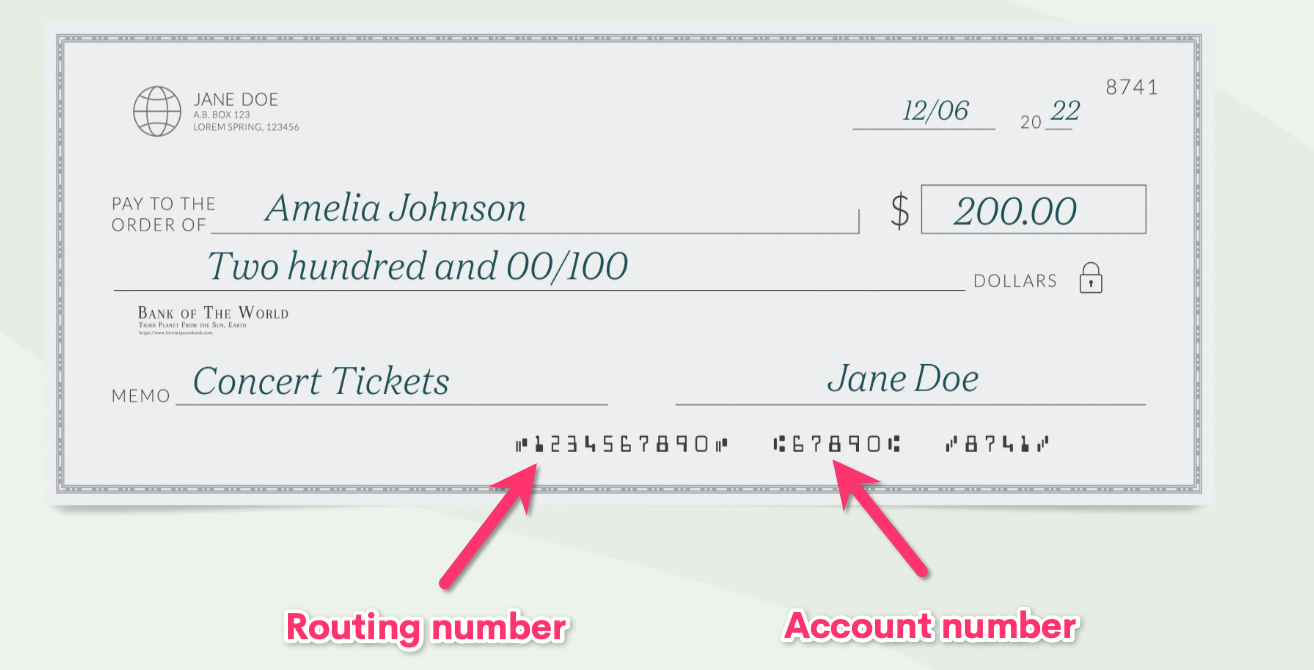
Routing number - The 9-digit code used to identify your bank in financial transactions.
Account number - The unique identifier for your personal bank account.
You can locate your routing and account numbers by checking your bank statements, looking at a check for your account, or contacting your bank directly.
For Providers: Connect a Debit Card
To connect your account to BookingKoala, sign in to your BookingKoala provider dashboard in the app or via a web browser. Click on the "Profile" tab, then select the "Payment Processor" tab. Click on the "Debit card" option to continue.

Scroll down the page and fill out the following fields:
Legal first name - Your first name as it appears on official documents and IDs.
Legal last name - Your last name as it appears on official documents and IDs.
Date of birth - Your legal birth date.
Debit card details - Please include the card number, expiration date, and CVC code.
For Providers: Connect an Existing Stripe Account
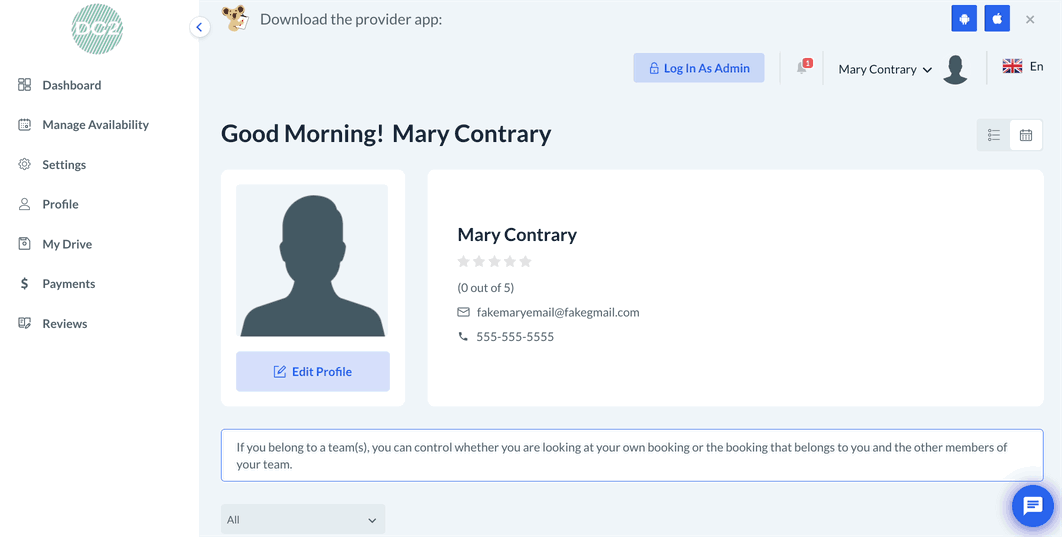
First, please check that your account is activated and confirmed, otherwise, payments may be delayed. If the account has verification issues, there will be a read message at the top of your profile when you sign in.

You can correct this by clicking on the top right-most "Profile icon" and select "Profile".
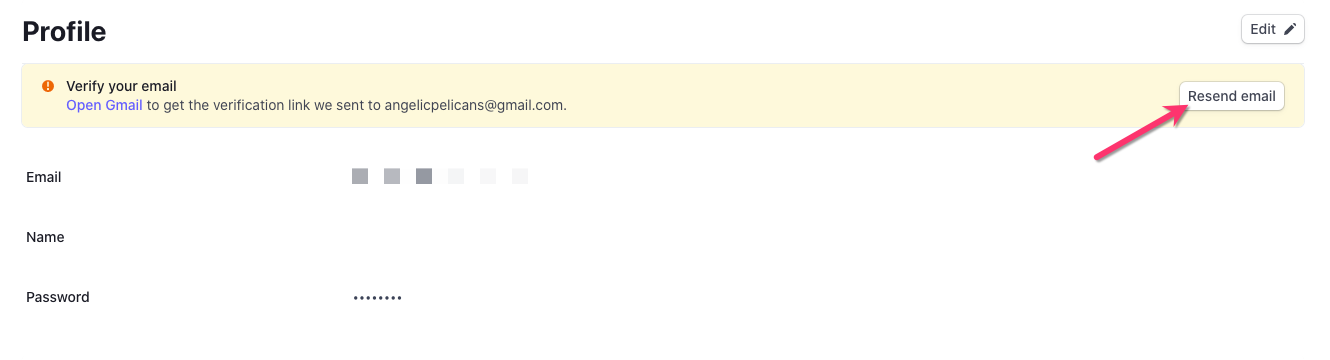
If need be, you can click the "Resend Email" button to resend your verification email, and then check both your inbox and spam folder for an email from [email protected].
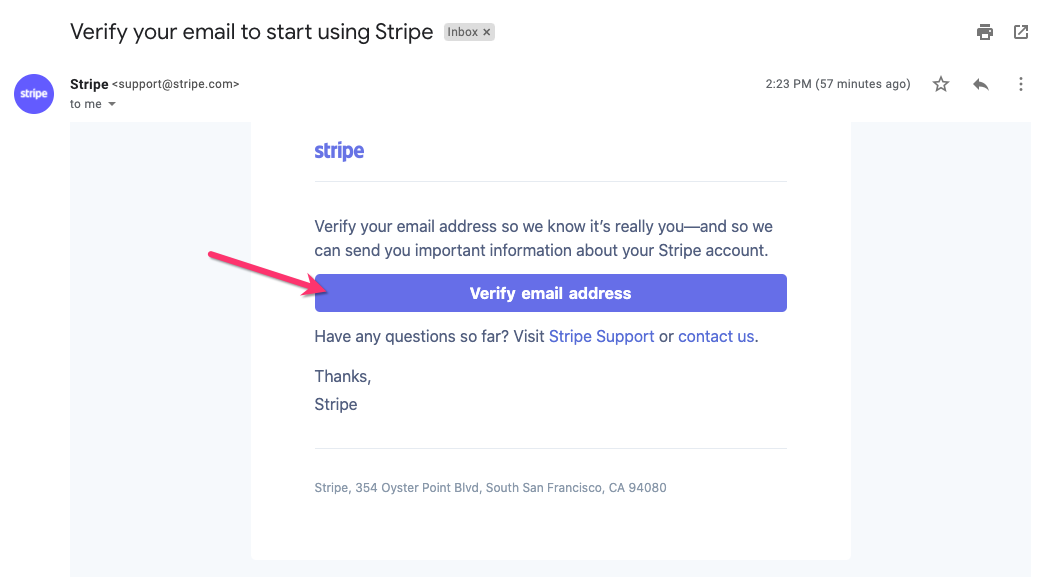
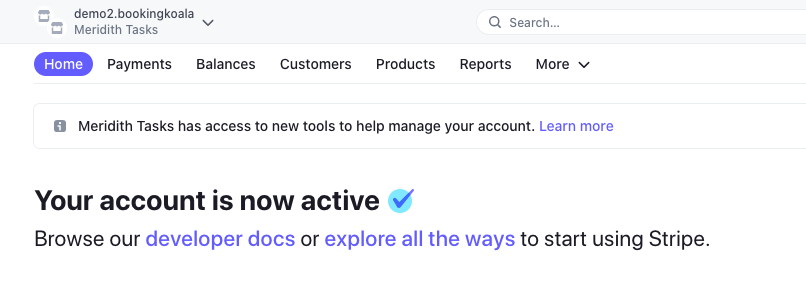
Once you locate the email, click the blue "Verify Email Address" button in the email. This will bring you to your Stripe dashboard. If you are already logged in, your account will be verified. If you are not logged in, the account will become verified once you sign in.
To connect your account to BookingKoala, sign in to your BookingKoala provider dashboard in the app or via a web browser. Click on the "Profile" tab, then select the "Payment Processor" tab. Click on the "Manual" option to continue.
Next, click the blue "Connect with Stripe" button in the section below.
A pop-up window will appear. If no window pops up in a web browser, please check your internet browser settings and allow pop-ups from this site.
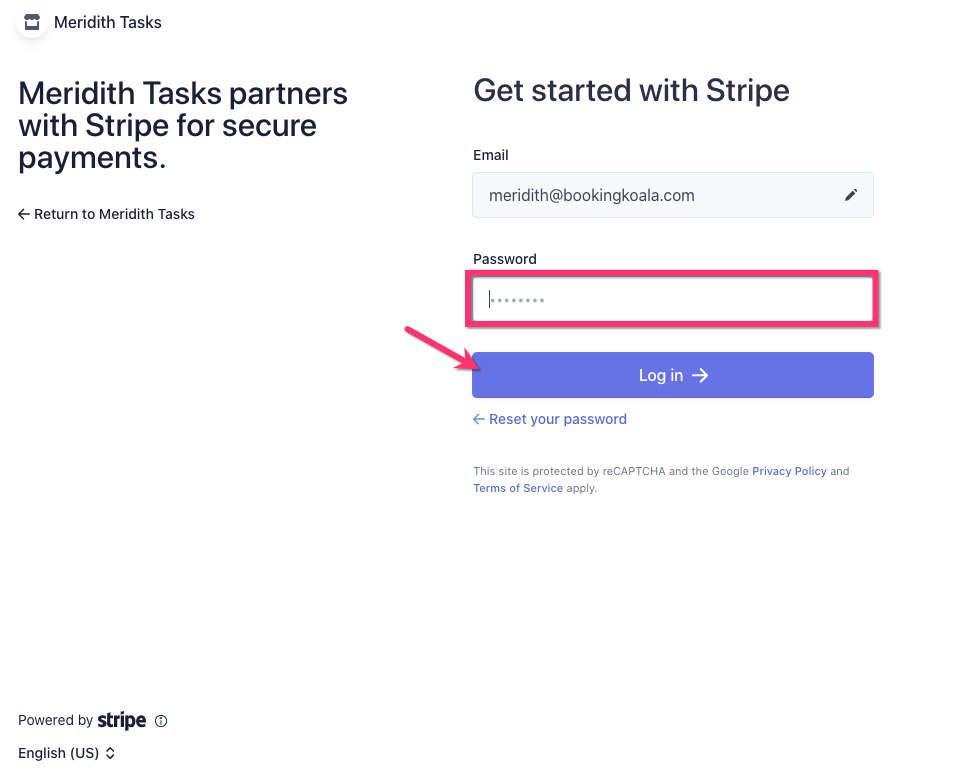
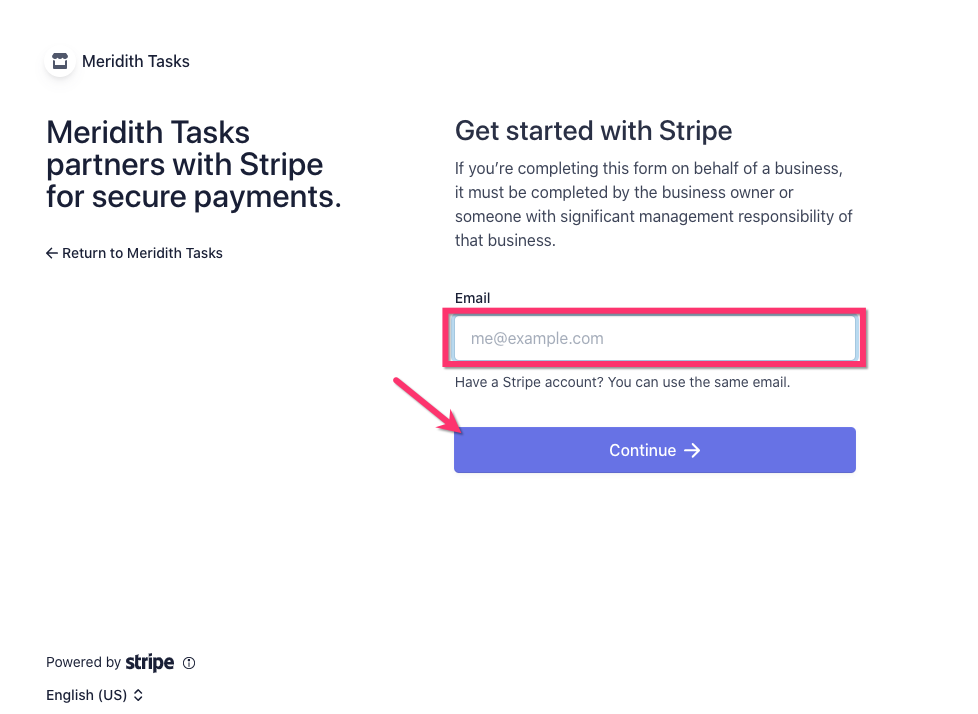
Next, enter your email address connected to the Stripe account and click the blue "Continue" button.

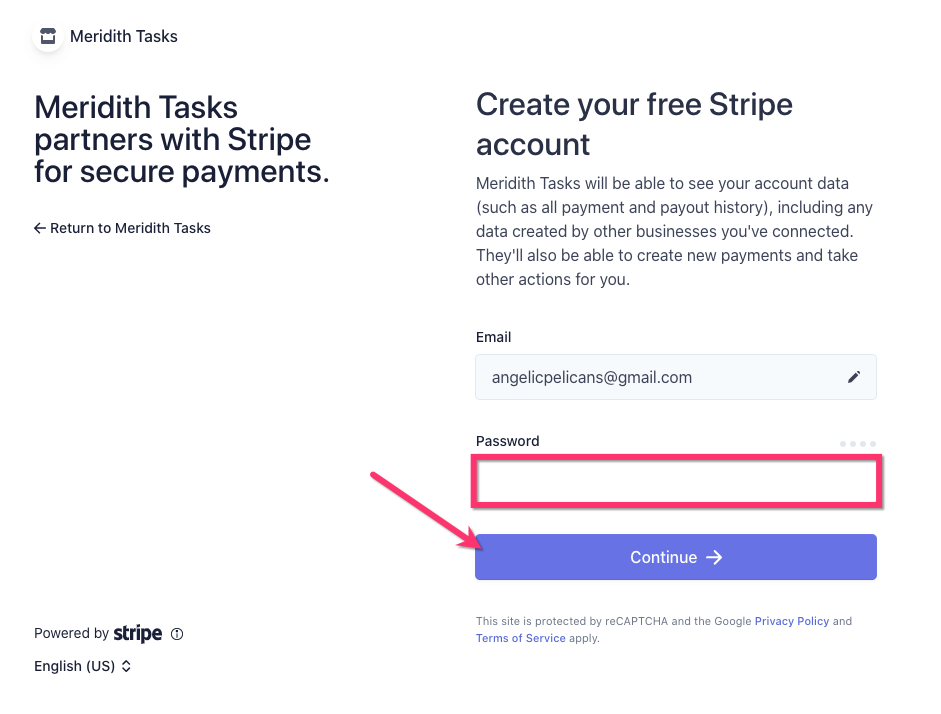
There will be a login page with a password box. Enter your password, then click the blue "Log in" button.
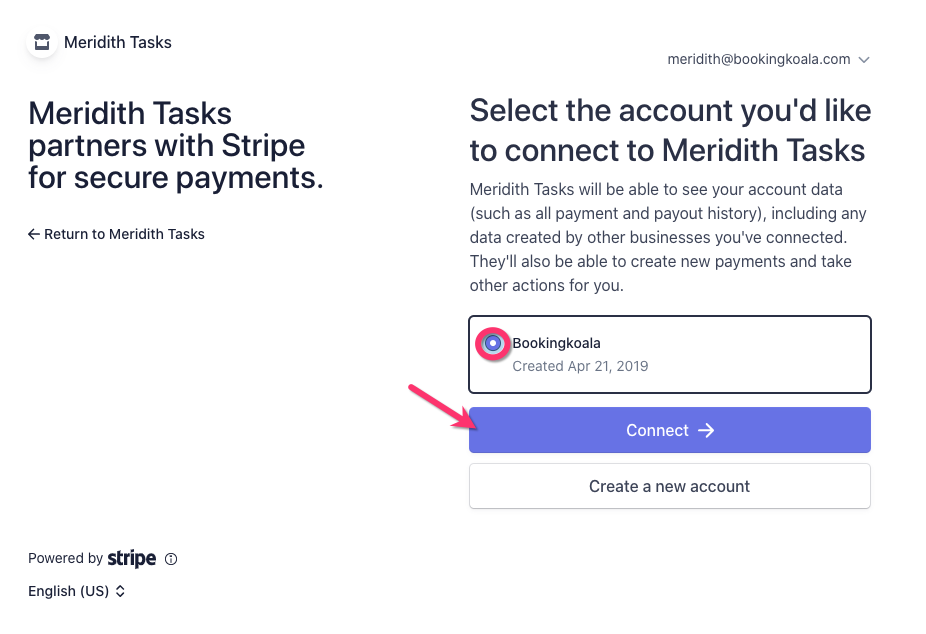
Next, select the account you would like to connect to and then click the blue "Connect" button.
Give the system a moment to load while the connection takes place. Please do not close or refresh the page until it finishes loading. Once the connection is complete, the pop-up will display this message:

You can now close out this pop-up window. If you refresh the "Payment Processor" tab of your dashboard, you will now see a message that says "Connected with Stripe".
For Providers: Create and Connect a New Stripe Account
To create a Stripe account and connect your account to your BookingKoala account, sign in to your BookingKoala dashboard via the BookingKoala for Providers app or using a web browser.
First, click on the "Profile" tab. Then, click on the "Payment Processor" tab. In the section below, click on the blue "Connect with Stripe" button.
A pop-up window will appear. If no window pops up in a web browser, please check your internet browser settings and allow pop-ups from this site.
Next, enter your email address into the "Email" box and click the blue "Continue" button.
Then, create a password for the account. This can always be changed later on.
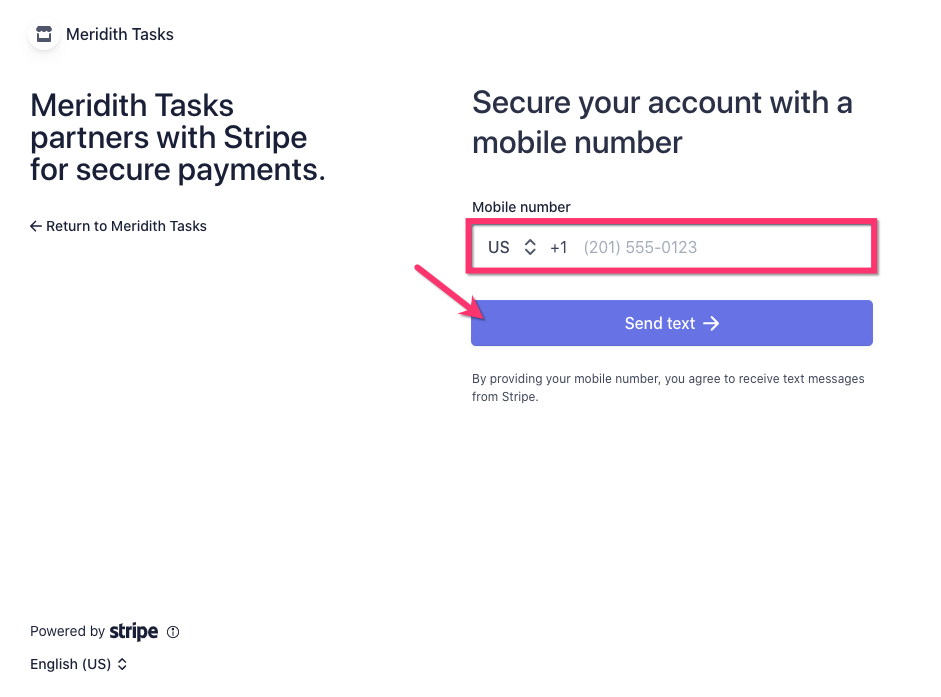
Enter your phone number. This will be used to enable two-step verification, which is required by Stripe. You must enter a valid phone number that you have access to in order to proceed. Then click the blue "Send Text" button to send out the verification code to the phone number.
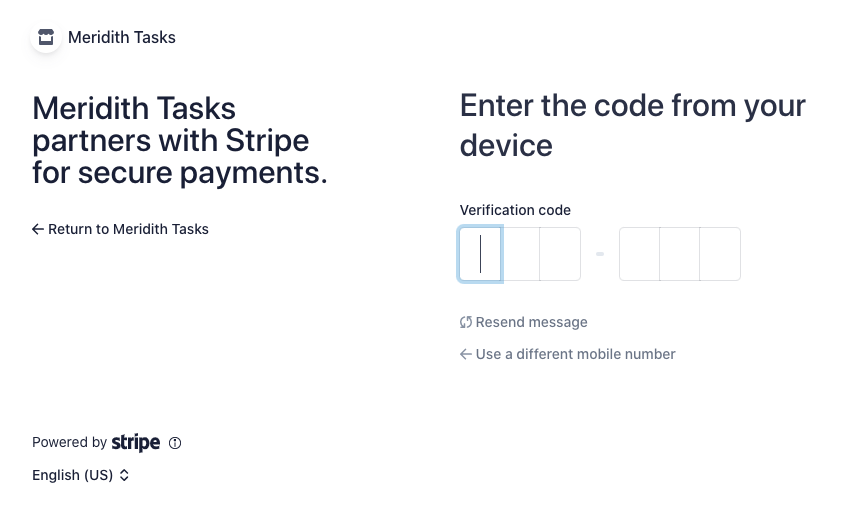
Once you receive the 6-digit verification code, paste it into the boxes below. The next step will appear automatically upon entering the correct code.
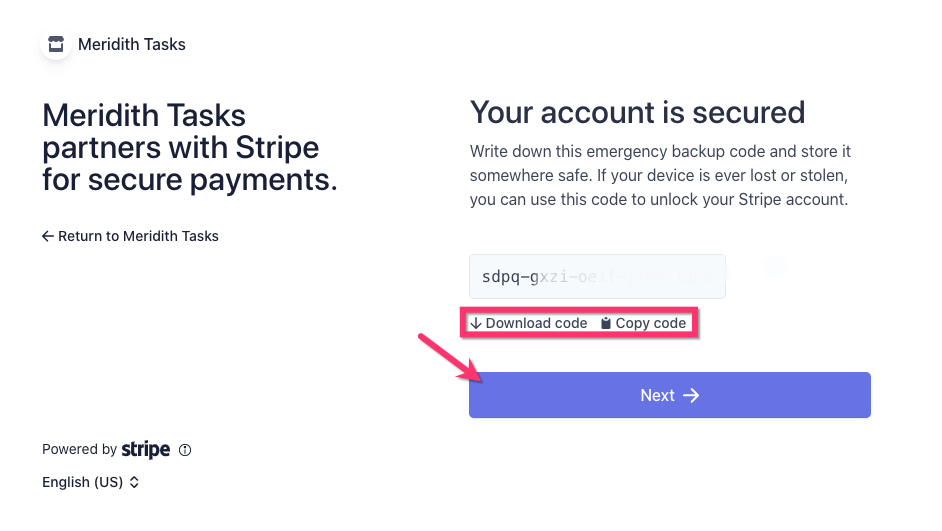
The following page will display an emergency backup code. This code is used in case of an emergency if you need to reset your password but no longer have access to your phone number.
Click Copy Code or Download Code and store in a save place. Then, click the "Next" button.
Next, fill out the following questions about yourself and your business (or the business you are working for).
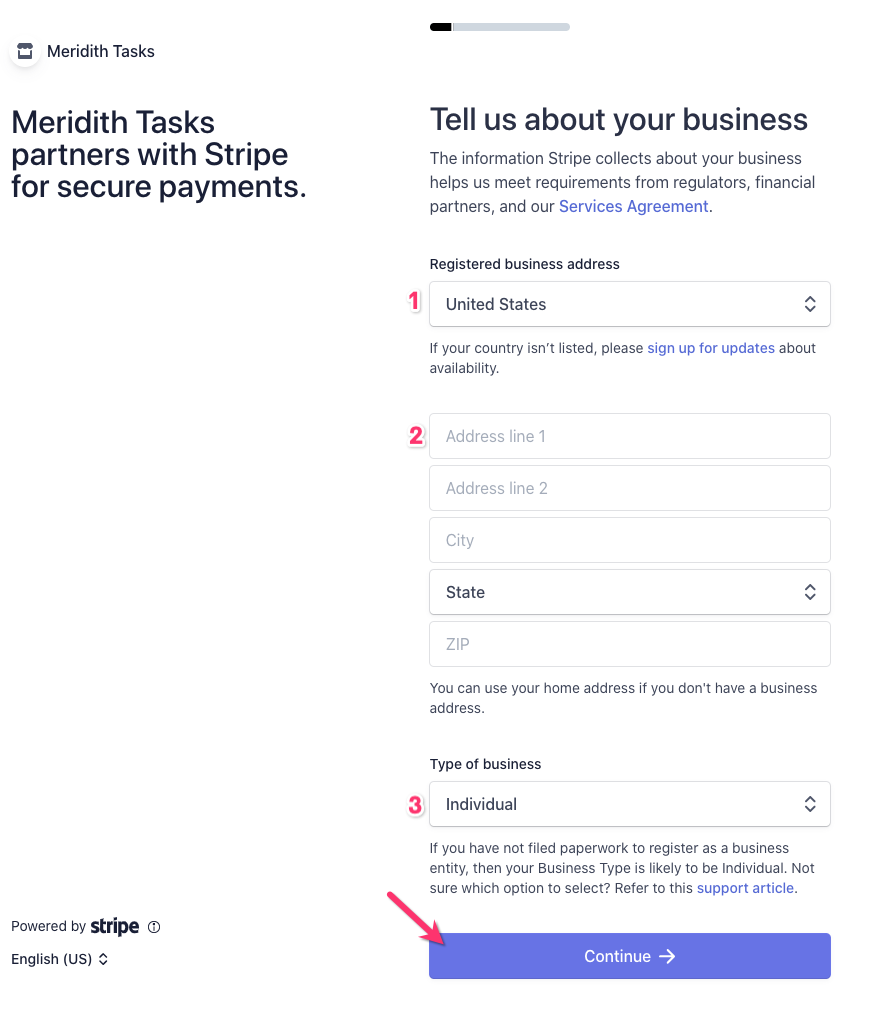
Select your country.
Enter your full address.
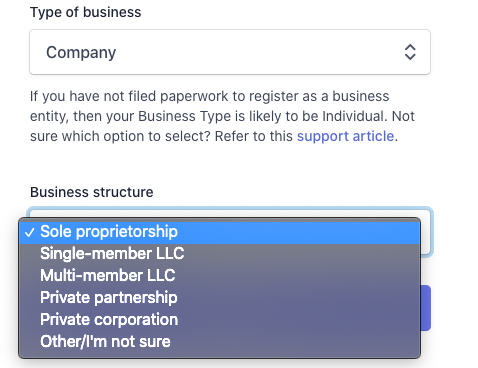
Select the type of business you have.
Most accounts will be set up as an "individual" if you have not filed paperwork to register as a business.
If you do have a registered business, select "company" and pick which business structure you use.
You can also select "nonprofit organization" if applicable.
Then, click the blue "Continue" button.
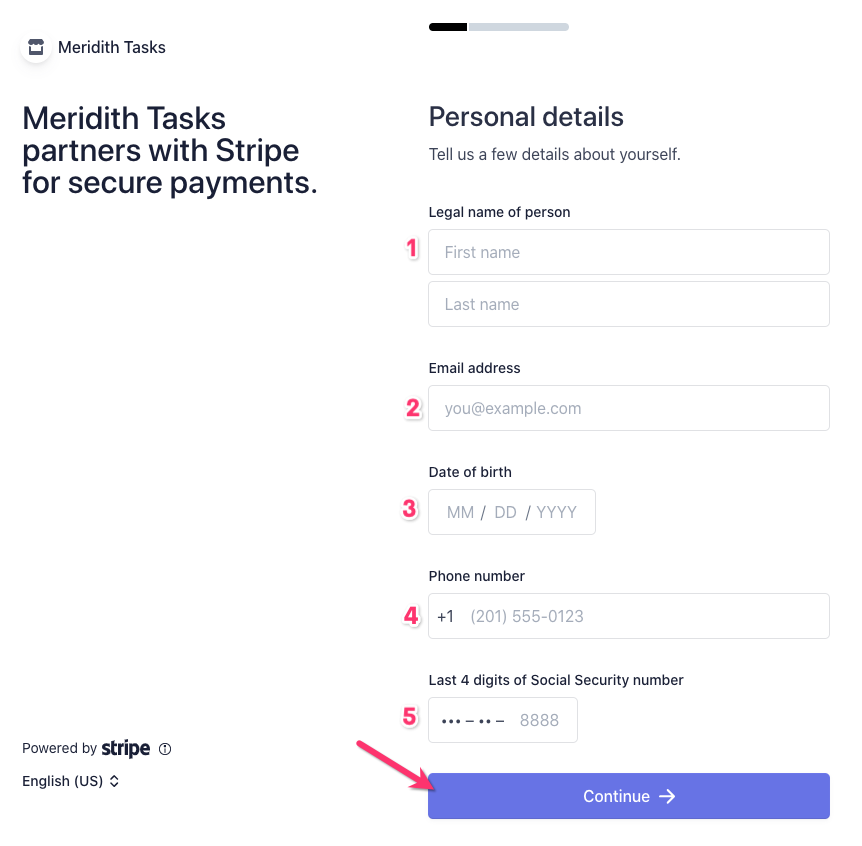
Enter your first and last name.
Enter your best contact email address.
Type in your date of birth.
Enter your contact phone number.
Enter the last four digits of your security/tax id (SSN if in the USA).
Then, click the "Continue" button.
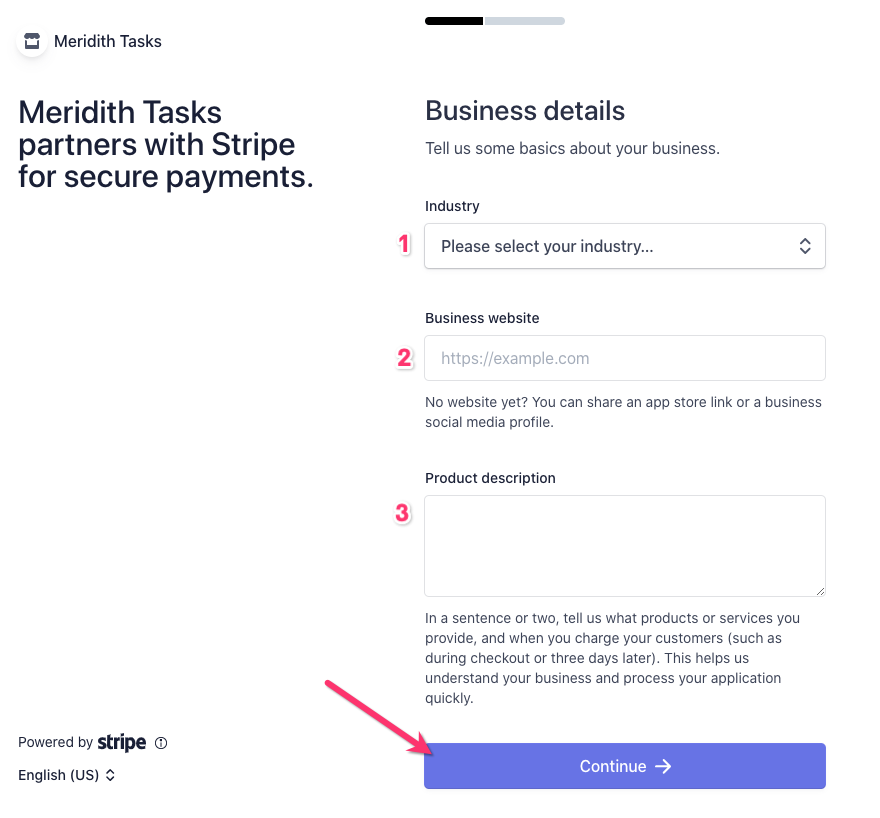
Select the industry of the business. If you are not sure, you can select "Software".
Enter the business's website URL.
Enter a short description of what goods or services are offered by the business. For example, you may write "Commercial and residential cleaning services" if it is a cleaning company, or "Tutoring high schoolers for their ACT or SAT exam" if it is a tutoring business.
Click the "Continue" button.
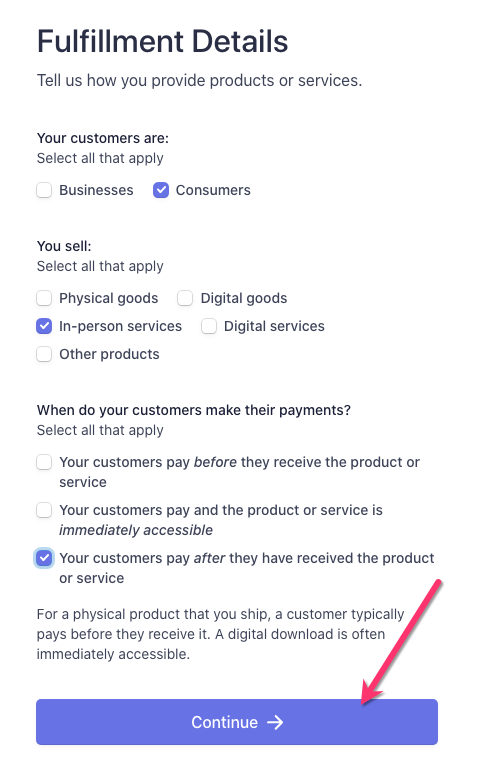
Next, provide more information about who the customers are, what the business sells, and when customer payments are collected. This can vary depending on the nature of the business.
Click "Continue". Next, connect your checking account to receive automatic direct deposits.
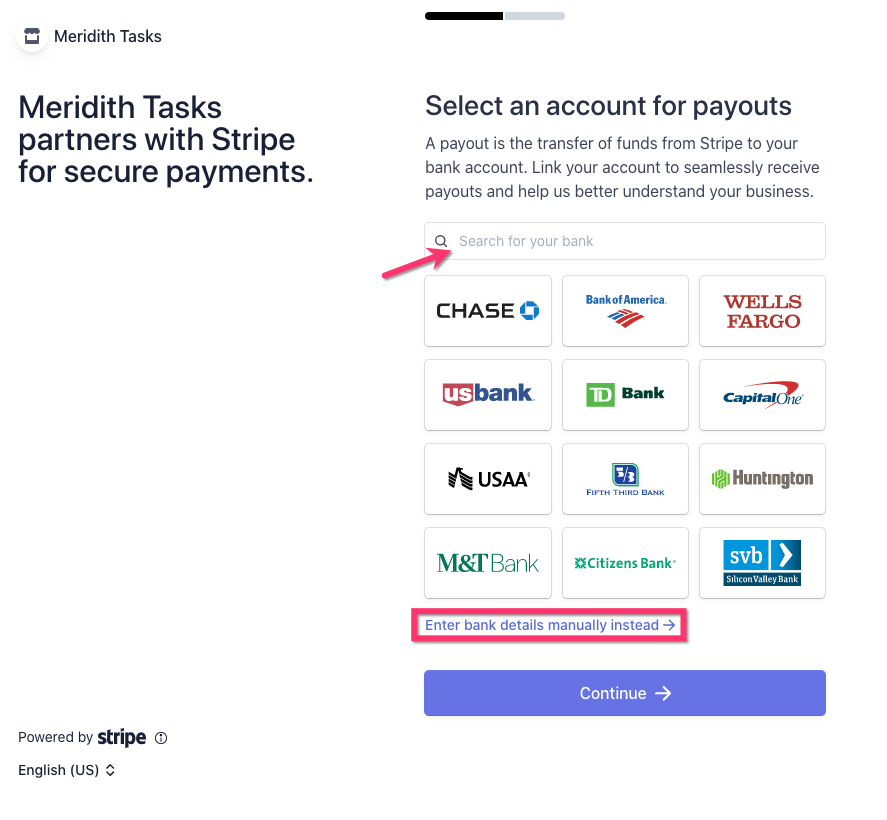
You can click "Enter bank details manually instead" if you would like to manually enter the routing and checking numbers, or, use the search bar to look up your bank and log in to connect your account.
If you are entering the account details manually, a separate pop-up window will appear where you can enter your routing and checking account numbers.
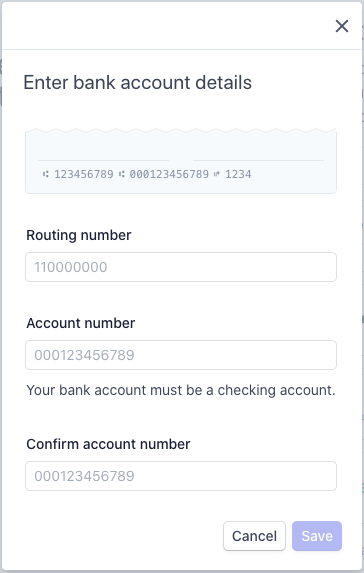
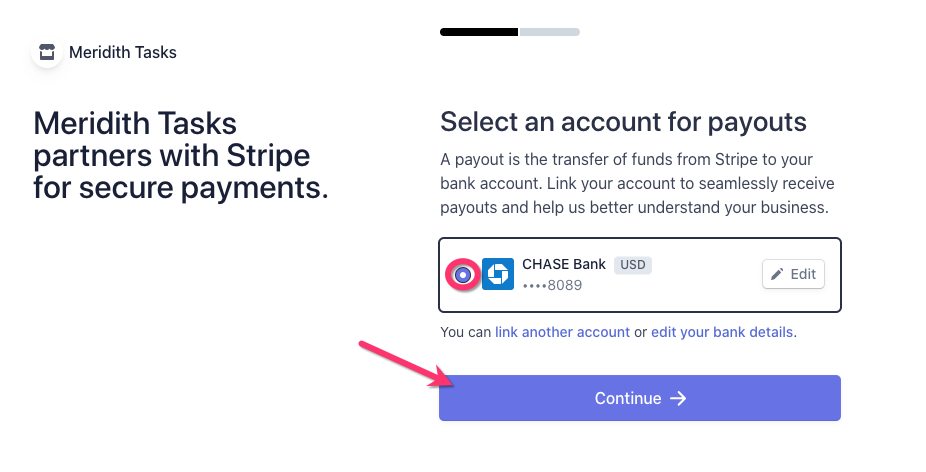
Click the blue "Save" button. You will now see your bank account listed in the pop-up. Select it and click "Continue".
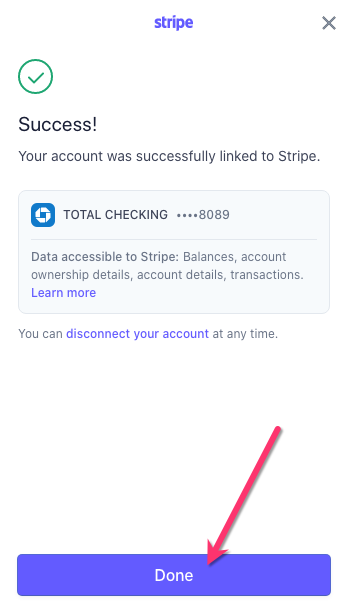
If you are logging into your online bank account, follow the prompts until you reach the "Success" window. Click "Done" to proceed.
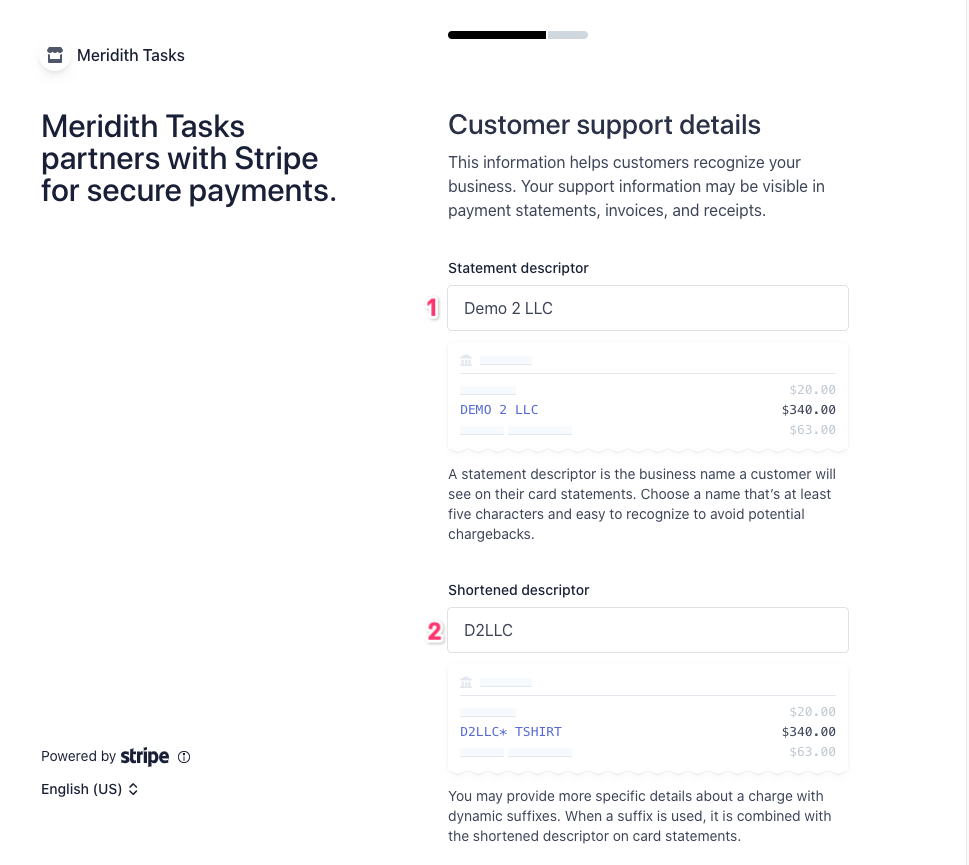
Next, enter a: 1. "Statement Descriptor" and a 2. "Shortened Descriptor" into the first and second boxes. This will appear on the customer's credit card they are charged for your services.
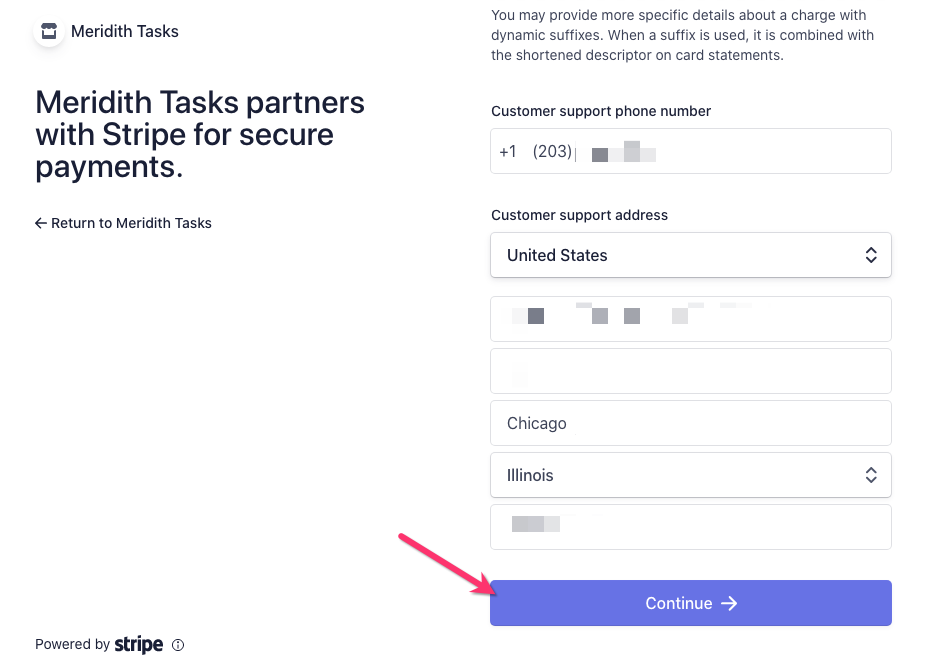
Scroll down and enter the 3. "Customer Support Phone Number" and 4. "Customer Support Address", then click the "Continue" button.
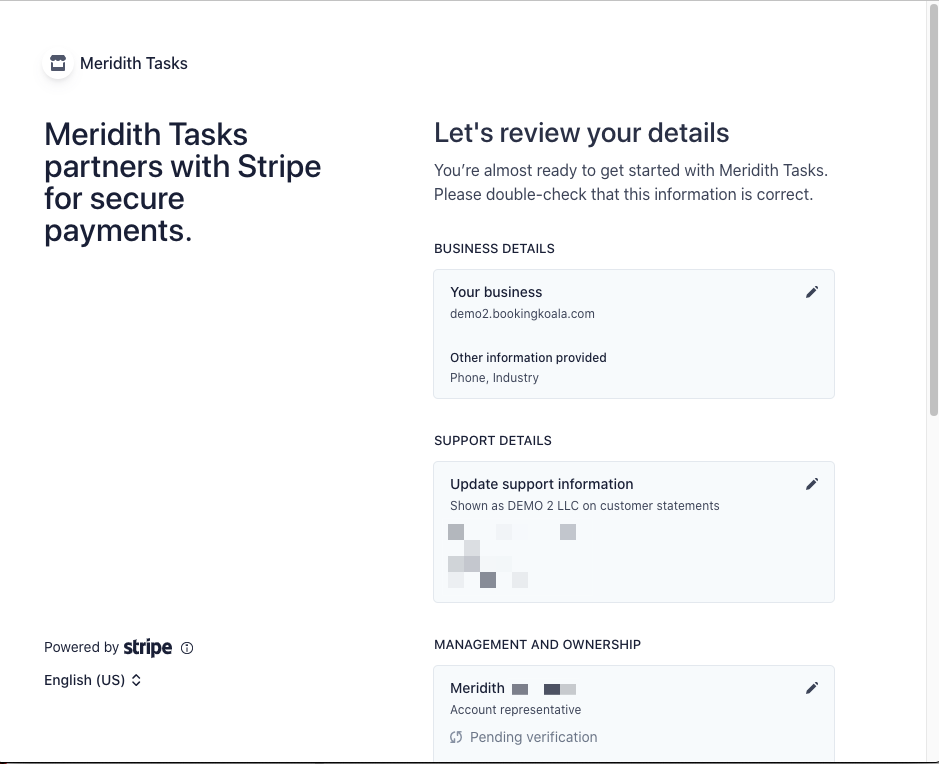
You will be brought to a final review page to confirm the details you have entered.
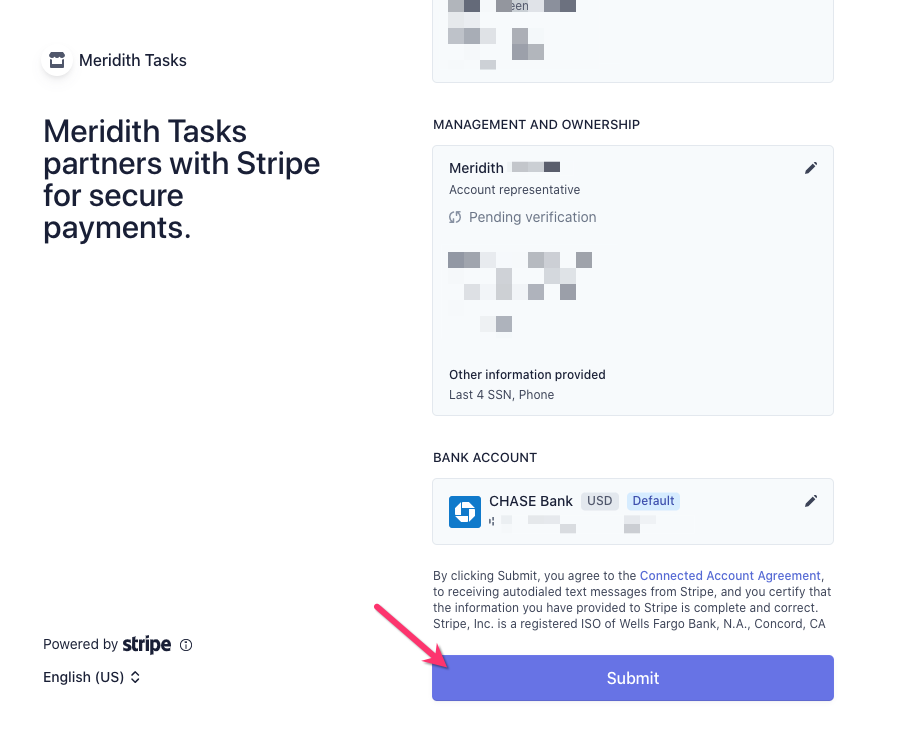
Scroll to the bottom of the window and click the blue "Submit" button to finish creating and connecting your new Stripe account.
Give the system a moment to load while the connection takes place. Please do not close or refresh the page until it finishes loading. Once the connection is complete, the pop-up will display this message:

You can now close out this pop-up window. If you refresh the "Payment Processor" tab of the provider's dashboard, you will now see a message that says "Connected with Stripe". You are now ready to receive direct deposits from the business!