The purpose of this article is to help you learn how to:
Create a Stripe account
Flush out any test data
Connect Stripe as your payment processor
Connect multiple Stripe accounts per location
Creating a Stripe account
If you do not have one already, begin by signing up for an account with Stripe.
Click here to visit Stripe's registration page and create your account.
For questions about how to set up your Stripe account, visit Stripe's Support Center to see guides or learn how to get ahold of a support representative.
Click here to learn more about Stripe's fees and pricing.
Flush your test data
Next, if you haven't done so already, you will need to flush the test data out of the system. Every new BookingKoala account includes a few fake customers, providers, and bookings to better help you understand the system and test your settings. It is important to flush the test data before incorporating your payment processor, as any existing bookings with payment options may affect the accuracy of your revenue and earnings reports.
Click here to learn how to purge the test data from your account.
Finding your API keys and tokens
You will connect your account by entering two special keys from your Stripe account into your BookingKoala settings.
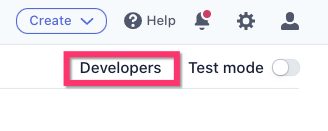
To locate your keys, log in to your Stripe dashboard and click on the Developers button in the top right corner.
Next, click on API keys from the Developers menu on the left. If you are ready to start collecting real customer payments, you will want to make sure it says "Viewing live API keys" at the top of the screen.
If it shows you are viewing your test API keys instead, click the "View test data" button to turn it off. You are also welcome to connect test keys if you are not ready to start collecting real payments just yet. Click here to learn more about why test mode exists and how to use it.
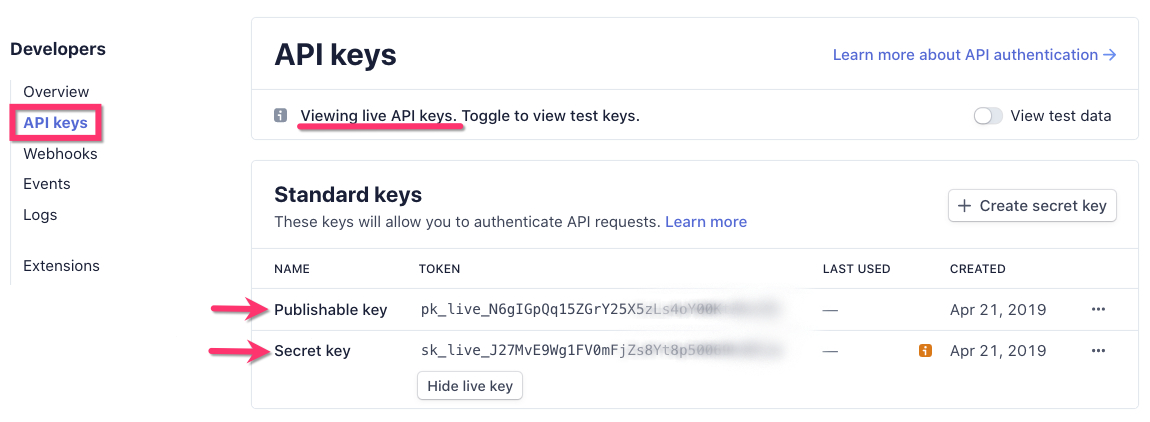
The two keys we use to connect your account are located in the Standard Keys section.
The publishable key always begins with "pk_live_" and proceeds with a long string of numbers and letters.
The secret key always begins with "sk_live_", followed by numbers and letters.
For security purposes, the secret key will be partially obscured or hidden from the API keys section. Look for a "Review Live Key" button and click it to copy the entire code.
If part of the secret key includes "..." and appears to have fewer characters than the publishable key, the full code is not displayed.
If you are unable to reveal the entire secret key, use the white "Create Secret Key" button to generate a new secret key. Be sure to copy the entire secret key code BEFORE you exit the screen displaying the new code.
For more questions regarding Stripe API keys and tokens, please see Stripe's API keys guide.
Connecting the Stripe Account to BookingKoala
After locating your API keys, open your BookingKoala in a separate window and go to:
Settings > General > Store Options > Admin
Scroll down to the Connect Payment Gateways section at the bottom of the page. Next to the option "Enable or disable your payment processor", click the red "Disabled" button. A pop-up window will appear, click Yes to continue.
Next, click on the Stripe tab from the side panel.
Here, you will paste your publishable key into the Publish Key box, and the secret key into the Secret Key box.
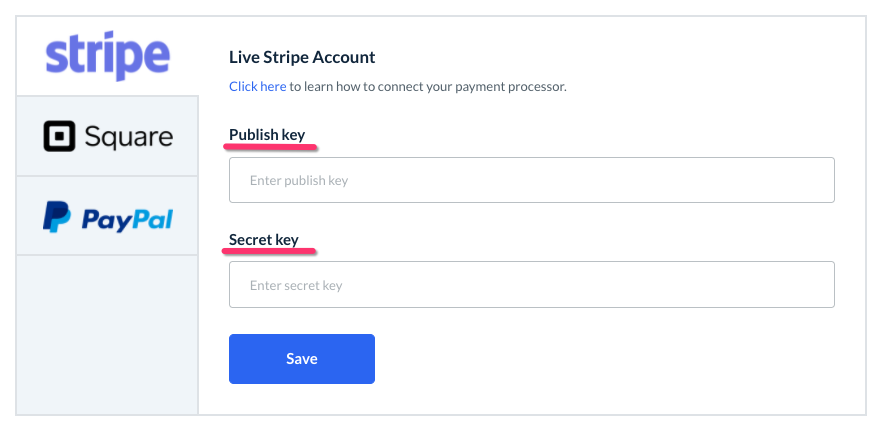
Click the blue Save button to connect the account. A green system alert will appear at the top right section of the page letting you know your Stripe integration has been saved successfully.
Optional: Using separate Stripe accounts for each location
If your store uses locations, you will need to make sure your payment processor is linked to your location(s).
If you have not set up your locations yet, please check out the article Setting Up Locations for Every Form.
To edit your locations, go to:
Settings > Industries > [Industry Name] > Form [#] > Locations

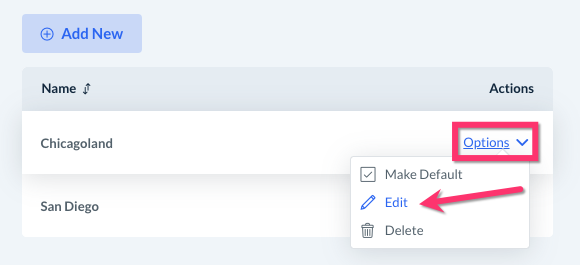
Next, select the Options menu next to your location and click Edit.
Click the blue Next button on the bottom of the first page to proceed to the second page where it says Setup Stripe account.
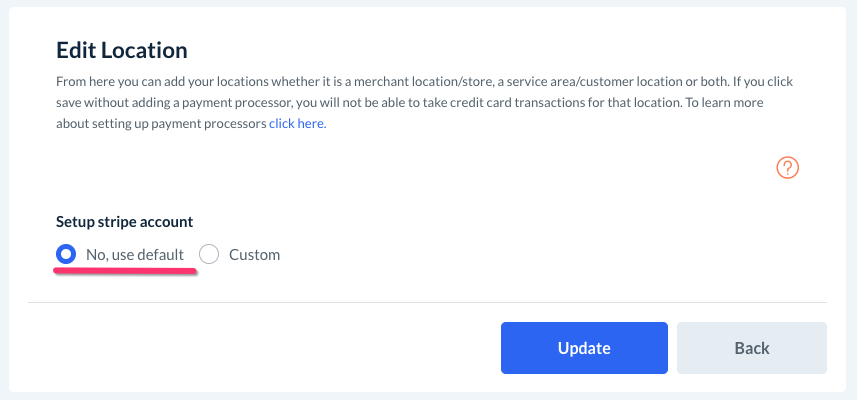
If you have one Stripe account that you will use for all of your payment processing, make sure "No, Use Default" has been selected. Anyone who books within this location will have their card information stored inside the stripe account you just connected in the Store Options settings.
Some businesses operate with multiple Stripe accounts using one for each location. Using a different Stripe account for each location can be helpful for tax purposes or more in-depth income tracking.
For example, let's say you have a location in Chicago and another in San Diego. If a client books for the San Diego location, their cards will be stored in the San Diego Stripe only. If the same customer creates a new booking in Chicago, the card will be saved into the Chicago Stripe account separately.
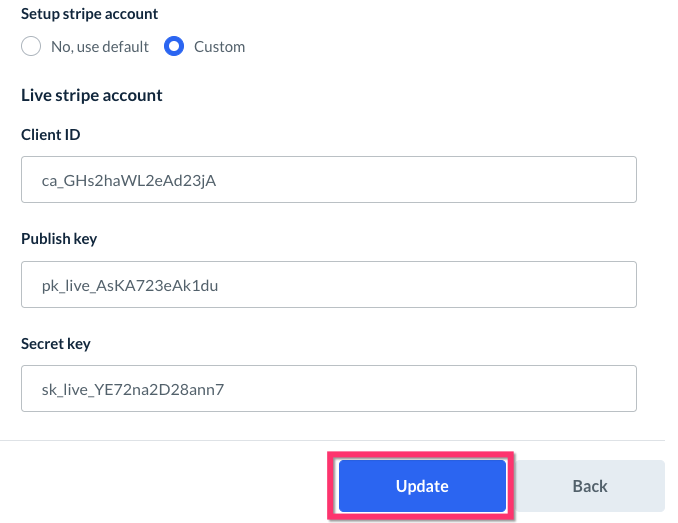
If you have multiple stripe accounts, you can select the "Custom" option to set up which location is associated with each account.
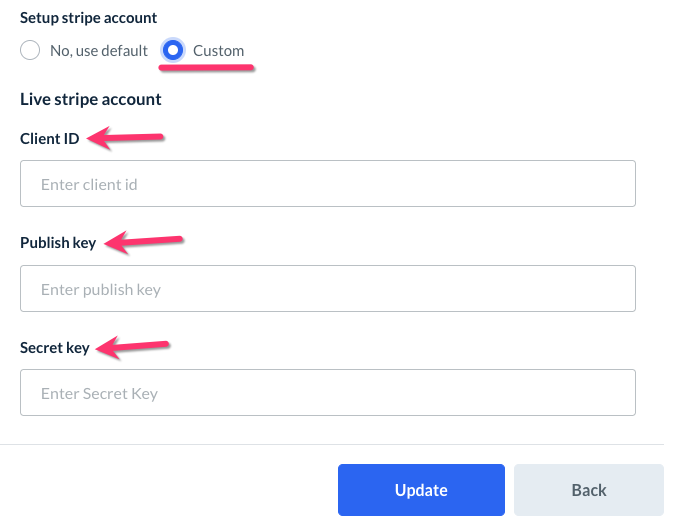
To connect a different Stripe account, you will again need to use the Publish/able key and the Secret key as found in the API Keys tab under the Developers section in your dashboard. In addition to that, you will also enter the client ID.
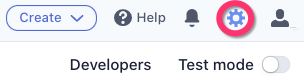
To locate the client ID, click on the Settings wheel icon on the top right side of your Stripe Dashboard.
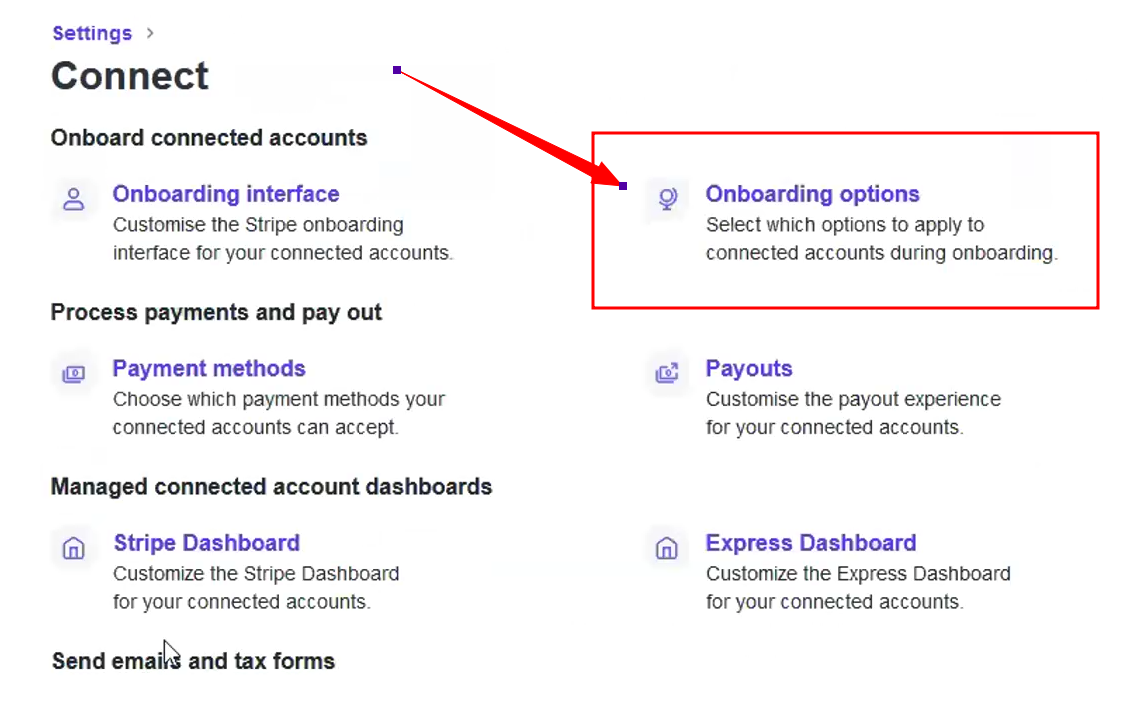
Under the Product settings section, click on the Connect box.

Click "Onboarding Options."
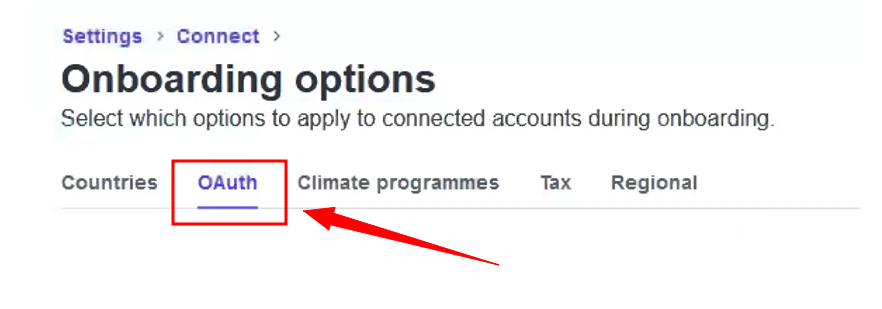
Click the " OAuth" tab.
This will bring you to the section where you can copy the "Live mode client ID". Please ensure that the OAuth settings are enabled.
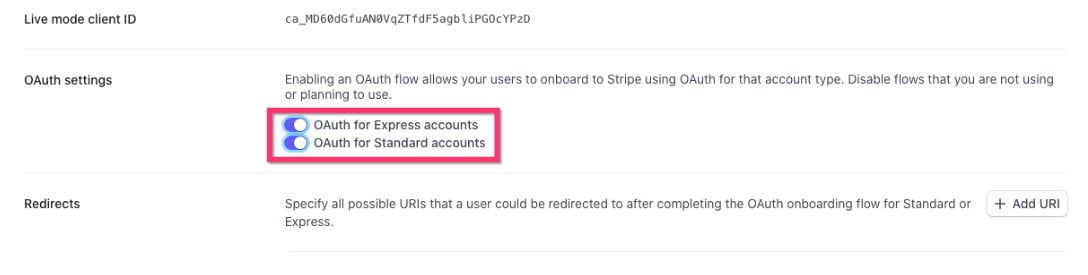
Check to ensure you are viewing the live client ID, as opposed to the test data. If you are connecting a test account, click the toggle to View Test Data instead.

The client ID will always begin with "ca_" and then a long string of letters and numbers.
Paste the ID and keys into the correct boxes, then click the blue Update button. This location will now have a custom Stripe account linked.
Once your Stripe account(s) are set up for your locations, you will be able to collect credit and debit cards from customers. Each time a user is charged, the amount will be deposited into your Stripe account. From there, you can decide how you want your funds deposited.
For instructions on how to link your bank account(s) and set up payouts, please click here.
Please make sure your Stripe account is confirmed and activated to avoid future errors. Follow the information in your Stripe account or contact Stripe Support to make sure your Stripe account is live and ready to go.
Are you ready to start sending payments to providers?
Click here to visit the guide on how to set up Stripe Connect and connect your provider's accounts for payouts and deposits.
Once you have integrated Stripe Connect with your booking Koala, click here to learn how you can create and/or connect provider Stripe accounts to receive payouts from your account.
If you would like your providers to be able to set up and connect their own Stripe accounts, click here.