The purpose of this article is to help you learn how to:
Create an SMS campaign
Send out a campaign SMS
What are manual campaigns?
Manual campaigns are single-sequence comaigns that can be sent out immediately or scheduled for an upcoming date and time. You can create manual campaigns for both email and SMS.
Manual campaigns can be used in many different ways. For example, you can send a coupon to all of your one-time clients by creating a campaign for this audience.
To get started, you will first need to have collected emails and/or phone numbers inside an audience list. For more information on how to set up audiences, click here.
Connect Your Twilio Account
To create and send out SMS campaigns, you will first need to connect your Twilio account to the Campaign Module.
If you do not have a Twilio account yet, click here to learn how to set one up.
To begin, you will need to access the Campaign Module. From the left-side menu, click on:
Marketing > Campaigns
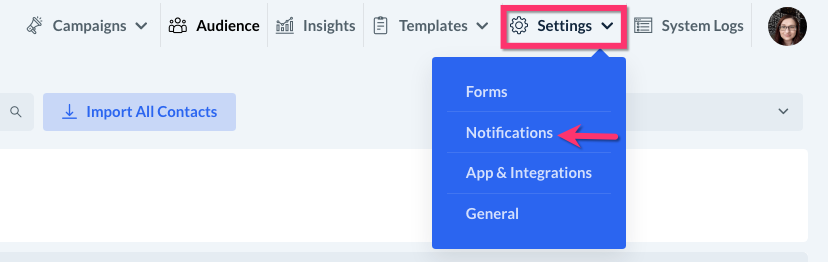
Next, select the "Settings" tab at the top right corner of the page and click on "Notifications".
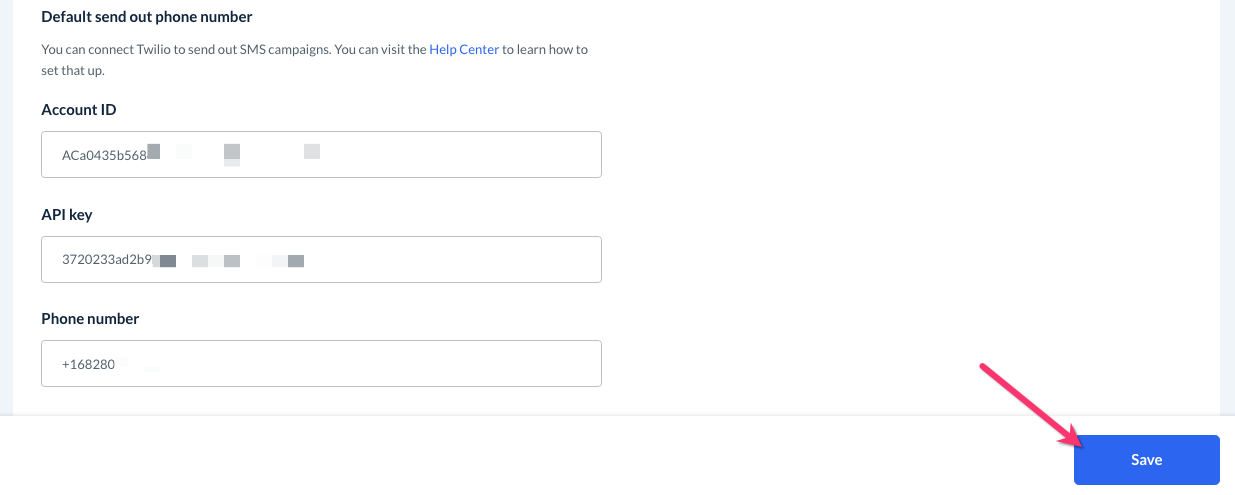
Scroll down to the bottom of this page until you see the "Default send out phone number" section.
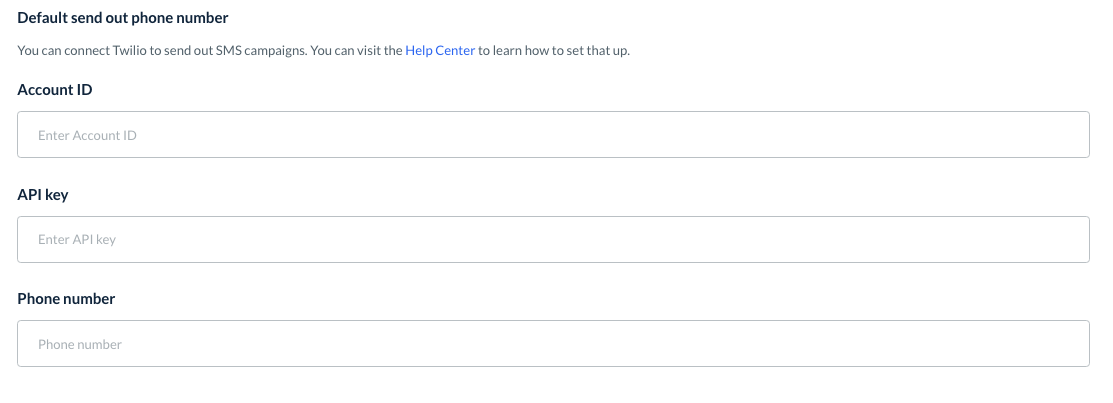
You will need to enter your Account ID, API Key (auth code), and Phone Number into the corresponding boxes.
If you've previously connected your Twilio account to send out system notifications, you can easily copy and paste these codes directly into this section. You can view your Twilio integration keys by going to the main admin dashboard and clicking:
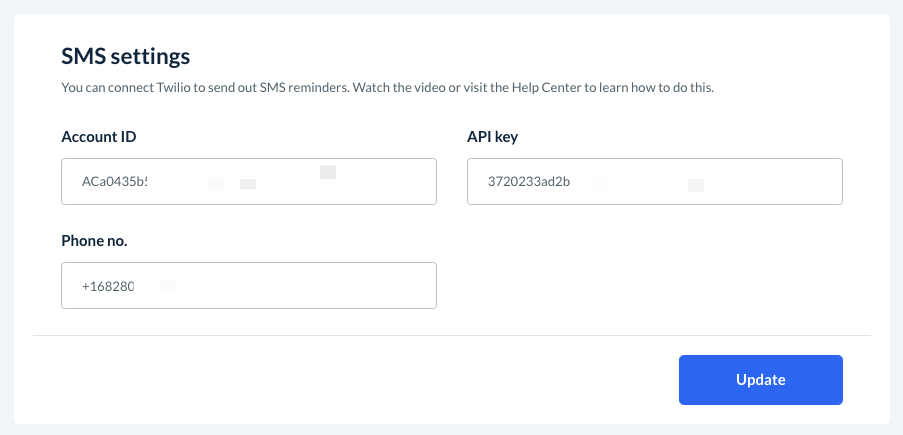
Settings > Notifications > General
Scroll down to the bottom of the page and copy each code from the "SMS Settings" section.
If you have not integrated Twilio with BookingKoala yet, you can find these keys by visiting your Twilio dashboard. Once you are on your dashboard, scroll down to the bottom of the page and locate the "Account Info" section.
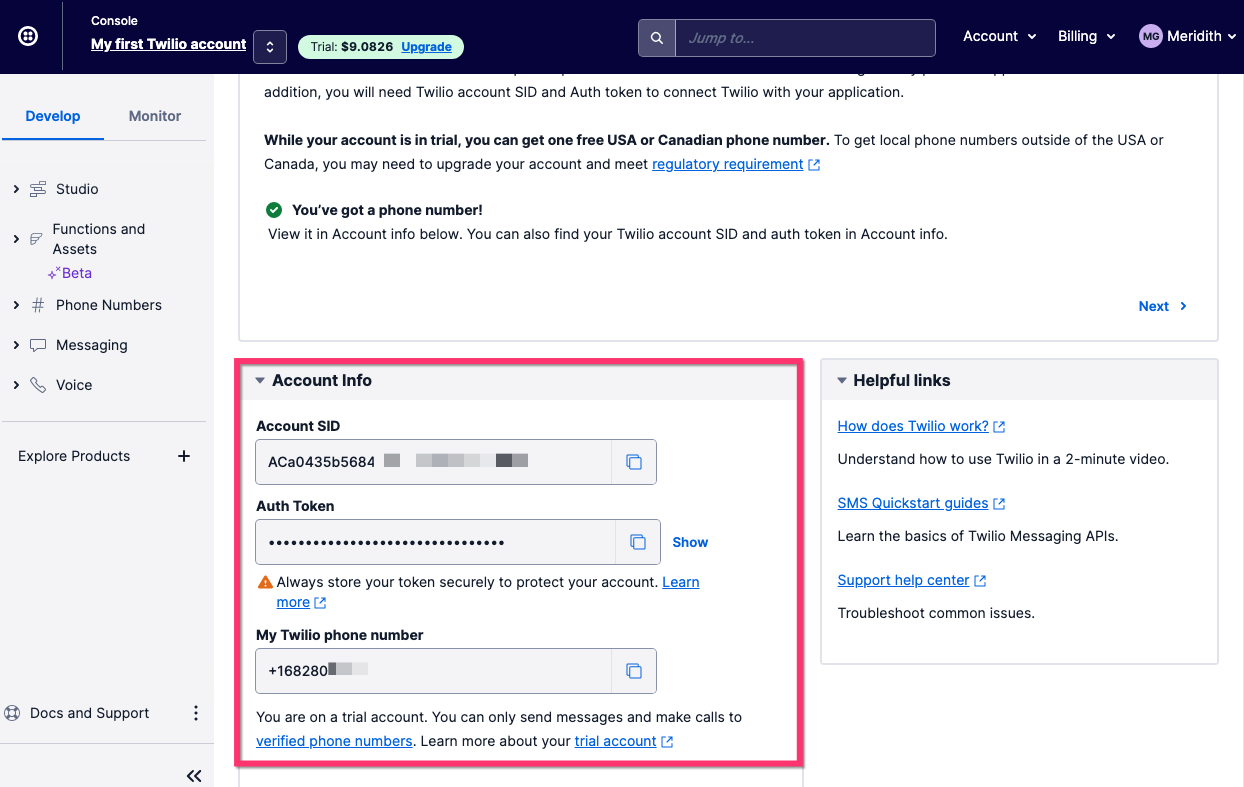
All of the information you need is located in this section. Copy and paste each code in to the corresponding boxes in the Campaign Module.
The "Account SID" in Twilio goes into the "Account ID" box in BookingKoala.
To copy your "Auth Token", you will need to click the "Show" link to the right of the box. The "Auth Token" goes into the "API Key" box in BookingKoala.
Make sure "My Twilio phone number" from Twilio is entered exactly as pictured into the "Phone Number" box in BookingKoala.
For example, "+15672299756" is correct.
"15672299756" is incorrect.
"5672299756" is incorrect.
"+1(567)2299756" is incorrect.
"+1-567-229-9756"is incorrect.
Finally, click the blue "Save" button at the bottom right corner of the screen.
A green system alert will appear in the top right corner, letting you know that your account has been connected successfully. From here, you are ready to begin building SMS campaigns.
Create a Manual SMS Campaign
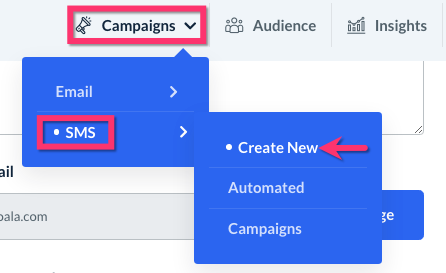
To begin building a manual SMS campaign, click on the "Campaigns" drop-down menu at the top of the Campaign Module page and select "SMS", then "Create New".
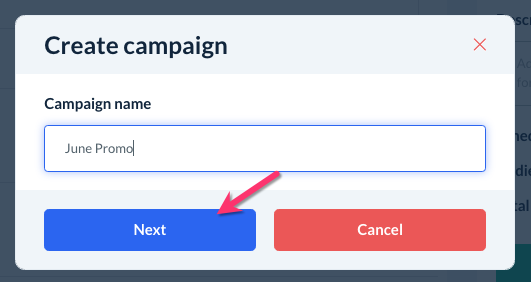
Enter the name of your campaign in the pop-up, then click "Next" to continue.
You will be redirected to the campaign creation page. The topmost sections are used to set up who you are sending the campaign to and who it is coming from.
To and From
In the "To", select one or more audiences who you would like to receive the campaign. Select an audience from the drop-down list, and then click anywhere inside the box to add additional audiences.
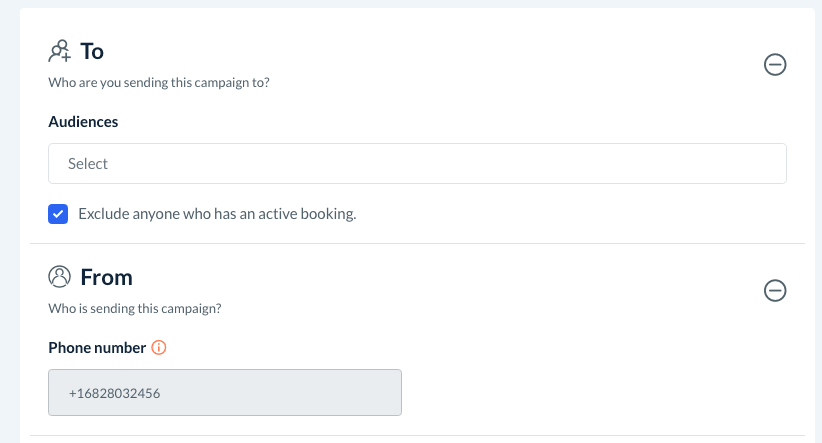
Below, you can check the box next to "Exclude anyone who has an active booking" if you only want the campaign to be sent to users with no active services. This is a helpful option if you are trying to get customers to book your services again.
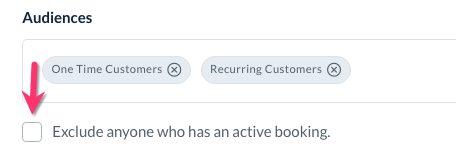
If you want to contact both customers with and without active bookings, please leave the box unchecked.
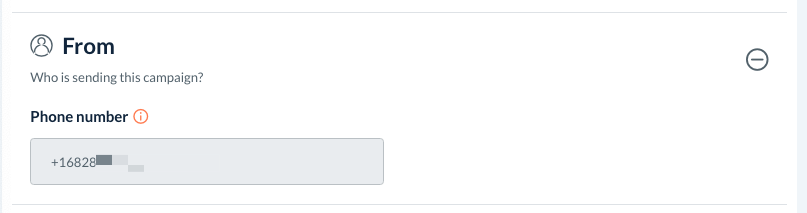
The "From" section will display your Twilio phone number. This is specifically the Twilio number you set up in the Campaign Module settings page from earlier in the article.
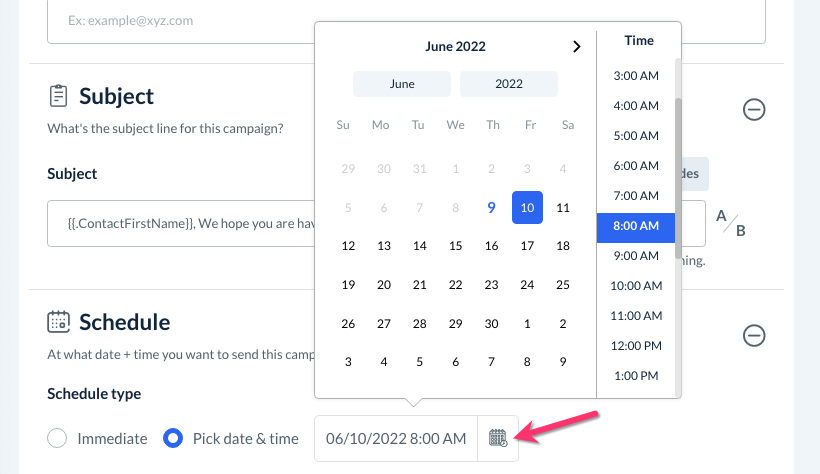
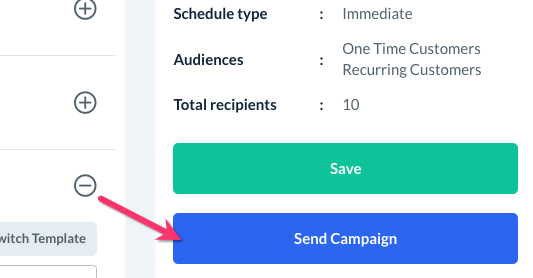
Schedule
Next, set a schedule for when the campaign will be sent out.
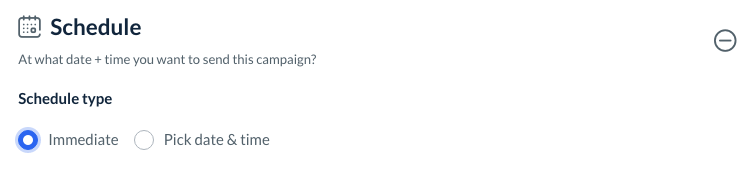
If you select "Immediate" the campaign will be sent out as soon as you click the blue "Send Campaign" button on the right sidebar.
If you select "Pick Date & Time", use the calendar box to select the date and time the campaign will be sent by the system.
Message
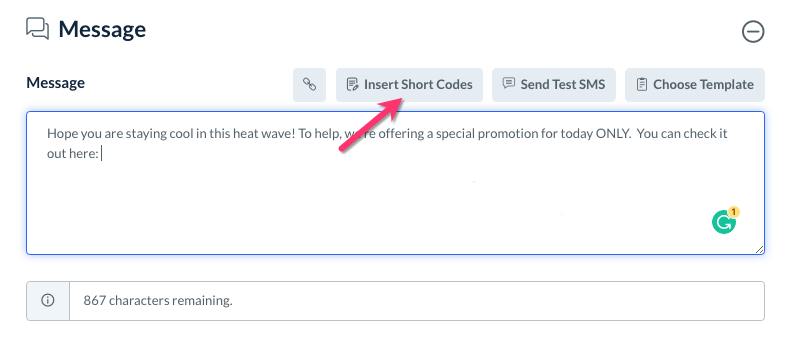
Next, create your campaign's content by entering text into the "Message" box.
Click on the link icon to add a link to the message.
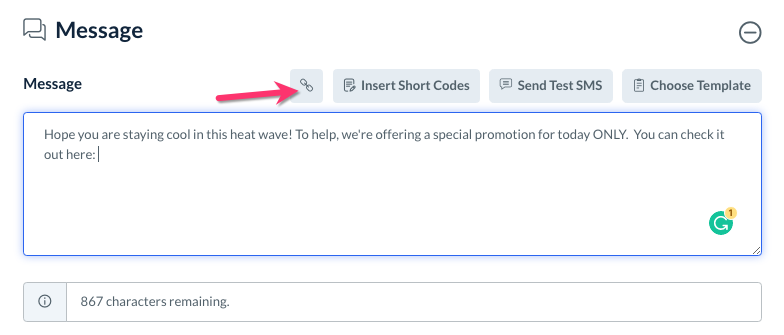
Click the "Insert Short Codes" button to add a shortcode to the template.
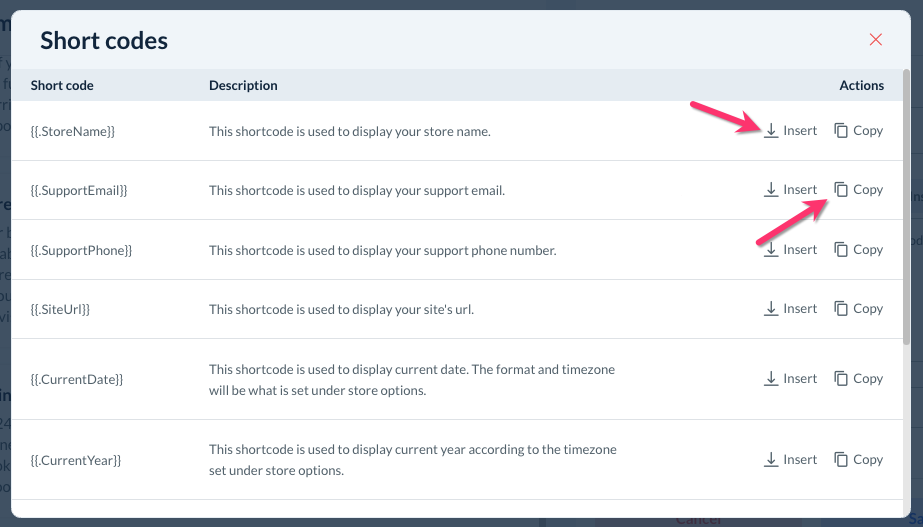
Click "Insert" or "Copy" to use the shortcode in your message.
The shortcodes available for use in the SMS templates are:{{.StoreName}} - Displays your store name.
{{.SupportEmail}} - Displays your support email.
{{.SupportPhone}} - Displays your support phone number (as set under the General Store Options).
{{.SiteUrl}} - Displays your site's url.
{{.CurrentDate}} - Displays the current date (the format and timezone will be set according to your General Store Options).
{{.CurrentYear}} - Displays the current year (the timezone will be set according to your General Store Options).
{{.ContactFirstName}} - Displays the contact's first name.
{{.ContactLastName}} - Displays the contact's last name.
{{.ContactFullName}} - Displays the contact's full name.
{{.ContactEmailId}} - Displays the contact's email address.
{{.ContactPhone}} - Displays the contact's phone number.
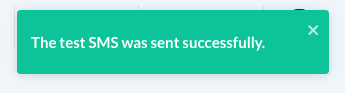
Click the "Send Test SMS" button to send out a preview of the SMS to any phone number. Enter a phone number into the box in the pop-up.
Click the blue "Send" button to send out the SMS. A green system notification will appear in the top right corner of the page, letting you know the SMS has been sent successfully.
Any shortcodes used in the template will be populated with "dummy" data to show you what the message will look like when a lead or client receives it.
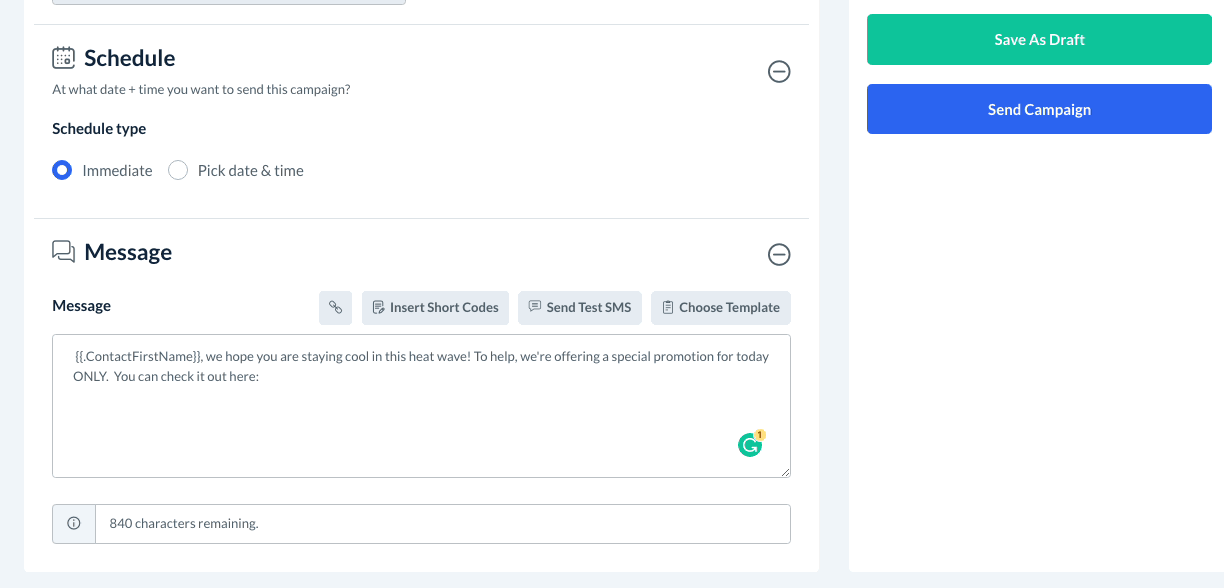
Click the "Choose Template" button to add a custom or pre-built template to the message box. A menu will appear on the right side of the page with two tabs, "Custom" and "Basic".
Click on "Custom" to view any SMS templates you have saved.
Click here to learn more about how to make SMS templates in the Campaign Module.
Click on "Basic" to view a list of pre-built SMS templates.
Select the template you would like to insert and click on the light blue "Save & Close" button. The template will be inserted into the message box.

Save and Activate Your Campaign
Once you have finished constructing your campaign, you save it as a draft or send it right away.
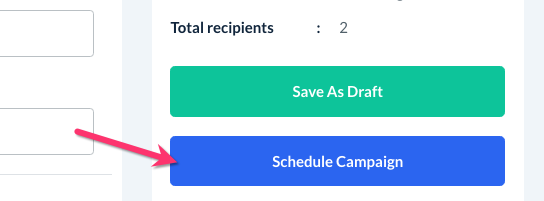
To save the campaign as a draft, click the green "Save As Draft" button in the right side menu.
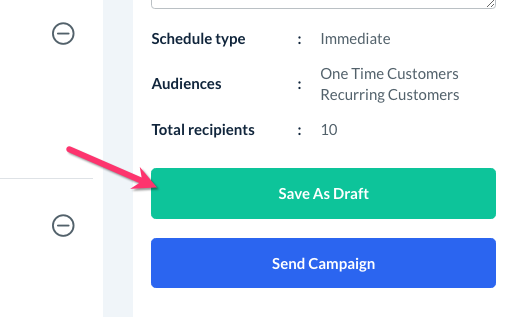
You will be directed back to the SMS Campaigns page where you can view a summary of its basic information.
To send out the campaign, click the blue "Send Campaign" button just below the "Save" button.
If you have selected "Immediate" for your schedule type, a pop-up will appear reminding you that the campaign will be emailed out as soon as you click the blue "Yes" button.
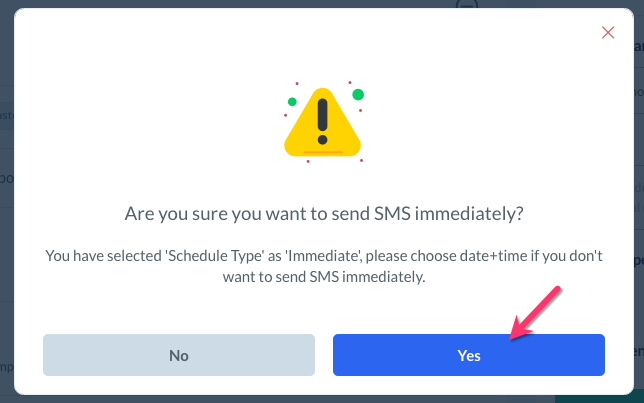
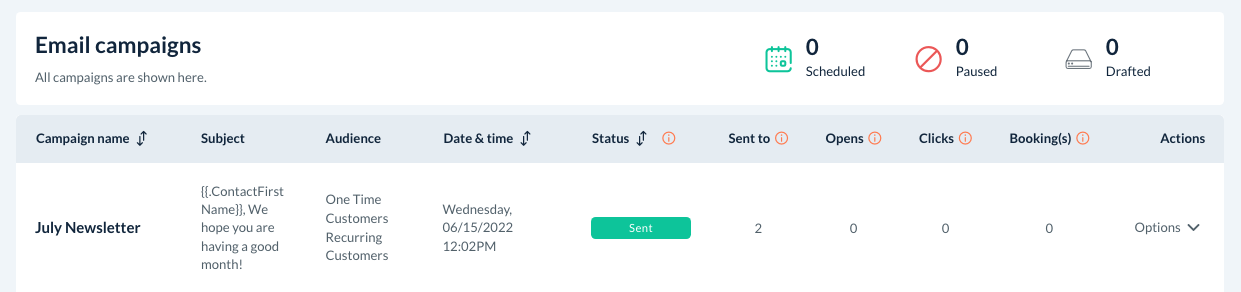
Once you click "Yes", you will be redirected back to the main "Email Campaigns" dashboard. The status of the campaign may say "Processing" if the system is still in the process of sending the campaign to your audience members.
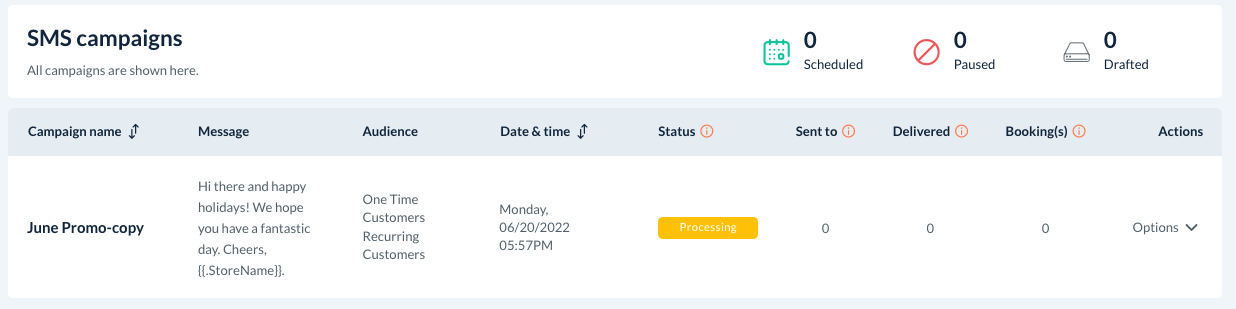
You can refresh the page until you see the status switch to "Sent". At this point, you have successfully sent out the email campaign!