The purpose of this article is to help you learn how to:
Create an email campaign
Send out a campaign email
What are manual campaigns?
Manual campaigns are single-sequence comaigns that can be sent out immediately or scheduled for an upcoming date and time. You can create manual campaigns for both email and SMS.
Manual campaigns can be used in many different ways. For example, you can send a coupon to all of your one-time clients by creating a campaign for this audience.
To get started, you will first need to have collected emails and/or phone numbers inside an audience list. For more information on how to set up audiences, click here.
Create a Manual Email Campaign
To begin, you will need to access the Campaign Module. From the left-side menu, click on:
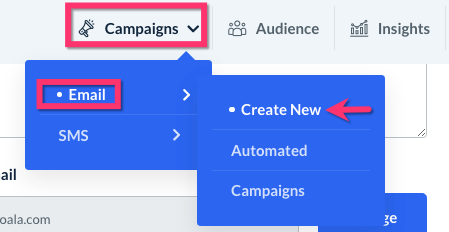
Marketing > Campaigns
Click on the "Campaigns" drop-down menu at the top of the page and select "Email", then "Create New".
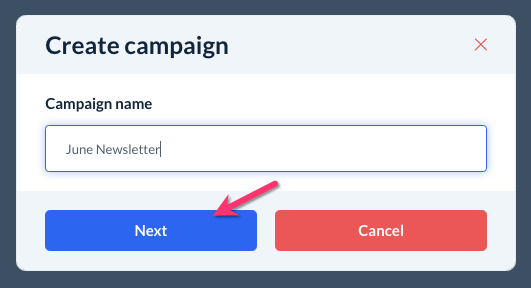
Enter the name of your campaign in the pop-up, then click "Next" to continue.
You will be redirected to the campaign creation page. The topmost sections are used to set up who you are sending the campaign to and who it is coming from.
To
In the "To", select one or more audiences who you would like to receive the campaign. Select an audience from the drop-down list, and then click anywhere inside the box to add additional audiences.
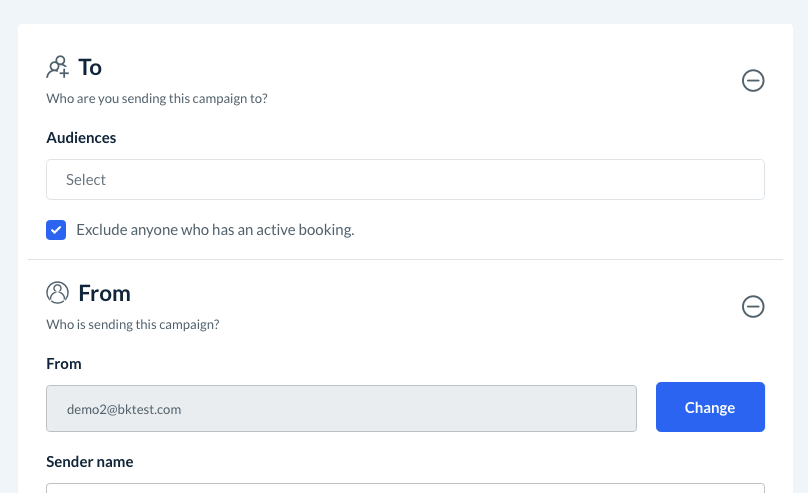
Below, you can check the box next to "Exclude anyone who has an active booking" if you only want the campaign to be sent to users with no active services. This is a helpful option if you are trying to get customers to book your services again.

If you want to contact both customers with and without active bookings, please leave the box unchecked.
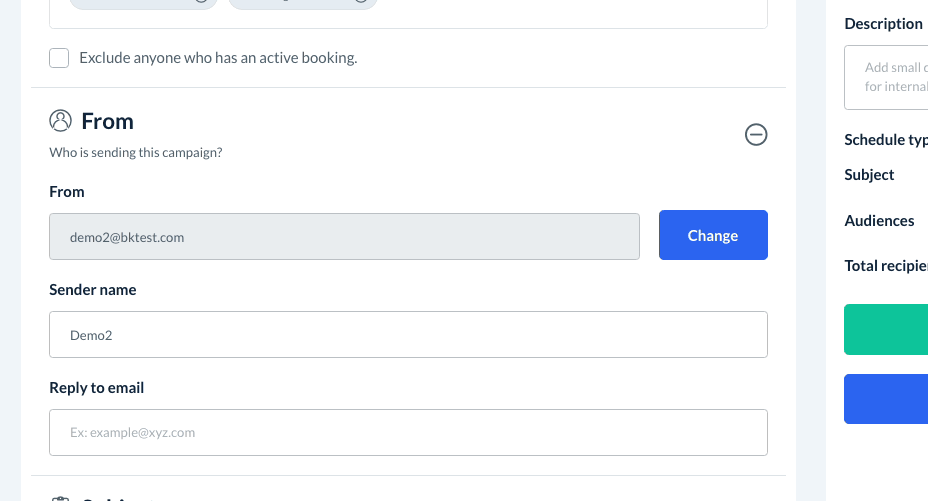
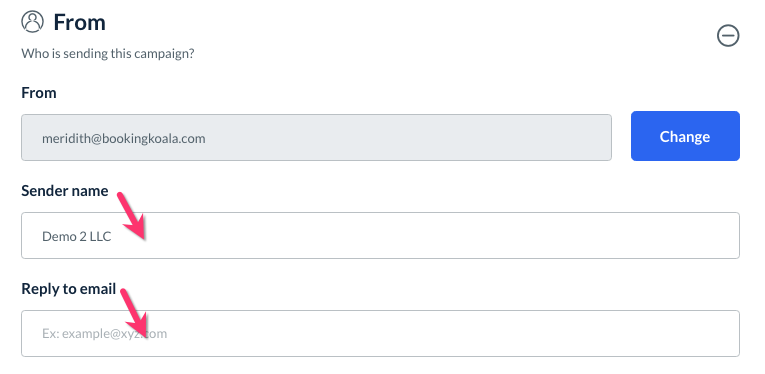
From
Next, set up the "From" section. The system will use your default "send out" email address from the Campaign Module's "Settings" section.
You can change the sender email by clicking the blue "Change" button to the right of the default email address.
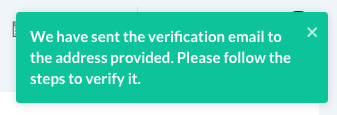
Enter the new email in the box below and click the blue "Update" button to proceed. You'll see a green system notification in the top-right corner letting you know that a verification email has been sent to this email address.
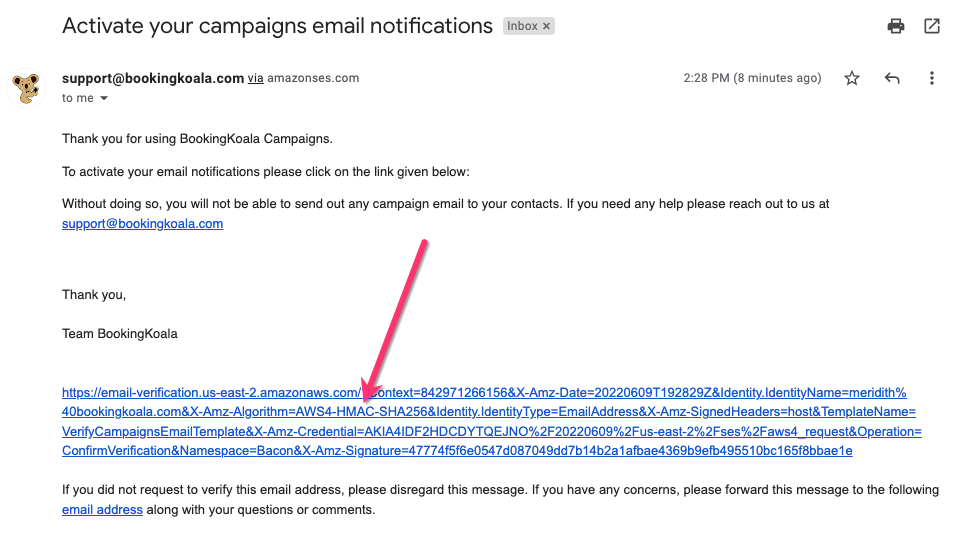
You must verify the email address before it can be used to send out your campaign. Open the inbox and look for a new email from Support with the subject "Activate your campaigns email notifications". If you do not see the email in your main inbox, please check your spam folder as well.
Inside the email body, click the link at the bottom of the message to complete the verification process.
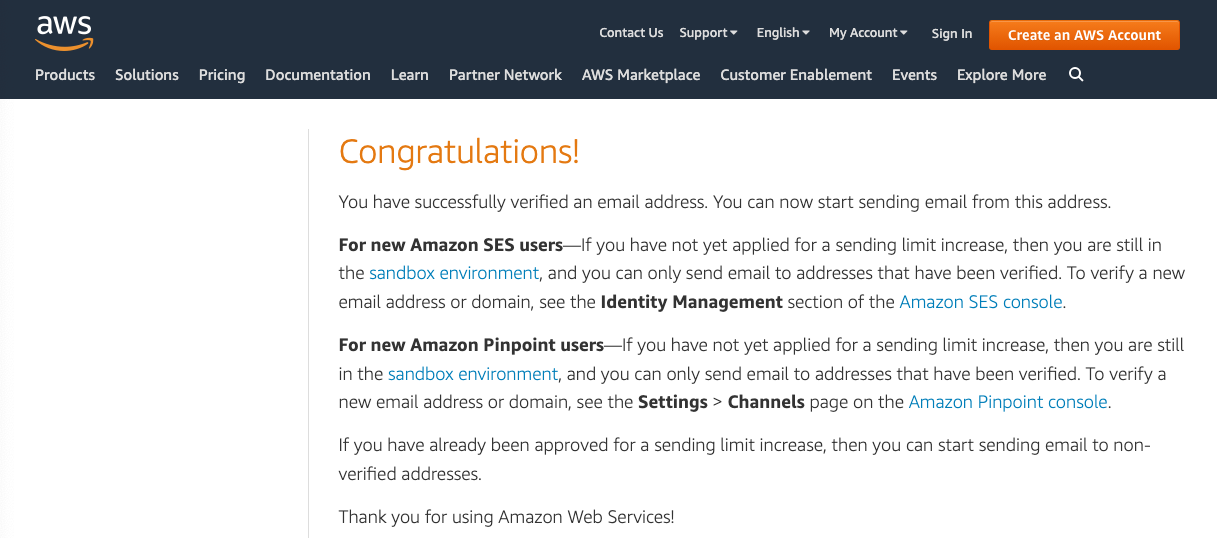
This will trigger a new tab to open in your internet browser with "Congratulations" at the top of the page. You have now verified the email and can continue setting up your campaign.
Once you are back on the campaign creation page, you can make changes to the sender name or provide a separate "reply to" email for responses to the campaign.
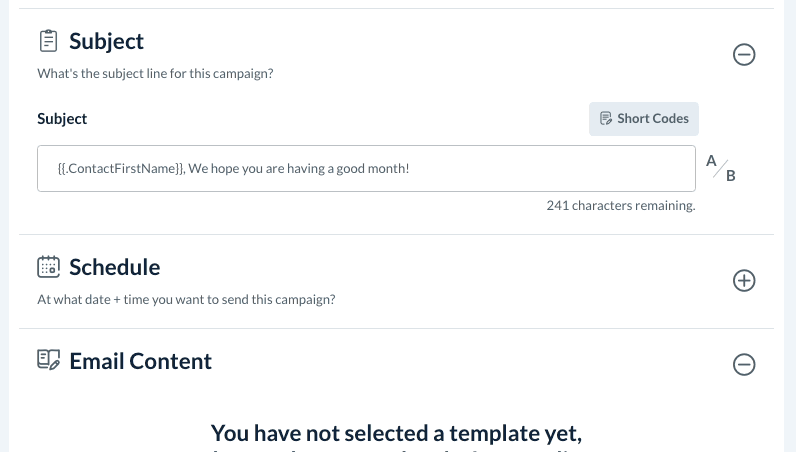
Subject
Next, enter the subject for this campaign. This will be the first thing customers will see when they received your email.
If you'd like, you can use shortcodes in the email subject to populate a field with custom information. You can insert any of these shortcodes by clicking the copy button and then pasting them into the subject line.
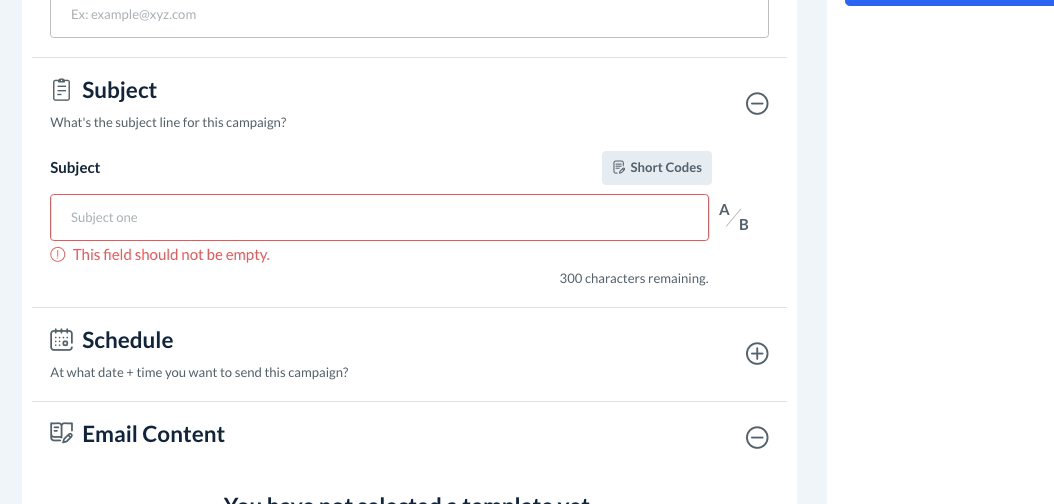
If you would like to test the success rate of two different subjects, click the "A/B" icon to the right of the subject box.
This feature will send subject A to 15% of your subscribers and subject B to a different 15% of subscribers (a combined total of 30%).
The system will observe the click rate for both subjects for 4 hours. Once this observation period has concluded, the remaining 70% of subscribers will receive the campaign with the more effective subject.
Please Note: You must have at least 10 subscribers in your audience list to use this function.
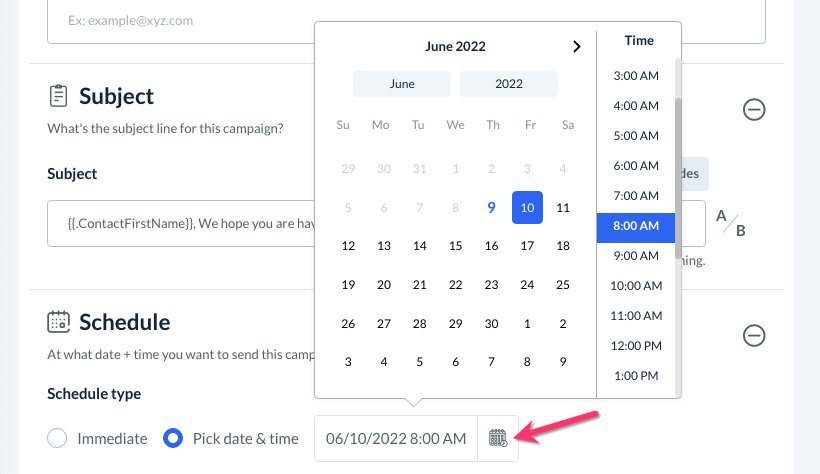
Schedule
Next, set a schedule for when the campaign will be sent out.
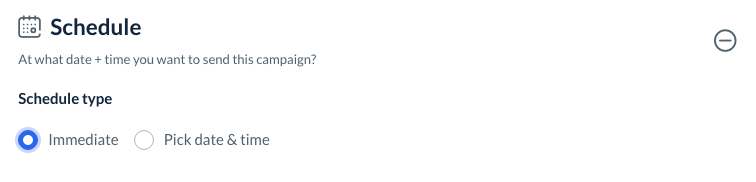
If you select "Immediate" the campaign will be sent out as soon as you click the blue "Send Campaign" button on the right sidebar.
If you select "Pick Date & Time", use the calendar box to select the date and time the campaign will be sent by the system.
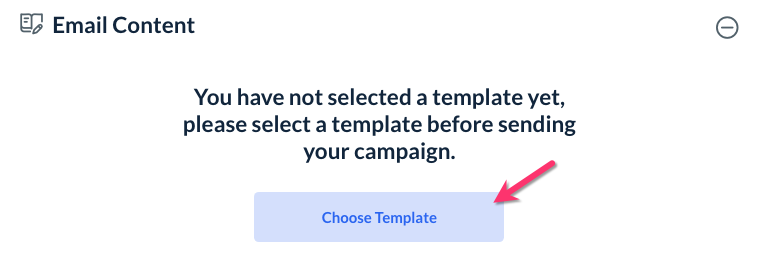
Email Content
The bottom section of the campaign generator is where you create and customize your email content. Click the blue "Choose Template" button to begin the process.
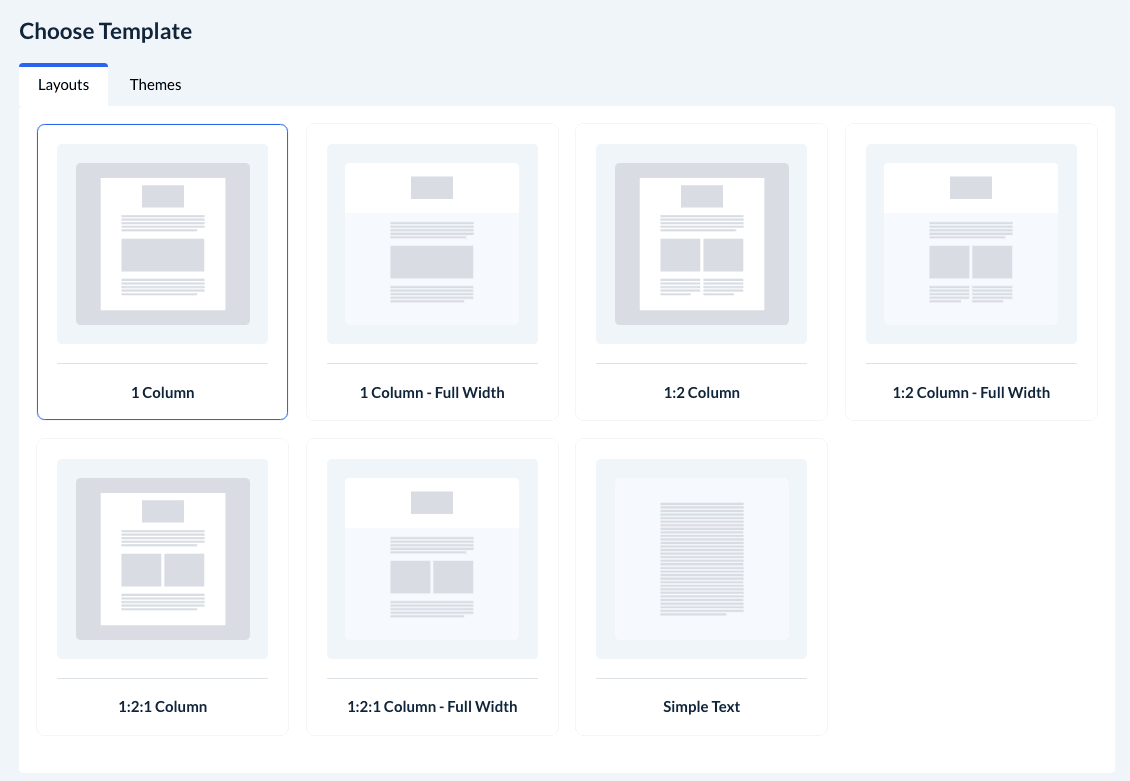
Layouts and Themes
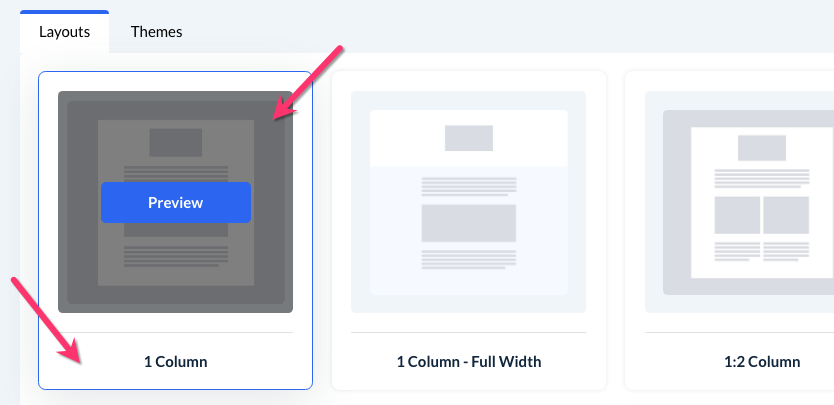
First, select a layout or theme from the provided options. There are 7 general layouts and 8 prebuilt themes to choose from.
Layouts have a basic structure differentiated by the number of columns, the width of email content, and the inclusion of spaces for media. The layout is filled with dummy text and images to serve as placeholders for your email.
Hover over each layout and click the blue "Preview" button to see the structure in greater detail. Use the desktop and mobile icons at the top right corner of the preview window to see how this layout looks for each type of device.
Themes are layouts that can be used immediately. These pre-built layouts already have images, text, and colors. Just like layouts, you can also edit themes to further customize the style of the email.
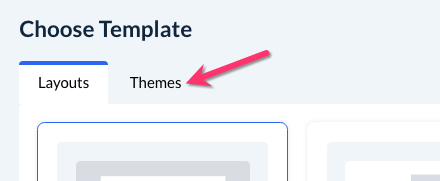
If you would like to view the pre-built themes, click the "Themes" tab at the top of the page.
Just like with layouts, you can hover your cursor over each theme and click the blue "Preview" button that appears. There are also desktop and mobile icons to see how the template will look on different device types.

To select a layout or theme, simply click anywhere except the "Preview" button to select it. Once you pick a template, you will be automatically directed to the "Drag and Drop Editor" to finish constructing the email.
If you ever navigate back to this step and would like to choose a different template, your original selection will have a blue box around it.
Blocks
Once you're inside the Drag and Drop Editor, you can finish constructing your campaign email.
Click/hover over on any section or "block" in the email body to view the action buttons.
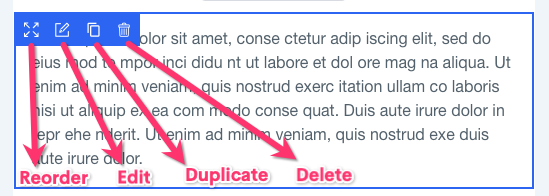
If you select the "Edit" icon, options to modify the block will appear in the right-side menu. Depending on the block, there may be additional tabs that control the content, style, or settings.
Once you are finished making any changes, be sure to click the blue "Save & Close" button at the bottom of the menu.
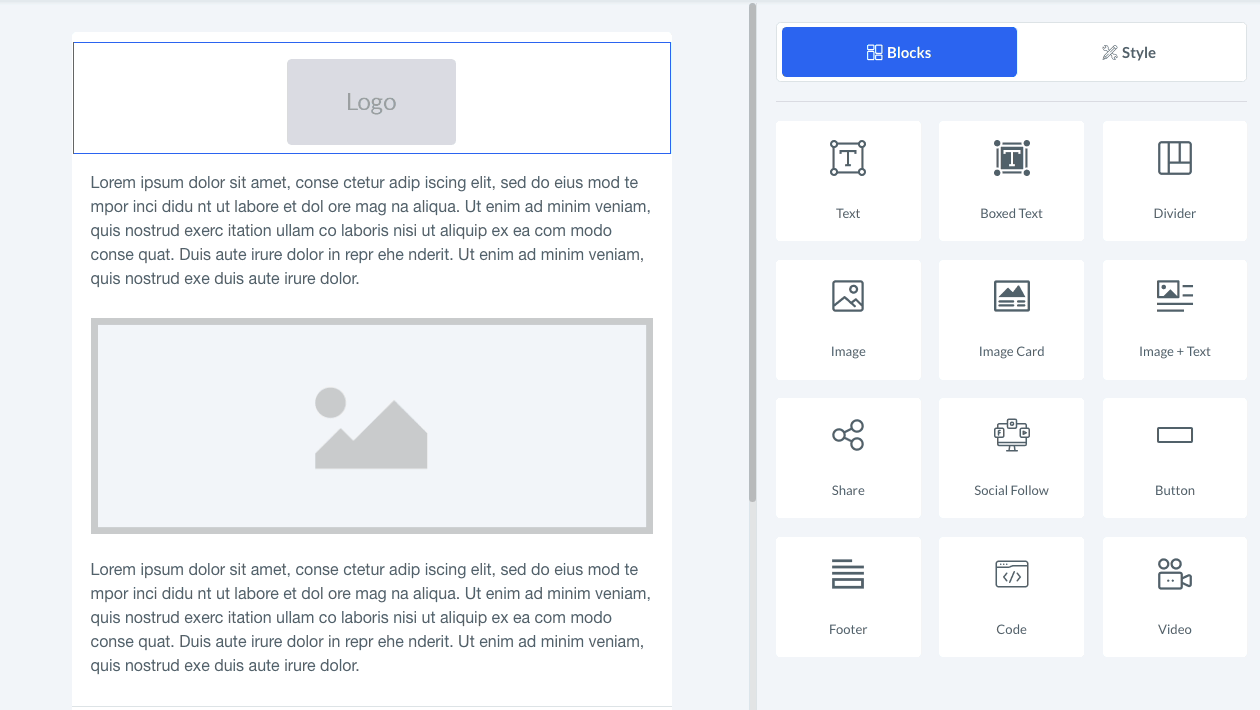
To add new blocks to your email, drag and drop any block from the right-side menu into the email.
There are 12 different blocks to pick from.
Text: Insert a section that contains plain text.
Boxed Text: Add a section of text with a high-contrast background color.

Dividers: Insert a line to separate blocks in your email.

Images: Add an image. The accepted formats are JPEG, PNG, or GIF. Each JPEG and PNG file can be up to 1 MB, and GIFs can be up to 3 MB.

Image Card: Insert an image that has a high-contrast background color and space for a caption.
Image + Text: Insert an image with space for a caption.
Share: Add icons that share a link when clicked.

Social Follow: Link your social media pages to icons.

Button: Add a button that directs the user to a website, email address, or phone number.

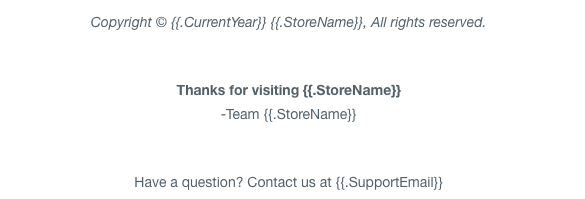
Footer: Add a customized footer at the bottom of the email.
Code: Insert custom HTML code into the email.


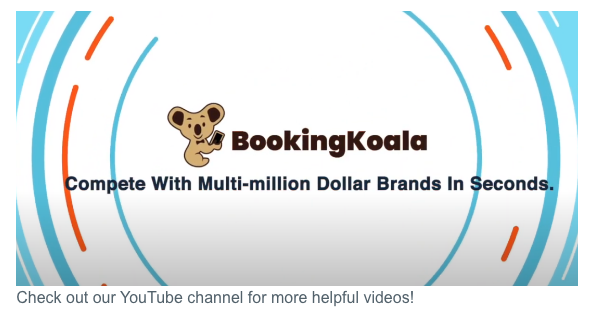
Video: Insert a video with a thumbnail and caption below it.
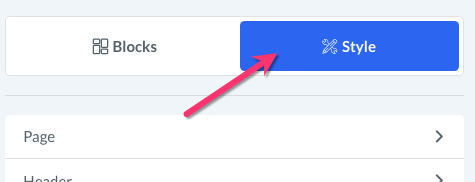
Style
Switch into the "Style" tab to control the font size, colors, and other aspects of the appearance of your campaign.
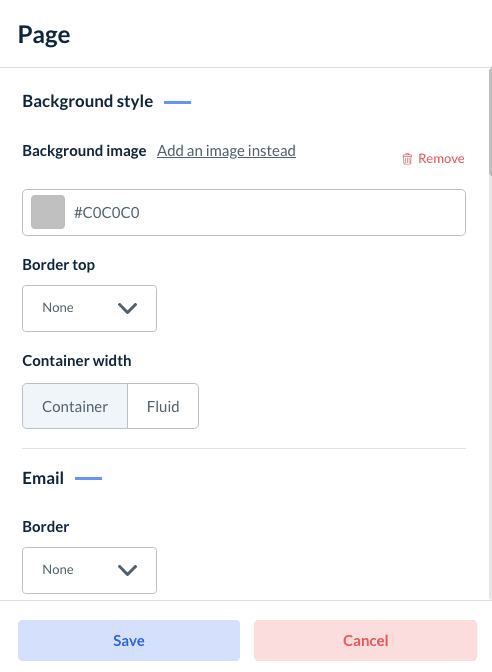
Under the "Style" tab, there are five different sections.
Click the "Page" section to format the background colors or images, adjust the appearance of the template structure, and format fonts for each heading style.
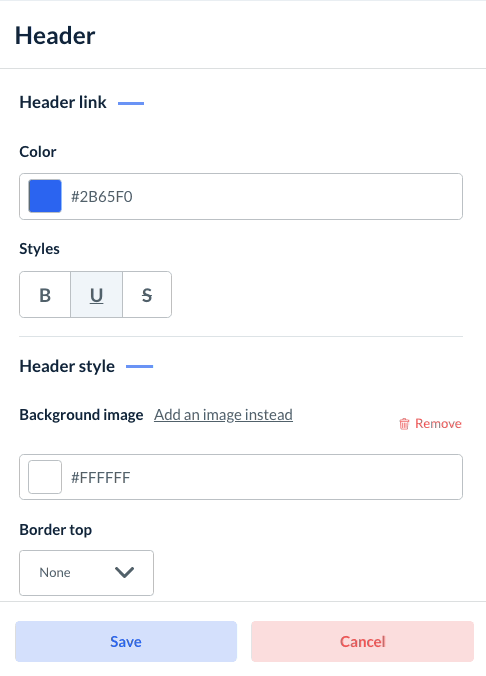
Click the "Header" section to format the link, style, padding, and text in the email's header.
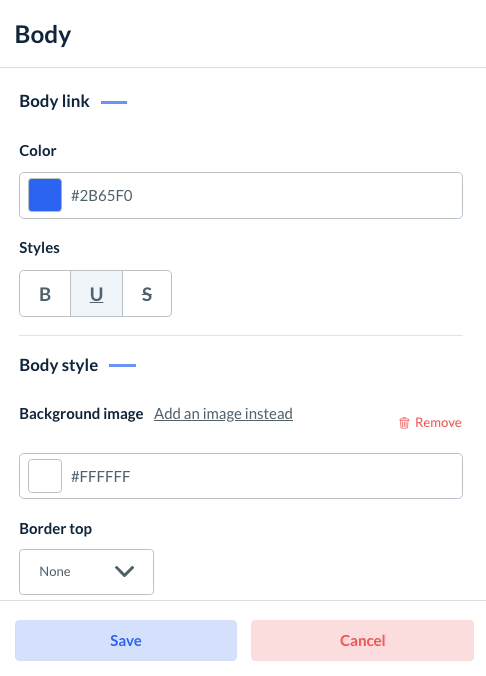
Click the "Body" section to format the link, style, padding, and text in the email's body.
Click the "Footer" section to format the link, style, padding, and text in the email's footer.

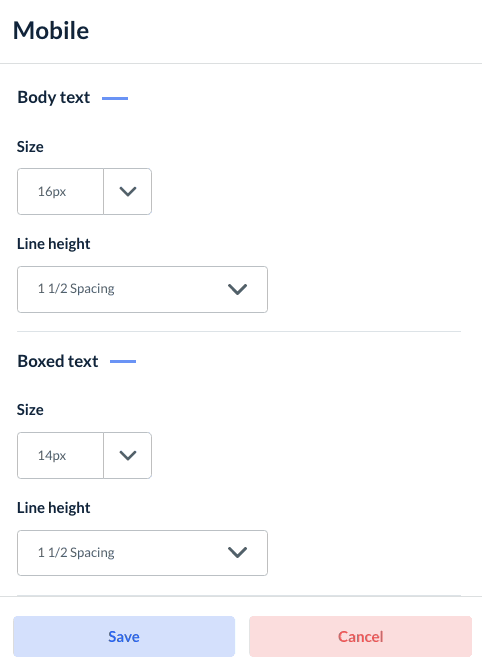
Click the "Mobile" section to configure the size and line height of text displayed on a mobile device.
Please make sure you have clicked the light blue "Save" button at the bottom of the sidebar if you have made any changes you would like to keep.
Export
If you would like to export your template, click the white "Export" button at the top right side of the page.
Choose "Export As HTML" to export the template as an HTML file. The file will begin to download automatically.
Choose "Export Template" if you'd like to export the template as a JSON file. The file will begin to download automatically.
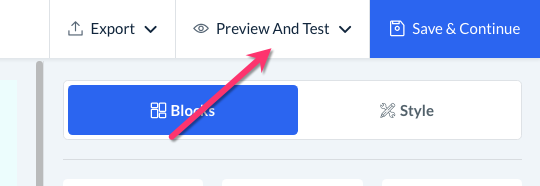
Preview and Test
Once you are finished formatting the email, you can click the white "Preview And Test" button at the top right corner of the page.
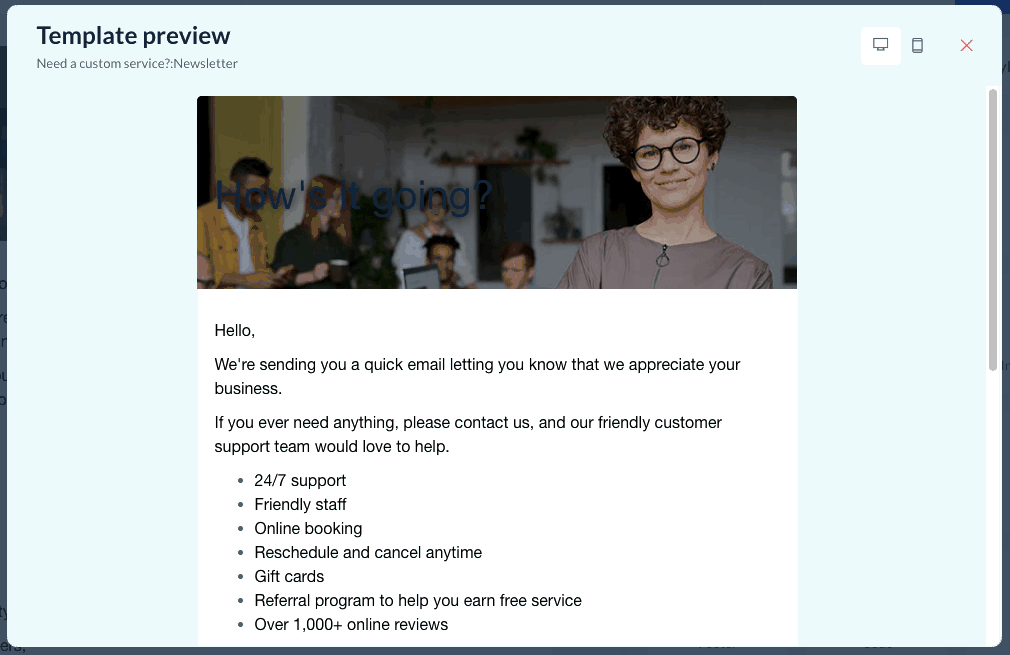
Select "Enter Preview Mode" to preview your email for desktop and mobile devices. Click the red X icon in the top right corner of the box to exit the preview pop-up.
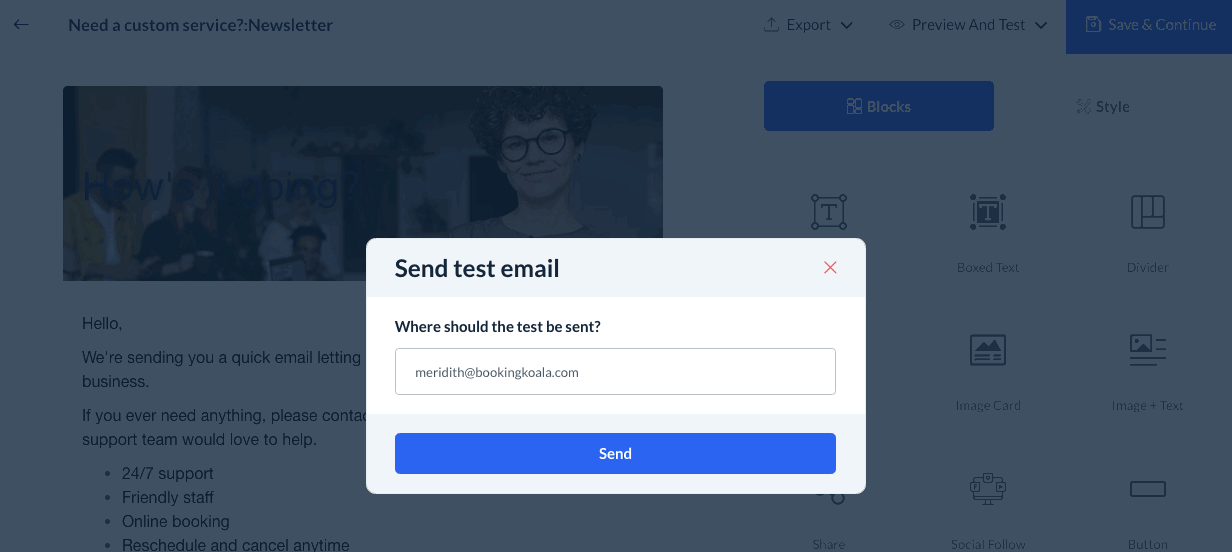
Select "Send Test Email" to email the template to yourself or another interested party. Enter the email address into the box and then click the blue "Send" button. If successful, you will see a green system alert in the top right corner letting you know the test email has been sent.
If you receive a red error message, the email address you entered has not been verified in the Campaign Module. Once you've saved your draft, go back to the campaign dashboard and select Settings > Notifications.
Scroll down to the "Default Send Out Email" and click the blue "Change" button.
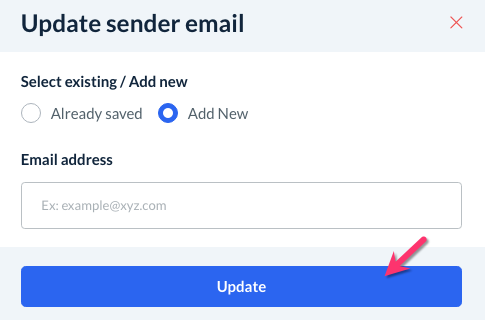
A pop-up window will appear. If you have verified other email addresses in your BookingKoala account, you can select "Already Saved" to switch to an existing sender email and click "Update".
If you need to add a new email address, select "Add New" and enter the email into the box below. Click the blue "Update" button to proceed.
A green system notification will appear in the top right corner letting you know a verification email has been sent to the new email address. Visit your inbox and complete the process by clicking the link in the email.
Click here for more detailed instructions on how to verify sender email addresses.

Save and Activate Your Campaign
Once you have finished building your campaign, you save it as a draft or send it right away.
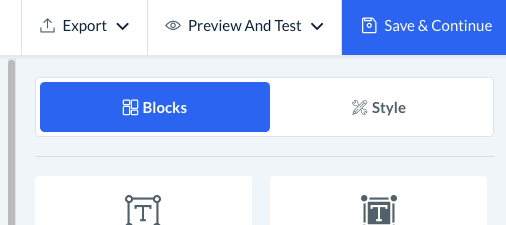
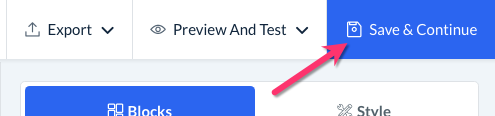
First, click the blue "Save & Continue" button in the top-right corner of the page.
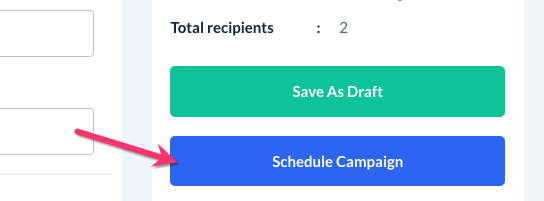
You will be directed back to the main campaign builder page. To save the campaign as a draft, click the green "Save" button in the right-side menu.
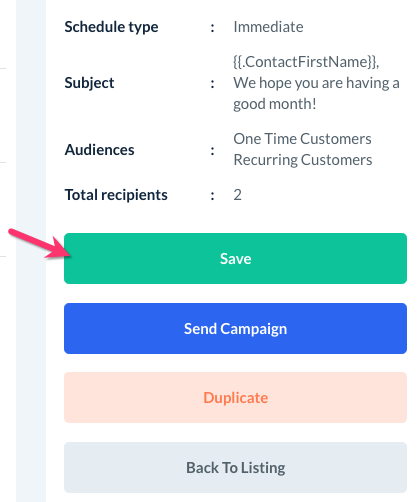
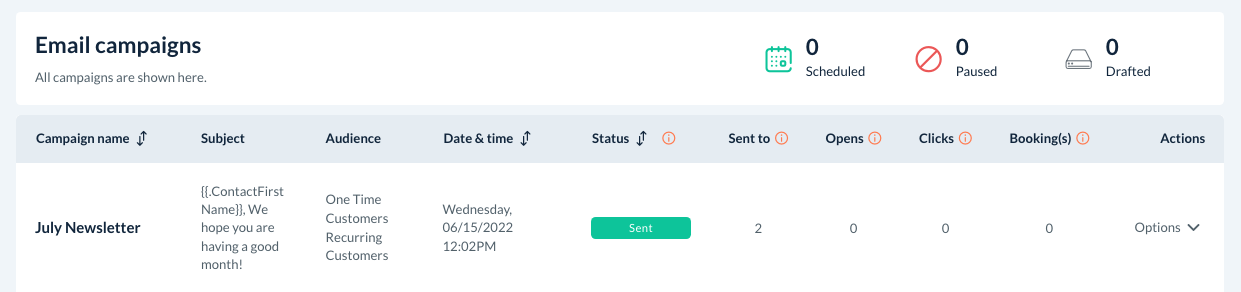
Once the campaign has been saved as a draft, you'll be directed back to the Email Campaigns section of the Campaign Module.
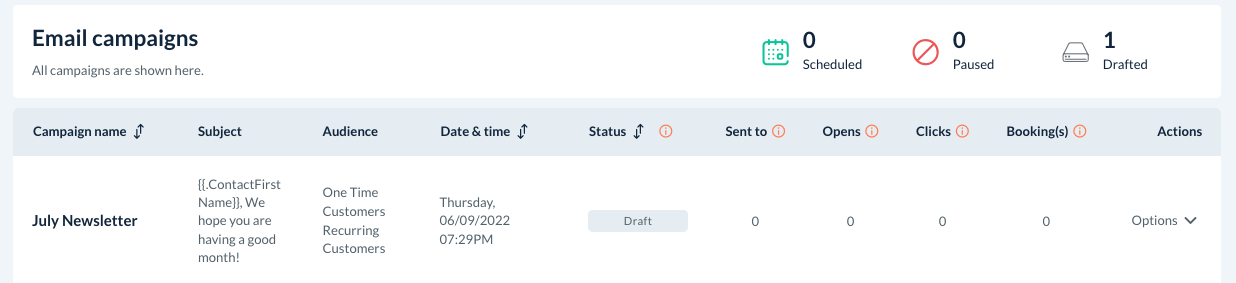
To make any further changes, or to send the email out, click "Options" on the right of the row and select "Edit".
To send out the campaign, click the blue "Send Campaign" button just below the "Save" button.
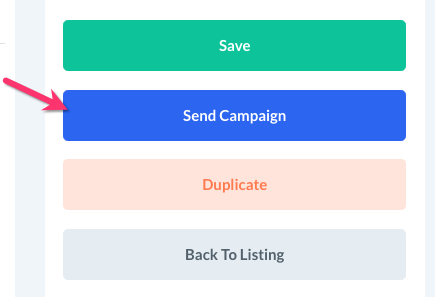
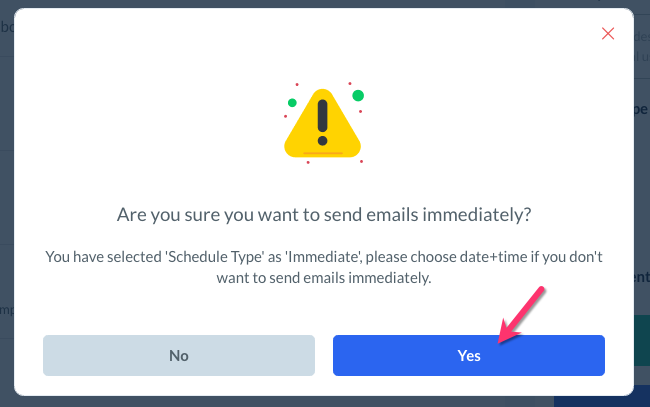
If you have selected "Immediate" for your schedule type, a pop-up will appear reminding you that the campaign will be emailed out as soon as you click the blue "Yes" button.
Once you click "Yes", you will be redirected back to the main "Email Campaigns" dashboard. The status of the campaign may say "Processing" if the system is still in the process of sending the campaign to your audience members.
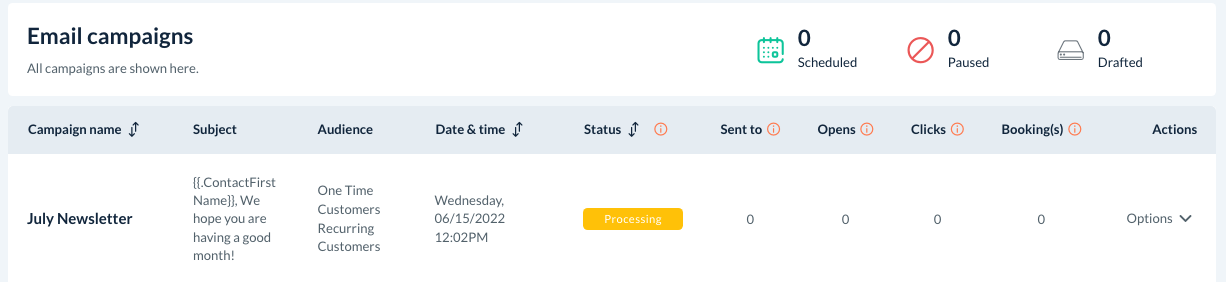
You can refresh the page until you see the status switch to "Sent". At this point, you have successfully sent out the email campaign!