The purpose of this article is to help you learn:
What are items and add-ons
How to add form 3 to your industry
How to set up locations, frequencies, service categories, items, add-ons, extras, and custom sections in form 3
What is form 3?
Form 3 is a type of booking form used in BookingKoala. Each booking form represents a different type of pricing structure a business can use to quote their clients. Form 3 uses items and add-ons as a pricing structure to determine the total cost and length of each booking.
What are items and add-ons?
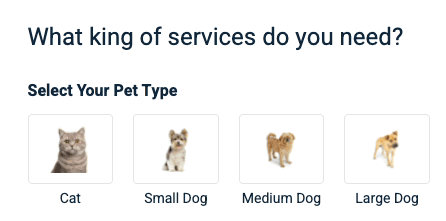
Items represent different categories your customer can select to customize their service. Items are not associated with any price or time information. The forms will work best if your business offers different rates based on the specific type of object being serviced.
For example, in the pet grooming industry, rates and services vary depending on the type of pet. In Bookingkoala, this business's items would be "Cat", "Small Dog", "Medium Dog", and "Large Dog".
Once the customer selects an item, they can view a list of "add-ons". Add-ons are the different services you have available for purchase.
For example, a pet grooming business may cater to cats, dogs, and birds. If they offer services for brushing, shampooing, conditioning, and nail trimming, these services would be their add-ons.
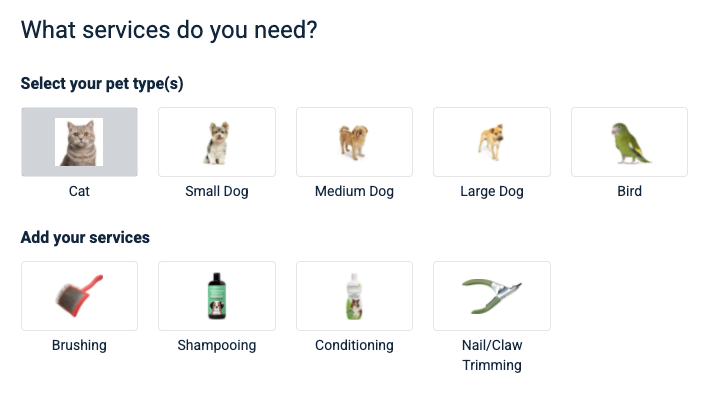
Add-ons contain an icon and description of your service and can be customized per item. Add-ons can also be added in multiple quantities with a multiply-type or custom pricing structure.
How do I add form 3 to my industry?
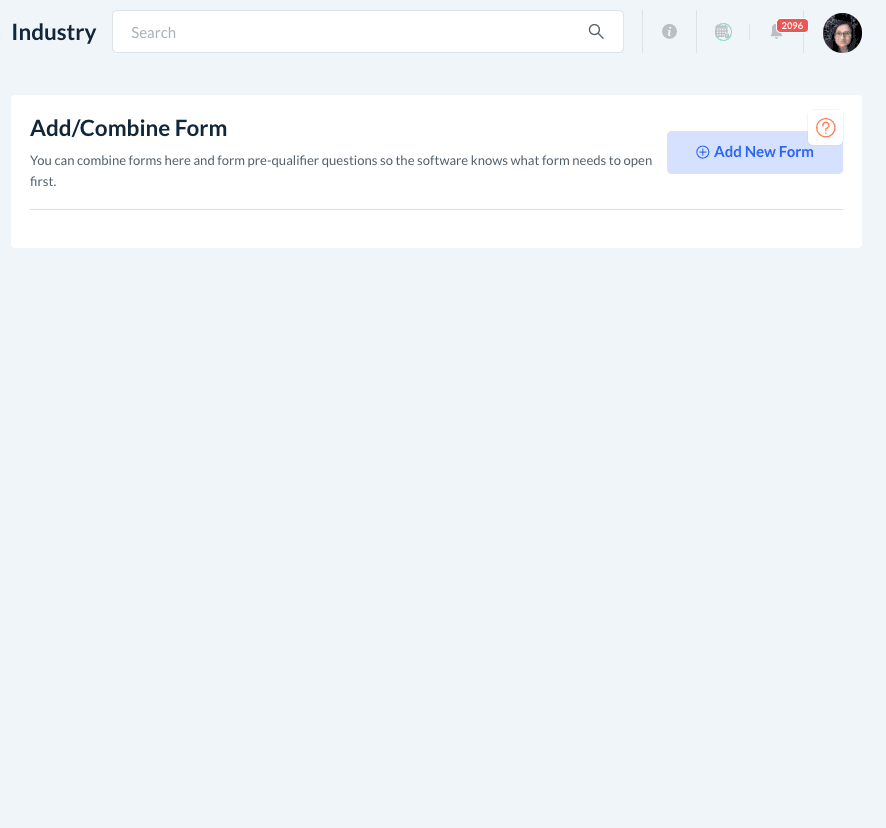
Depending on your industry, form 3 may or may not be set as the default form. If you would like to use form 3 instead, you can easily add it through the settings section. Go to:
Settings > Industries > [Industry Name] > Settings > Add/Combine Form
Next, click the blue Add New Form button. The Select Form page will open with a list of the remaining forms available for use. Click on Form 3 and click the blue Next button.
Here, you will be able to set up your Form settings. These settings pertain to how to form is viewed by the admin, the customer, and a variety of other options on how to customize your booking form.
Click here to view our guide on what features are controlled under your form's settings.
If you are ever unsure what an option means, hover over the orange "i"/tooltip icon to view more information.
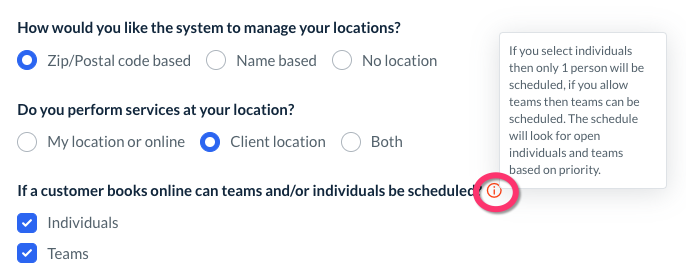
Remember to click the blue Save button at the bottom of the page once you have made your selections. After saving, you can choose to be redirected to the Service Categories section or the Form Listing page for this industry.
Setting the Default Form
If you would like to set the form as your default for this industry, click on Go To Form Listing. You can also navigate to this page from the side menu by going to:
Settings > Industries > [Industry Name] > Settings > Form Settings
From here, click Options next to Form 3 and select Make Default.
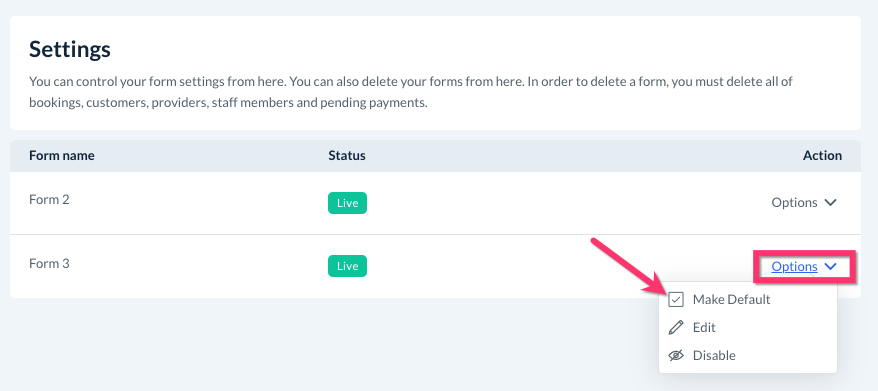
A pop-up window will confirm if you want to change the default form. Click Yes to continue. This form will now display as your booking form.
You may also use the Options button to Disable the form you are not going to use. Once a form has been disabled, it cannot be seen or used by customers or the admin. Forms can be re-enabled at any time. For more information about how to delete a form, click here.
How do I set up form 3?
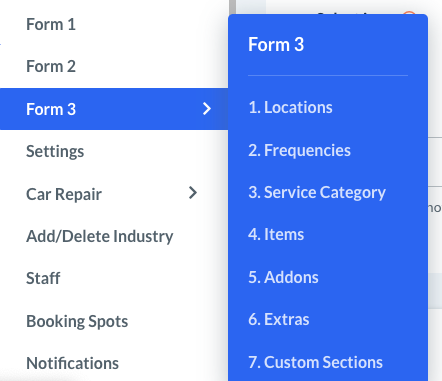
The steps you will take to set up your form are already listed in the suggested order once you click Form 3 from the side menu.
If you already created settings in a different default form, most of those settings will be automatically copied into your new form. The settings that are automatically transferred are existing Locations, Frequencies, Service Categories, Items, Add-Ons, Extras, and Custom Sections.
If you are starting from scratch with form 3, click each section name to view a detailed step-by-step guide. We recommend you follow this order when setting up your form:
1. Locations
2. Frequencies
4. Items
5. Addons
5. Extras