The purpose of this article is to help you:
Locate the import tool in the system
Create and upload information from a .CSV file
Undo an import
Send an invitation to create a password for newly imported contacts
Connect customer payment processor accounts using the import tool
Troubleshoot the common errors while uploading/importing the customer/contact data
Whether you are switching systems or are a new business with lots of leads, our import tool is a convenient way to upload information and speed up the migration or onboarding process. We also have an export tool so you can download a file containing customer, provider, and lead information that has been stored in your account.
Where to Find the Import Tool
The import tool is associated with two different sections: one can be used to upload customer data, and the other is for uploading provider data. To find it, you will need to go to your main menu and click:
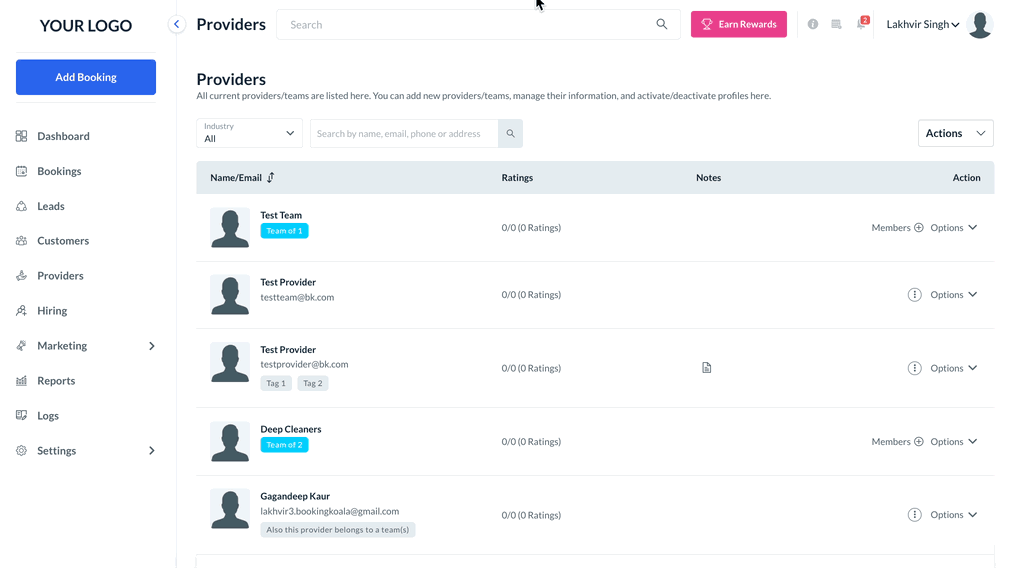
Providers > Providers > Actions > Import

Getting Started
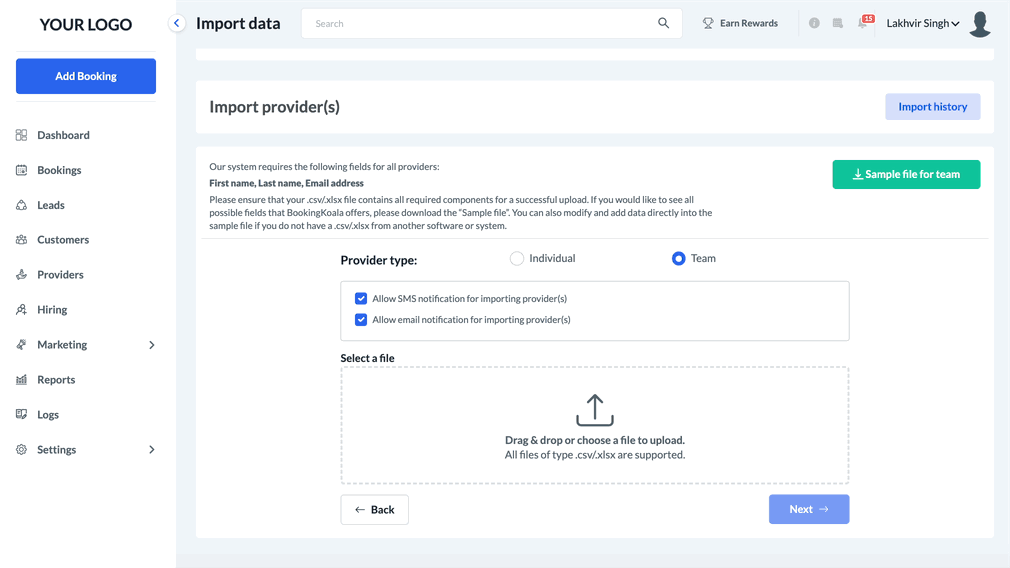
To begin the process of importing your information, you will first select the “Import” option from the Actions menu. In the provider's import section, there are two different options based on whether you want to upload individuals or teams.
Depending on your business, you’ll select either “Individual” or “Team”. Please keep in mind that you can import as many files as you need to, so if you work with a combination of individuals and teams, you can use a separate sheet for each option. For this example, we will reference the import team option.
Preparing Your File
After making your selection, you will land on the import page.
We’d recommend that before you search for your file, please click the “Sample File For Team” or "Sample File for Individual" to see all of the fields BookingKoala supports. If you do not already have a file, you may also use this template to create one by adding new rows and filling them out as needed.
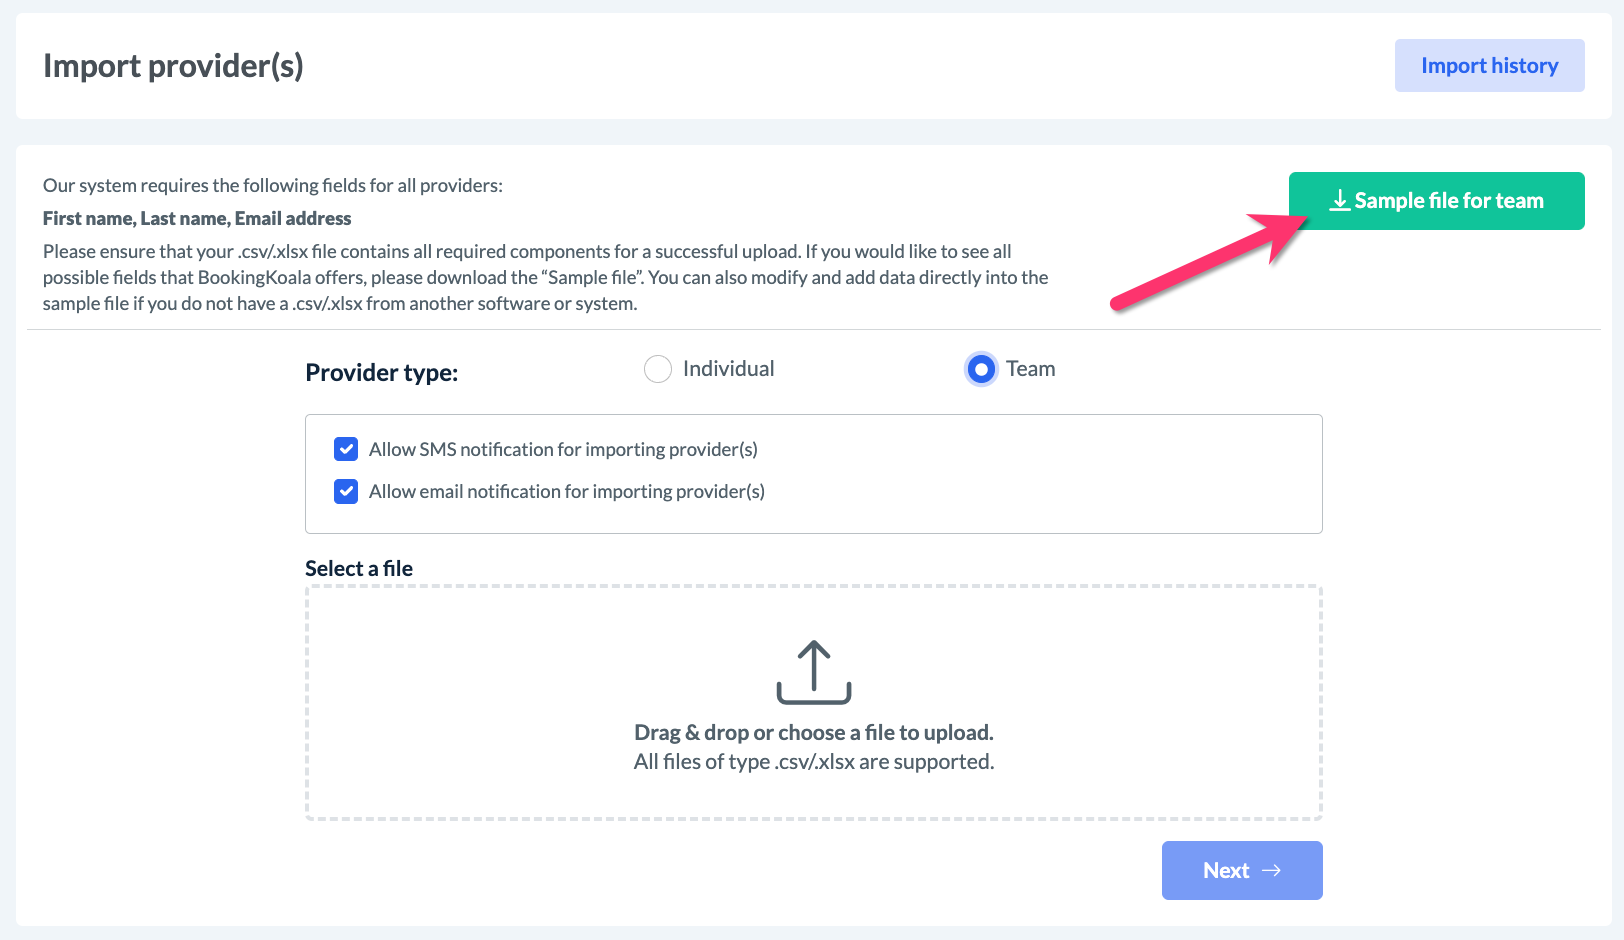
Please ensure that regardless of where your file originates, it will need at minimum the following columns: first name, last name, and email address. If you are importing teams, the team name is required as well. If they are missing from your file, you may not be able to successfully import them.
You will also need to ensure that the extension is .CSV or .XLSX. If it does not have this extension, you can use your spreadsheet builder to “Save As” or export your list in this format. Once these aspects have been verified, you will need to click the file upload area to select the proper file, and then click the “Next” button below.
If you would like to connect the payment processor IDs as well, you will need to create a new column in the .CSV file with the heading "Payment Processor ID".
Please note: Make sure to check the ID when copying and pasting it to the corresponding customer. If you connect the wrong ID to the wrong customer account, the card on file could be used by the incorrect owner.
The Import Process
Once you’ve uploaded your file, you will need to match or “Map” the imported fields with those in BookingKoala. You can drag and drop whichever fields of information you would like to be imported.
Some of your fields may be labeled differently than BookingKoala’s. For example, BookingKoala has “zip code” as a field whereas you may have something like “zip” or “postal code”. You can map your field with the closest corresponding field in our system. You can also leave most of the BookingKoala fields empty if you do not have those in your file, or if you are not interested in importing that specific information.
Once you have mapped your fields, you will click “Import”. A green system notification will let you know the import process has begun.
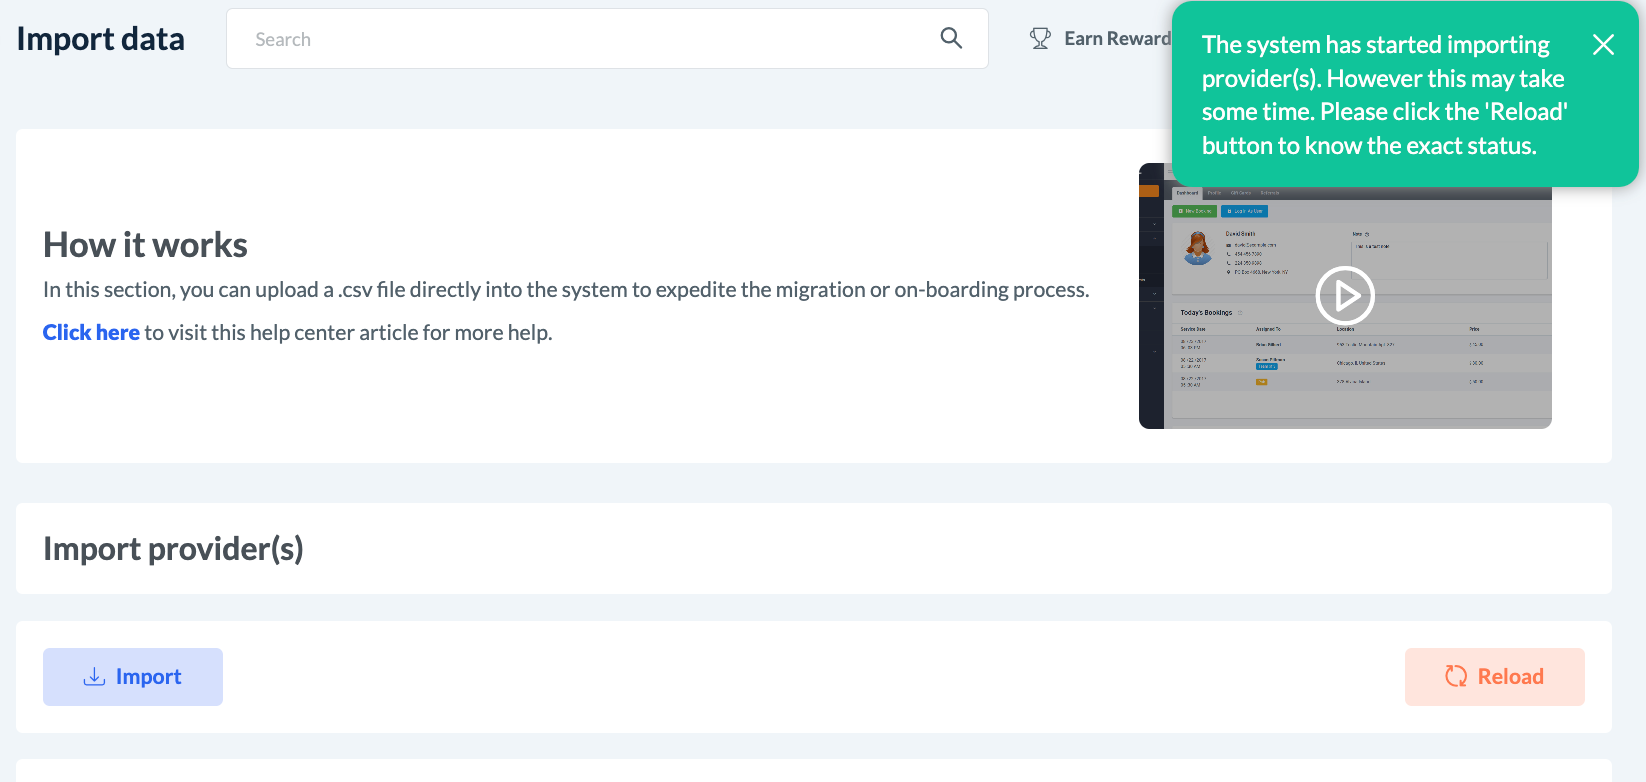
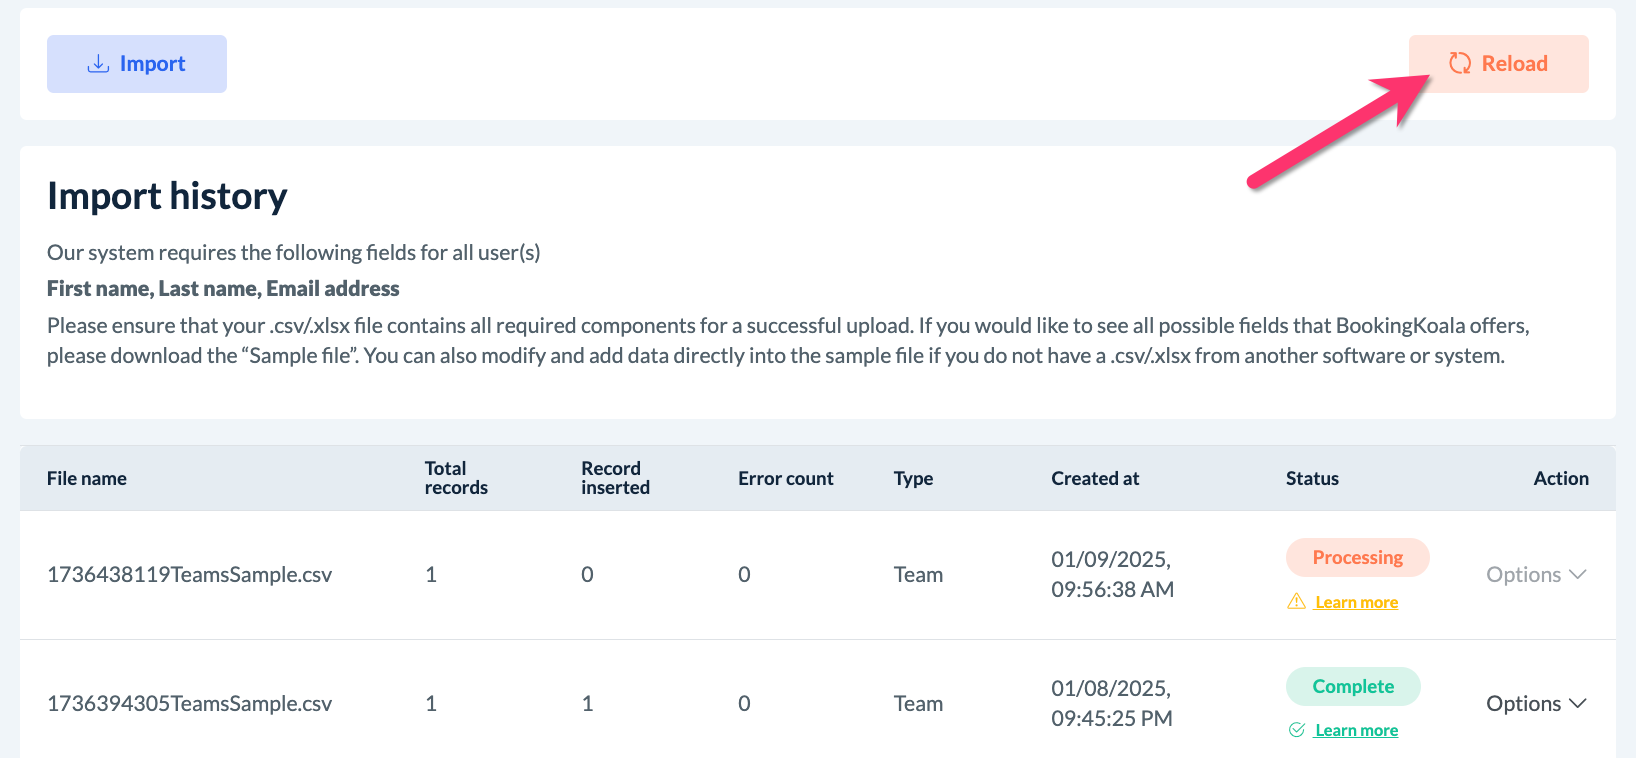
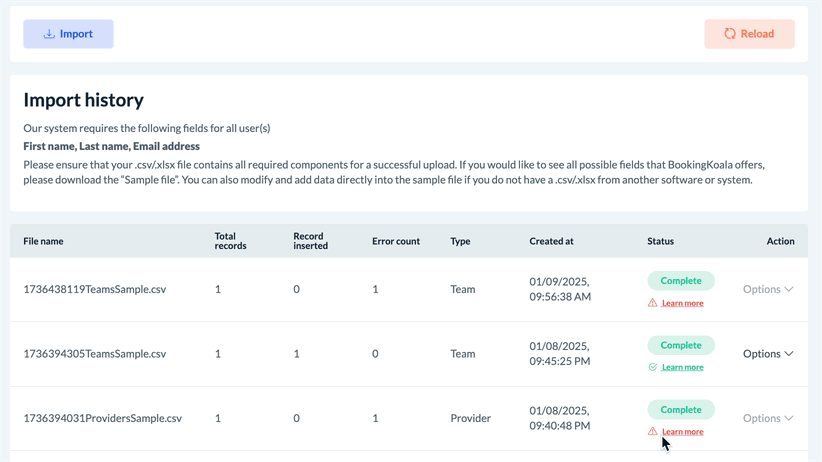
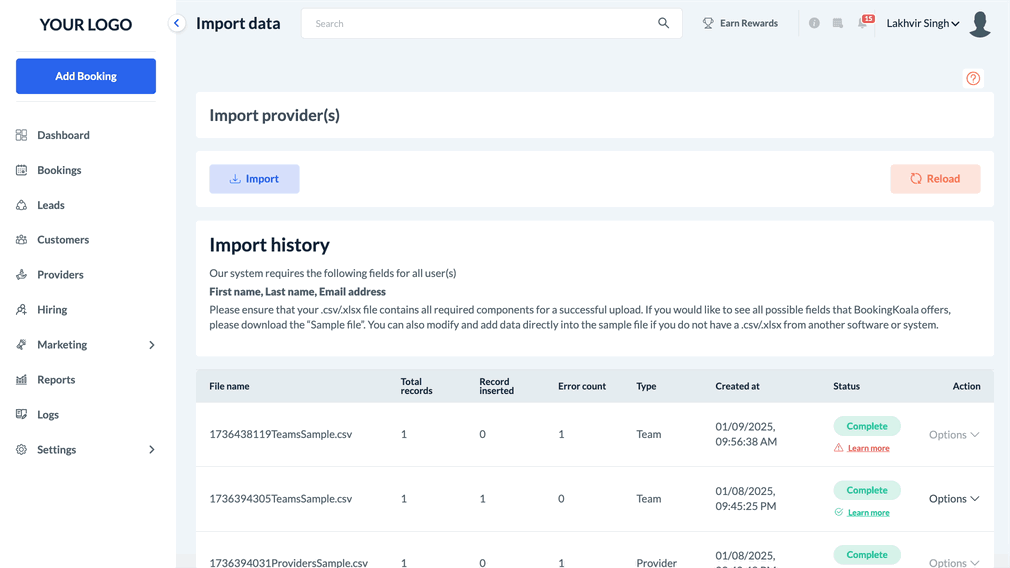
While your file is being imported, you will be brought to the “Import History” section. Here you can view new and past imports and their corresponding details:
Filename
Total records within the file
Total records inserted into your BookingKoala account
Error count of failed records
Type of import
Import creation date and time
Import Status
To the far right, you will see the import’s status. While the system is finalizing the import, the label will read “Processing”. You can click the orange “Reload” button to check for an updated status.;......'''[]\
New Features
1. Automated synchronization of campaign contacts during import will be based on the campaign contacts limit and audience setup.
If a merchant has an existing limit for campaign contacts, the imported users will be automatically synced to the campaigns within their defined audience.
However, if the merchant has reached their limit for synced users, the system will still allow users to be imported, but automatic syncing to campaigns will not occur in this case.
Additionally, if the merchant has some campaign contact limits remaining but the queued import exceeds that limit, automated syncing will also not function.
Regardless of the campaign contacts limit, the system will always import the users into the main system.
2. Phone (+) is specifically intended for customer imports only. It allows for the inclusion of additional phone numbers based on a revised format. If the additional phone numbers in your file do not comply with BookingKoala’s acceptable format, you can enter the corresponding user's additional phone number into the Phone (+) field. This number will then be treated as an additional phone number for your imported record. Please ensure that you check the format of the Phone (+) before using it.
3. Notification Settings Update:
The notification settings have been revised. During the import process, you can now choose whether to enable email and SMS notifications for the users included in your uploaded import file for the BookingKoala system.
Please ensure that the default notification preferences are taken into account based on your selections. There are two options for notification settings: one for email and the other for SMS.
If you choose to enable email and/or SMS notifications, please make sure that valid email addresses and/or phone numbers are provided for those users. If such contact information is not available, the notification settings will not be activated.
If you choose not to enable email or SMS notifications for your imported users, then notifications will be disabled for those users according to your preference.
Troubleshooting
Once your import has been completed, you will see a green “Complete” status after refreshing. This indicates that all data (or as much as possible) has been imported. Next to this, there is a "Learn More" link.
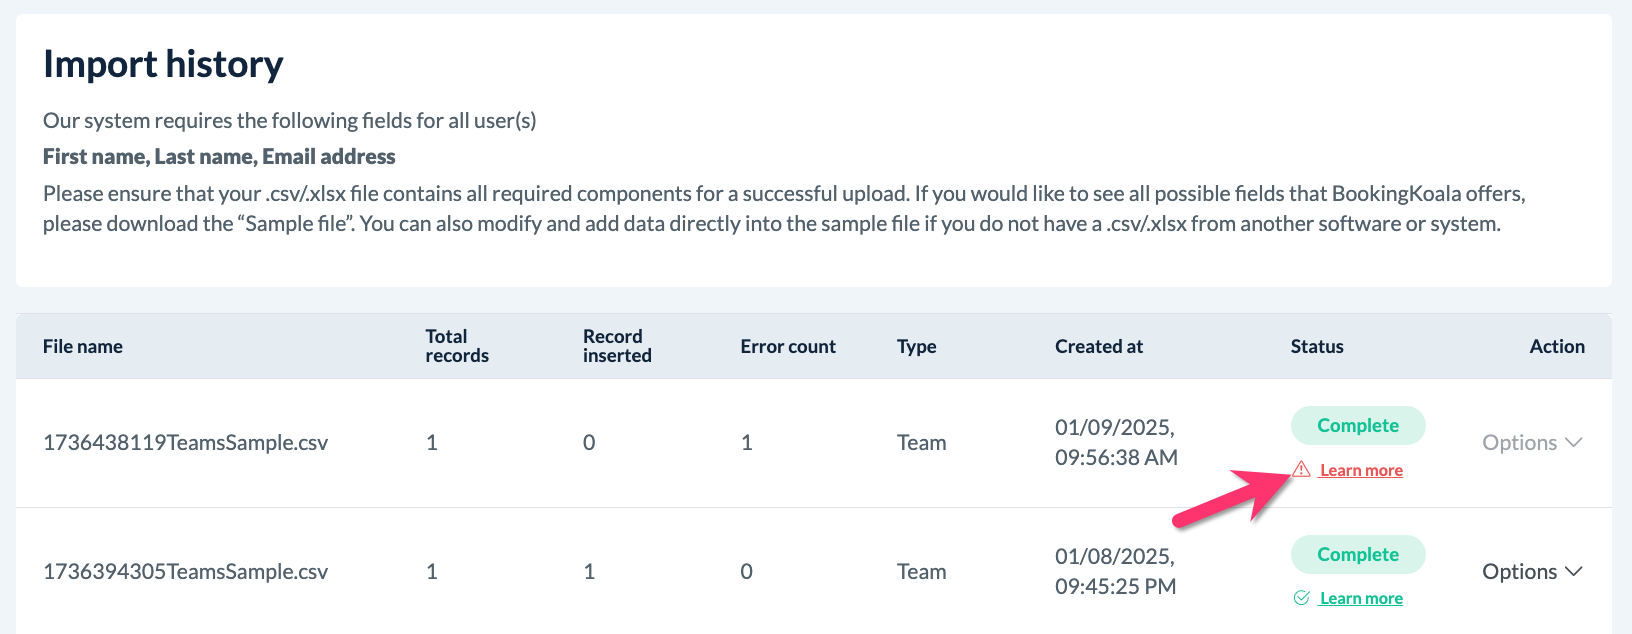
When this link is green, it indicates that all data has been fully imported.
If the link is orange, your import is complete but some information was not able to be imported.
When the link is red, the import was unsuccessful.
When the link is orange or red, you can click the triangle icon to view a more detailed record of what failed.
There are several possible reasons why user information could not be imported, including:
The first name, last name, and/or email fields are empty
Incompatible “special characters” (like #, $, %, etc.) have been used in the name, email, or phone fields
The email or phone number already exists in the system.
Any users that could not be imported will be listed in a file you can download so you can look at the original file to add or modify the corresponding entries.
Undo an Upload
If you have accidentally uploaded the wrong file altogether, you can click "Options" and then “Undo import” to undo the import. This will permanently delete the file’s contents from your system.
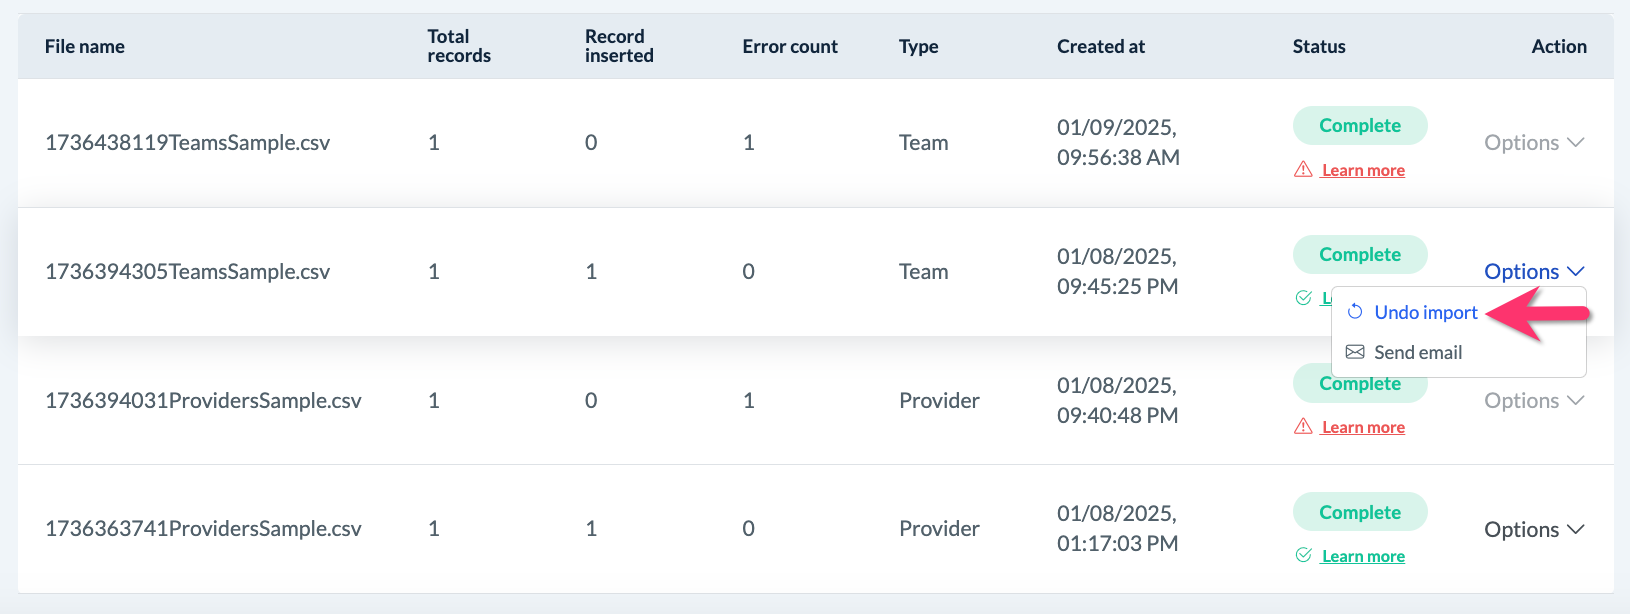
The Undo feature is intended to remove users from the system. Its behavior varies depending on whether the users were synced to campaigns during the import process.
1. If users are successfully synced to campaign contacts during import, the Undo action will prompt for confirmation regarding the removal of users from campaign contacts.
If you choose to undo from campaigns, it will remove the users from both the main system and the campaigns.
On the other hand, if you do not select the option to undo campaigns, it will only remove the users from the main system, and the campaigns will still retain the users' data.
2. If users were not synced to campaign contacts during import, the Undo action will delete the users from the main system without requiring additional confirmation
Send an Invitation to Create a Password
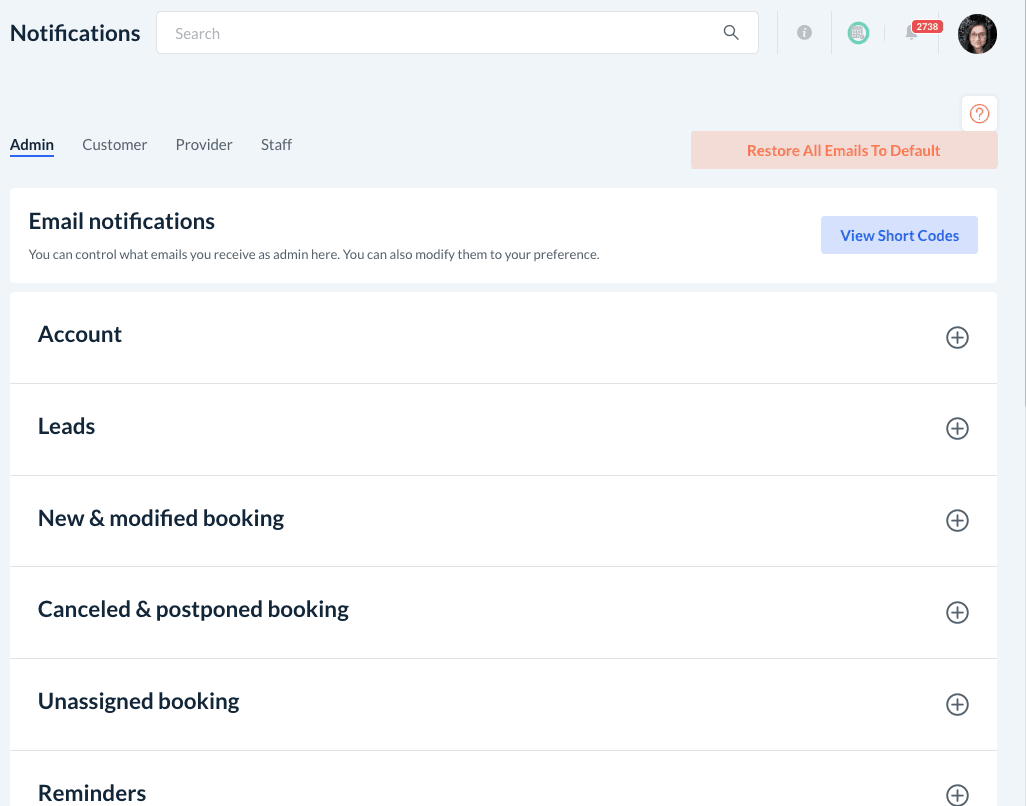
If you would like to invite the people in your file to create an account with your BookingKoala platform, you can click Options then "Send Email".
From here, you can mass email all new imports with the “New Account” email and even include a note for their reference. You can click “Send Email” when you are ready, or “Preview” to see what the email will look like first.
Please be sure that the "New Account" email template is enabled under the Notifications section. To check, please go to:
Settings > Notifications > Emails > Provider
Click the red “Disabled” button to re-enable the notification. You can also click the pencil icon to edit the general message for this email as well.
Connect Customer Payment Processor Accounts
In the customer import area, you have the additional option of connecting your customer’s payment processor account if you have imported their customer ID.
Stripe
You can find a customer's Stripe ID in your by searching their name or email address under the "Customers" section. Click on their account to view their dashboard. The Stripe ID is located in the "Details" section just beneath their email address in the left-side menu. This code will always begin with "cus_".
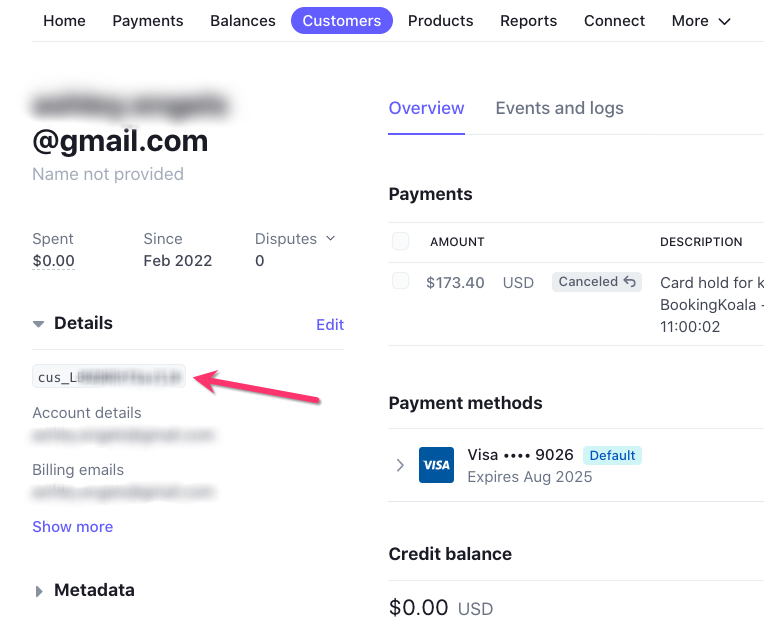
Paste the Stripe ID into a separate column labeled "Stripe ID" in your .CSV file. Make sure there are no extra spaces or characters as this may result in a failed import.
Troubleshoot the common errors while uploading/importing the customer/contact data
Please use the following steps to try and identify what issue(s) are causing your file not to upload the contact data properly.
1. Download the Sample file:
It is recommended that you click on the "Sample File For Team" or "Sample File for Individuals" before uploading your file so that you can get a better sense of all the fields that BookingKoala supports. In case you do not already have a .CSV file, you may also download this template and use it to create one by adding new rows and filling them in as needed.
2. Check the format of the file you are uploading/importing:
If the format of the file is NOT ".CSV" or .XLSX, please save the file in ".CSV" or .XLSX format and then try to upload the file.
If the format of the file is ".CSV", proceed to the next step.
3. If the file format is ".CSV" or ".XLSX", and you get the below error message:

This error means that sometimes while uploading the file, the column name has some extra characters like spaces or commas which creates an issue for the system to read the file. If this error appears, it is recommended to re-save the file as a ".CSV" file and then re-try uploading the file.
4. If you still get the error:
Please email your file and the error screenshot to [email protected] if seeking further assistance.