The purpose of this article is to help you:
Understand how provider payments work in BookingKoala
Connect your provider payment gateway
Set a default wage for all providers
Set up reimbursements for providers
How do provider payments work in BookingKoala?
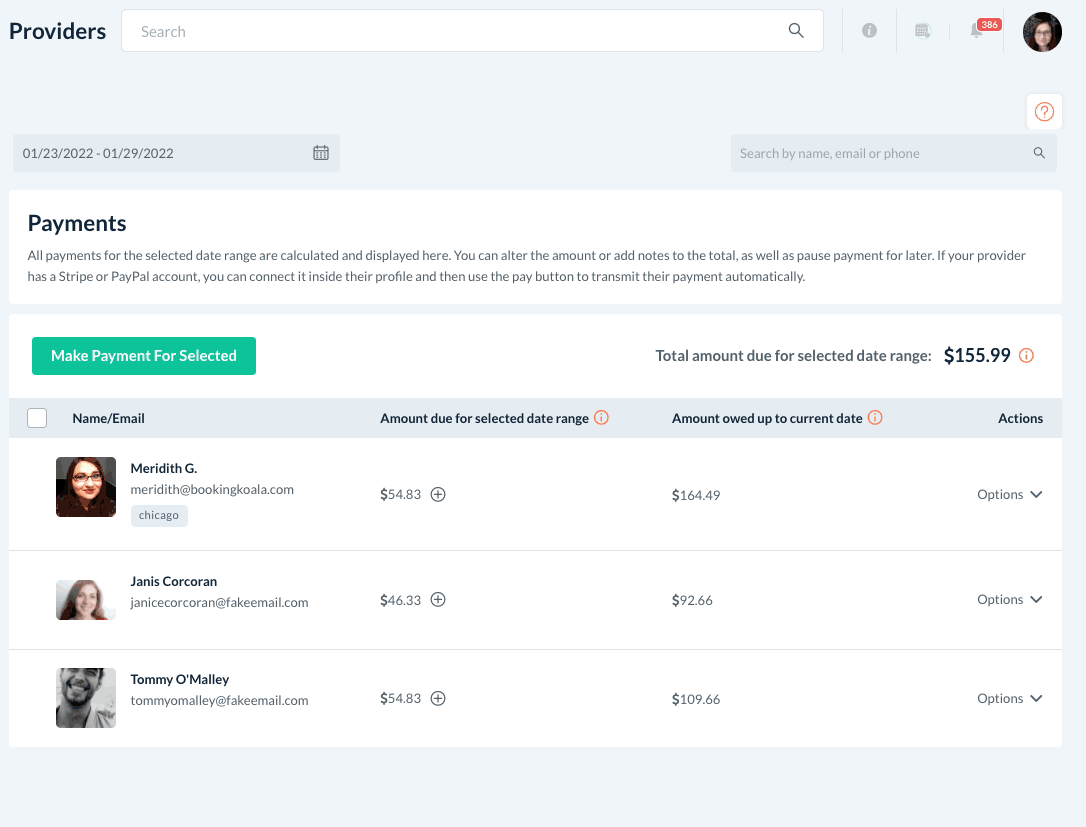
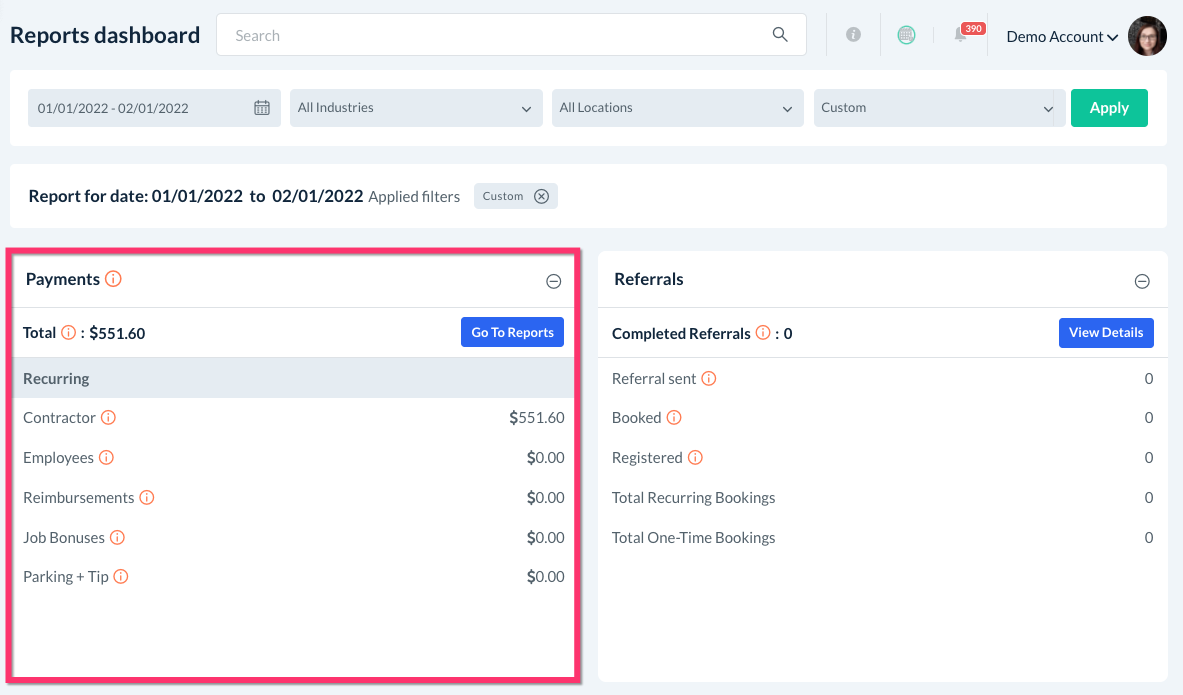
BookingKoala can be used to track and send out payments to your providers. Once a job is completed (that is, the provider has clocked out or the appointment length has passed), the system pulls any payment information for the assigned provider(s) and adds it to the Provider Payments section.
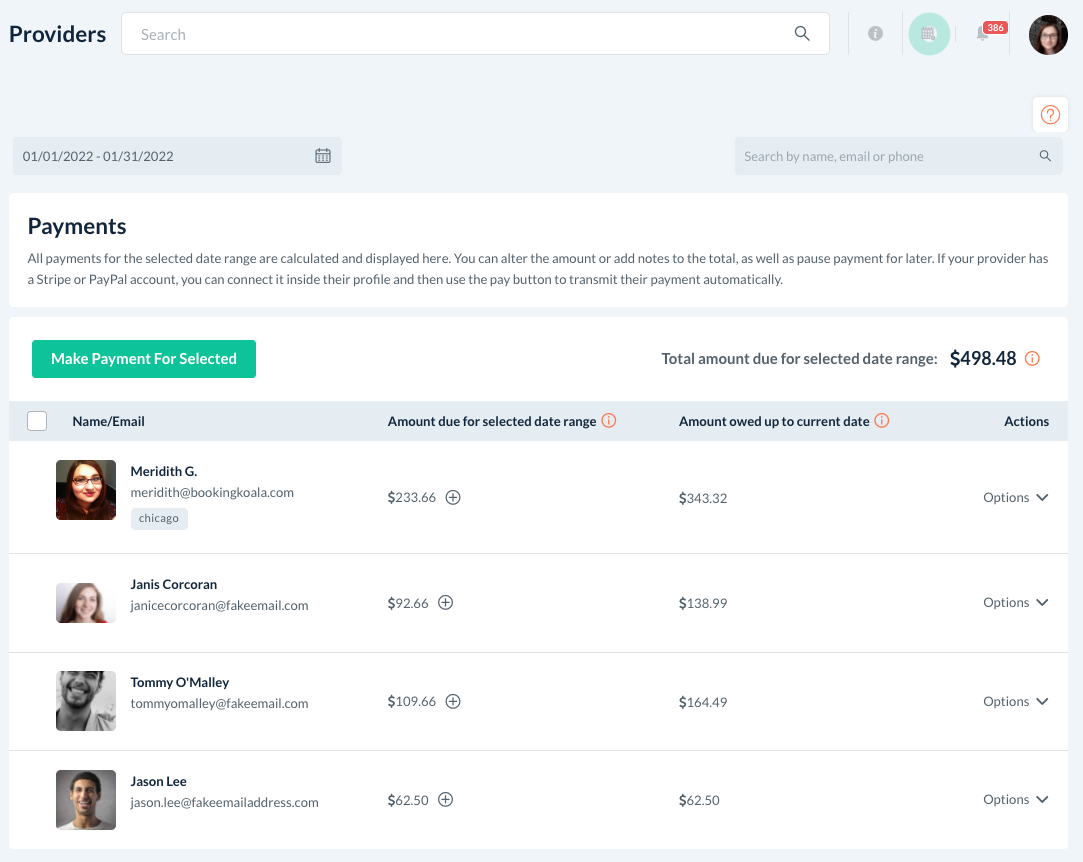
In the Payments section, select the dates of your pay period and the system will pull all payments due for bookings in that period. You can view a list of all jobs completed during the pay period including a breakdown of how much was paid out for each job. You can also edit the payment total, make adjustments, and add notes before paying out the provider.
If you have connected a payment processor like Stripe or PayPal to your BookingKoala account, you can set up BookingKoala to send payments directly to your providers. Providers have a Payments section in their account to view their paycheck and job breakdown after it has been finalized.
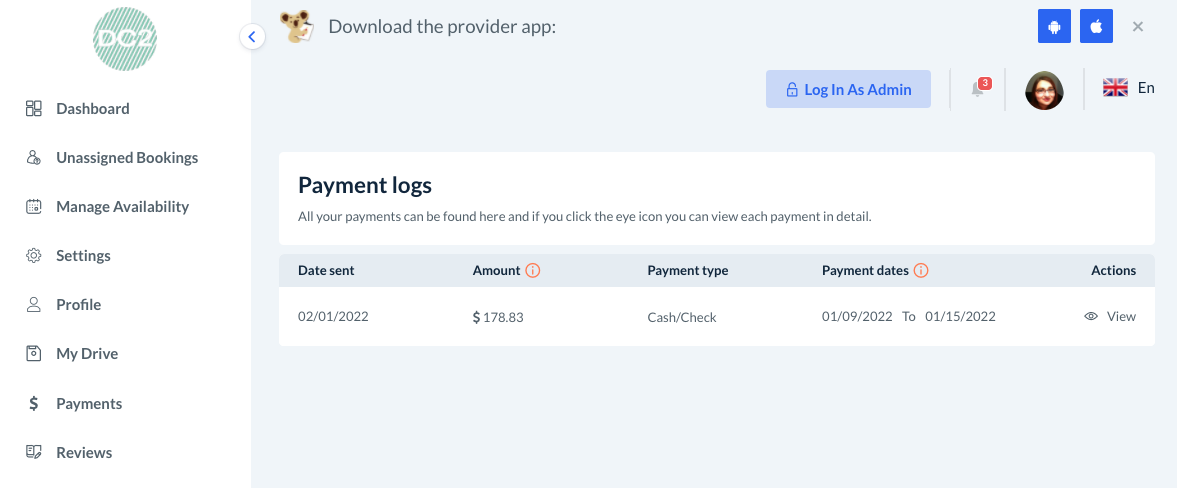
Once payments are sent out, they can be found under the Payment Logs section for your reference, and under the Payments section of the provider's dashboard for their reference.
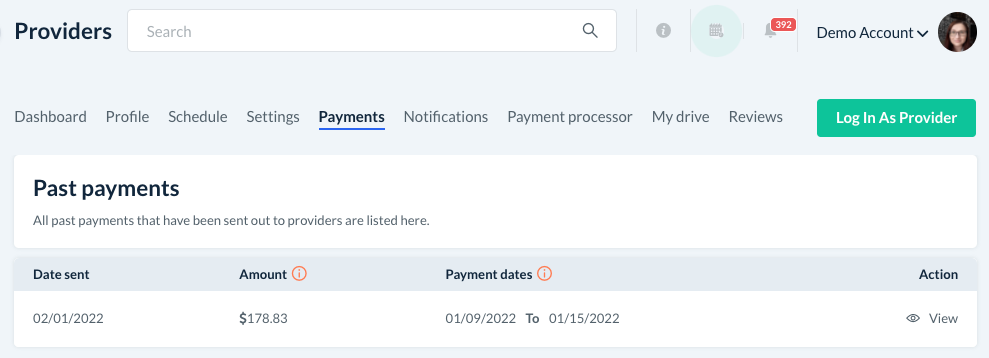
If you do not want to connect a payment processor and prefer to pay your providers another way, you can mark paychecks as being paid in "Cash/Check. This way, you can still keep a record of payment for yourself and your providers while keeping the Reports section accurate.
Connecting Your Provider Payment Gateway
If you would like to pay your providers through Bookingkoala, you will first need to connect Stripe or PayPal as your payment processor. You can only connect one payment processor per account, so please keep this in mind when deciding which one to use.
Please note: You do not need to connect a payment processor if you plan on paying your employees outside of Stripe or Paypal. Instead, you can use the payment section to help calculate the provider's wages and click the "cash/check" option to let the system know the jobs have been paid out.
Stripe
To learn how to connect Stripe as your payment processor, click here.
To learn how to connect a provider Stripe account, click here.
PayPal
To learn how to connect PayPal as your payment processor, click here.
To learn how to connect a provider PayPal account, click here.
Setting Up a Default Wage
To help speed along the onboarding process, you can choose to set a default wage for your providers. This default will be used whenever a new provider account is created.
To set the default wage, go to:
Settings > General > Store Options > Provider
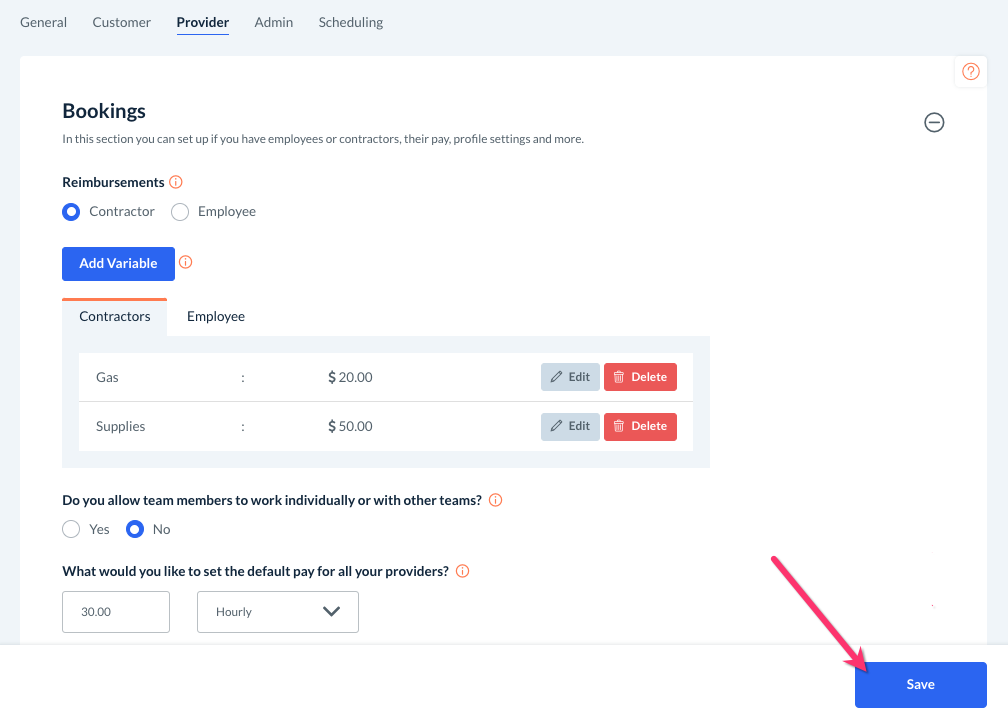
Use the "plus" icon to expand the Bookings section and scroll down to where it says, "What would you like to set the default pay for all your providers?"
Below, enter the payment amount into the first box, and select a payment type from the second box. The options are:
Fixed - Providers will receive one payment of the default amount per job.
For example: If you type in "50" and select "fixed", providers will be paid $50 per job regardless of any other job details. Whether a job costs the customer $50 or $500, the provider will always receive $50 as payment.
Percentage - The provider will receive a percentage of the job total as payment.
For example: If you enter "50" and select "percentage", providers will be paid 50% of the total payment. If the customer's total is $200, the provider would receive $100 as payment.
Hourly - The provider will receive payment based on the length of the booking.
For example: If you type in "30" and select "hourly", the provider will be paid $30 per hour. If a job's length was 3 hours, the provider will receive $90 in payment.


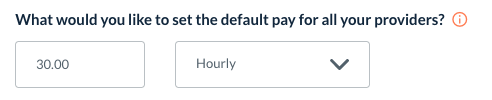
Once you have made your selections, click the blue "Save" button at the bottom of the page. All newly-created providers accounts will have this set as their default wage.
Setting Up Provider Reimbursements
If your business provides reimbursements for business-related expenses like gas, mileage, or supplies, you can set those up to be automatically calculated into your provider's payment. Reimbursements tend to be for businesses who work with employees; however, you have the option to create reimbursements for contracts and/or employees.
To begin, go to:
Settings > General > Store Options > Provider
Use the "plus" icon to expand the Bookings section. The reimbursement settings are located at the top of this section.
Below the blue "Add Variable" button, select Contractors (1099 in the US) or Employees (W-2 in the US) depending on which your business works with.
Next, click the blue "Add Variable" to set up reimbursements for this type of worker.
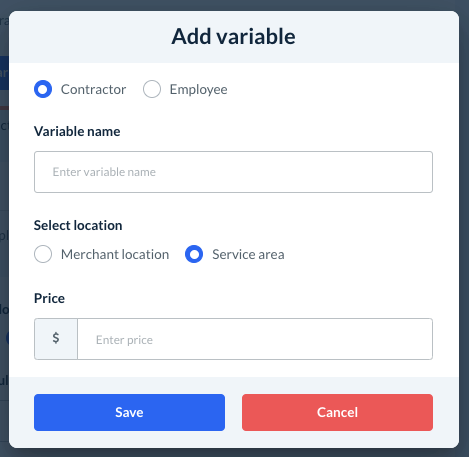
For the "Variable Name", type in the type of reimbursement being processed.
Then, select which location this reimbursement is for.
If you select "Merchant Location", the reimbursement will be added whenever a provider has a job at a merchant location (such as storefront, office, etc.).
If you select "Service Area", the reimbursement will be added whenever a provider has a job scheduled in a service area (traveling to the customer's location).
Finally, enter the price in the box at the bottom.
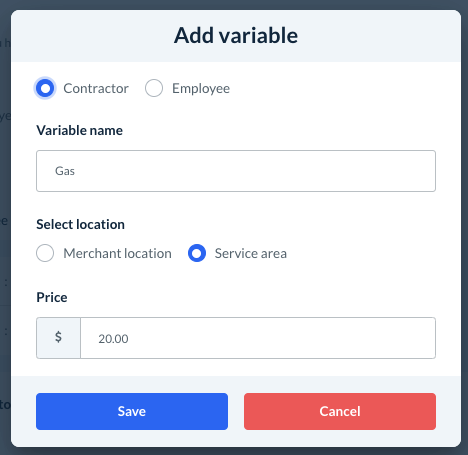
In this example, the reimbursement for "gas" will add $20 to the provider's payment whenever they are scheduled for a booking in a service area.
Click the blue "Save" button to add the reimbursement to the system. Once you are done adding your reimbursement variables, remember to click the blue "Save" button at the bottom of this page as well.
For more information about how reimbursements work, click here.