The purpose of this article is to help you understand:
How to edit the Invoice template via the customer invoice page
Getting Started
The customer Invoice page displays the customer's invoice and an optional contract pop-up to collect and verify the customer's signature upon reviewing and paying the invoice. This page is displayed when a customer is sent an invoice link as detailed in this article.
To modify the appearance and features used on this page, you must access the BookingKoala Website & Theme Builder. To do so, please go to:
Settings > Design Forms & Website > Website Builder & Themes > Customize Theme
Edit the Invoice Template
To edit the Invoice page, select the top center Page menu, select Payment Details, and click on Invoice.
To add a logo to the invoice, click on the Your Logo text in the top left corner of the invoice to reveal the Edit button. Optionally, the logo can be clickable and redirect users to a specific page on your website.
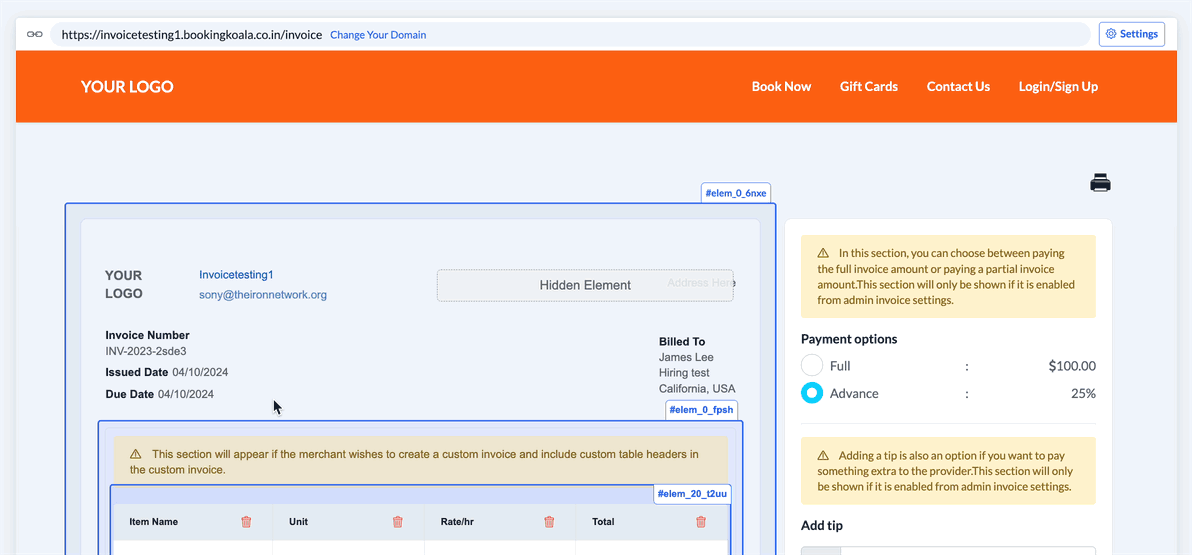
The topmost section of the invoice contains dynamic shortcodes that display your business's store name and support email. Like other elements, these can be edited by clicking on the text to reveal the edit button.
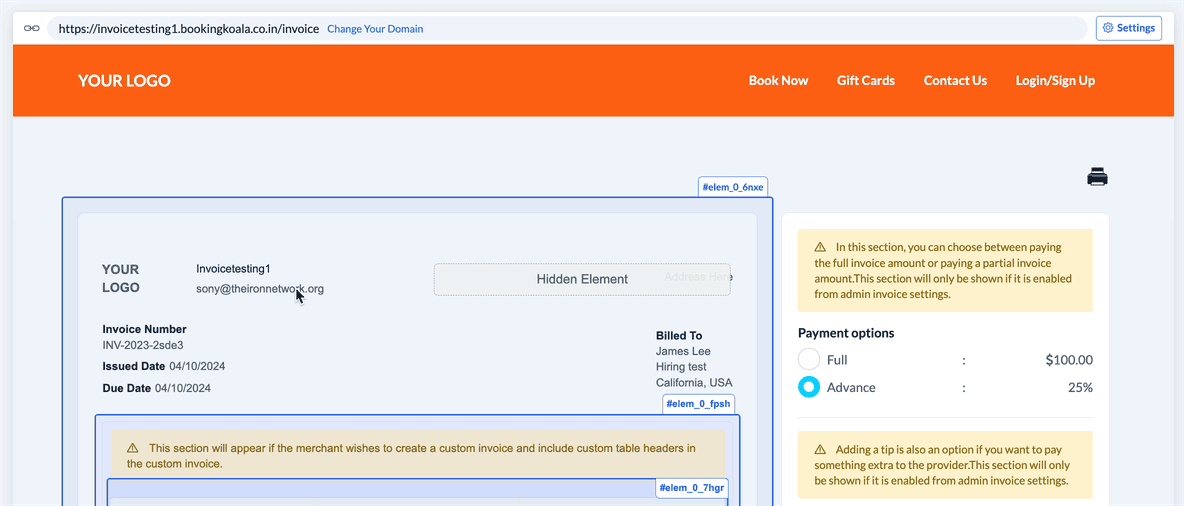
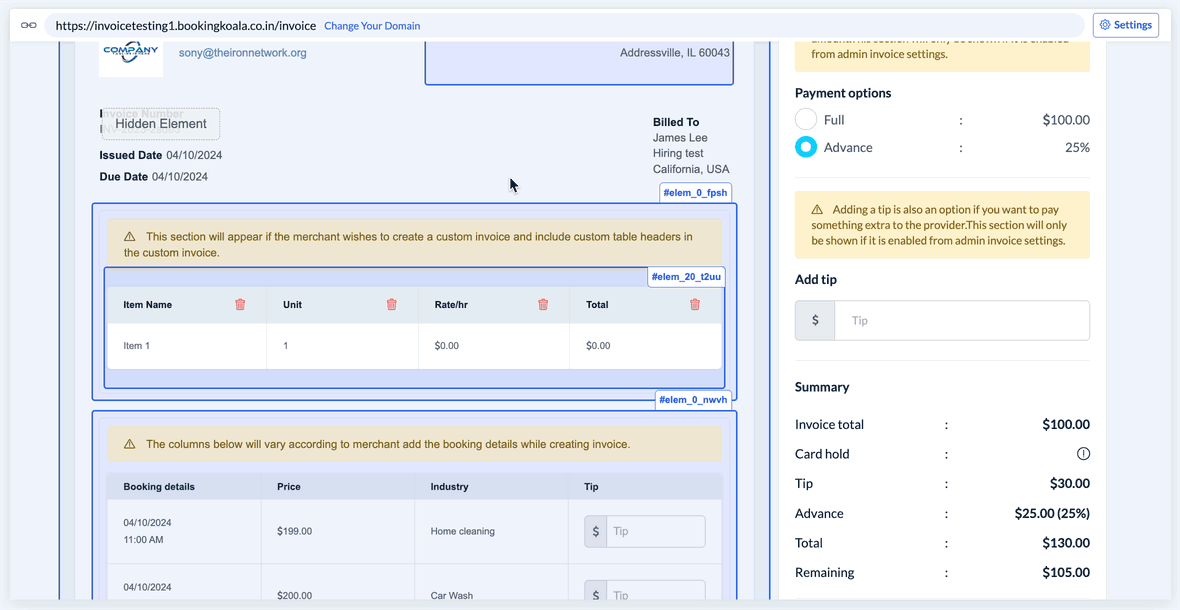
Other sections, like the company address, invoice number, issued date, due date, and billed-to sections, can be shown or hidden depending on what you would like customers to see.

Below, two different tables represent the type of details displayed for each invoice. The topmost table is used in the case of creating a custom invoice with customer table headers.
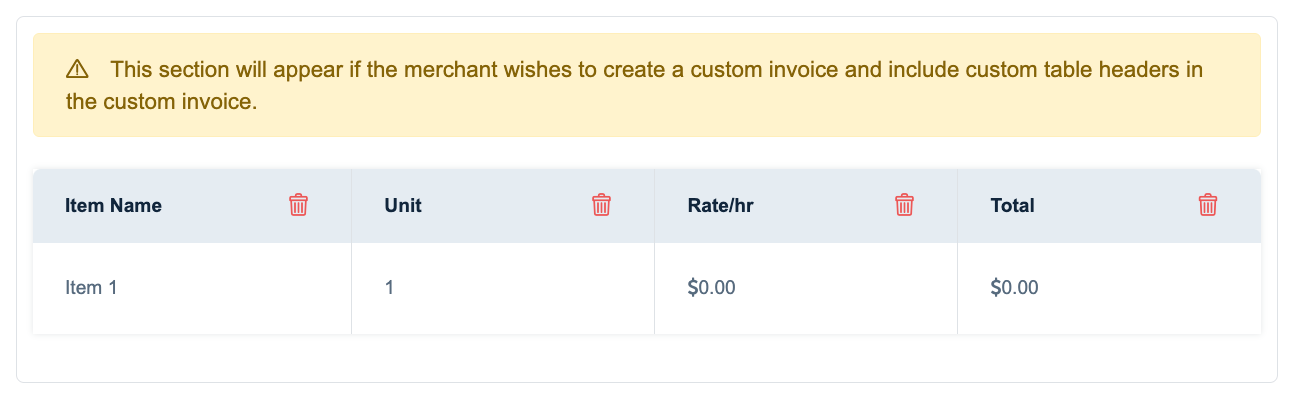
To modify this section, click on the table to reveal the Edit, Add Row, Add Column, and Rearrange buttons. Use the trash can icon to delete any rows or columns that you do not want to use.
It is also possible to add multiple tables for the custom invoice by clicking on the topmost table to reveal the Add Table button. Once more than one table has been added, a Rearrange button will appear allowing you to modify the order of the tables as they are displayed on custom invoices.

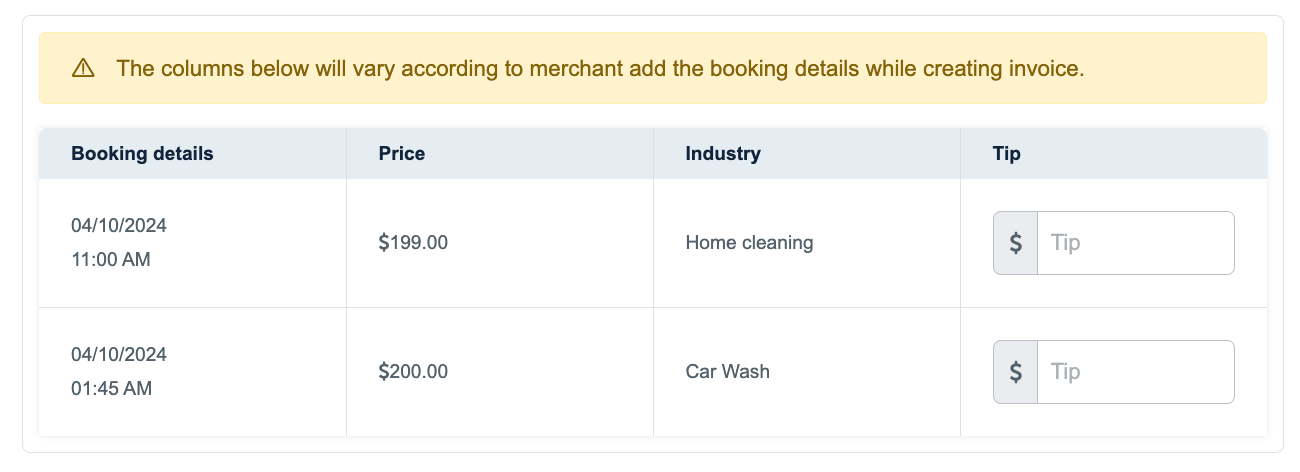
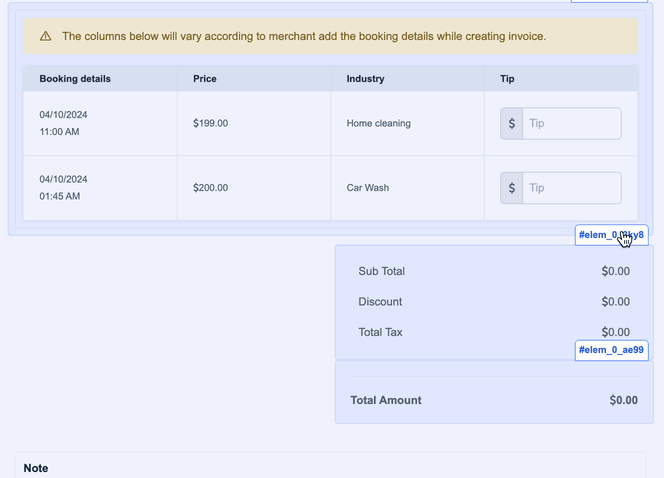
The table below the custom table(s) is used for invoices that are generated from bookings. The content of this table varies from merchant to merchant and depends upon the parameters selected when creating the booking invoice as detailed in this article. Only the Tip text can be edited from the website builder.
Below the custom and from booking tables are options for the subtotal, discount, and total tax. These can be edited or removed based on your preference. The total amount text can also be edited.
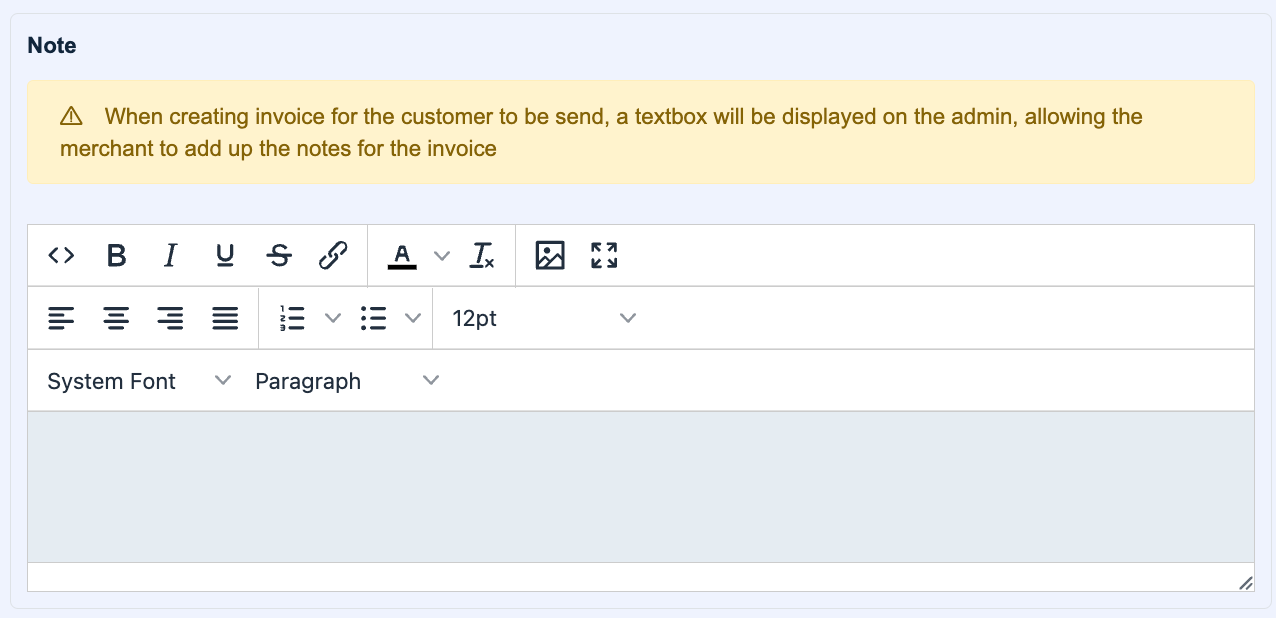
Below this section is the note section. This section appears as a text box to the admin and allows them to add an optional note for the customer at the bottom of the invoice. Click on the note box to reveal the edit option to alter the title of this section.
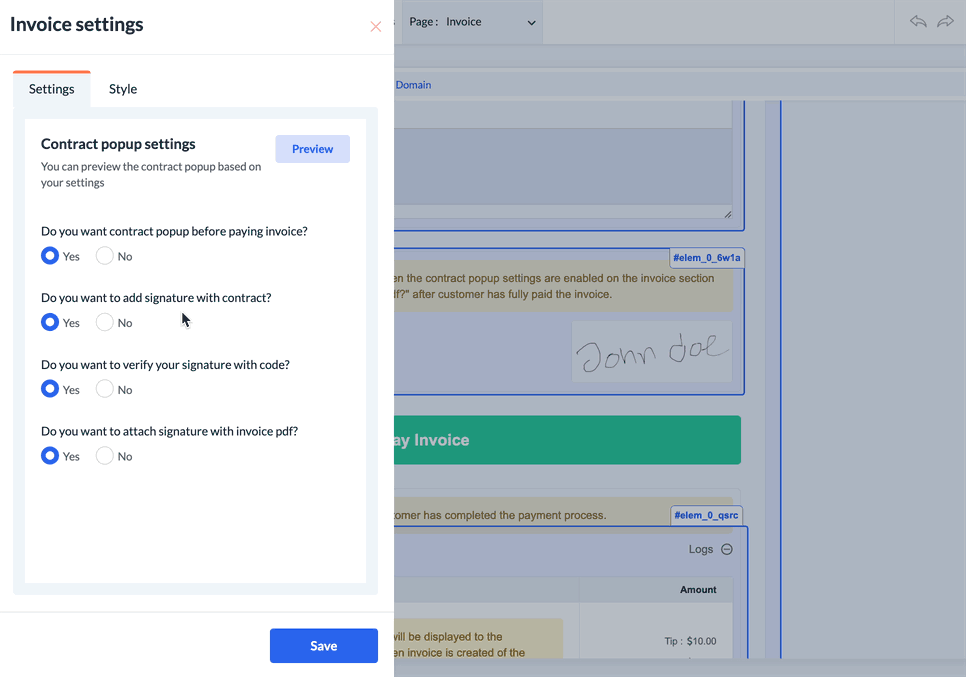
Another optional feature is the customer contract pop-up. This section allows you to create a pop-up that displays
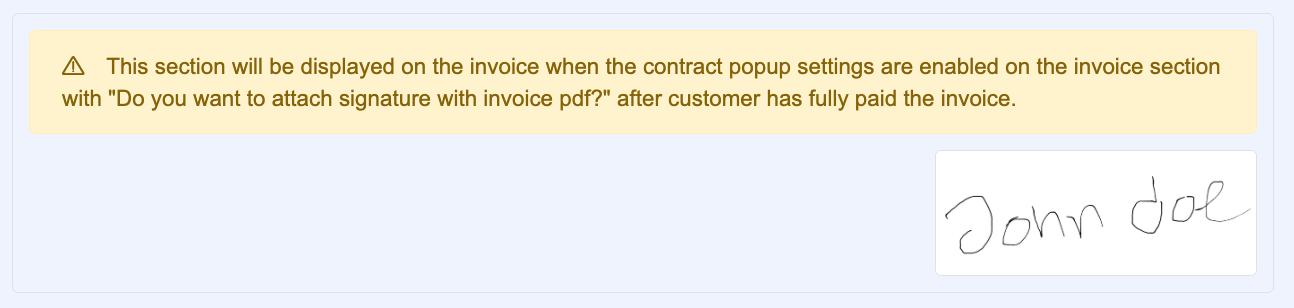
This option can be enabled on the invoice from the contract popup settings when you answer "Yes" to "Do you want to attach a signature to the invoice PDF?" by clicking on the section and selecting Edit.
If you want the contract to pop up before the customer pays the invoice, select Yes to the topmost question. From here, you can decide if you'd like to collect a signature from the pop-up, if you would like the customer to authenticate their signature by entering a code, and if the signature will be attached to the invoice PDF.
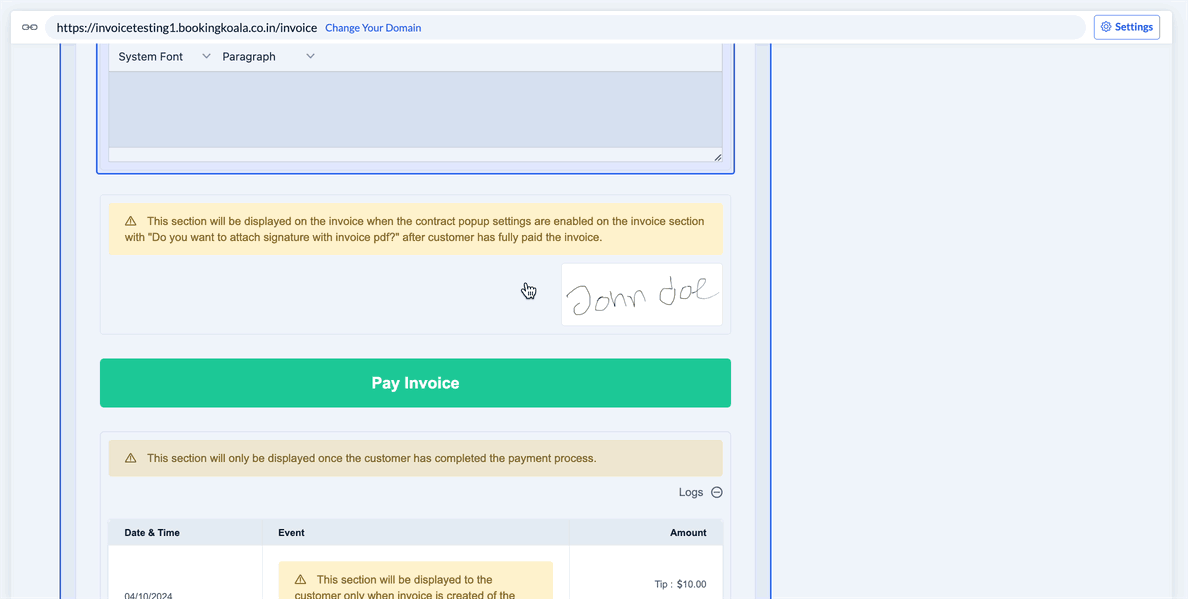
Use the blue Preview button to view what the contract pop-up will look like based on your answers to each setting.
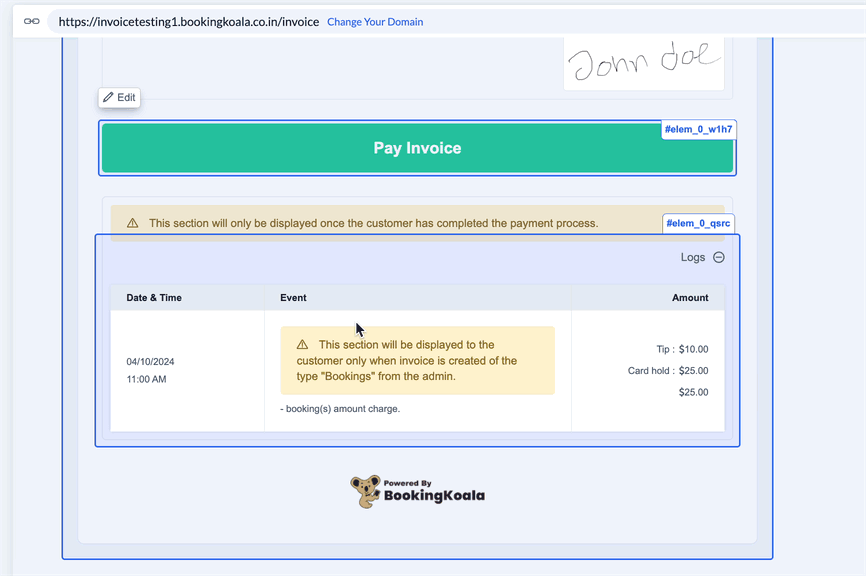
Below the Pay Invoice button, you will see a preview of the log(s) the customer will see on the invoice once they have completed the payment process.
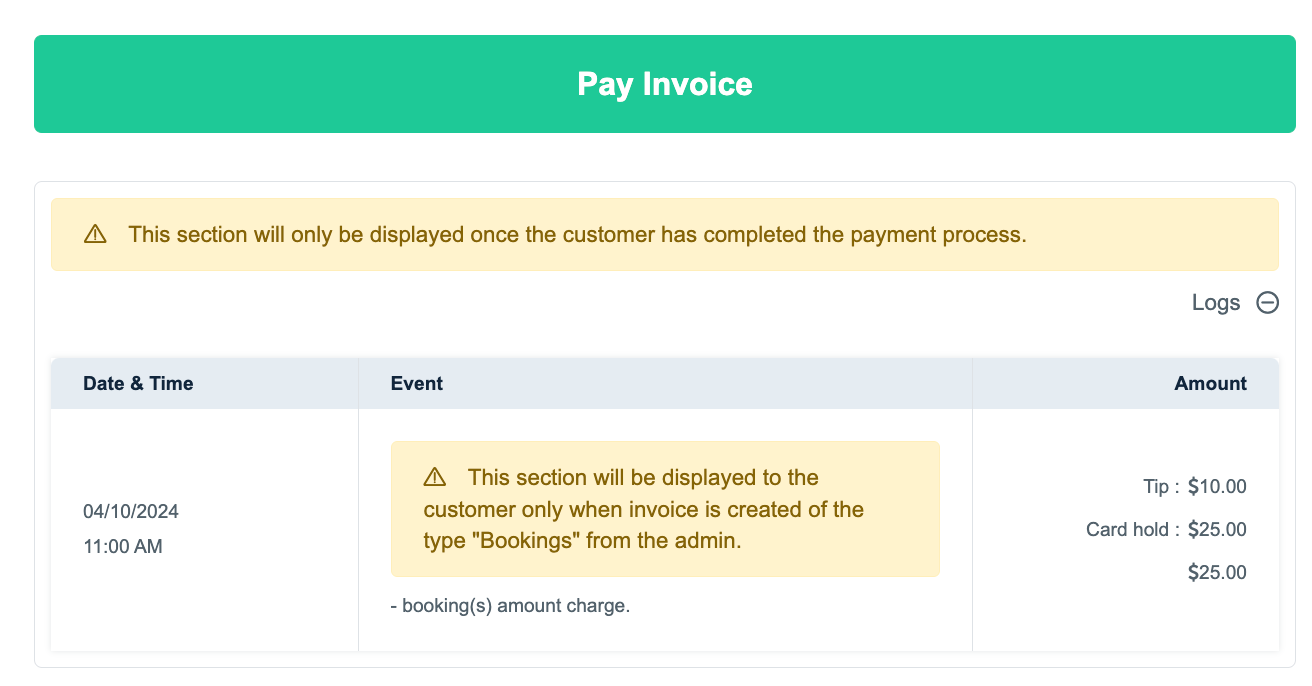
To edit the log sections, click to reveal the Edit button, then click Edit to modify the section titles.
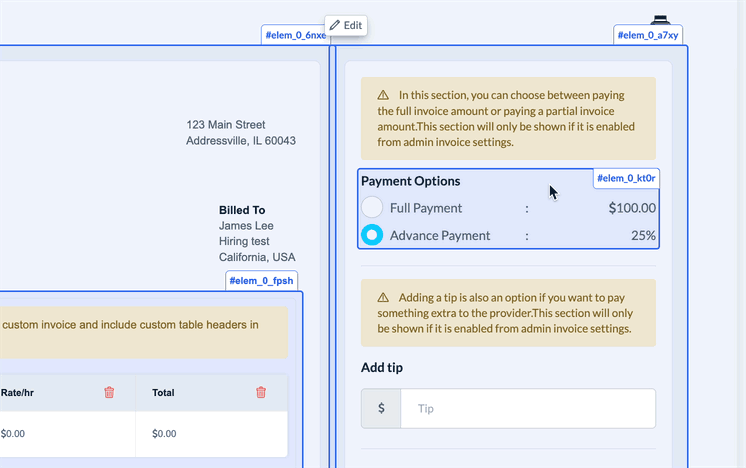
Along the upper right side of the invoice, you can view the payment summary section. This section displays the payment options that you have enabled during the invoice creation process as detailed in this article.
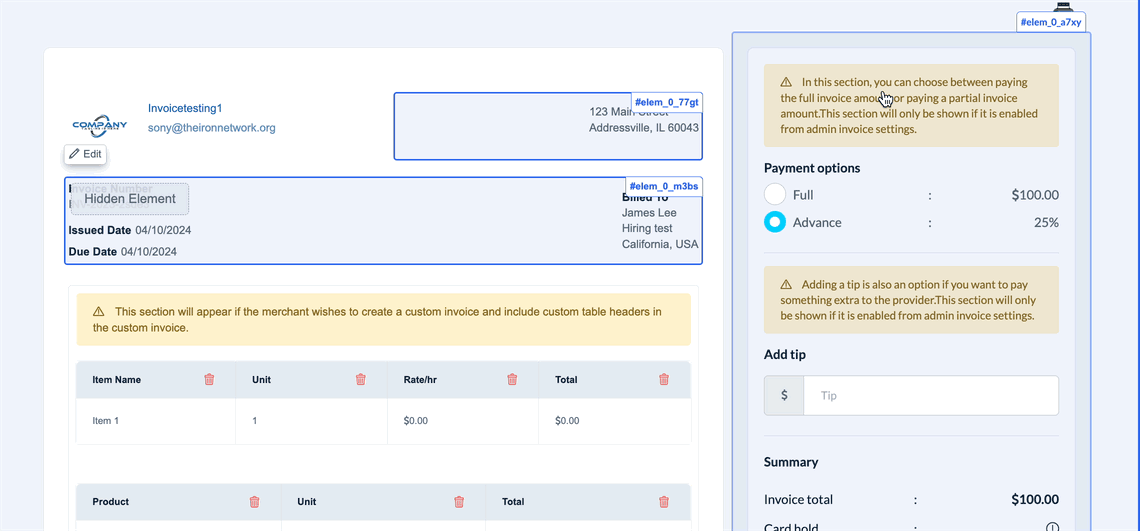
If you have enabled the partial/advance payment option, customers can select whether they are paying the full invoice or the advance portion. You can edit these labels by clicking on the section to reveal the Edit button.
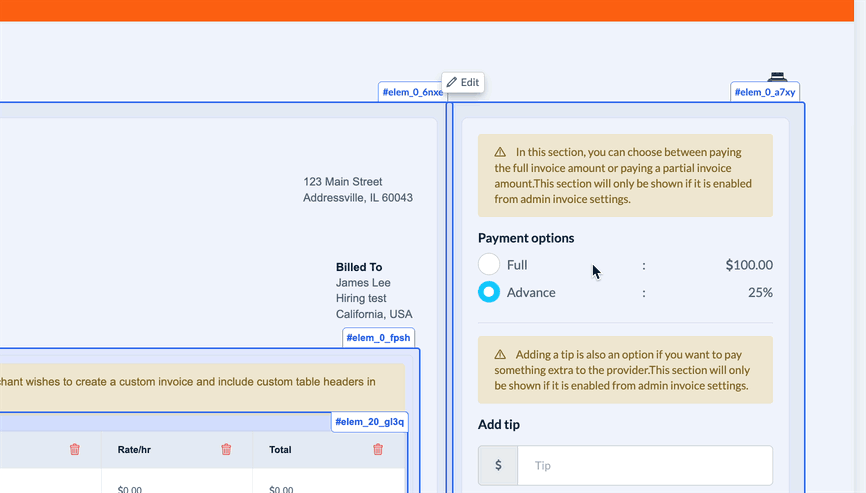
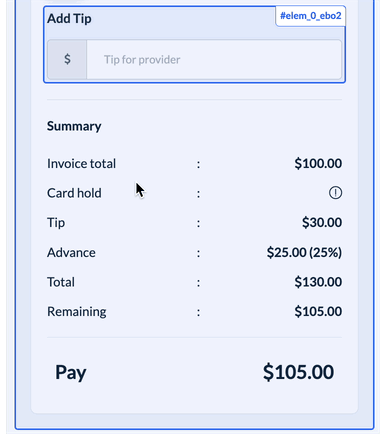
If you have enabled the customer tip payment option, the customer will see an Add Tip section just above the payment summary. The text in this section can also be edited using the Edit option.
Finally, the customer's invoice will display a summary of the charge. Each of these labels can be edited by clicking on the label and selecting the Edit button.
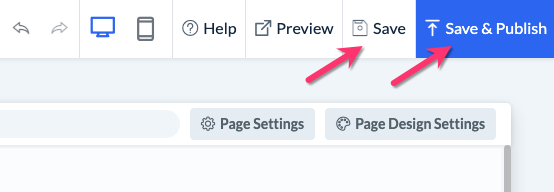
Save & Publish
When you are finished making edits to your page, please click the "Save" button to save your changes to the backend, or "Save & Publish" to push your changes live to your default invoice template.