The purpose of this article is to help you learn:
How to locate the booking form settings section
How to enable or disable features controlled by the form settings
What are form settings?
Your booking form's settings control several key aspects of how you and your customers schedule services, including:
Setting up the one-step, two-step, and/or multi-step form types for customers and admin
Enabling Zip/postal code-based or name-based locations, or no location at all
Allowing customers to book individuals, teams, or both
Special "items" settings for Form 3
Enabling "none" parameters for Form 1
Enabling validation for the form's pricing parameters
Making the service fee taxable
Change the form from live to test mode
Enabling dependencies
To locate your form's settings, please go to:
Settings > Industries > [Industry Name] > Settings > Form Settings
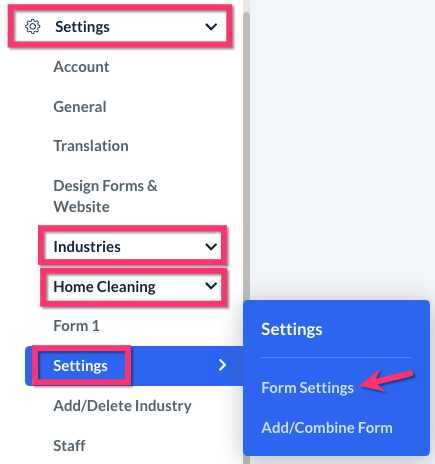
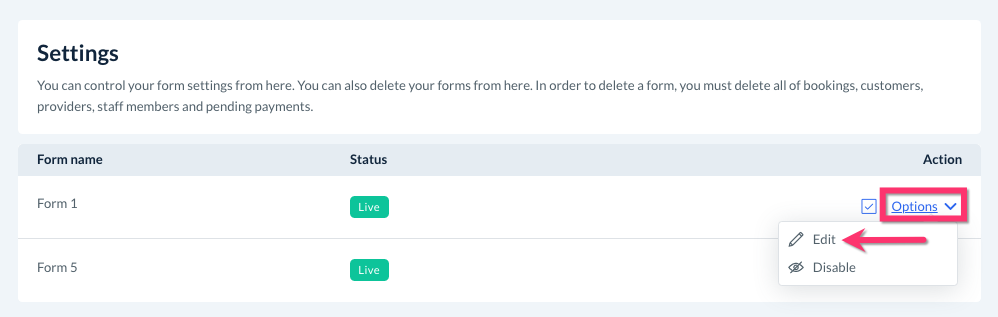
Next, click "Options", then "Edit" to the right of the form name/"Form [#]".
Please Note: The "Form Settings" section is also displayed after adding a new or different booking form to an industry.
Click here to learn how to add new (and combine) booking forms.
Form Settings
Once you are on the "Form Settings" page, please go through each option to set up how you would like your booking form to work.
Would you like a one-step or two-step booking form as the admin?
Select "One Step" to have the booking form appear as a single page on the backend of the site.
Select "Two-Step" if you'd like to have two pages to navigate between when booking on the backend.
Click here to see an example of each view.
Would you like a one-step, two-step, or multi-step booking form on the customer end?
Select "One Step" to have the booking form appear as a single page on the backend of the site.
Select "Two-Step" if you'd like to have two pages to navigate between when booking on the backend.
Select "Multi-Step" if you'd like to break each section into its own step.
Click here to see different examples of what each type looks like.
How would you like the system to manage your locations?
Select "Zip/Postal code-based" if you want your service areas to consist of a list of zip or postal codes. Customers will then enter a zip code to check if you service their area.
Select "Name-based" if you want your service areas to consist of a list of place names. Customers will select their location from a drop-down list when booking a service.
Select "No location" if you want to disable locations for this booking form. This means that you or your customers will not need to enter any location at the top of the form to see if you service their area.
You can also set up your default location preferences for your entire store. Click here to learn how to manage your default locations or disable locations entirely from your store.
Do you perform services at your location?
Select "My location or online" if your services will be provided at your business's location or online.
Select "Client location" to create a service area. This means you will be traveling to your clients to perform the job.
Select "Both" if you perform services both at your business and the client's location.
Click here to learn how to set up each type of location for your booking form(s).
If a customer books online can teams and/or individuals be scheduled?
Check the box next to "Individuals" if you want customers to be able to book individual providers when using this form.
Check the box next to "Teams" if you want customers to be able to book teams using this form.
If you do not check either box, customers will not be able to book any type of provider for a service and they will only see "No Availability" when checking dates and times.
Would you like to add validation for the form's pricing parameters?
Select "Yes" to require the admin and customer to select the pricing parameters to schedule a booking. This prevents customers and admin from creating bookings that do not contain any pricing information or booking details.
For example, if you offer your customers packages, the customer must add at least one package to their cart in order to schedule a service.
Select "No" to disable validation for the form's pricing parameters. This means that customers and admin do not need to select any of the pricing parameters in order to schedule a service.
For example, if you offer pricing based on square footage, the "square feet" box can be left empty and the job will still be saved to the schedule.
Would you want to add an item as a separate entity if the user selects the same item with the same package already in your list chosen? (Form 2)
If you are using Form 2 and have set up items, decide if multiple selections of the same item and package belong to the same entity or if they should be treated as separate entities.
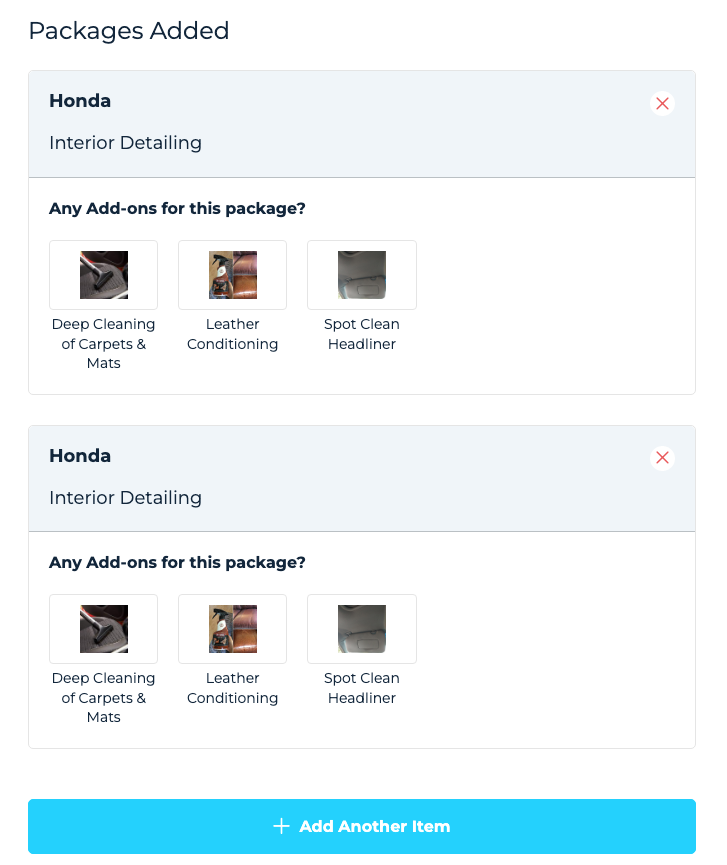
Select "Yes" to treat each item as a separate entity. When the same item is added more than once, each item will be considered separate from the previous one.
In this example, the booking form reflects that two separate Honda cars have been added, each set up for the "interior detailing" package.
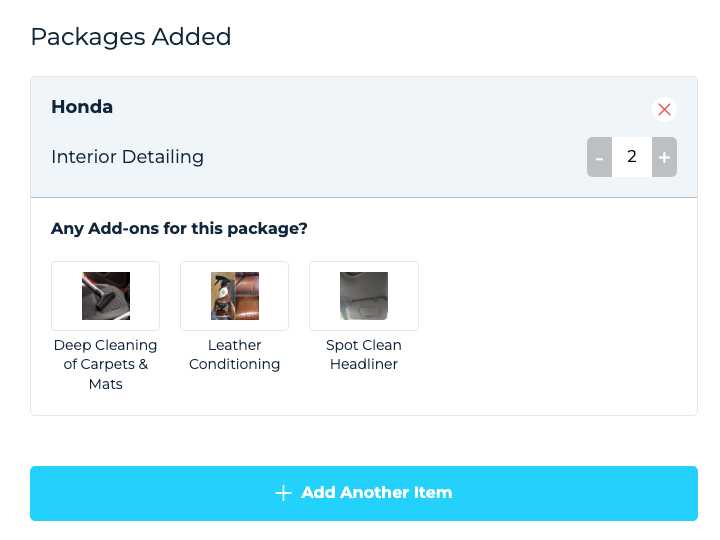
Select "No" to treat every item as one entity. When the same items are added more than once with the same package, the form will display one item with multiple packages.
In this example, the booking form reflects that one Honda has been added with two of the same package.
Would you want to add an item as a separate entity if the user selects the same item with the same package already in your list chosen? (Form 2)
This option Form 2 settings allow you to decide whether you would like to show items as one entity or multiple.
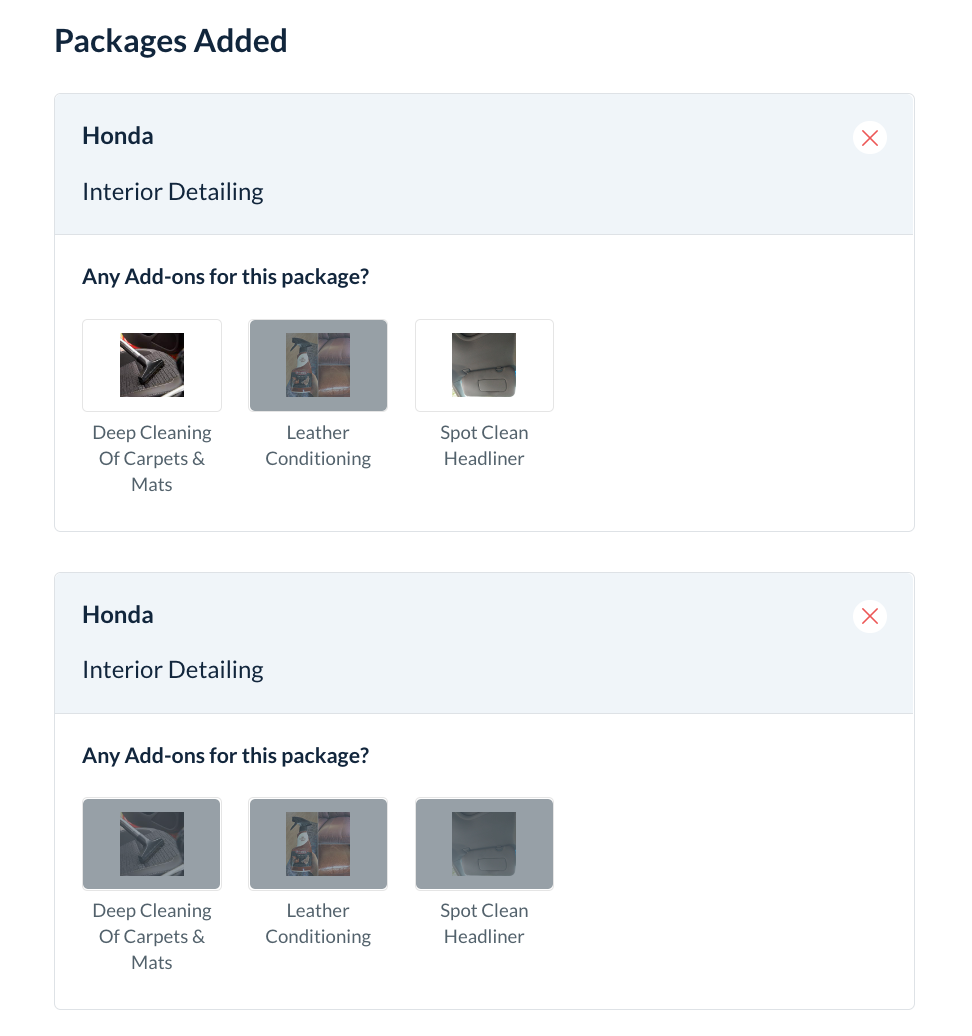
Select "Yes" to show each item and package as separate entities. For example, this form uses the option to indicate the packages and add-ons for each item (car). This customer has two different cars that require service during this booking.
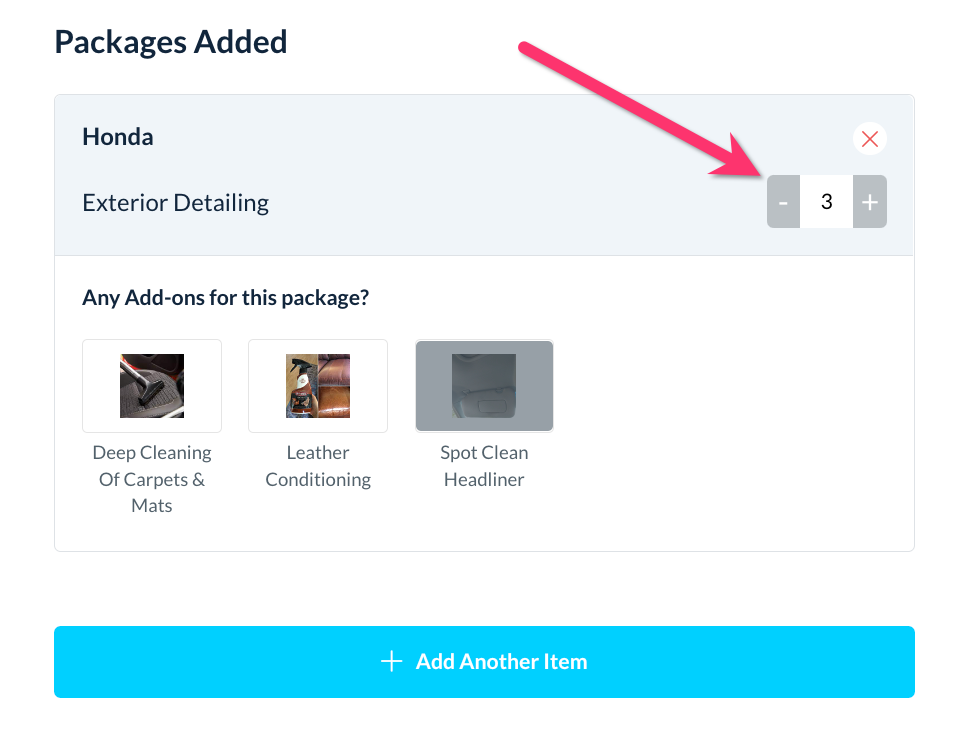
Select "No" if you want to consolidate all packages into one item if the same item is selected more than once. This option assumes there is only one item being serviced. In this example, there is just one car (item) being serviced. If multiple packages or services are added under the "Honda" category, the system will assume these will be for this single car.
Would you like to add an option for 'None' to the pricing select list? (Form 1)
This feature allows you to add "None" as an option for the pricing parameters/variable categories added to your form.
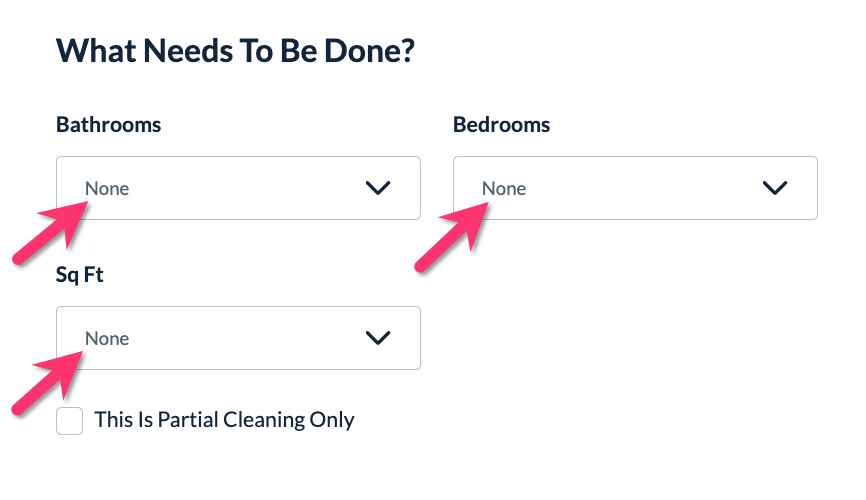
Select "Yes" to add an option for "None" to each variable category. This option will not have any settings and will not impact the booking price or time estimate.
Select "No" if you do not want to add the "None" option for each category.
Would you like to make the service fee taxable?
If you have set up service fees and taxes for your locations, decide whether or not the service fee will be taxable.
Select "Yes" to charge tax on the service fee.
Select "No" to exempt tax on the service fee.
Click here to learn how to enable taxes for your locations.
Click here to learn how to set up service fees.
Form Status
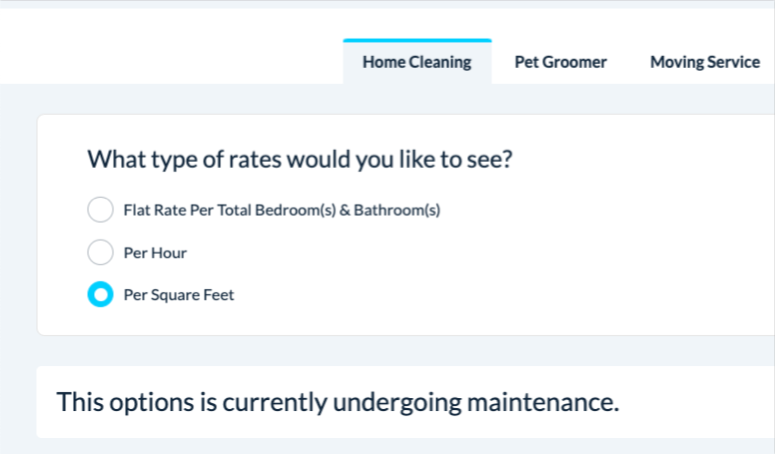
The toggle button below "Form Status" allows you to control whether the form is live or in test mode. When a form is in test mode, customers see an "under maintenance" message on the front end while the admin still has access to make adjustments and updates.
If you would like to turn off your form from being used by customers, switch the toggle button to "Disabled".
Click here to learn more about test mode versus disabling a form or industry.
Dependencies
The last several questions in your form settings relate to setting up dependencies. When you enable a dependency for a category in your booking form, you can customize how other categories will display when this option is selected. Simply put, one category's options will depend on the selection(s) of another.
To set up a dependency, check the box beneath the question that contains the category you would like to link.
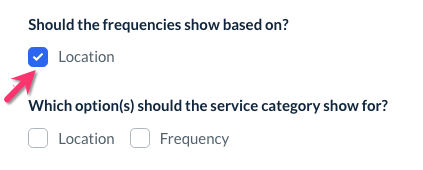
In this example, the form's frequencies will depend on which location the client is booking. This allows the business to offer different frequencies based on which location is being serviced.
Click here to learn more about how to set up dependencies based on location.
Click here to learn more about how to set up dependencies based on frequency.
Remember to Save!
Once you have gone through all of your form's settings and have made your selections be sure to click the blue "Save" button at the bottom of the page.

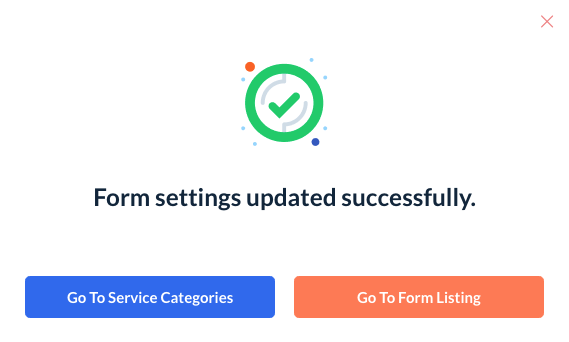
Once you have saved your updates, you will see a pop-up that lets you know the form settings have been updated successfully. It also asks if you want to be redirected to the service category section or the form listing. You can also click the red X icon at the top right corner to close this window.