The purpose of this article is to help you and your providers learn more about:
How to access checklists from the provider dashboard and provider app
How to mark checklist tasks and subtasks as "completed" or "does not apply"
How to send checklist notes to the admin and staff
How to upload job media to a checklist or booking
Getting Started
This article goes over how providers access and use features related to the Checklist Module. If you have not added or imported any provider or team accounts yet, or are not familiar with the Bookingkoala checklist features, please refer to the following guides:
Click here to learn more about provider and team accounts, including how to add and edit provider/team profiles.
Click here for a general overview of the "Checklist Module" and how to get started.
Provider Checklist Access
Providers can complete checklist(s), send checklist notes, and add media for a booking from the "Booking Details"/"View Details" page.
The "Booking Details"/"View Details" page is available for bookings assigned to that provider or team in the provider dashboard.
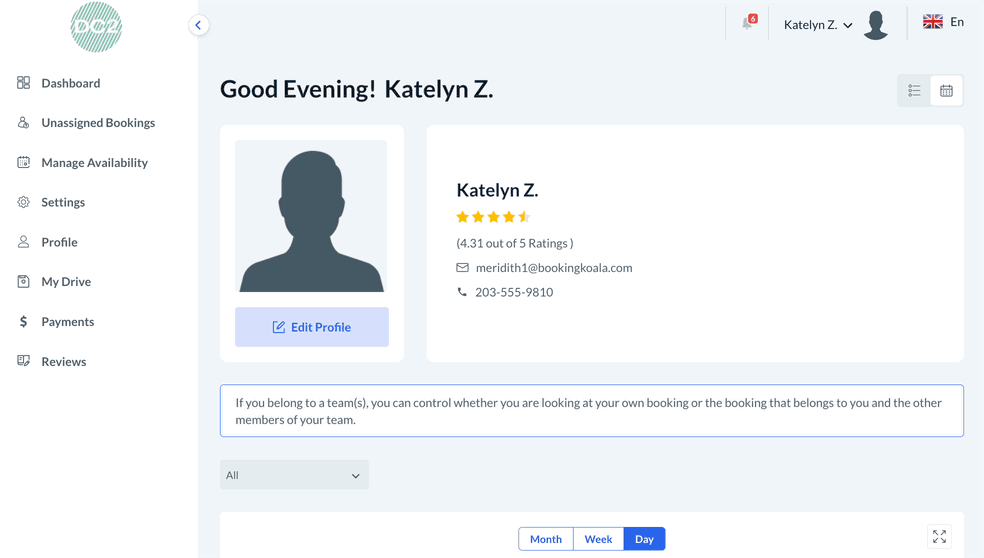
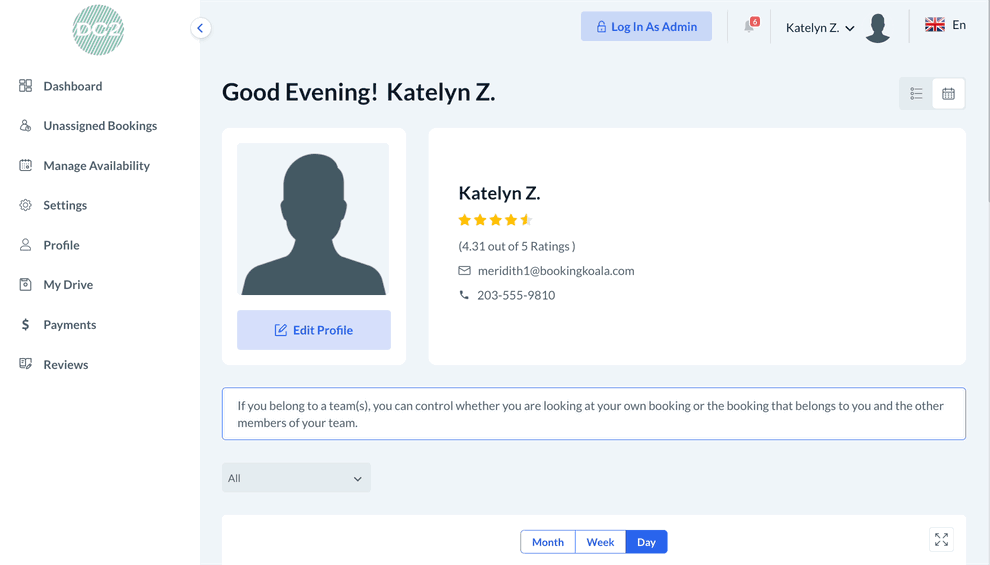
To log in to the provider dashboard, providers can enter their email and password into your site's "Login" page using any web browser, or they can download and log into the BookingKoala for Providers app.
Click here to learn how providers and other types of BookingKoala users log into their dashboards.
The features available to providers in the checklists will depend on the account's subscription (Starter, Growing, or Premium) as well as each checklist's settings as related to the provider(s) or team.
Provider Checklist Settings & Permissions
Like other sections of the software, the admin controls which checklist features providers can access. Provider access to checklists and related features is set up under the "Checklist Settings" section in the admin checklist dashboard.
To review the provider checklist settings for a specific checklist, please go to:
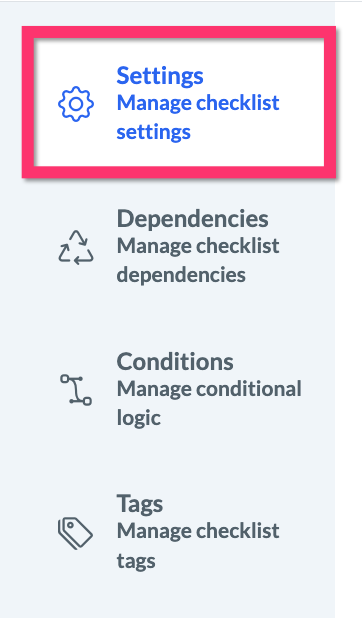
Settings > General > Checklist
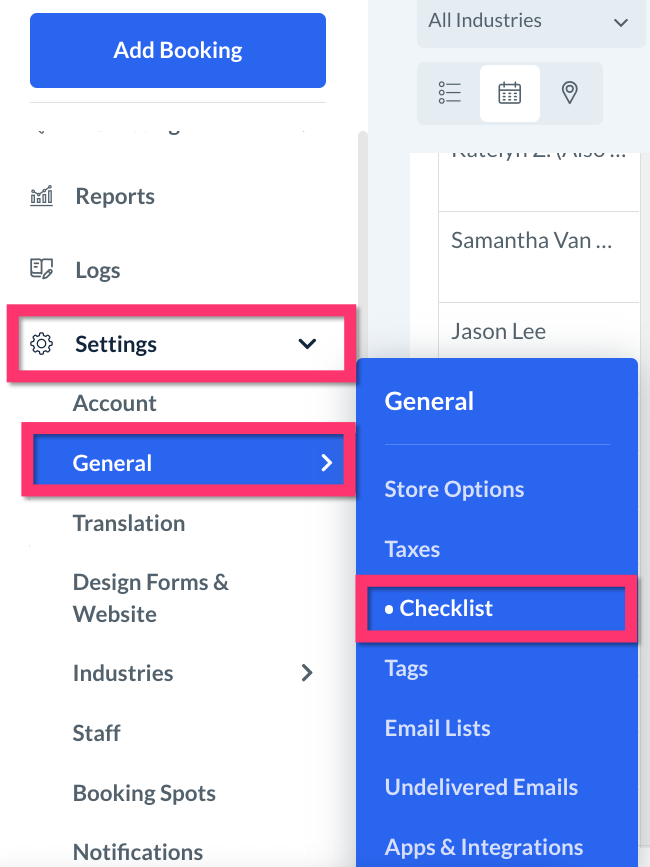
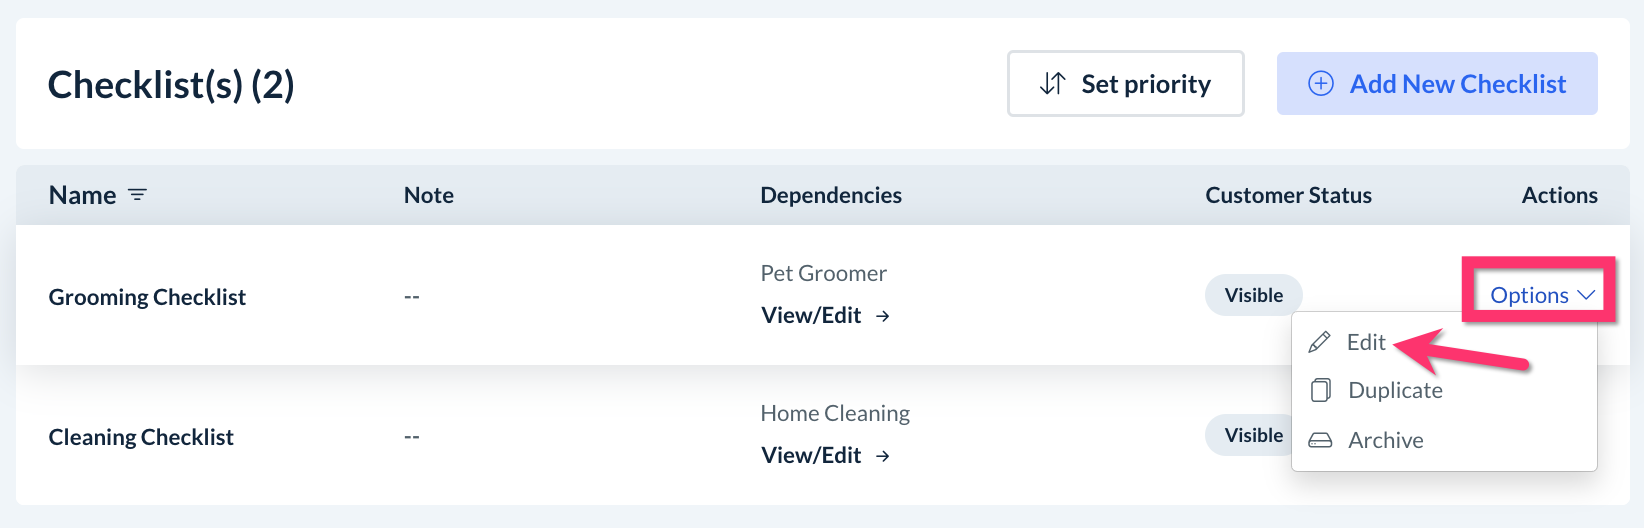
Once the dashboard has opened, select "Options" then "Edit" under the "Actions" column to open a specific checklist.
To view a checklist's settings, click on the "Settings" tab to the right of the "Builder" tab at the top of the Checklist Builder page.

By default, the "Settings" tab always directs to the "Settings" section located at the top of the left-side menu.
The provider checklist settings and permissions in this section are summarized in the list below:
Is the provider/team required to complete the checklist prior to clocking out?
Yes
No
If the service is recurring, would you like to display this checklist for all bookings in the series?
Yes
No
If No:
Display this checklist for the first [#] appointments.
Display this checklist after [#] appointments.
Should providers be able to add notes to the checklist?
Yes
No
If Yes:
Would you like to allow providers to add notes for individual tasks/subtasks or should the notes be added for all tasks/subtasks?"
Individual tasks/subtasks
All tasks/subtasks
If a team is assigned to the booking, who will be allowed to add notes to the checklist?
Team leader only
Everyone (individually)
Would you like to set up a default checklist note to display to providers?
Yes
No
Click here to view a detailed guide on how to set up and customize checklist settings.
How to Use Checklists: Web Version
Providers can view booking checklists from the provider's dashboard via a web browser (the "Desktop") or the BookingKoala for Providers App. This section discusses how to complete checklists and utilize other checklist module features from a web browser.
How to View the Checklist(s)
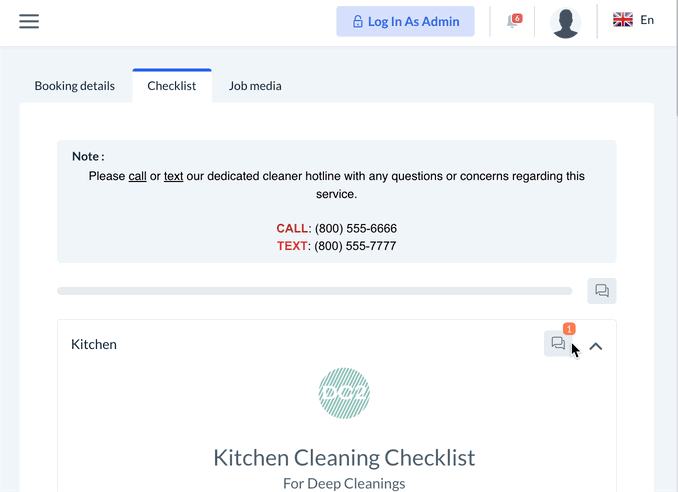
On the web version of the provider dashboard, providers can access the checklist(s) by clicking on a booking from the job calendar and selecting the "Checklist" button from the "Booking Details" menu.
If the provider is viewing their schedule as a list, they can click the eye icon/"View" button and select the "Checklist" tab at the top of the page.
How to Update & Complete Checklist Tasks
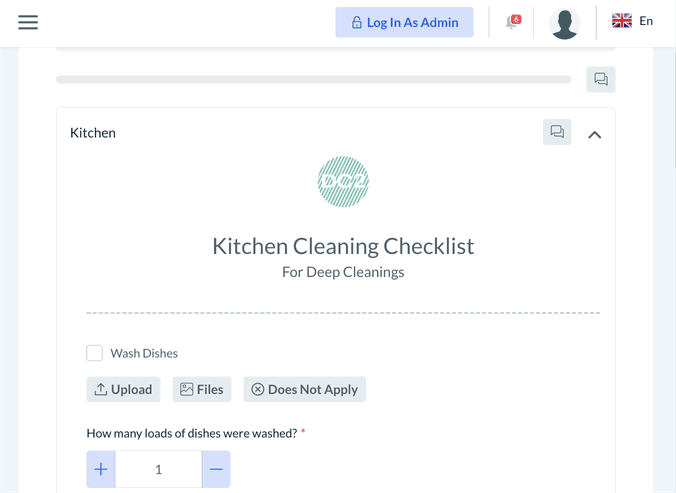
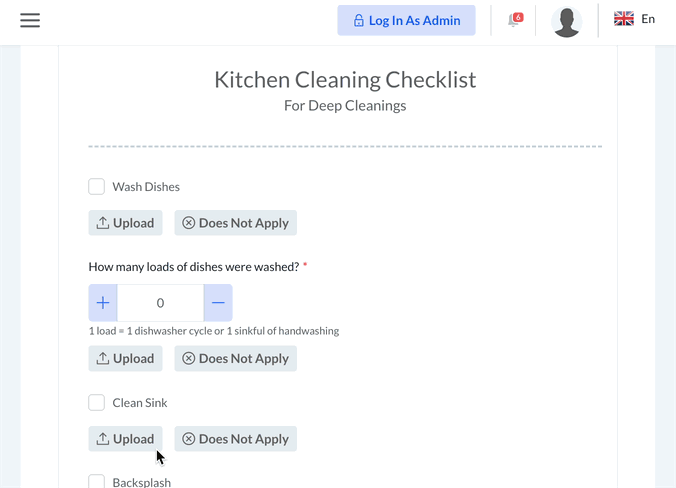
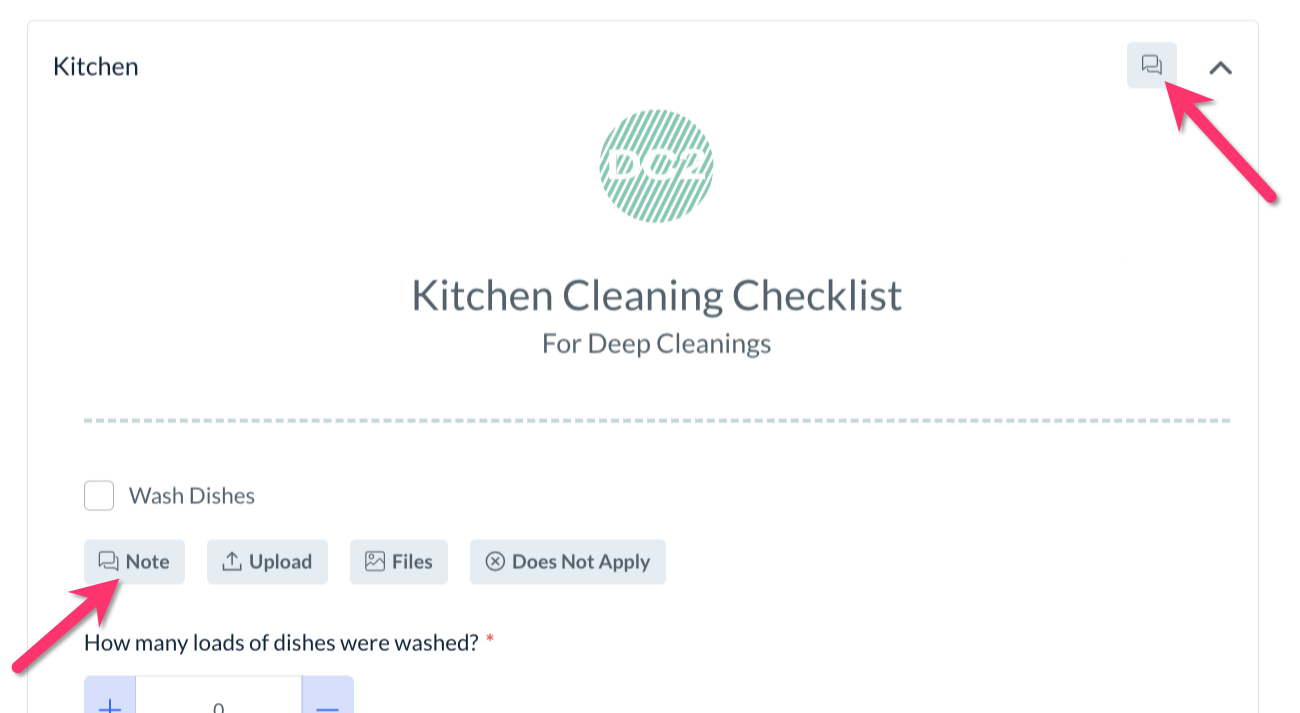
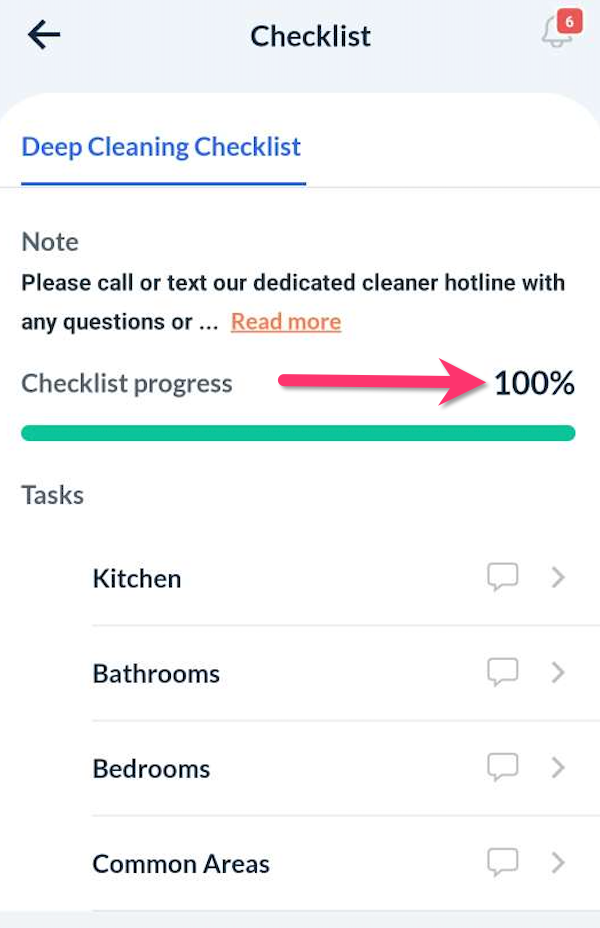
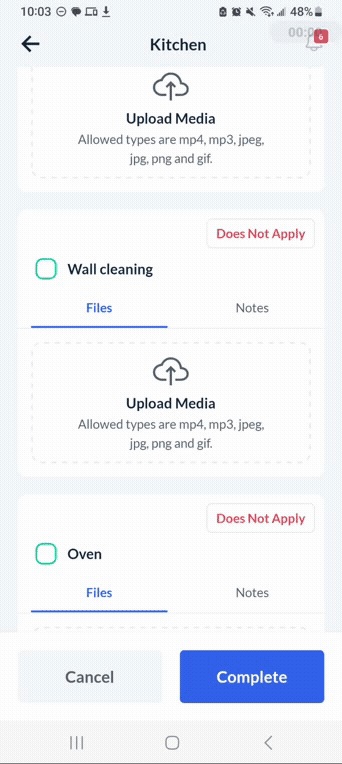
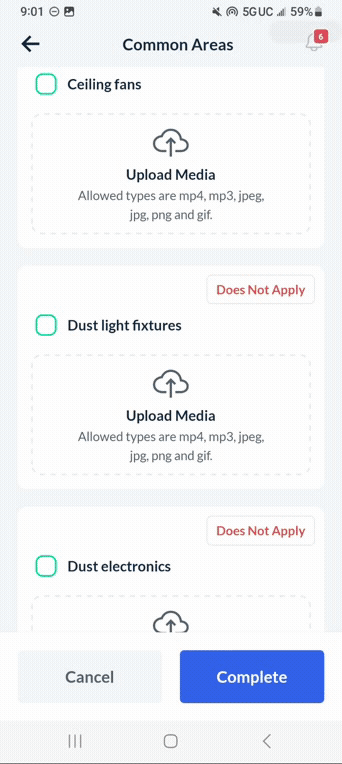
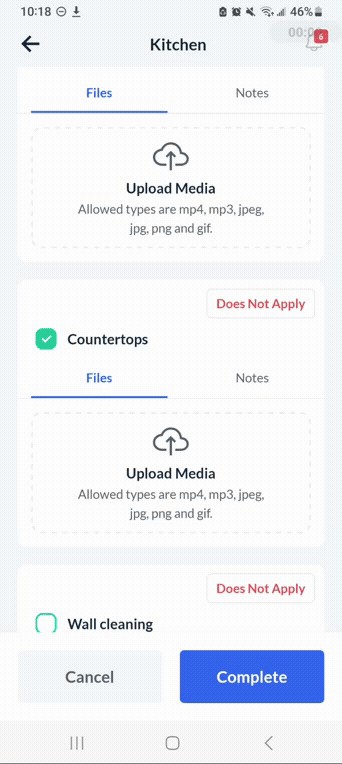
Upon selecting the "Checklist" button or tab, the system opens the "Checklist" page where the provider can view the checklist tasks, subtasks, and other elements.
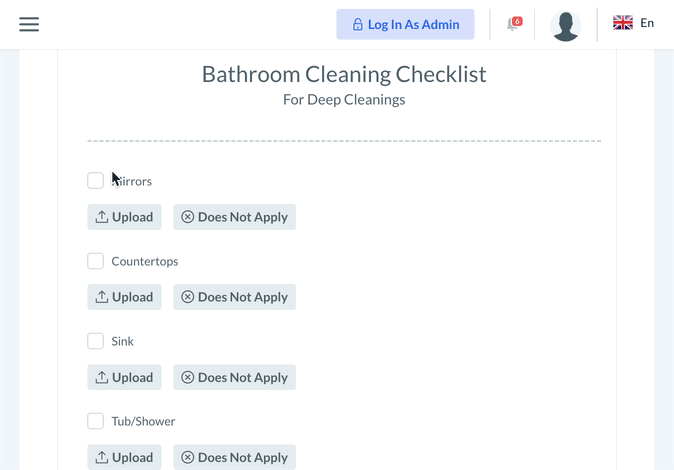
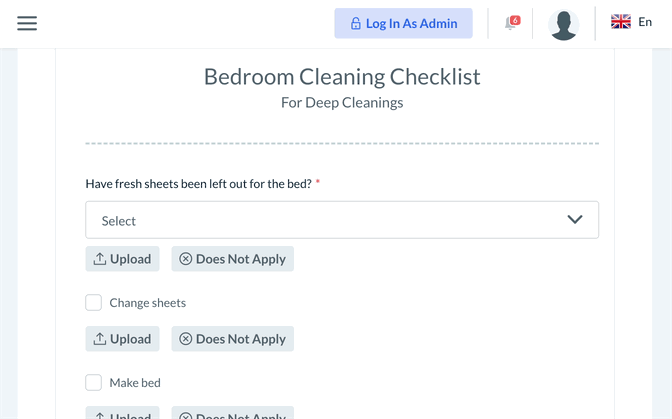
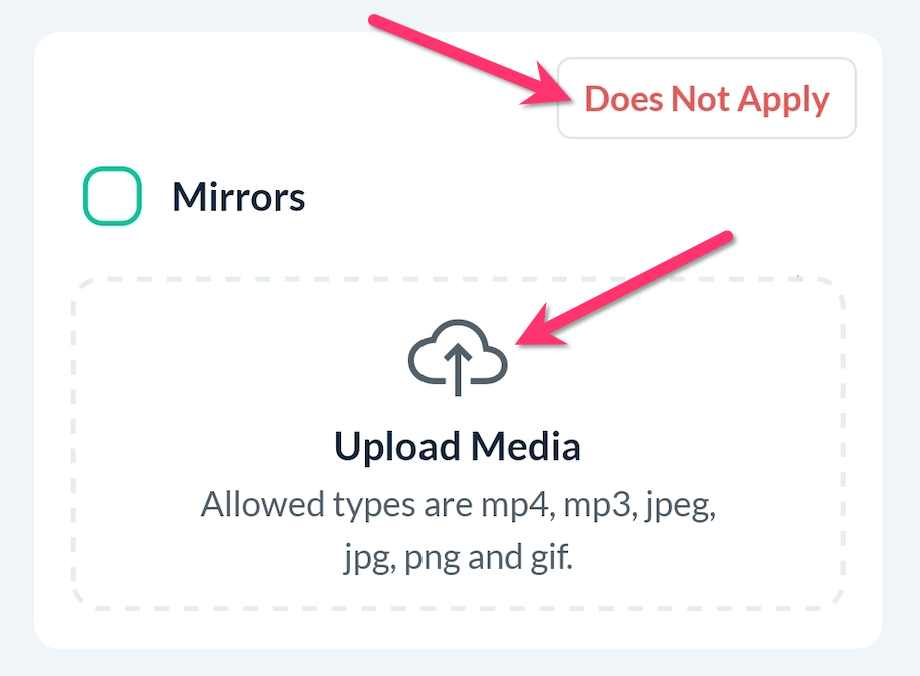
Providers will see up to two options beneath each subtask: "Upload" and "Does Not Apply".
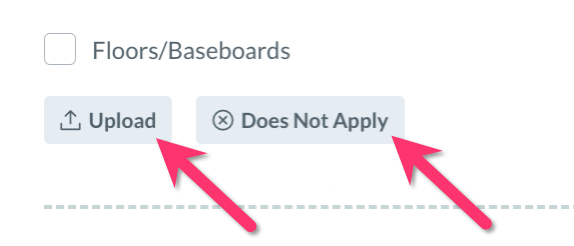
The "Upload" button allows providers to upload job media for a specific subtask using an "Attach File" pop-up window.
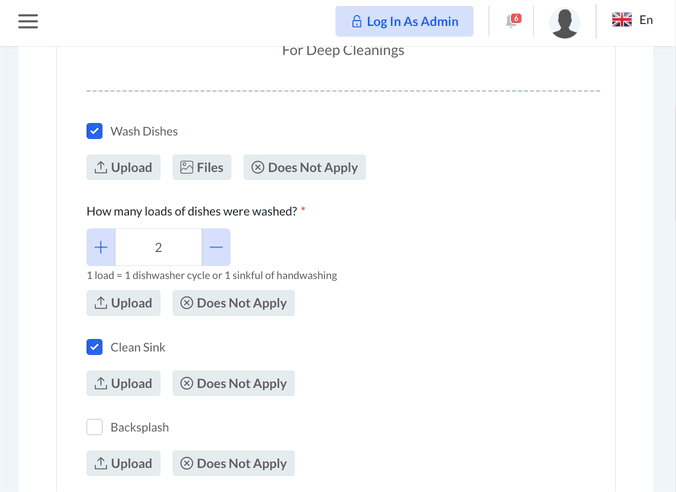
The "Does Not Apply" button allows admin and staff to cancel a specific subtask that is not included in the service.
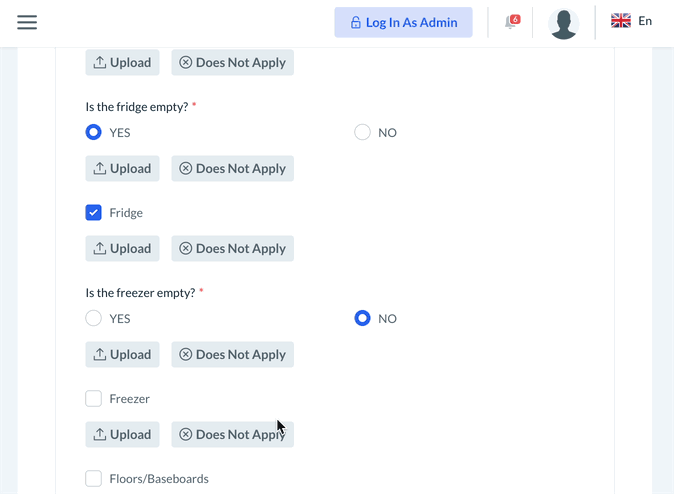
Providers can mark most subtasks as complete by checking the box to the left of the task name or description.
Other tasks come in the form of single-choice, multiple-choice, written responses, or other elements that log details, feedback, or other information about the service.
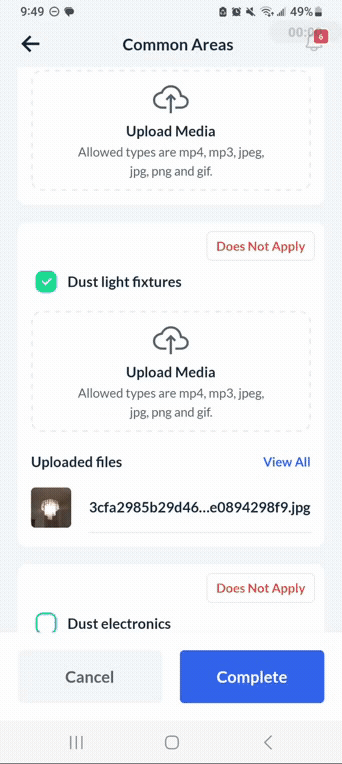
As soon as the provider completes or updates one of the checklist subtasks, a note is added to the right of that subtask that says "Completed by: [Provider Name]". The checklist progress bar will increase and the new percentage of completed tasks will be displayed as "[#]% Completed", and a green system alert will confirm the "Subtask value has been updated successfully".
Checklists for providers, admin, staff, and customers are updated simultaneously, in real-time, without reloading the page.
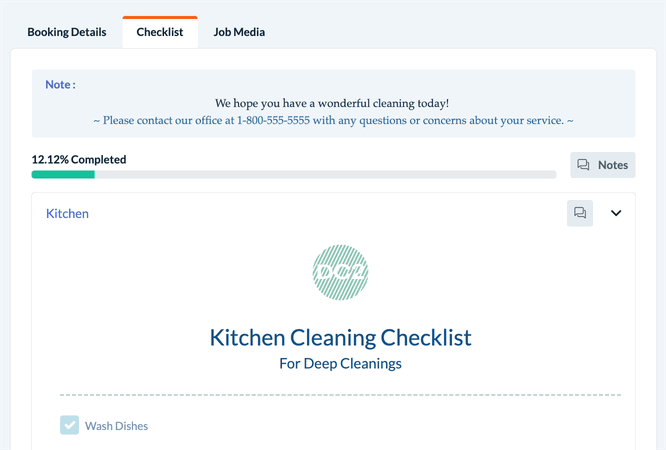
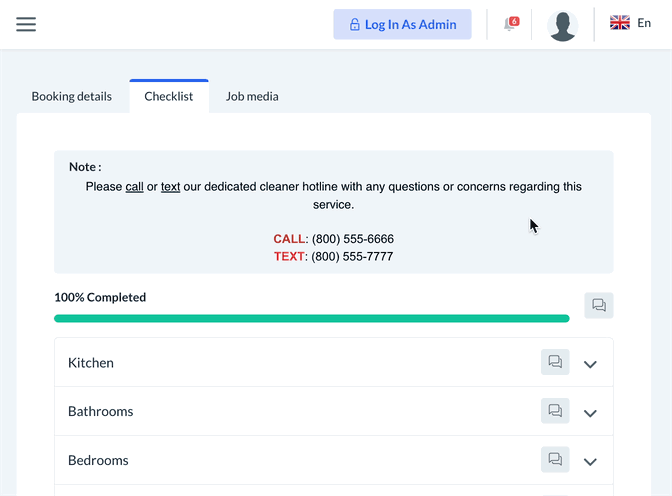
Once all subtasks are completed or marked as "Does Not Apply", the progress bar will show "100% Completed".
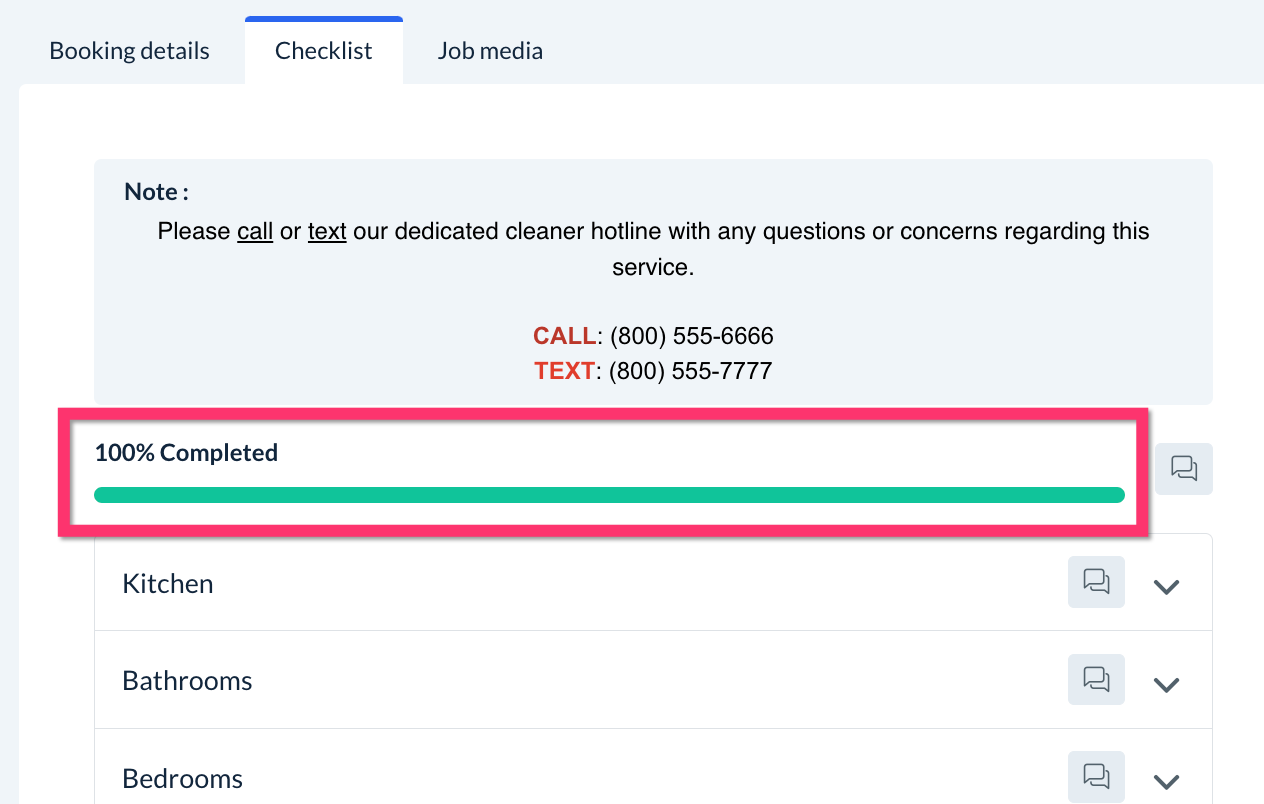
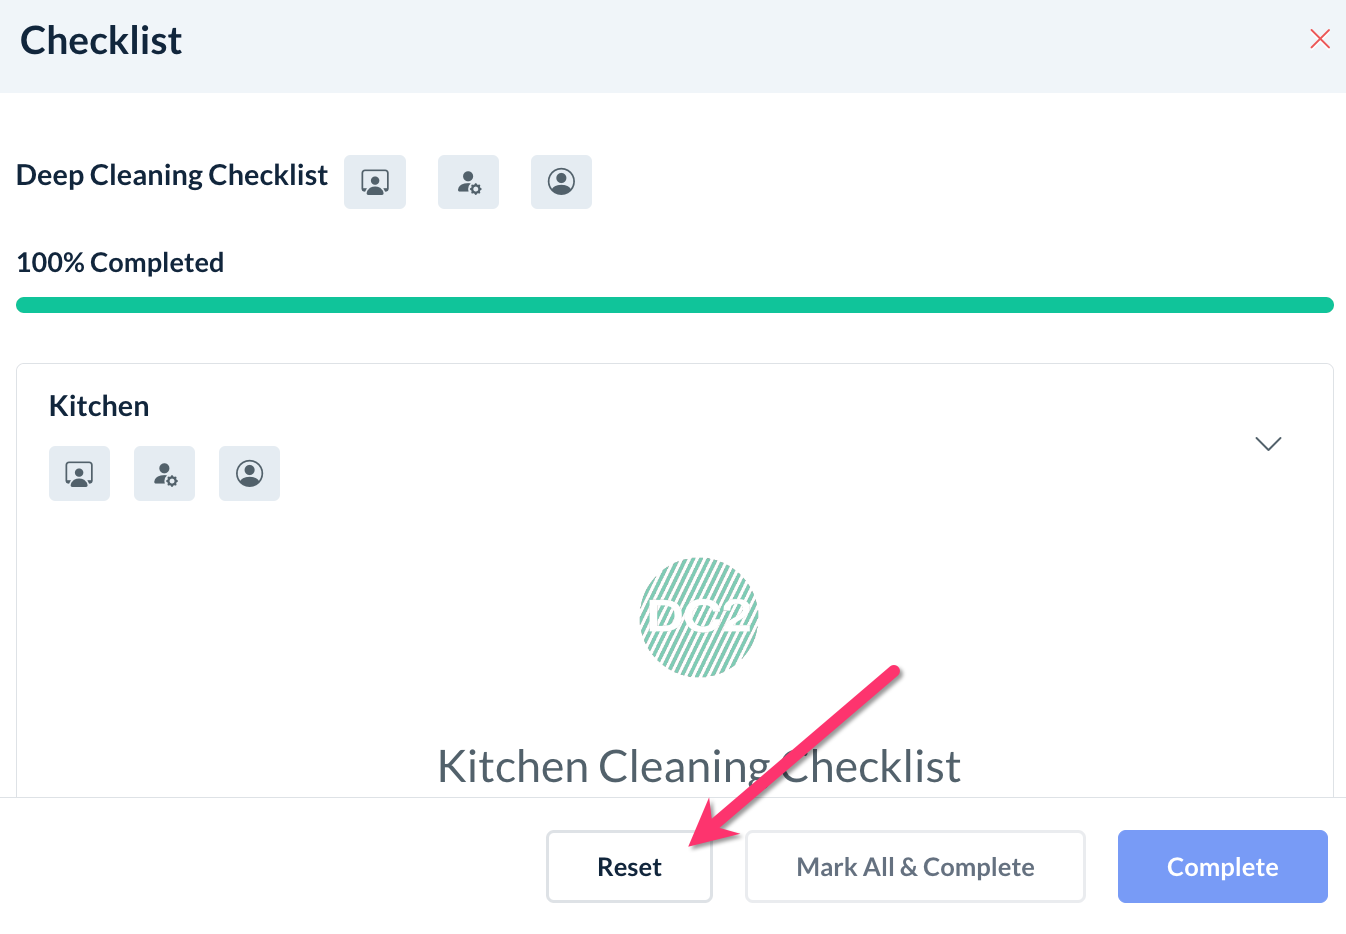
Upon clicking the "Complete" button, the checklist will be submitted and the provider(s)/team will not be able to make any further changes.
If a provider accidentally clicks the "Complete" button but has missed completing a subtask or uploading a media file, they cannot go back to that task to change it.
Instead, the provider must contact the admin or staff with permission to "Reset" the checklist. Resetting a checklist will reactivate all subtasks and clear all previously uploaded media, so the provider(s) must upload the data again.

Click here to learn how the admin or staff can reset a checklist for the provider(s).
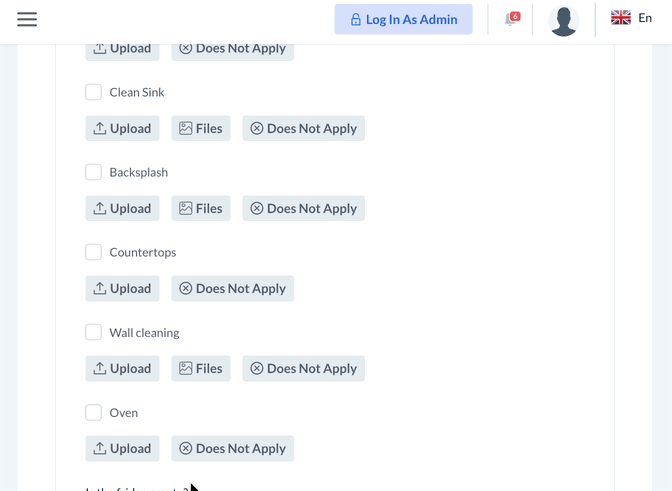
How to Upload & Tag Job Media
In addition to the "Checklist" tab, the Booking Details page will include a "Job Media" tab to display all images, audio, and video files that have been uploaded by the provider for each subtask and task.
To upload media to the checklist, use the "Upload" option described earlier in the article.
Once a file has been selected, providers can optionally select one or more checklist media tags to assign to the file. Media tags are enabled by the merchant and can be used to control the types of files the customer is allowed to view.
Providers can add or edit media files and tags using the "Files" button below each subtask containing job media.
Click here to learn more about how admin and staff set up job media tags for checklists.
How to View & Send Checklist Notes
If permission is enabled, providers also have a "Notes" feature from which they can view and send chat-like messages from the checklist to the merchant (the admin or staff).
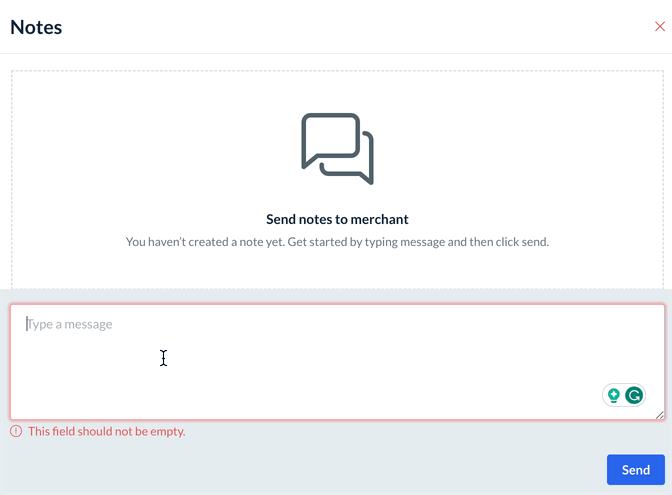
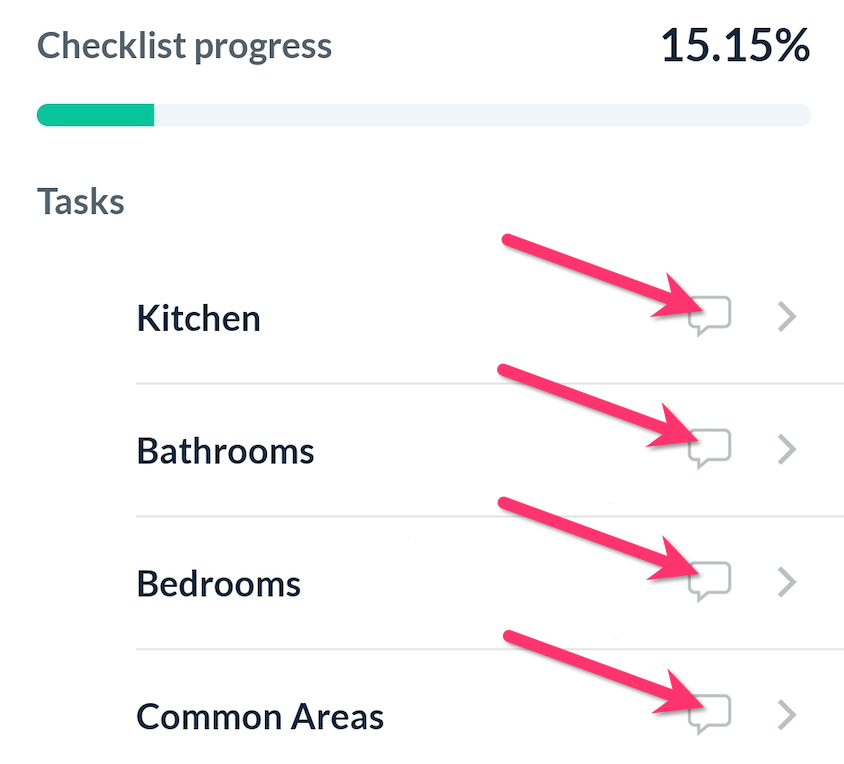
The primary "Notes" section for the entire checklist is located near the top-right corner of the checklist (below the default note for the provider if applicable).
If providers are allowed to add notes for individual tasks and/or subtasks, they will see "Notes" buttons beneath the enabled tasks and/or subtasks.
Unread notes from the merchant will display a small red number icon on the corner of the "Notes" buttons.
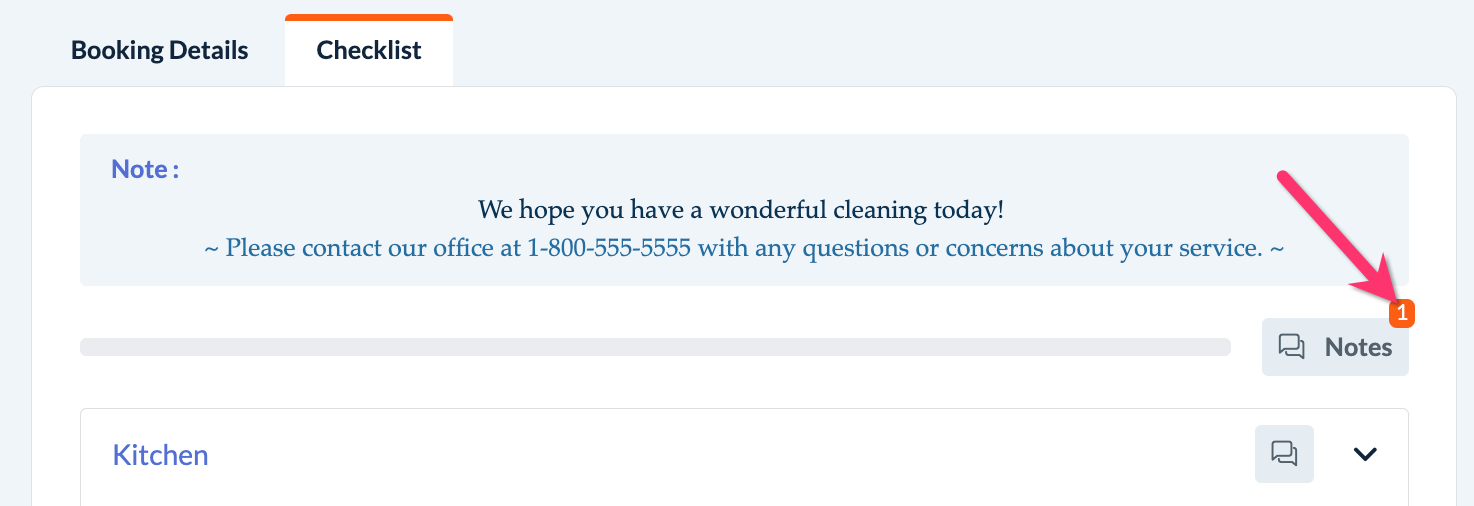
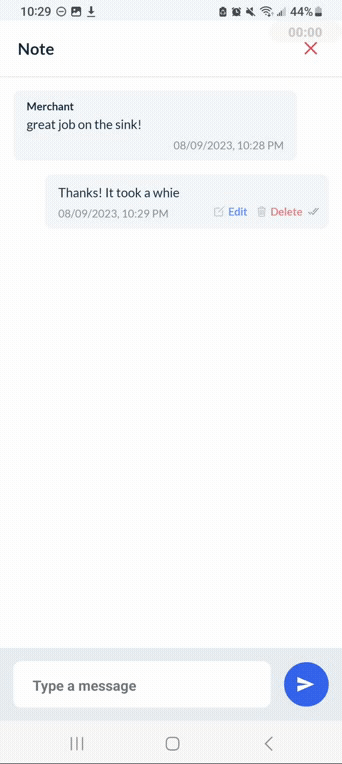
Each note displays who added the note and what time it was sent. Providers can also edit or delete notes they have sent to the merchant.
How to Use Checklists: App Version
Providers can also view booking checklists from the provider's dashboard via the BookingKoala for Providers App. Click here to find download links for the iPhone and Android apps.
How to View the Checklist(s)
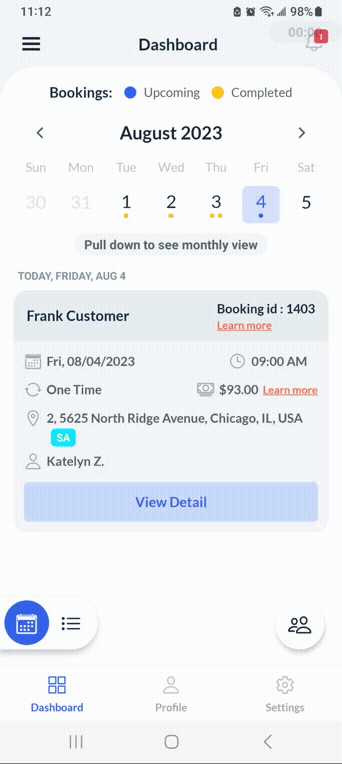
On the BookingKoala for Providers app, providers can access the checklist(s) by selecting the "View Detail" button for any booking on their Dashboard and clicking on the "Checklist" tab at the bottom of the "Booking Details" page.
How to Update & Complete Checklist Tasks
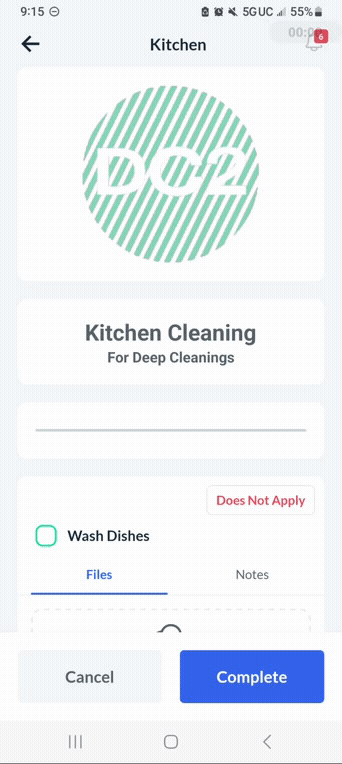
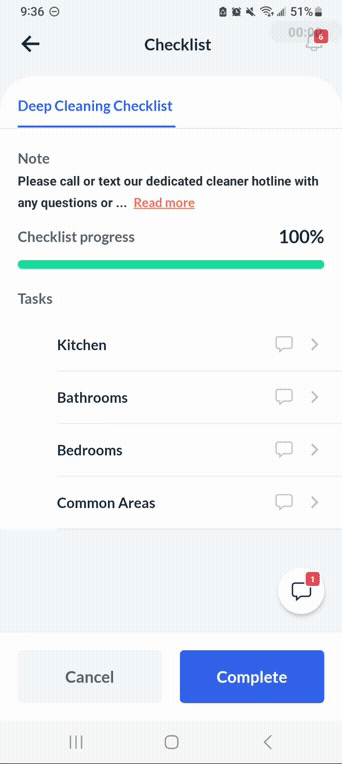
Upon selecting the "Checklist" tab, the system opens the "Checklist" page where the provider can view the checklist tasks, subtasks, and other elements.
Providers will see up to two options for each subtask: "Upload" and "Does Not Apply".
The "Upload" button allows providers to upload job media for a specific subtask using the "Upload Media" pop-up window.

The "Does Not Apply" button allows providers to cancel a specific subtask that is not included in the service.

Providers can mark most subtasks as complete by checking the box to the left of the task name or description. Other tasks come in the form of single-choice, multiple-choice, written responses, or other elements that log details, feedback, or other information about the service.
As soon as the provider completes or updates one of the checklist subtasks, the checklist progress bar will increase and the new percentage of completed tasks will be displayed as "[#]% Completed".
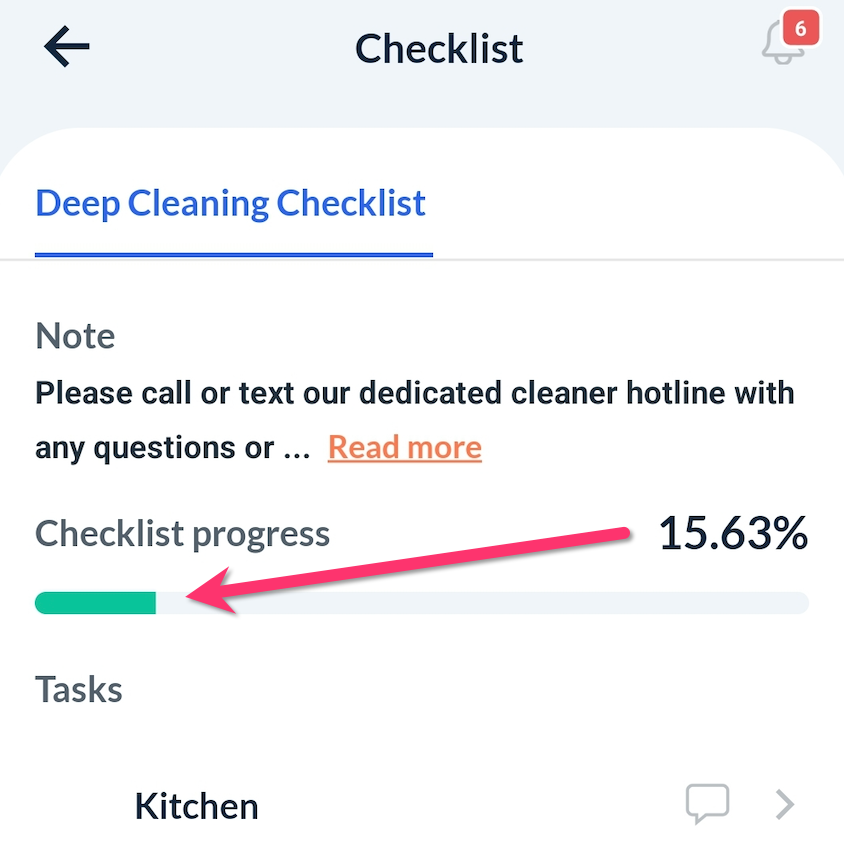
Checklists for providers, admin, staff, and customers are updated simultaneously, in real-time, without reloading the page.
Once all subtasks are completed or marked as "Does Not Apply", the progress bar will show "100% Completed".
Upon clicking the "Complete" button, the checklist will be submitted and the provider(s)/team will not be able to make any further changes.
If a provider accidentally clicks the "Complete" button but has missed completing a subtask or uploading a media file, they cannot go back to that task to change it.
Instead, the provider must contact the admin or staff with permission to "Reset" the checklist. Resetting a checklist will reactivate all subtasks and clear all previously uploaded media, so the provider(s) must upload the data again.
Click here to learn how the admin or staff can reset a checklist for the provider(s).
How to Upload & Tag Job Media
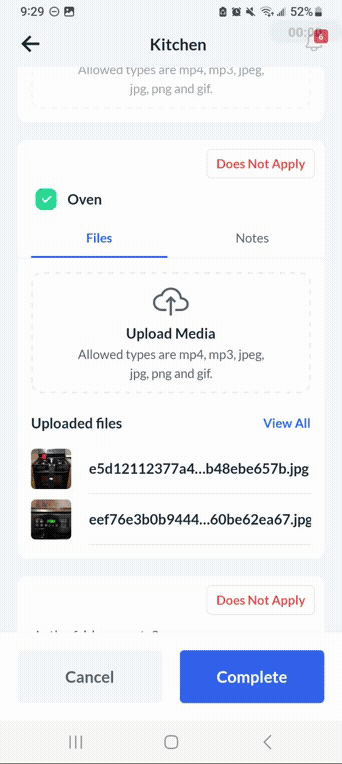
In addition to the "Checklist" tab, the Booking Details section will include a "Job Media" tab that displays all images, audio, and video files that have been uploaded by the provider under each subtask and task. Providers can also upload media directly to this section.
To upload media to the checklist, providers can use the "Upload" option depicted earlier in the article. There are three main options in the "Upload Media" pop-up: "Upload Image", "Upload Audio", and "Upload Video".
"Upload Image" - Providers can use this to upload image files. This option offers two options:
"Take Photo" - Providers can use their device's camera to take a new photo.
"Choose From Files" - Providers can select photos saved to their devices.
"Upload Audio" - Providers can use this option to upload audio files. This option offers two options:
"Record Audio" - Providers can use their device's camera to record a new audio file.
"Choose From Files" - Providers can select audio files saved to their devices.
"Upload Video" - Providers can use this option to upload audio files. This option offers two options:
"Record Video" - Providers can use their device's camera to record a new video.
"Choose From Files" - Providers can select videos saved to their devices.
Please Note: To upload various media files, the provider must grant the app access to their mobile device's files and folders. Images (maximum 10 files selected at a time for the upload) and audio recordings (maximum 5 files selected at a time for the upload) can be uploaded up to a maximum size of 10 MB. Videos (maximum 5 files selected at a time for the upload) up to 50MB and 60 seconds in run-time can be uploaded as Job Media.
Once a file has been selected, providers can optionally select one or more checklist media tags to assign to the file. Media tags are enabled by the merchant and can be used to control the types of files the customer is allowed to view.
Providers can add, edit, and delete media files and tags using the "View Files" button below each subtask containing job media.
Click here to learn more about how admin and staff set up job media tags for checklists.
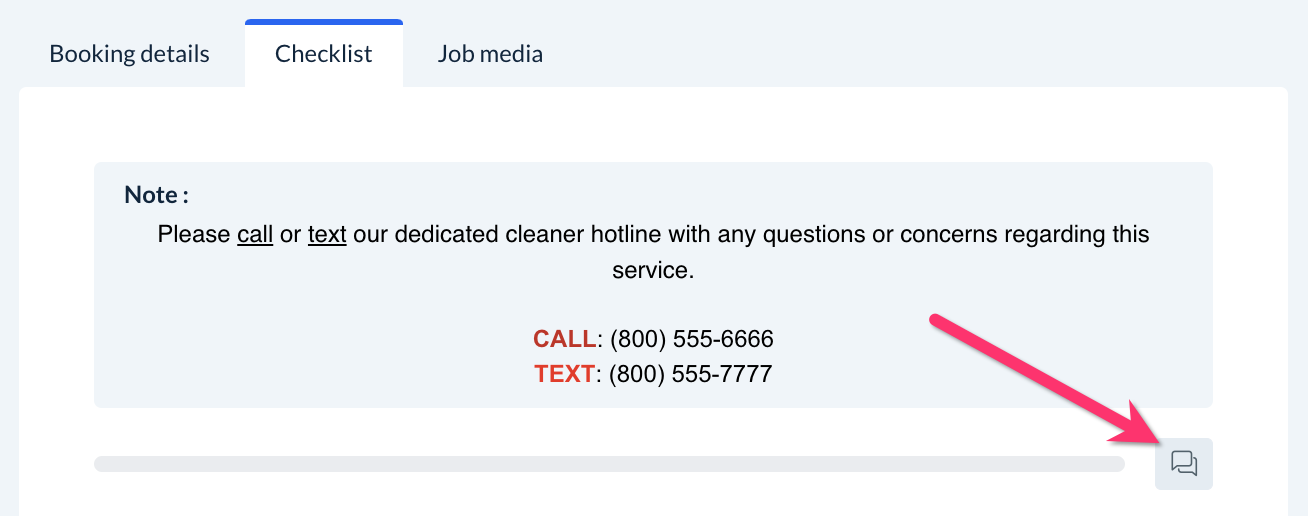
How to View & Send Checklist Notes
If permission is enabled, providers also have a "Notes" feature from which they can view and send chat-like messages from the checklist to the merchant (the admin or staff).
The primary "Notes" section for the entire checklist is located in a chat icon at the bottom-right corner of the checklist. Unread notes from the merchant will display a small red number icon on the corner of the "Notes" buttons.
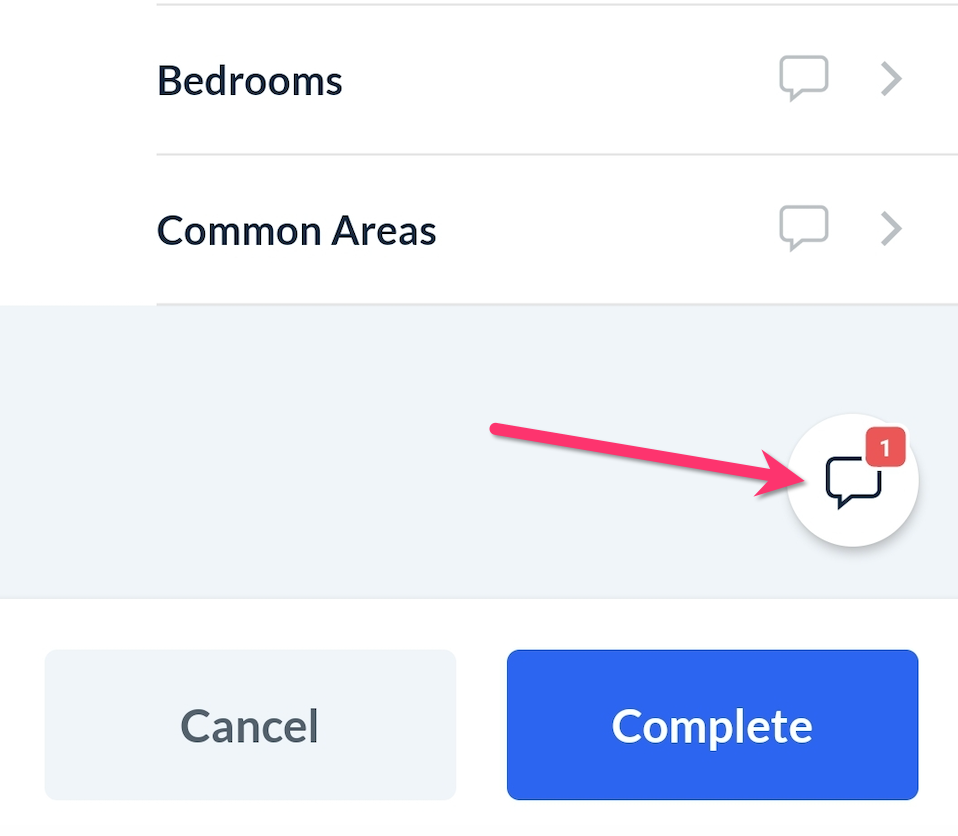
If providers are allowed to add notes for individual tasks and/or subtasks, they will also see "Note" buttons beneath the enabled tasks and/or subtasks.
Each note displays who added the note and what time it was sent. Providers can also edit or delete notes they have sent to the merchant.
Checklist Access for Other User Types
To learn more about how other users can access and use the Checklist Module features, please refer to the guides linked below:
Admin & Staff
Click here to learn how to set up staff permissions for the Checklist Module.
Click here to learn about the admin checklist dashboard, including how admin and staff view, filter, add, edit, archive, publish, and delete checklists.
Click here to learn how admin and staff use various checklist tools on the booking form.
Click here to learn how admin and staff access the "Checklist Progress" dashboard, including how to view live checklist updates, add notes, and send messages to the customer or provider(s).
Customers
Click here to learn how customers access checklists and use checklist features.