The purpose of this article is to help you:
Upload a business logo
Change your business name
View your store currency
Change your store/account email
Set your time zone
Set your time format
Set your date format
Add country codes for phone numbers
Change your contact phone number
Set your phone number format
Select which forms of payment you would like to accept
Enable which types of forms you would like to offer
Manage the colors for the "calendar view"
Set filter preferences
Change the name of the "service fee" to something else
Store Info Settings
The "Store Info" section under your General Store Options contains a lot of the basic details about your business. To customize these options, go to:
Settings > General > Store Options > General
Click the plus sign icon to expand the "Store Info" section.

Upload a Logo
You can upload your business logo at the top of this section. The image should not be more than 225 x 50 pixels in size or it will be resized by the system. The allowed file types are JPG, JPEG, PNG, and GIF.
We recommend having a transparent background for the image so it can be better integrated into your site's overall design. This logo will be displayed on the front- and back-end of the website, including inside customer accounts, provider's accounts, admin/staff accounts, and inside all of your notifications.
Click the blue "Browse" button to select the file from your device. Be sure to click "Save" at the bottom of the screen to update the logo.

You can also upload your logo by going to:
Settings > Design Forms & Website > Website Builder & Themes > Customize Theme
If you update the logo on the website builder, it will be updated in the general settings as well. To learn more about customizing your website and themes, please click here.
Business Name
Your original business name is used to create your subdomain and notification signatures. Click inside the textbox to edit the name.

You can change the business name at any time, but it will not update your domain.
If you'd like to set up a custom domain, you can click here for more information.
Store Currency
You can view your store's currency in this section. This is selected when you are first setting up your account.

You cannot change your currency after your store has been created. If you do need to change your currency, please email our support team so we can manually update it for you.
This section shows the email you used to sign up for BookingKoala. This will be used as the business email displayed at the bottom of your email notifications in place of the {{.SupportEmail}} shortcode. Click here to learn more about how shortcodes work.
You can change this email address and anytime and it will not impact your admin login email.

If you would like to change your admin/account login email address, please go to:
Settings > Account > Your Info
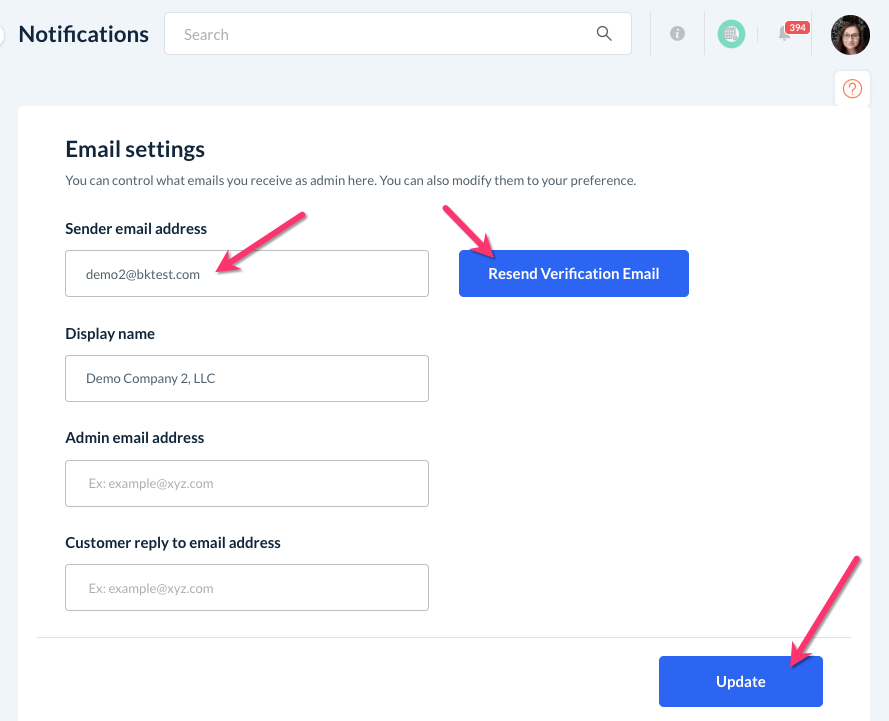
You can also select a different email address to send out your notifications. To do this, go to:
Settings > Notifications > General
Enter the new email into the "Sender email address" box and click the blue "Resend Verification Email" button. You will receive an email to verify the new address. Back under the general notifications section, click the blue "Update" button to save the new email settings.
Click here to learn more about notifications in BookingKoala.
Time Zone
Select which time zone your business operates in.

For clients in the United States who observe Daylight Saving Time, please use the following key to select a timezone that will automatically move the clock forward and backward one hour on the designated dates.
EST5EDT - Eastern Standard Time/Eastern Daylight Time
CST6CDT - Central Standard Time/Central Daylight Time
MST7MDT - Mountain Standard Time/Mountain Daylight Time
PST8MDT - Pacific Standard Time/Pacific Daylight Time
If your business services multiple time zones, select your personal time zone in this section. There is an option to enable the "multiple time zone" feature which can be enabled further down in the General tab.
Click here to learn more about how multiple time zones work in BookingKoala.
Time Format
Select which time format your business operates in. The options available for the time format are:
12-hour time
For example: 8:30 AM, 5:30 PM
24-hour time
For example: 8:30, 17:30
Date Format
Select how you'd like dates to be displayed in the system. This format is what you and your customers will see.

Here are the options using the first day of May in the year 2022 as an example.
DD/MM/YYYY - date/month/year
For example: 01/05/2022
MM/DD/YYYY - month/date/year
For example: 05/01/2022
YYYY/MM/DD - year/month/date
For example: 2022/05/01
DD-MM-YYYY - date-month-year
For example: 01-05-2022
MM-DD-YYYY - month-date-year
For example: 05-01-2022
YYYY-MM-DD - year-month-date
For example: 2022-05-10
Would you like to give the option to add the country code for phone numbers?
If you have international customers, you can choose to allow customers to include their country code when entering their phone number.
Select "Yes" to enable this feature.

Phone Number
Enter your business's contact phone number in this section. This number will be displayed wherever the {{.SupportPhone}} shortcode is used in your email and SMS notifications.

The support number can be updated at any time.
Phone Number Format
Select how you would like phone numbers to be displayed in the system. This format is what you and your customers will see.

Here are the options you can pick from:
999-999-9999
999 999 9999
(999) 999-9999
(999) 999 9999
(99) 9999-9999
9999999999
99999 999 999
9999 999 9999
99 99999-9999
9999-9999999
9999 9999
9999 99 99 99
999 999
999 999 999
999 99-9999-9999
999 999999
999 9999
9999 999 999
999 999 99 99
9 999 999-99-99
99 99 99 99
(99)99999-9999
999 9999999
99 99
99 999 999
99 99 99 99 99
99999 9999999
99999 99999
999-9999-9999
99 999 99999
9999
Accepted Forms of Payment
Here, you can select which type(s) of payment your customers can use when booking. Customers can pay using a debit or credit card, selecting "cash/check", or both.
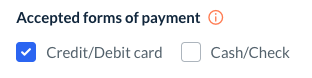
For example, if you unselect "Cash/Check" and click "Save", customers will be required to enter a valid debit or credit card to book online. Staff and admin will always have access to both the credit/debit card and cash/check options.
If you would like to collect payments via credit/debit cards, click here to learn more about how to set up and connect a payment processor to BookingKoala.
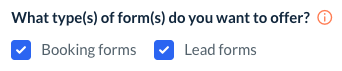
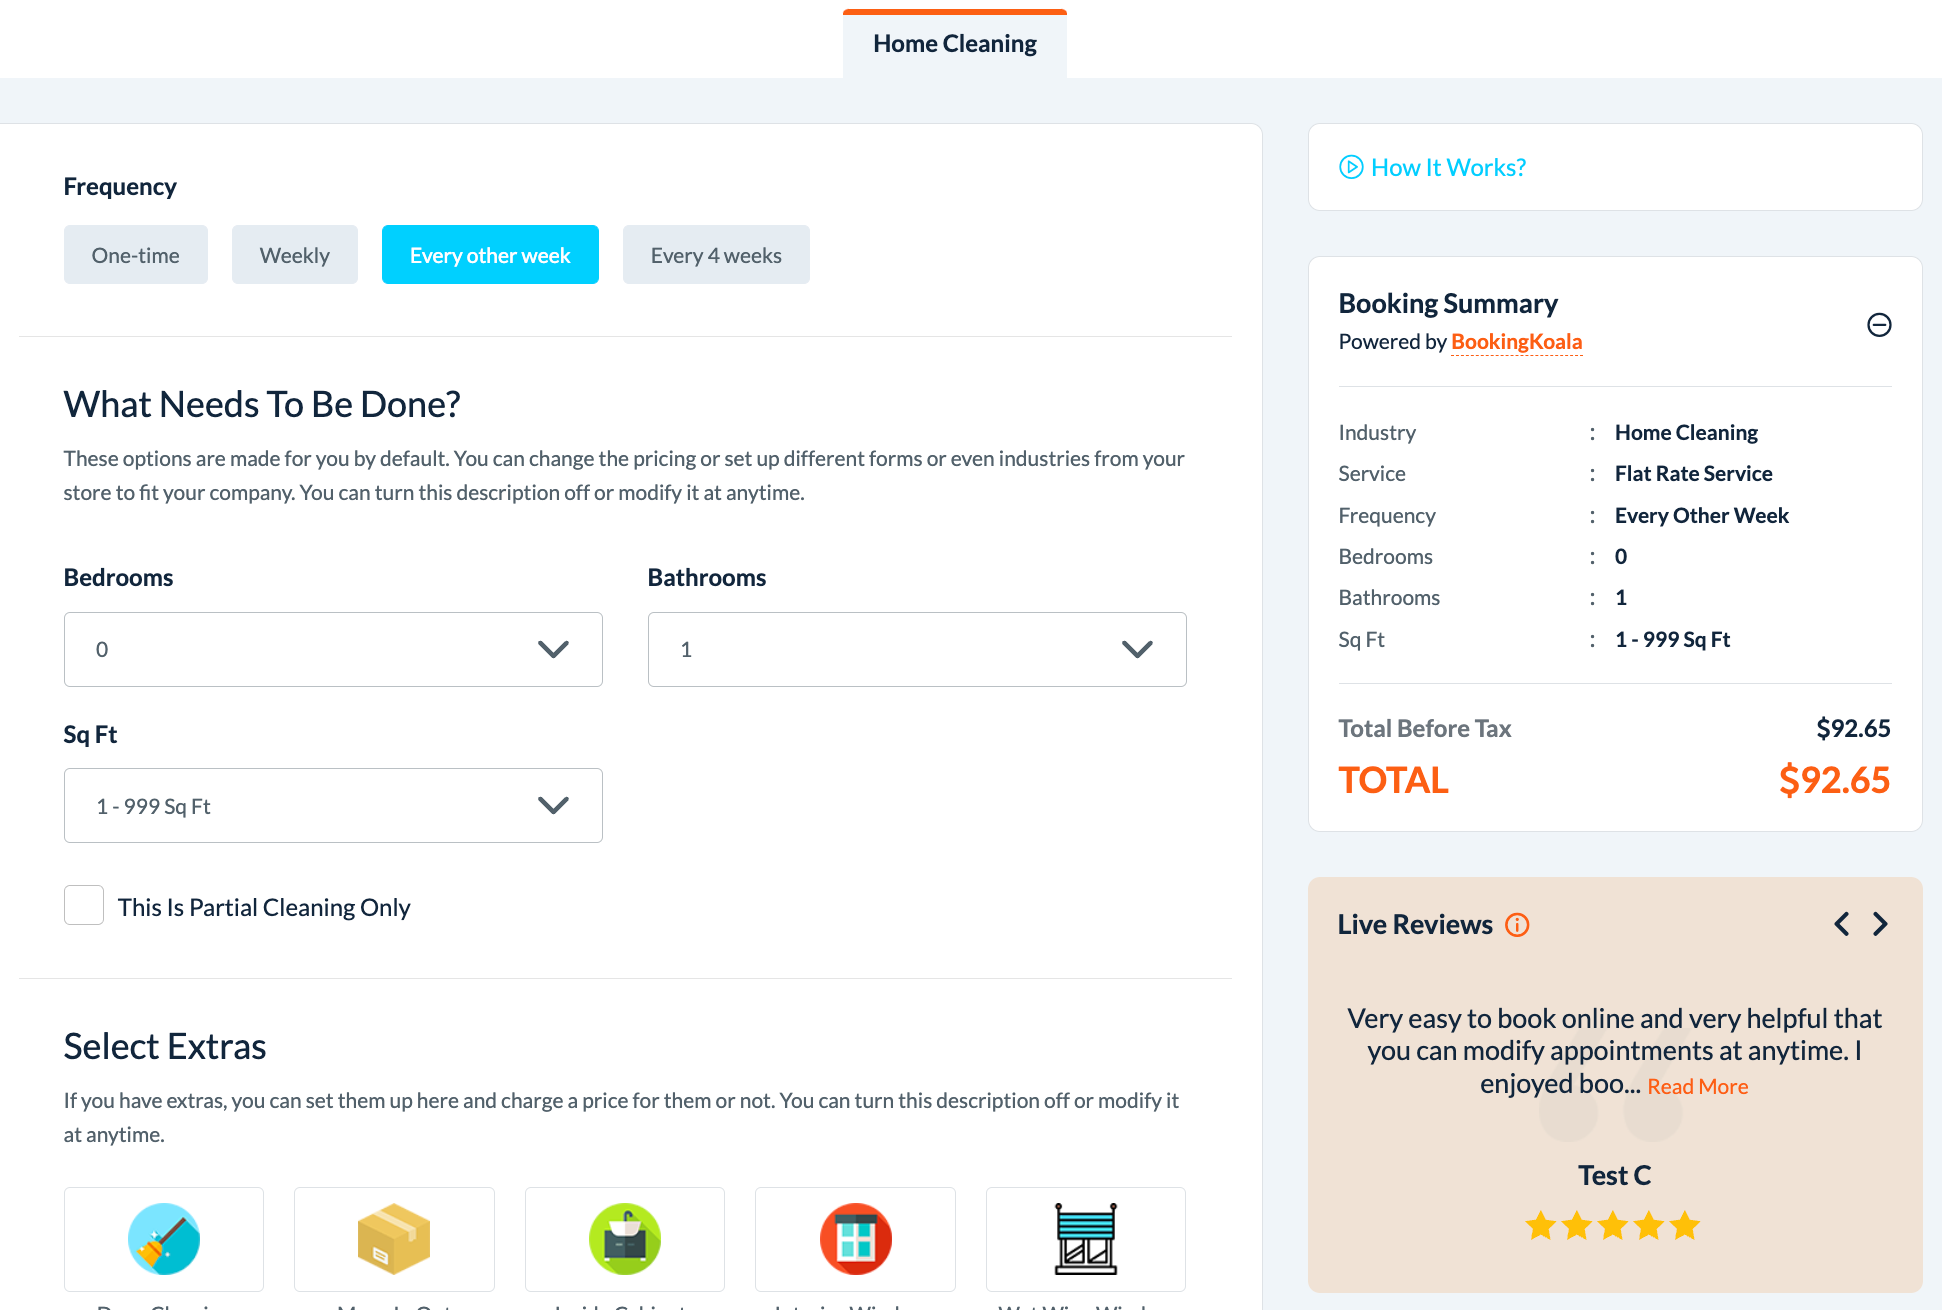
What type(s) of form(s) do you want to offer?
All paid subscriptions have the option to use booking forms, lead forms, or both.
Booking Forms allow customers to view pricing, check availability, and schedule a service by themselves. You can control whether the service is automatically assigned to a provider, manually assigned by an admin, or alerts available providers about the new unassigned booking.
To learn more about booking forms and how to begin setting them up, click here.
Once a service is booked, it can be viewed under the Bookings section in your dashboard.
You can modify the appearance of your booking forms by opening the website builder and selecting the "Book Now" page from the top center menu.
Scheduling settings are discussed in more detail in the Scheduling section of Store Options. Click here to learn more.
Lead Forms allow customers to submit a request for a quote or inquire more about your services. Once submitted, leads will be collected in the Leads section of your dashboard.
Lead forms can be customized to collect whatever information is required to ensure you can provide an accurate quote. Click here to learn how to set up lead forms and add them to your website.
Once you receive a lead, you can follow up with the client to provide more information about the services.
You can modify the appearance of your lead forms by opening the website builder and selecting the "Contact Us" page from the top center menu.
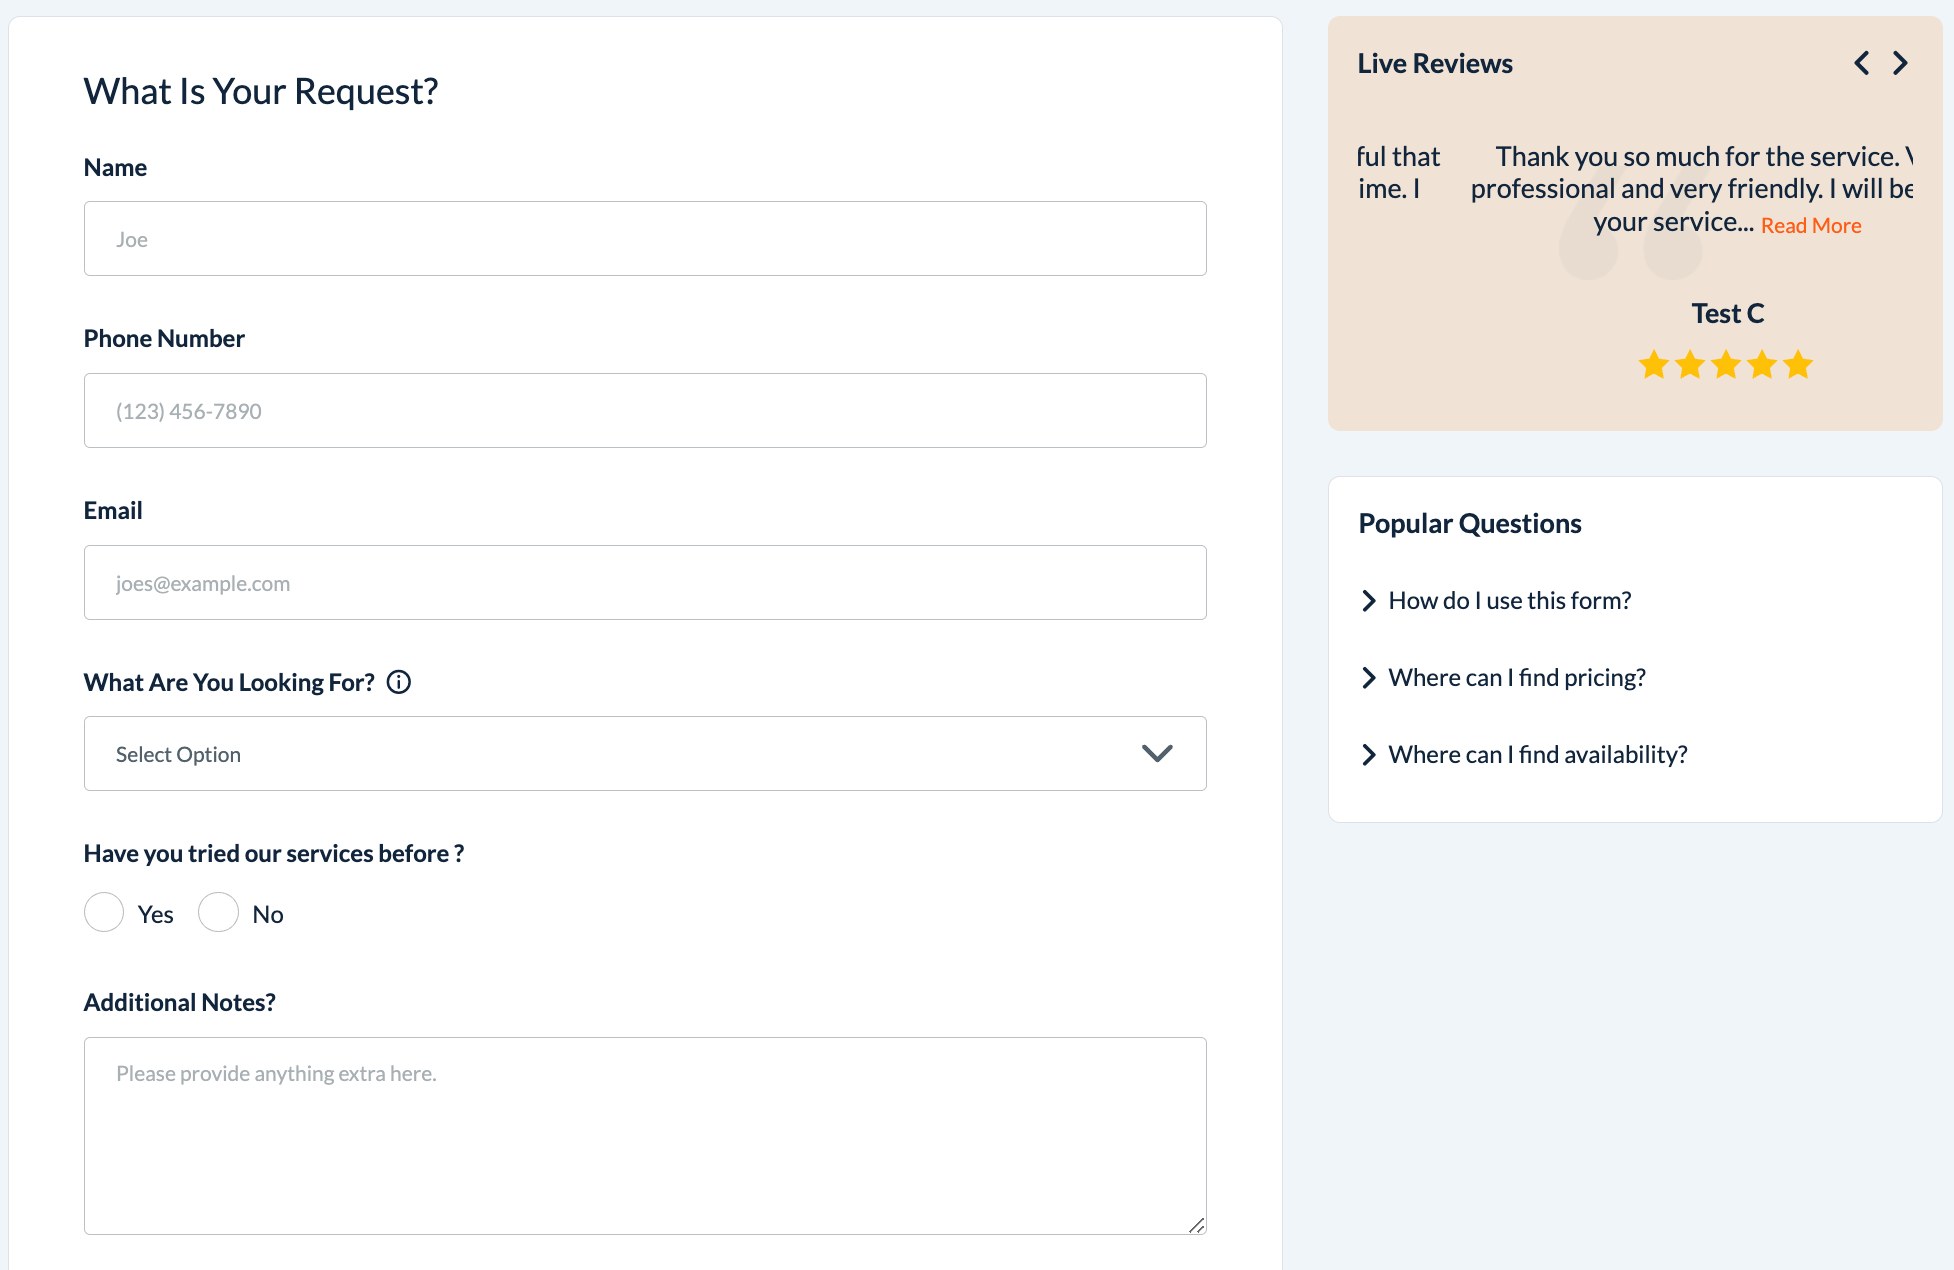
If you decide to offer both lead forms and booking forms, customers can navigate to the "Book Now" page or the "Contact Us" page.
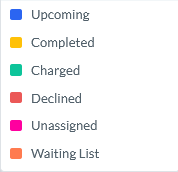
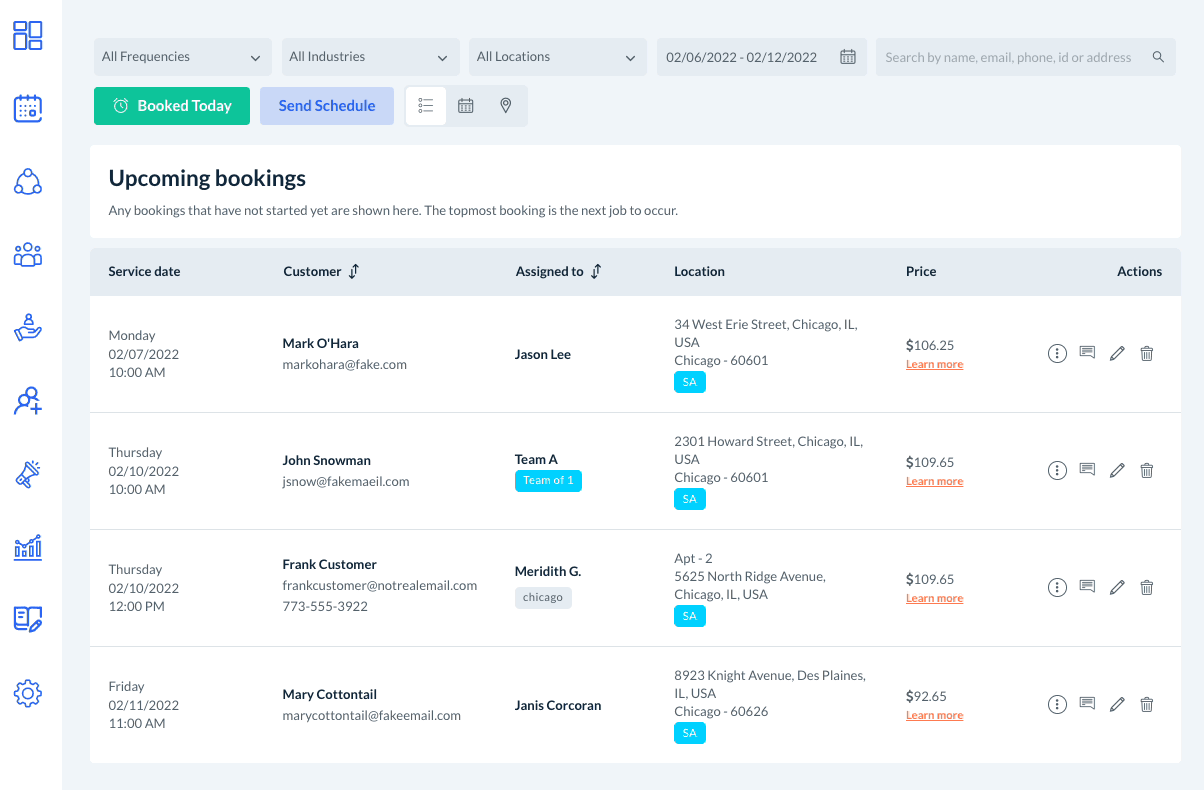
How do you want to manage the colors in your admin booking calendar?
This setting affects how bookings are color-coded when in calendar view.

To view the schedule in the calendar view, look for the schedule view icons near the top of any section that contains bookings and click the calendar icon.
If you select "Booking type-based", your bookings will be color-coded according to the booking's status.
If you select "Provider-based", you can set a color for each provider or team.
To set a color for each provider or team, go to the "Providers" section and click on the provider/team name to be brought to their dashboard.
Click on their "Profile" tab at the top of the page, and then scroll down until you see the box for "Booking Color".
Select the color from the box on the right, or type in the color's HEX code in the box on the left.
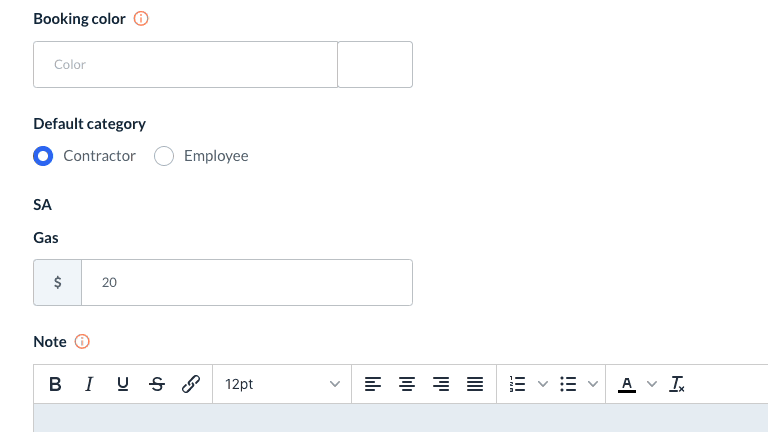
Click the blue "Update" button at the bottom of the page to update the provider's color.
Would you like to remember the last selected option in filter(s)?
Whenever you apply a frequency, industry, or location filter to a booking section, it will display only bookings that fit that category.
When you select "Yes" for this question, the filters you selected will stay applied when you navigate away from that section.
Select "No" if you'd like the filters to reset every time you leave a page.
For example, if you selected "No", you can apply whichever filters you like at the top of the page. When you navigate to another section of the software and go back to the booking page after, the filters will be reset back to "All Frequencies", "All Industries", and "All Locations".
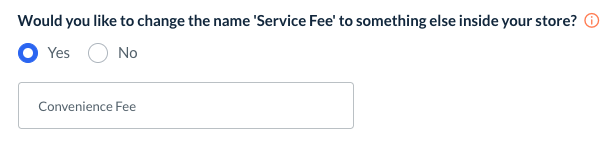
Would you like to change the name "Service Fee" to something else inside your store?
You can add a service fee to a customer's bill under the Locations section of the booking form. This fee is displayed on the booking summary as well as notifications that contain pricing details.
If you would like to change the name from "service fee" to something else, select "Yes" and enter the new name in the box below.
Remember to Save!
If you have made any changes, remember to click the blue "Save" button at the bottom left corner of the page to update your settings.