The purpose of this article is to help you learn:
Where to modify your general customer settings
How to configure settings for customers' bookings, Facebook use, referral sharing content, rescheduling rules, cancelation rules, and more.
Where is the "Customers" tab?
During your initial account set-up, it is important to go through each section in Store Options before you begin importing customers, and providers, and adding bookings. This will ensure that the system behaves how you would like it to efficiently run your business.
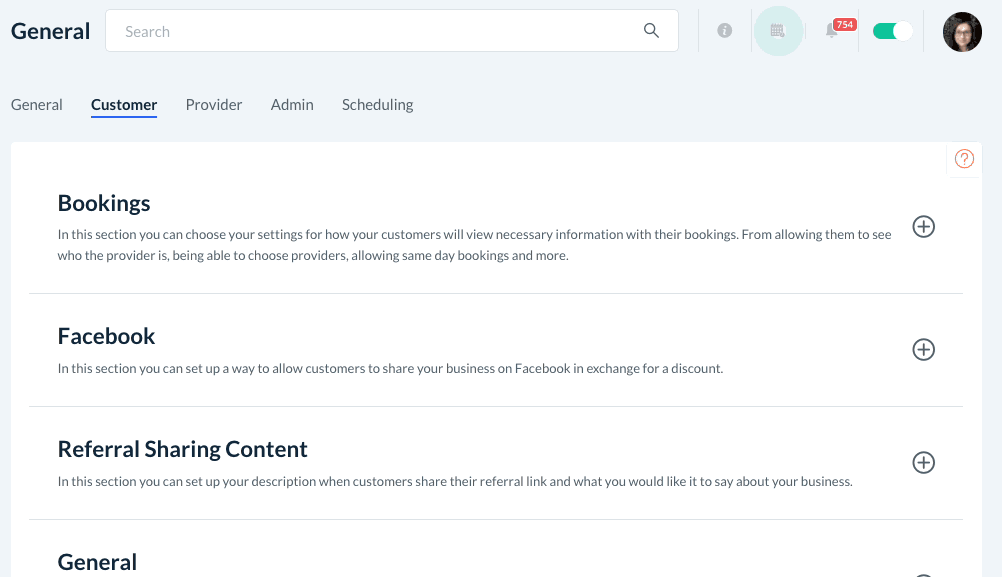
The Customer tab controls all settings that impact how customers use the system. To access this section, go to:
Settings > General > Store Options
At the top of the page, click on the Customer tab.

There are four subcategories in this tab:
Bookings
Facebook
Referral Sharing Content
General
Reschedule
Cancelation
To view the settings for each section, click the "plus sign" icon to expand it.
Bookings Settings
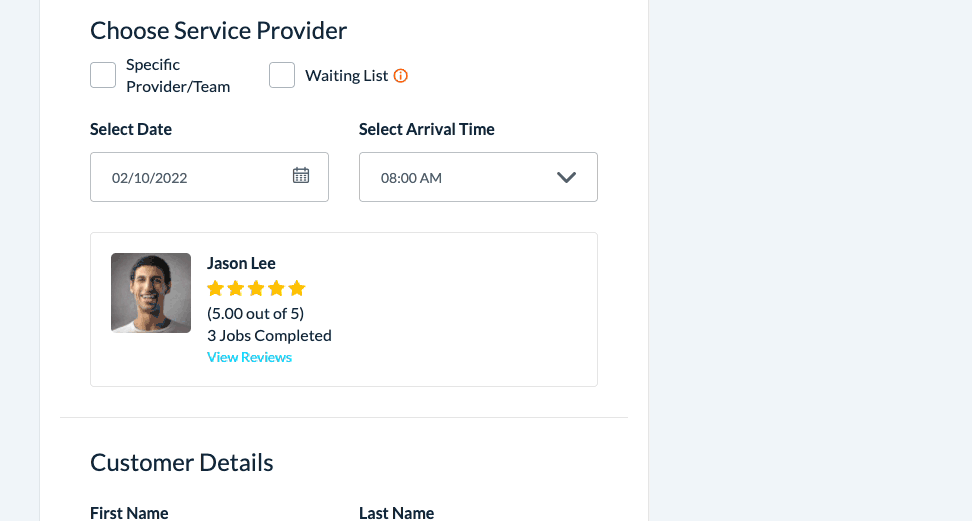
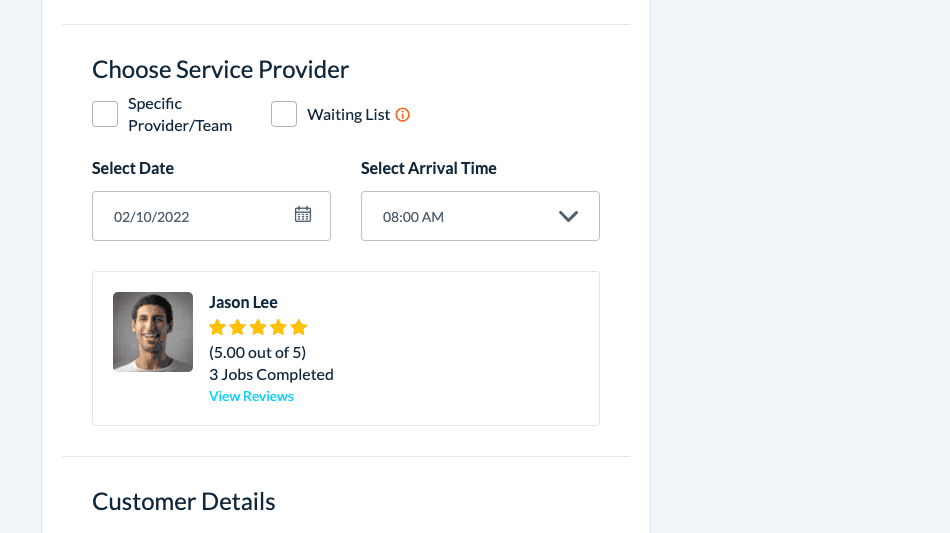
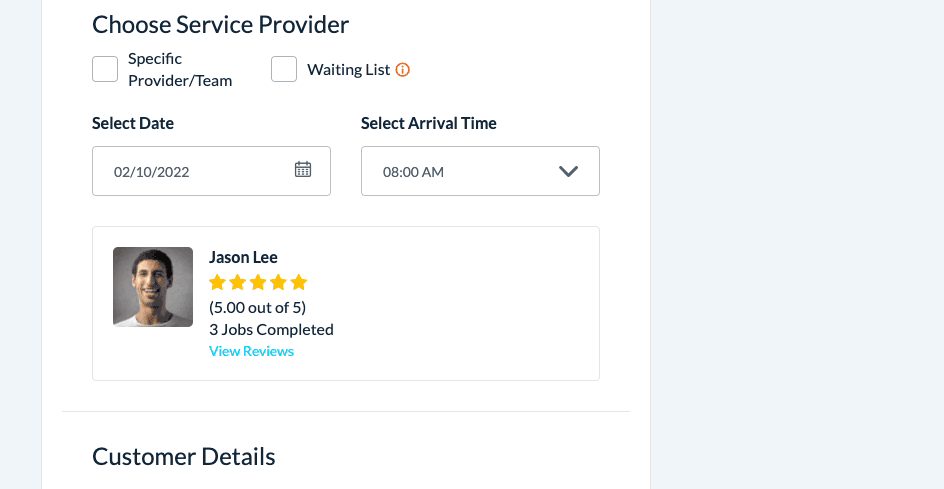
Display or Hide the Assigned Provider
Would you like to give the customer the option to see which provider is assigned to their booking?
If you select "No", the customer cannot see what provider has been assigned to their booking.
If you select "Yes", you can customize what provider information the customer will see.
Check the boxes next to each provider information you want to share with the customer.
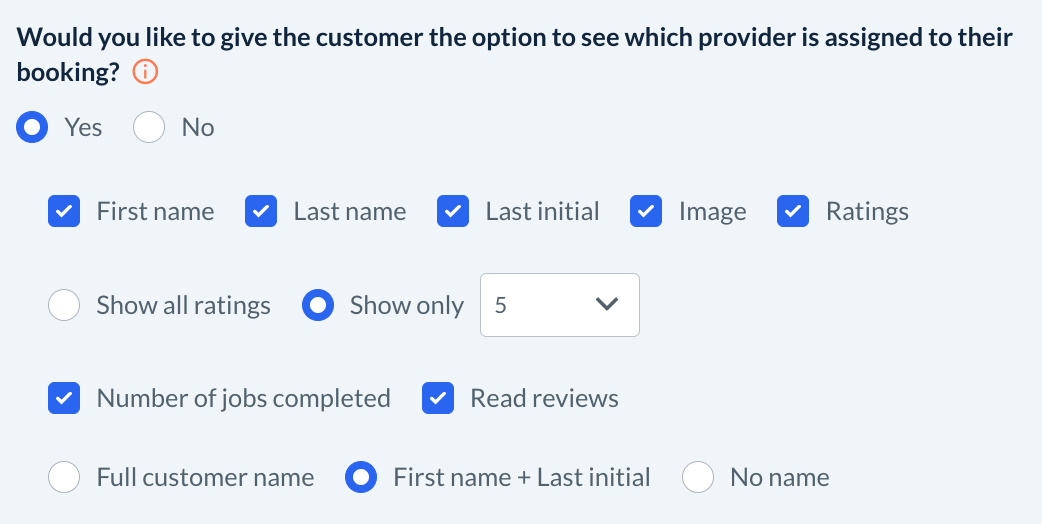
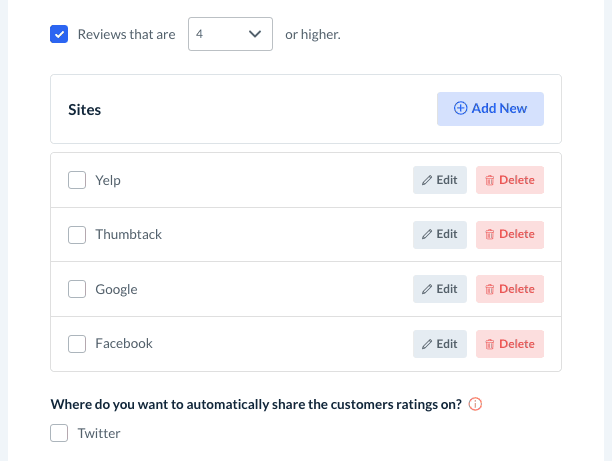
If you checked off the box next to "Ratings", decide if you want to show all reviews or only show ratings above a certain threshold.
For example, you can set the threshold to "4" so only ratings that equal 4 or higher are displayed under the provider's information.
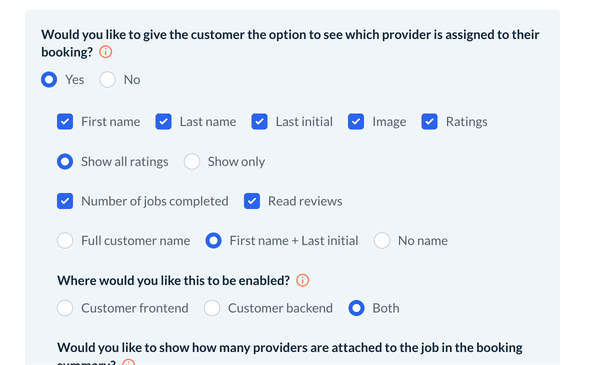
If you check off the box next to "Read Reviews", you can select an option for if/how much of that customer's name will display.
Full customer name - The customer's full first and last name will be displayed below the review. For example, John Smith.
First name + Last initial - The customer's first name and the first initial of their last name will be displayed. For example, John S.
No name - No customer name will be displayed below the review.
Where would you like this to be enabled?
This option allows you to choose where the customer will see the provider's information as set up above.
Customer Frontend - Only new customers and customers who are not logged in will see the provider details when booking.
Customer Backend - Only existing, logged-in customers will see the provider details.
Both - Customers on both the front and back end will be able to see provider details.
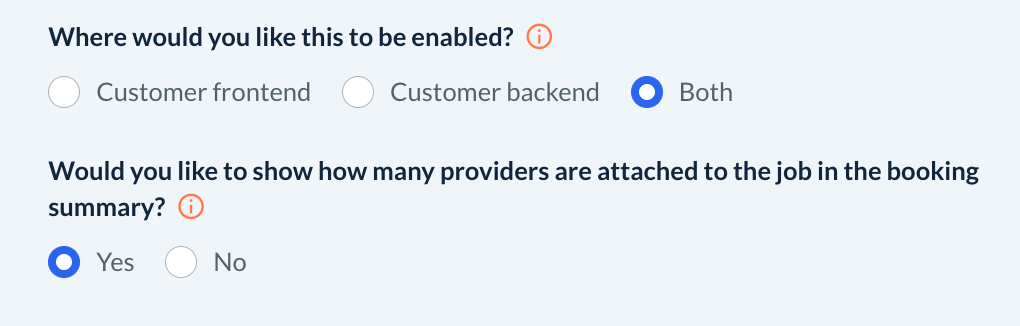
Would you like to show how many providers are attached to the job in the booking summary?
This option allows you to display how many providers have been assigned to the service in the booking summary.
Select "Yes" to add a "Professionals" count to the booking summary. This will display the total number of providers assigned to the booking.
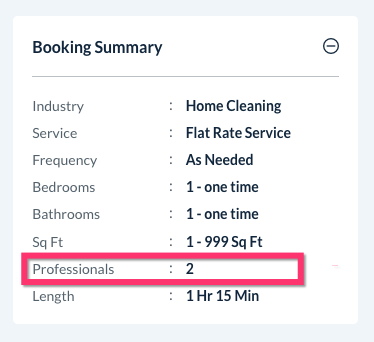
Select "No" to hide the "Professionals" count from the booking summary.
Would you like to increase conversions by showing live reviews?
This option allows you to choose if you want to display the reviews that customers leave on your site. Live reviews can be displayed on the Booking Form, "Contact Us"/Lead Form, and Home Page.

Select "No" to hide the live reviews feature from your website and forms.
Select "Yes" to enable the live reviews feature.
If you selected "Yes", decide if you would like to show All reviews or just reviews above a certain threshold.
For example, if you select "4.0", only reviews that received a rating of 4.0 or higher will be displayed.If you selected "Yes", select an option for if/how much of that customer's name will display under the review.
Full customer name - The customer's full first and last name will be displayed below the review. For example, John Smith.
First name + Last initial - The customer's first name and the first initial of their last name will be displayed. For example, John S.
No name - No customer name will be displayed below the review.

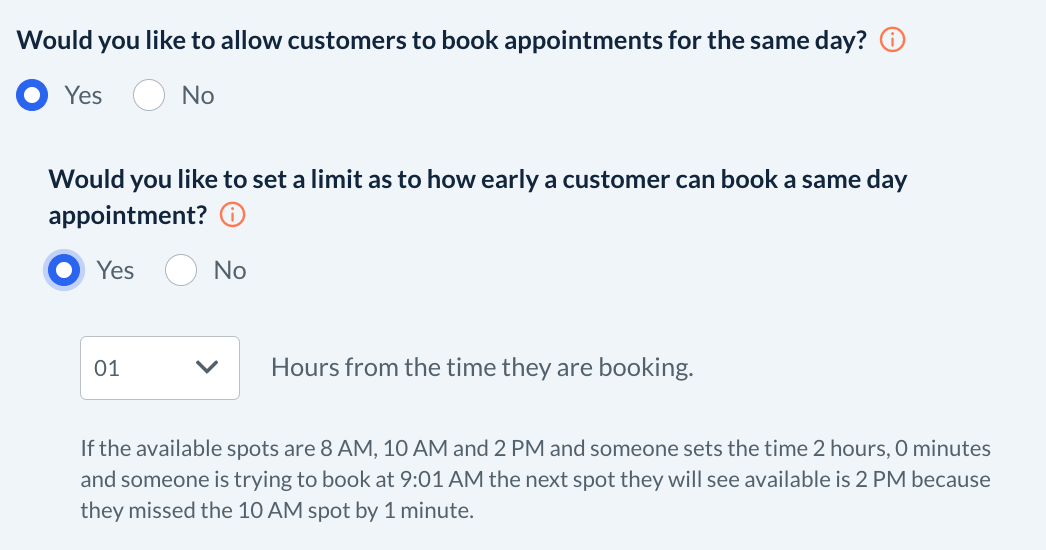
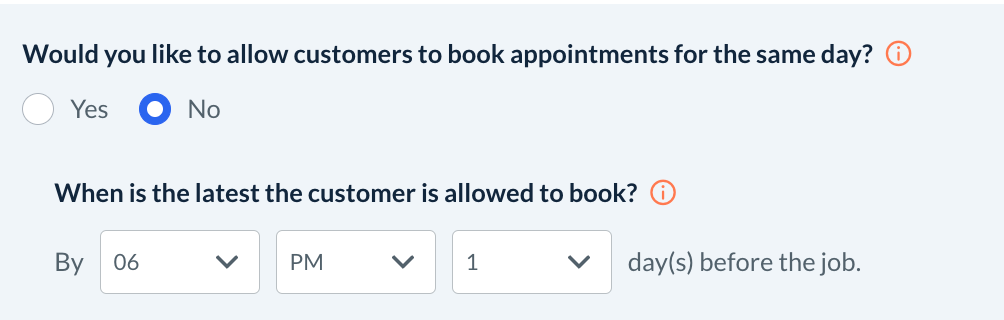
Would you like to allow customers to book appointments for the same day?
Select "Yes" to allow same-day bookings.
Use the drop-down box below to select how many hours customers can book before the start time. If your threshold is set to 1 hour, they must book at least 1 hour before the start time.
For example, let's say you have booking spots at 8 AM, 10 AM, and 12 PM. If a customer visits your site at 9:01 AM and tries to book, the next spot that will show as available will be for noon.
The reason why they cannot book the 10 AM spot is that it starts less than 1 hour from when they are booking.
Select "No" to block any same-day bookings from occurring. Use the drop-down boxes to set the latest time a customer can book and how many days it must be before the job date.
For example, let's say a customer wants to schedule a job for tomorrow. If a customer tries to schedule for tomorrow and it is 6:30 PM, they will not see any spot for tomorrow. The next date they would be able to schedule would be the day after tomorrow.
This is because they are trying to book after 6:00 PM less than one day before the booking date.
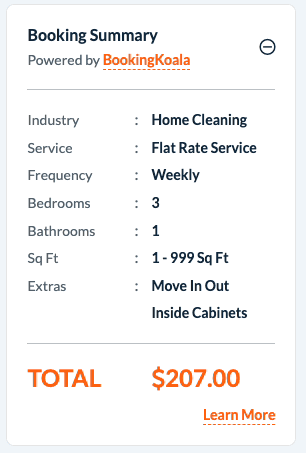
Do you want customers to see the entire payment summary on the booking form or only the total price?
This option allows you to add a "learn more" button to view the payment summary breakdown.
Customer Frontend - Only new customers and customers who are not logged in will see the full payment summary.
Customer Backend - Only existing, logged-in customers will see the full payment summary.
Both - Customers on both the front and back end will be able to the full payment summary.
None - Customers will only see the total price under the payment summary.
Would you like to make the primary phone number required on the booking form?
Select "Yes" to make entering a primary phone number mandatory when a customer is scheduling a service. This means that customers will not be able to book unless they enter a contact phone number.
Select "No" to allow customers to book without having to list their phone number.
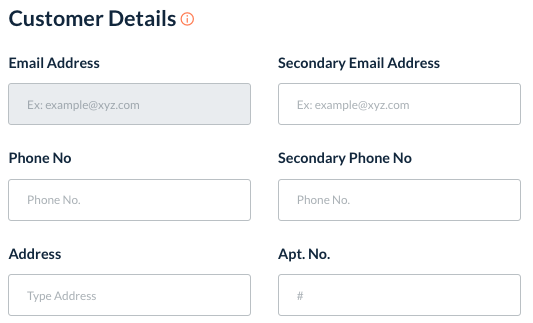
Would you like to disable the secondary email address and phone number on the booking form?
Select "Yes" to disable the secondary email address and phone number fields on your booking form.
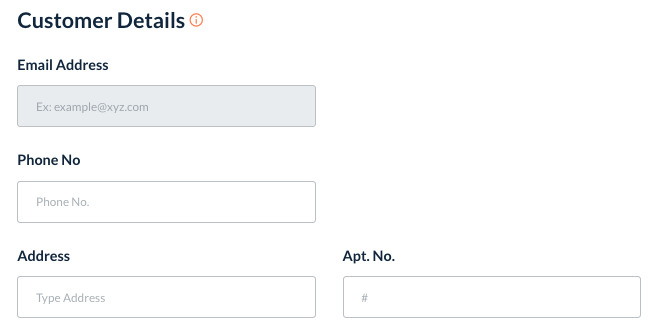
Select "No" to leave the secondary email address and phone number fields enabled on the booking form.
Allow Customer Reviews Feature
Would you like to allow your customers to rate your service?
This option allows you to control the ratings and reviews of your customers.
Select "No" if you don't want your customers to rate your service.
Select "Yes" to enable this feature.

If you select "Yes" to the previous question, the next question is
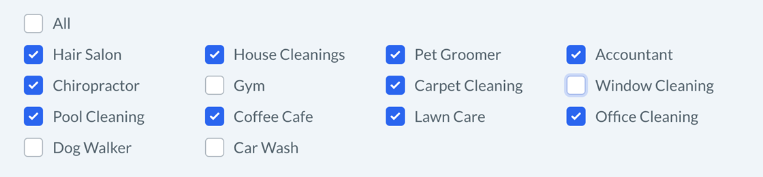
What industries can customers rate for?
This option allows you to choose which industry your customers can rate their bookings. Choose the industries for which you want customer reviews and ratings
External Reviews Feature
Would you like to give your customers the option to share their internal reviews on an external review platform?
This feature gives customers the option to post their internal reviews/ratings to other social media sites like Yelp, Thumbtack, Google, and Facebook.
Select "No" to disable the external reviews feature for customers.
Select "Yes" to enable this feature.
If enabled, you can set a threshold for how high the customer's rating must be for the external review pop-up to display.
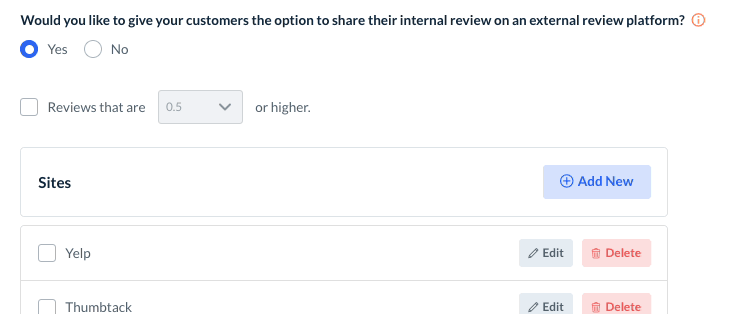
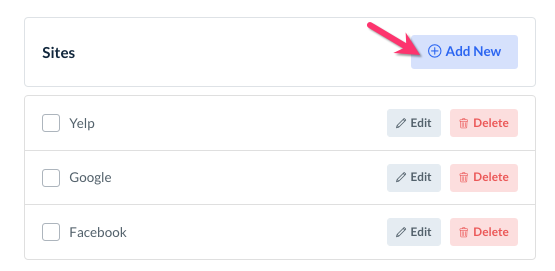
Then, check the box next to each site name to add links for each location you service. Click "Edit" to edit the label, or "Delete" to delete that site entirely from the pop-up.
Click the blue "Add New" button to add a new website of your choice.
Where do you want to automatically share the customer's ratings on?
Check the box below this question to enable automatic review sharing on Twitter or Facebook.

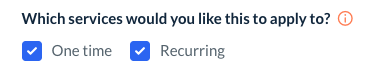
Which services would you like this to apply to?
Select which type of customers will see this feature. Check the boxes next to One time, Recurring, or both.
Do you want to let customers earn from sharing?
Select "Yes" to allow customers to earn credits when they share a review.
Select "No" to disable this option.
Will customers get rewarded per each share?
If you selected "Yes", to the previous question, decide whether customers will be awarded credits for each time they share or just the first time.
Click "Yes" to give a customer credits every time they share on Twitter.
Click "No" to only give them credits the first them they share their review.
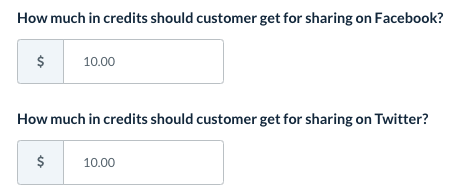
How much do customers get for sharing on Twitter/Facebook?
Enter the number of credits the customer will receive when they share on Twitter or Facebook.
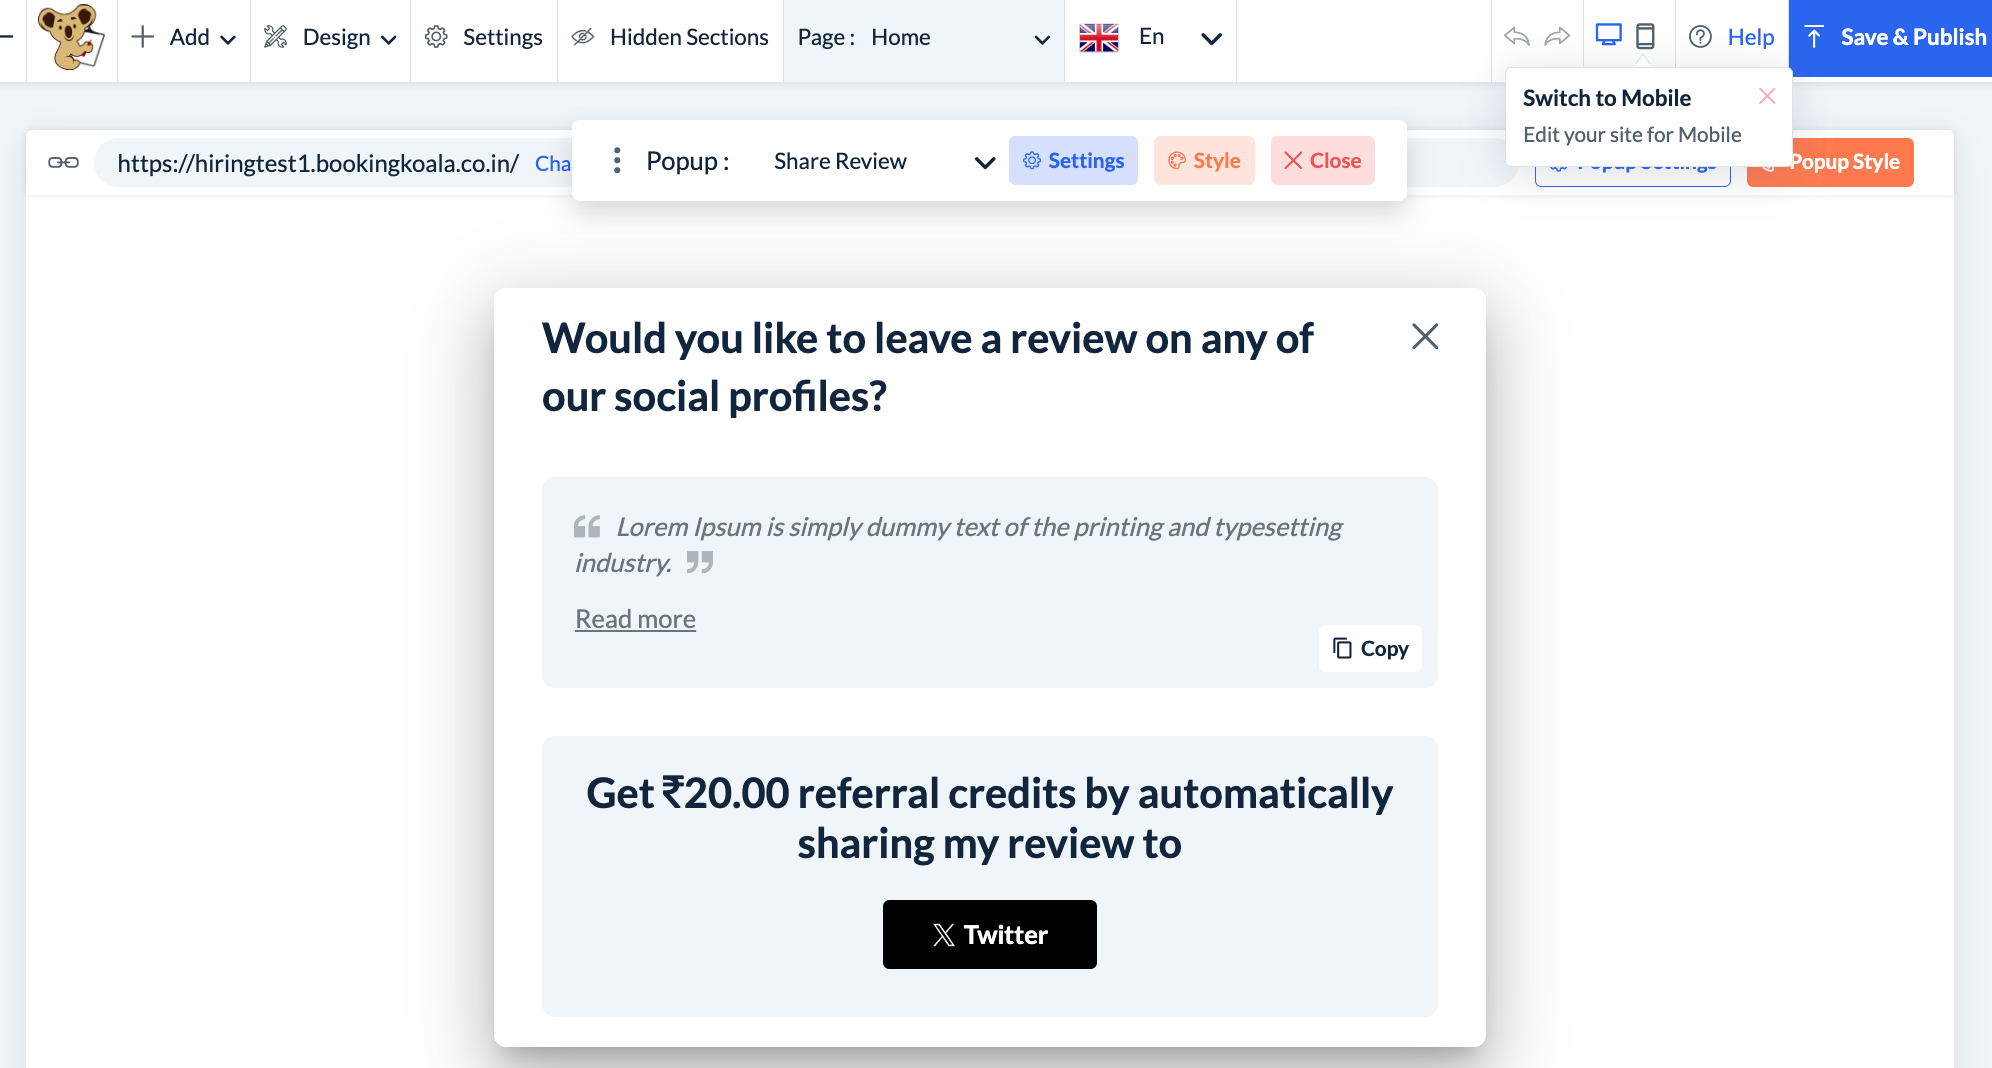
The corresponding pop-up in the website builder is called the Share Review pop-up and can be located by going to:
Settings > Design Forms & Website > Website Builder & Themes > Customize Theme > Page menu > Manage Popups > Customer Dashboard Popups > Share Review.
What percentage discount would you like to set up that is sent out to one-time appointments after the job is rated a 4/5 or higher to entice them to sign up for recurring services?
This setting pertains to the discount code offered in the customer notification email or SMS called "50% off your service (happy rating ot v1)".
This email can be enabled to offer a one-time customer a coupon code specifically for recurring services to entice them to sign up for more services.
Enter the discount percentage into the box below.

To modify the email/SMS that uses this discount, go to:
Settings > Notifications > Email/SMS > Customer > Rating & Review > 50% off your service (happy rating ot v1)
Click "Edit" to open the notification and make changes to the content. This notification uses the shortcode {{.DiscountedCouponCode}} to offer the discount you set up in your Customer Store Options section.
To learn more about shortcodes and how to use them to customize your notifications, click here.
Would you like to allow customers to see job media?
This option, if enabled, allows the customer to see the job media a provider took and added to the booking. Media that providers take and upload usually are before and after media of the job to ensure a proper service was completed.
Select "Yes" to allow customers to view any job pictures uploaded by the provider into the booking. This may help if you regularly share before and after photos with your clients.
Select "No" to keep job pictures hidden from the client. Only the provider and staff/admin will be able to view these photos.
Would you like to send booking reminder notifications to customers for unassigned bookings?
Select "Yes" to send reminder notifications, like "Your Booking is Coming Up Tomorrow", to customers for their unassigned bookings.
If you select "No", customers will not receive any reminder notifications until their booking has been assigned to a provider.
Facebook Settings
This section allows you to enable a Facebook Share coupon. When enabled, a Facebook share coupon will be inserted on your booking form page.

When a customer clicks the coupon box, they can share a post about your business. After sharing, they will receive a coupon code that can be applied to the service.
Check the box next to "Would you like to enable the Facebook share coupon?" to enable this feature.
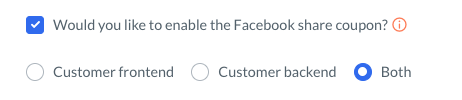
Below, select where you could like the coupon to be published.
Customer frontend - Only new customers on the front-end booking page will be able to see this promotion.
Customer backend - Only existing customers who are logged into their dashboard will be able to see this on the booking page.
Both - Both new and existing customers can see the Facebook share coupon.
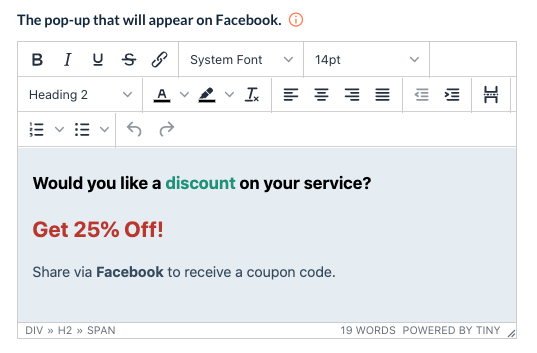
Then, enter the pop-up message you would like to show when the customer clicks the coupon box.
Please note: You must create a coupon and check the "Facebook Coupon" box in the Coupon section for this feature to work. You can create a new Facebook Share coupon by going to:
Marketing > Coupons > Add New
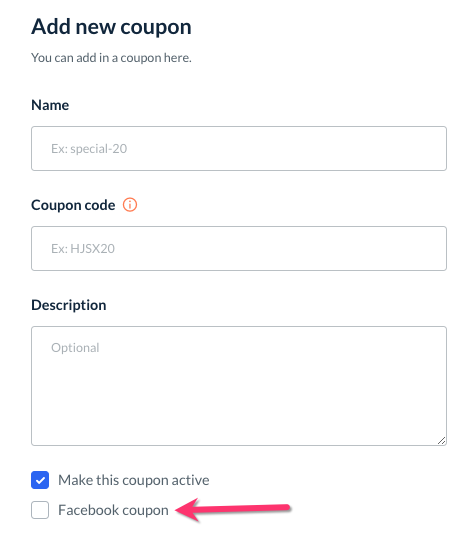
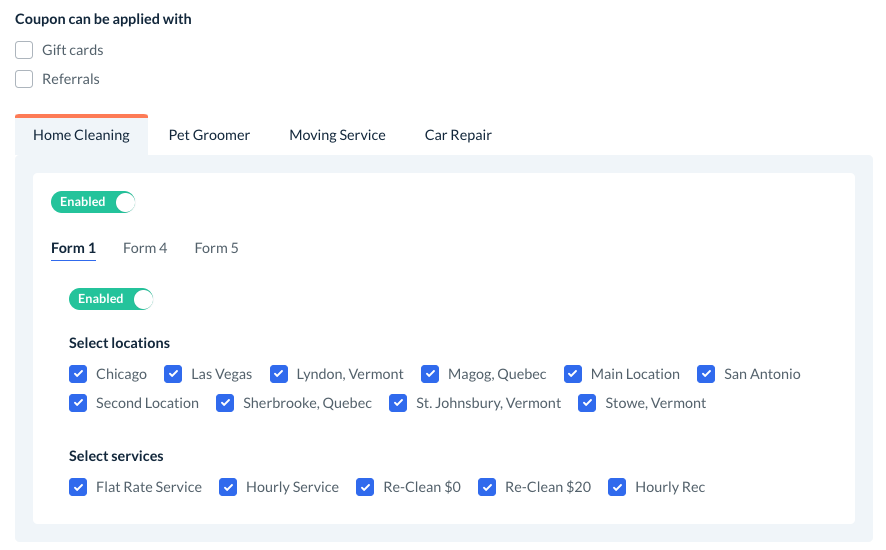
After checking the box next to "Facebook coupon", you can customize whichever services the coupon can be applied to in the section below.
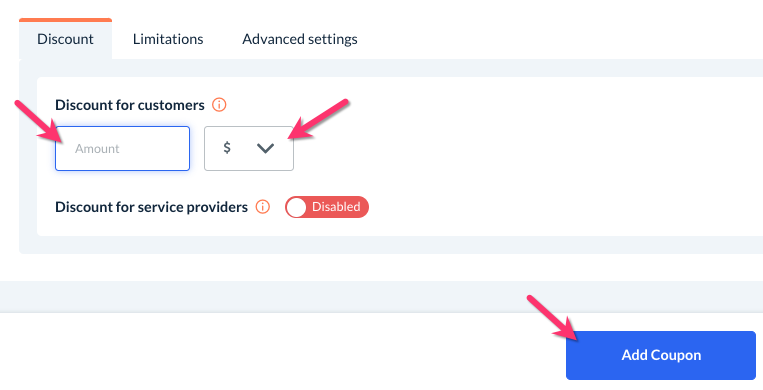
At the bottom of the page, set the discount amount, whether it will be a fixed amount ($) or percentage-based (%), and then click the "Add Coupon" button to save it.
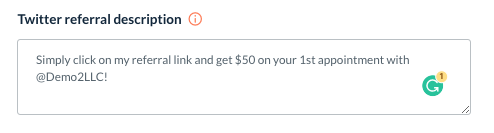
Referral Sharing Content Settings
This section allows you to set up a description when customers share their referral link on Twitter.
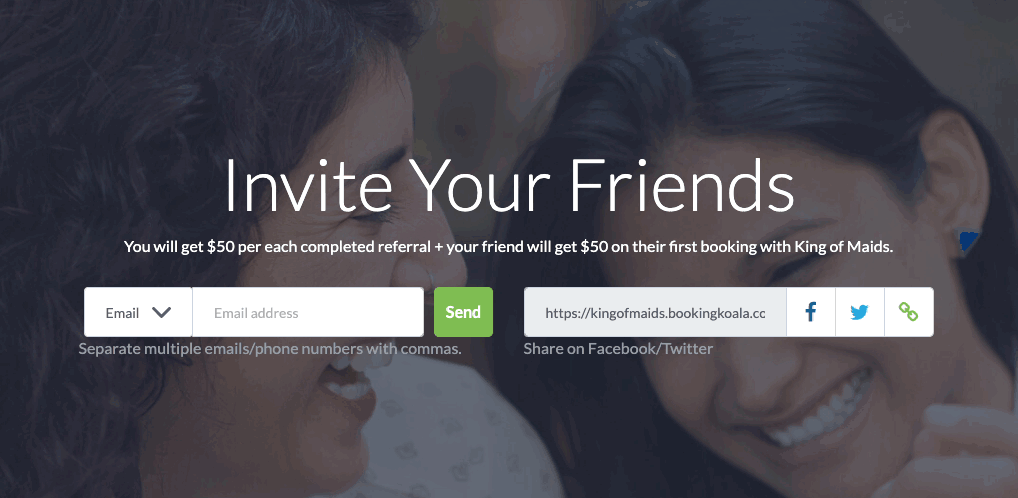
Beneath where it says "Twitter referral description", please enter the message you would like to be shared with the referral link.
General Settings
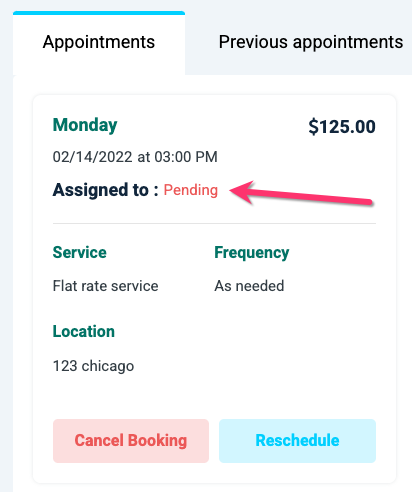
What would you like the system to display in the customer dashboard if their booking is not confirmed?
This setting applies whenever a booking is added to the Waitlist/Unassigned Folder. If you have allowed customers to see the name of the provider(s) assigned, this information is used in the customer's confirmation emails and displayed on their dashboard.
If their booking has not yet been assigned a provider, select what will be displayed instead.
Pending
Searching
Check the box next to "Turn on tooltip" to include a tooltip icon with an explanation for the customer.
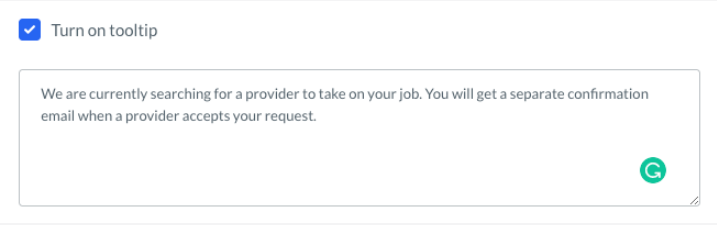
When the customer hovers over or clicks on the booking status, they will see the message you have entered here.
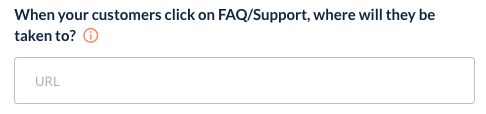
When your customers click on FAQ/Support, where will they be taken to?
This option allows you to redirect your customers to an external FAQ or support page. Paste the link into the box below.
By default, customers will be redirected to your home page if you have not created a FAQ page by going to:
Settings > Design Forms & Website > FAQ
Would you like to enable the "My Drive" option for your customers?
Select "Yes" to enable a "My Drive" section in your customer's dashboard. This will allow you and your staff to upload files directly into their account.
Select "No" to disable the "My Drive" feature for customers.
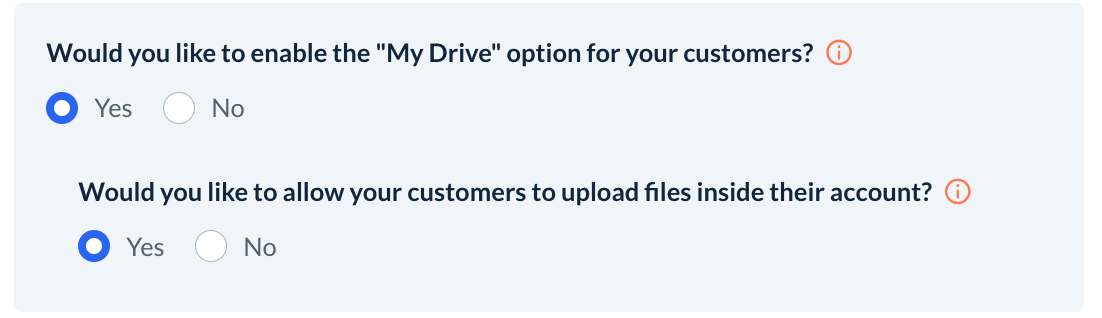
Would you like to allow your customers to upload files inside their accounts?
If you selected "Yes" for the previous question, decide if you would like to allow customers to upload files into the My Drive section.
Select "Yes" to allow them to upload files.
Select "No" to allow only staff and admin to upload files to their My Drive.
Which of these options would you like to allow customers to download invoices for?
Check the boxes next to "Booking", "Gift Card", and "Invoice" to allow customers to download invoices for these purchases.

Would you like to allow your customers to update gift cards inside their accounts?
Select "Yes" to allow customers to reload gift cards from inside their accounts. This means that a customer with an existing gift card can use a credit or debit card to add more credit to a gift card.
Select "No" to block customers from reloading gift cards. If the customer has finished using the balance on an existing gift card, they must receive or purchase a new gift card to continue making payments in the system without a credit or debit card on file.
When a customer adds a card, do you want to give them options or add the card to all bookings?
This setting applies if you use both cash/check and credit/debit as payment options for your customers in your bookings.
When a customer saves or updates a debit or credit card into a booking that was saved as "cash/check", you can have the system perform one of three actions:
Give options - The customer can select whether they would like to update the card for just bookings with a credit/debit card on file, or all bookings including those saved as "Cash/check".
Add to all bookings including cash/check bookings - The new card will be saved to all pending and upcoming bookings. Bookings that have already been charged will not be affected.
Add to all bookings not including cash/check bookings - The new card will be saved only to pending and upcoming bookings with a debit or credit card saved as the payment method. Bookings that have been saved as "Cash/check", as well as bookings that have already been marked as charged, will remain unaffected.
What should be the default state of the 'Send SMS notifications' opt-in checkbox?
This setting applies to the SMS notifications opt-in checkbox which is located under the phone number field on the booking form.
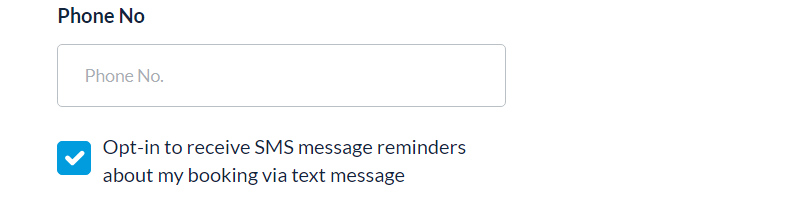
Checked - Customers will be automatically opted-in unless they uncheck the box.
Unchecked - Customers will not be automatically opted-in unless they check the box.
Reschedule Settings
This section allows you to control whether customers can reschedule bookings on their own and if so, what services this applies to.
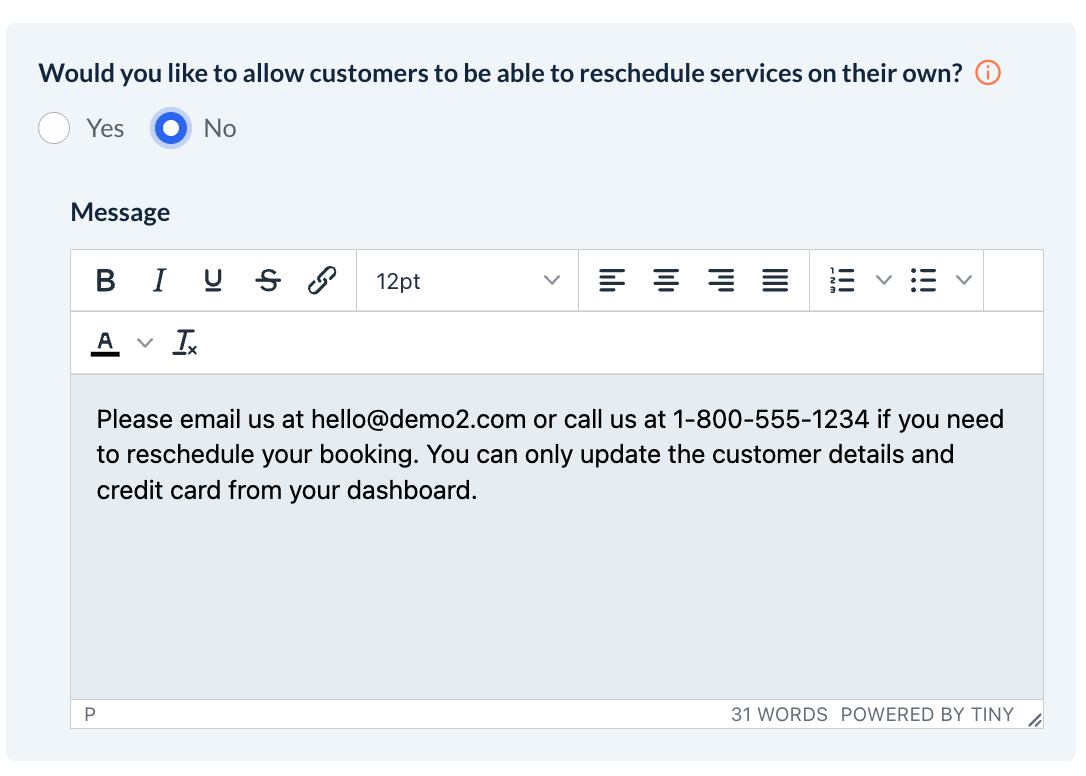
Would you like to allow customers to be able to reschedule services on their own?
Select "Yes" to allow customers to reschedule services without any approval from the admin.
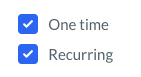
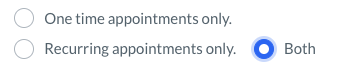
Check the boxes next to "One time", "Recurring", or both to allow these kinds of customers to reschedule on their own.
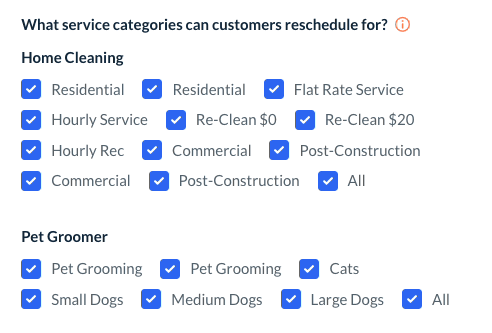
Under "What service categories can customers reschedule for?", check the boxes next to the service categories you would like to allow customers to reschedule.
Check the box next to "All" to select all service categories under an industry.
Select "No" to block customers from rescheduling on their own.
Enter a message into the box below to let customers know what to do when they need to reschedule their booking.
Cancelation Settings
This section controls your customers' ability to cancel or postpone their bookings.
Would you like to give your customers the ability to postpone bookings?
Select "Yes" to give customers a "postpone" option.
When a customer clicks to "Cancel" a booking, a pop-up will ask if they would like to cancel or postpone their service. If they click "Postpone", the customer can pick which date they would like to resume the service. The system will delete all bookings between now and the postponed date.
Select "No" to hide the "postpone" option. Customers will only be able to cancel bookings individually or the entire recurring service.
Can customers postpone pre-charged bookings?
If you selected "Yes" to the previous question, decide if you would like customers to be able to postpone pre-charged bookings.
Select "Yes" to allow customers to postpone pre-charged bookings.
Select "No" to hide the postpone option on pre-charge bookings. Customers will only be able to reschedule or cancel.
If you selected "Yes" to the previous question, decide what action should be taken by the system for the pre-charged booking.
Select "Refund & postpone" to refund any pre-paid amount back to the customer and postpone the appointments to the selected date.
Select "Postpone without refund" to retain the pre-charged amount and postpone the appointments to the selected date.
Would you like to allow customers to be able to cancel services on their own?
Select "Yes" to allow customers to cancel services on their own
Check the boxes next to "One time", "Recurring", or both to allow these kinds of customers to cancel on their own.
Under "What options would you like to offer your customers if they are canceling a recurring service?", check the boxes next to the following offers for customers:
Cancel a single booking from a recurring series
By selecting this option, customers can cancel individual bookings within their recurring service. For example, let's say a customer's recurring service consists of 5 bookings, "B1", "B2", "B3", "B4", and "B5". By enabling this option, a customer could cancel only B2 or B4 while leaving the rest of the bookings on the schedule.
Cancel bookings from a specific point onward
By selecting this option, customers can cancel their recurring service starting from a specific point in the future. For example, let's say a customer's recurring service consists of 5 bookings, "B1", "B2", "B3", "B4", and "B5". By enabling this option, a customer could cancel all future bookings starting from B3.
Cancel the entire recurring service
By selecting this option, customers are allowed to cancel the entire recurring series of bookings. This option will only be available when customers attempt to cancel bookings from the middle of the schedule. For example, let's say a customer's recurring service consists of 5 bookings, "B1", "B2", "B3", "B4", and "B5". By enabling this option, a customer would see the option to cancel the entire recurring service when viewing options to cancel B2, B3, B4, or B5, but would not see this option on B1.
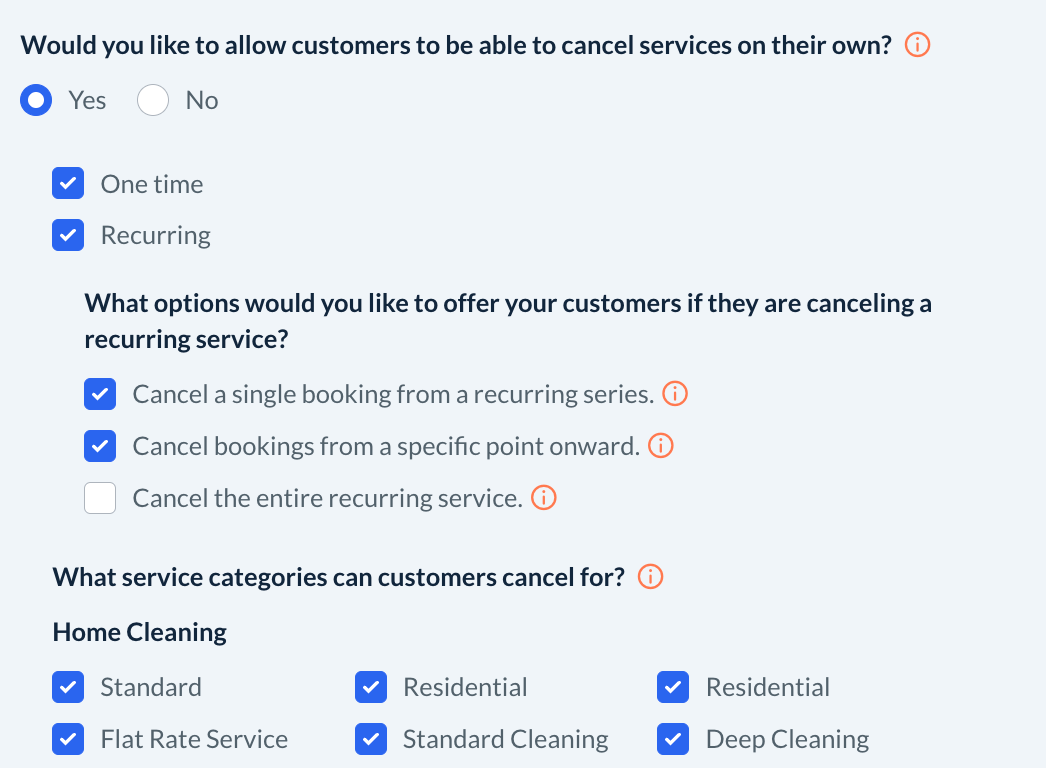

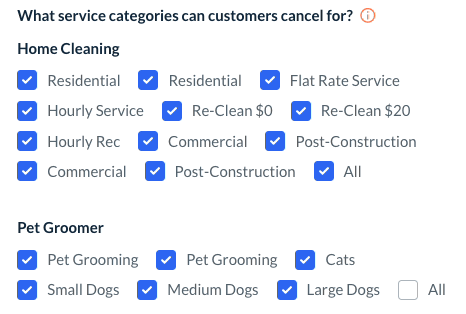
Under "What service categories can customers cancel for?", check the boxes next to the service categories you would like to allow customers to cancel.
Check the box next to "All" to select all service categories under an industry.
Below "Do you need to confirm the cancellation request before it leaves the customer's dashboard?" decide if you would like for customers to submit a cancelation request to the admin to cancel a booking.
Select "Yes" to enable customer cancelation requests. Cancelation requests will come into the "Cancelation Requests" tab under Canceled Bookings in the main menu.
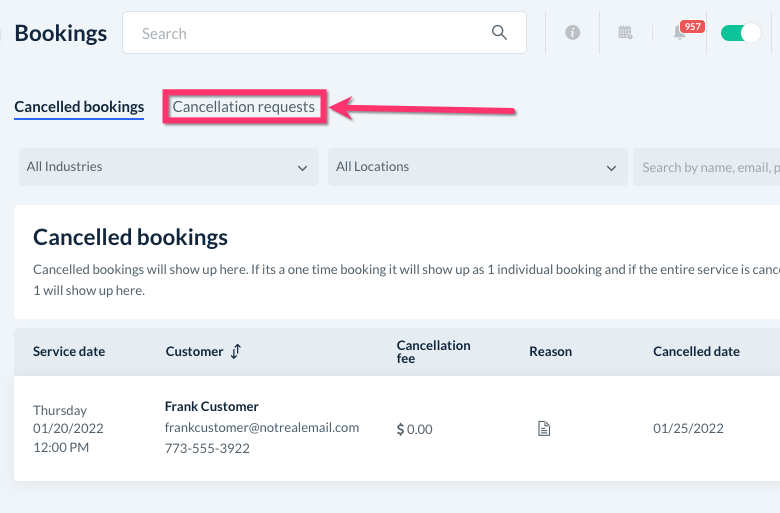
Select "No" to turn cancelation requests off. This means that customers can cancel appointments automatically without any admin or staff approval.
If you have enabled cancelation requests, decide what type of bookings this will apply to.
Under "Do you want to refund the booking if the customer cancels a pre-charged booking?", decide whether you want to process a refund when a customer cancels a pre-charged booking.
Select "Yes" to automatically refund the pre-payment when the booking is canceled.
Select "No" to cancel the booking but retain the pre-payment.
Select "No" to block customers from canceling on their own.
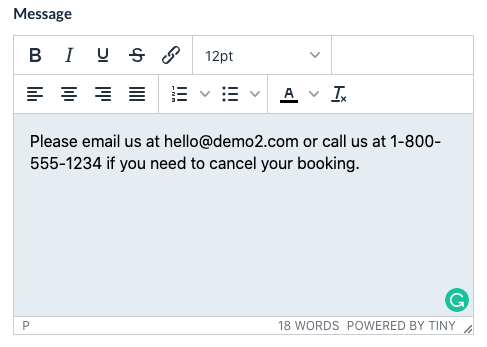
Enter a message into the box below to let customers know what to do when they need to cancel their booking.
If a customer resumes the cancellation booking, what should happen to the provider cancellation payment?
Select "Don't do anything, Provider will keep the payment" to allow the system not to do anything and let the provider keep the payment.
Select "Revert the payment and don't pay the Provider" to allow the system to revert the payment from the provider and not pay the provider.

NOTE: Please note that the "Revert the payment and don't pay the Provider" option will work only if payment has not been made to the provider.
Remember to Save!
If you have made any changes, remember to click the blue "Save" button at the bottom left corner of the page to update your settings.